A surprise visitor rang the doorbell just as I was eyeballing a nearly empty fridge. The only bright spot? A handful of fresh cucumbers lurking in the crisper drawer. No fancy brining plans, no days-long patience — just those cucumbers, some pantry staples, and a bit of improvising. Honestly, that’s how this quick refrigerator dill pickles recipe was born — out of necessity and a pinch of kitchen chaos.
The air was thick with the scent of dill and garlic before I even realized the magic was underway. The crisp snap of those pickles after just 24 hours? Absolute relief. It felt like a tiny victory, turning a last-minute scramble into something tangy, crunchy, and strangely comforting. This recipe isn’t about canning or lengthy waits; it’s about grabbing what you have and making it work fast.
It stuck with me because sometimes the best food comes from what’s unexpected. These quick refrigerator dill pickles capture that spirit perfectly — simple, bold, and ready when you need them. They’re proof that even a fridge full of “just enough” can still deliver a satisfying homemade treat.
Why You’ll Love This Recipe
Making these quick refrigerator dill pickles became a little kitchen tradition for me — they’re reliable, fast, and pack a punch of flavor. After testing several versions, I landed on this one that hits all the right notes every single time. Here’s why this recipe might just become your go-to pickle fix:
- Quick & Easy: Ready to enjoy in just 24 hours — perfect for last-minute cravings or unexpected guests.
- Simple Ingredients: No need for fancy spices or special tools; just basic pantry ingredients and fresh cucumbers.
- Perfect for Summer Meals: These pickles add a crisp, refreshing zing to your barbecue or picnic platter, pairing wonderfully with dishes like grilled corn on the cob or fresh watermelon feta cucumber salad.
- Crowd-Pleaser: Whether you’re feeding kids or adults, these pickles disappear fast — they’re tangy, crunchy, and just addictive enough to keep everyone coming back.
- Unbelievably Delicious: The combination of garlic, dill, and just the right amount of vinegar delivers a bright, balanced flavor that isn’t too sour or salty.
What sets this recipe apart is its no-fuss approach — no canning, no long waits, just fresh, crisp pickles that taste like they’ve been sitting for weeks. The trick? Using fresh dill and a cold brine that soaks in quickly but deeply. Honestly, once you taste these, you’ll see why I always keep the ingredients handy.
What Ingredients You Will Need
This recipe calls for straightforward, wholesome ingredients that come together to create that classic dill pickle flavor with a fresh twist. Most are pantry staples, making it easy to whip up a batch anytime.
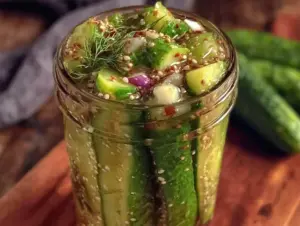
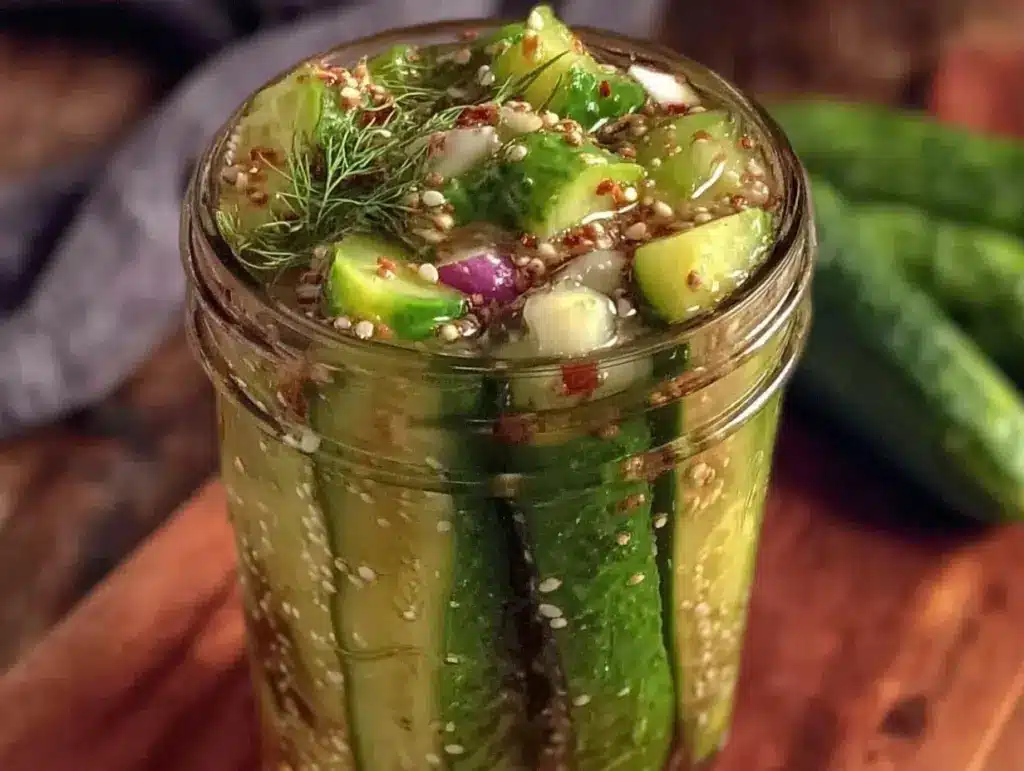
- Fresh cucumbers – about 1 pound (450 g), preferably pickling cucumbers or Kirby cucumbers for optimal crunch
- Fresh dill sprigs – 2 to 3 sprigs (aromatic and essential for that signature flavor)
- Garlic cloves – 2 large, peeled and smashed (adds pungent depth)
- White vinegar – 1 cup (240 ml), the base of your brine; you can substitute apple cider vinegar for a milder tang
- Water – 1 cup (240 ml), to dilute the vinegar and balance acidity
- Pickling salt or kosher salt – 1 tablespoon (use pickling salt if possible; iodized salt might cloud the brine)
- Granulated sugar – 1 teaspoon (balances the tartness, optional but recommended)
- Black peppercorns – 1 teaspoon (whole, for subtle spice)
- Red pepper flakes – ¼ teaspoon (optional, for a slight kick)
When choosing cucumbers, I always look for firm, unblemished ones — that’s key to keeping the pickles crisp. If you want a gluten-free or paleo-friendly version, this recipe fits perfectly as is. And if you’re out of fresh dill, dried dill can work in a pinch, but fresh really makes the difference here.
Equipment Needed
Luckily, this recipe doesn’t demand any fancy or specialized kitchen gadgets. Here’s what you’ll want to have on hand:
- A clean quart-sized (1 liter) glass jar or a similar airtight container — glass is best to avoid any flavors leaching from plastic.
- A small saucepan for heating the brine mixture.
- A sharp knife and cutting board to slice the cucumbers (slices or spears, your call!).
- A measuring cup and spoons for precise ingredient amounts.
- An optional vegetable peeler if you prefer peeling the cucumbers, though I like the skin on for added texture.
I’ve tried this recipe with mason jars, old pickle jars (cleaned thoroughly), and even wide-mouth fermenting crocks. All work great as long as they seal well to keep the brine fresh. If you’re looking for budget-friendly options, repurposed glass jars from your pantry are perfect — just make sure they’re spotless to avoid any funky flavors.
Preparation Method
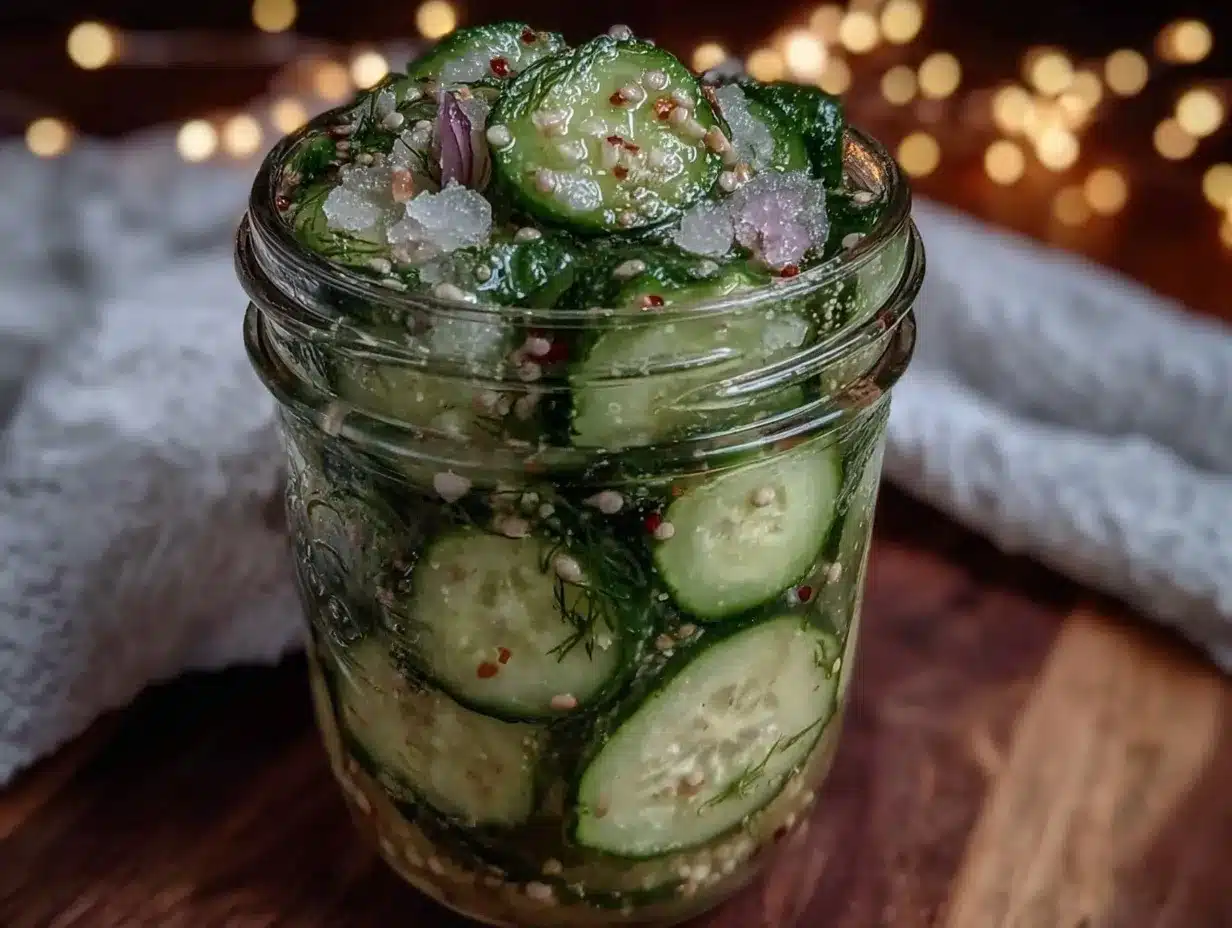
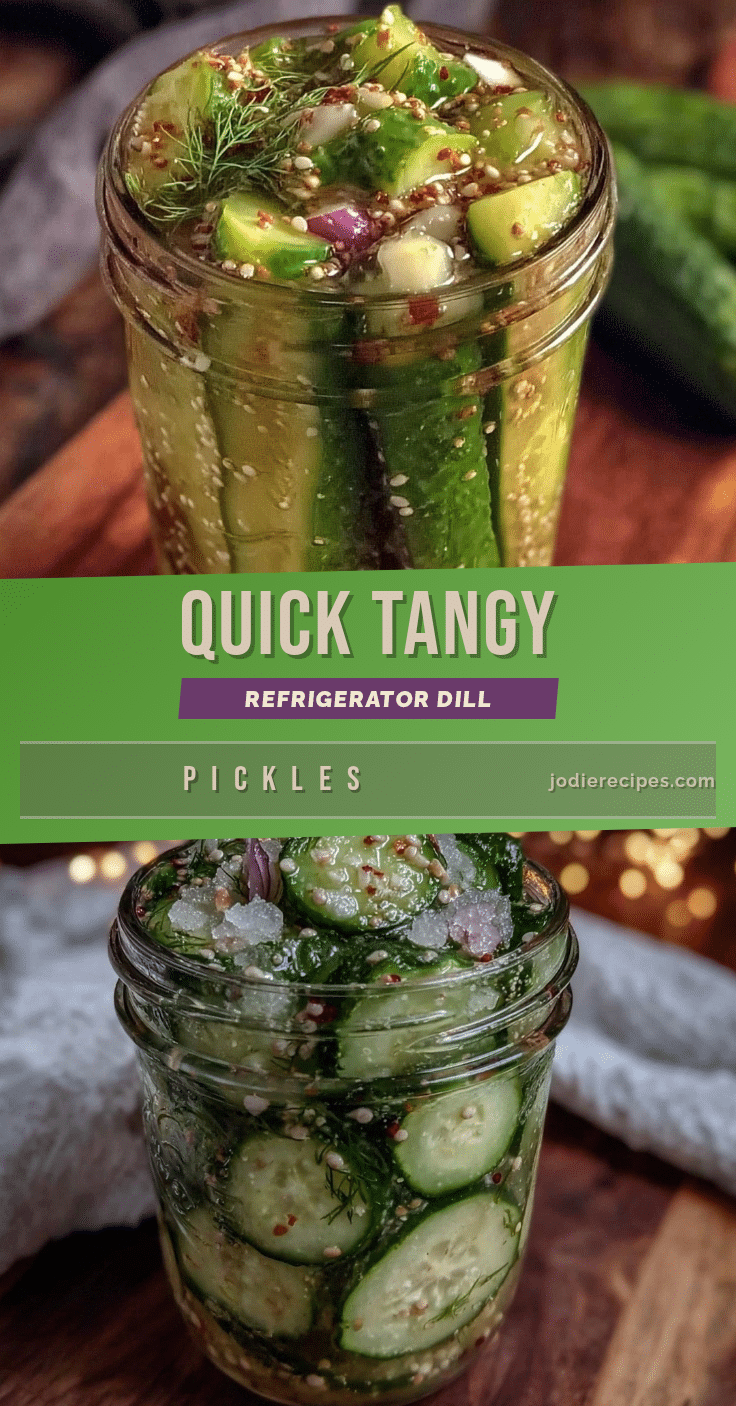
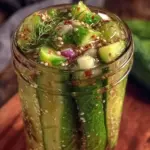
- Prepare the cucumbers: Wash and dry about 1 pound (450 g) of fresh cucumbers. Slice them into ¼-inch (6 mm) thick rounds or cut into spears depending on your preference. Set aside. (5 minutes)
- Make the brine: In a small saucepan, combine 1 cup (240 ml) white vinegar, 1 cup (240 ml) water, 1 tablespoon pickling salt, and 1 teaspoon granulated sugar. Heat gently over medium heat, stirring occasionally, until the salt and sugar dissolve completely. Remove from heat and let it cool slightly — you don’t want it piping hot when poured over the cucumbers. (7-10 minutes)
- Pack the jar: Place 2 to 3 fresh dill sprigs, 2 smashed garlic cloves, 1 teaspoon black peppercorns, and ¼ teaspoon red pepper flakes (if using) into the bottom of your clean quart-sized glass jar. Layer the cucumber slices or spears tightly but without crushing. (5 minutes)
- Pour the brine: Carefully pour the warm (not hot) brine over the cucumbers, making sure they’re fully submerged. Leave about ½ inch (1.3 cm) of headspace at the top. Use a clean utensil to press down gently if needed. (2 minutes)
- Seal and refrigerate: Screw on the lid tightly and place the jar in the refrigerator. Let it sit for at least 24 hours before tasting. The flavor will intensify if left longer, but 24 hours is the magic window for crunch and tang. (24 hours minimum)
- Serve and enjoy: Once ready, grab your pickles straight from the fridge. Keep refrigerated and consume within 2 weeks for best freshness.
Tip: If you find the pickles a little too salty or sour after 24 hours, drain some brine and replace it with fresh water to mellow the flavor. This quick tweak saved me once when I got a bit heavy-handed with the salt!
Cooking Tips & Techniques
Getting those quick refrigerator dill pickles just right means paying attention to a few key details I’ve learned over time.
- Pick the right cucumbers: Fresh, firm Kirby or pickling cucumbers are your best friends. Avoid ones that are soft or overly large because they tend to get mushy fast.
- Slice evenly: Uniform cucumber slices or spears help the brine penetrate evenly, so your pickles all have that consistent crunch and flavor.
- Don’t overheat the brine: Warm the vinegar mixture just enough to dissolve the salt and sugar. Too hot, and you risk cooking the cucumbers slightly, which kills the crisp.
- Tight pack without smashing: Layer cucumbers snugly but gently. Crushing them invites mushiness and cloudy brine.
- Use fresh dill and garlic: These ingredients are the heart of your pickles’ aroma and taste. Fresh is always better here.
- Watch the timing: 24 hours in the fridge usually hits the perfect balance, but if you like stronger flavor, 48 hours is fine. Just keep an eye on texture.
- Try quick chilling: After pouring the brine, placing the jar in the coldest part of your fridge speeds up pickling.
One lesson I learned the hard way? Don’t skip the salt — it’s crucial for both flavor and crispness. Also, if you want to amp up the spice without overpowering, add a few sliced jalapeños or mustard seeds next time.
Variations & Adaptations
This quick refrigerator dill pickles recipe is pretty flexible, so you can tweak it depending on what you have or want.
- Garlic Lovers’ Pickles: Double or triple the garlic cloves for a punchier bite — great if you adore that savory kick.
- Spicy Dill Pickles: Add extra red pepper flakes or toss in sliced jalapeños for heat. I once added a dash of smoked paprika, which added an unexpected smoky depth.
- Sweet & Tangy: Increase sugar to 2 tablespoons and toss in a cinnamon stick or a few cloves for a bread-and-butter style twist, but keep the dill for balance.
- Low-Sodium Version: Use half the salt and increase the vinegar slightly; the flavor will be sharper but still tasty.
- Different Vinegars: Try apple cider vinegar for a fruitier note or rice vinegar for a mellow sweetness.
Also, you can experiment with cucumber shapes — coins, spears, or even chunks depending on your serving needs. If you want to get fancy, these pickles pair beautifully with a grilled chicken Caesar pasta salad for a summery, crunchy combo.
Serving & Storage Suggestions
These quick refrigerator dill pickles are best served chilled straight from the fridge. Their crisp, tangy crunch makes them a perfect side or snack anytime.
- Serve alongside sandwiches, burgers, or grilled meats for a refreshing contrast.
- Chop and toss into salads or wraps for an added punch of flavor and texture.
- Pair with summer favorites like fresh watermelon feta mint salad or cowboy caviar with lime cilantro dressing.
For storage, keep the pickles refrigerated in a sealed jar for up to 2 weeks. Over time, the pickles will get softer and the flavor intensifies — still tasty, but best enjoyed fresh for that perfect crunch. If you want to refresh the crispness later, soak the slices briefly in ice water before serving.
Reheating isn’t needed here — these pickles shine cold or at room temperature, making them super convenient for quick snacks or last-minute meal add-ons.
Nutritional Information & Benefits
These quick refrigerator dill pickles are low in calories and carbs, making them a guilt-free snack or condiment. Here’s a rough breakdown per serving (about 3-4 slices):
| Nutrition | Amount |
|---|---|
| Calories | 10-15 |
| Carbohydrates | 2g |
| Fat | 0g |
| Protein | 0g |
| Sodium | 400mg (variable by salt used) |
Pickles provide hydration benefits due to their high water content and contain antioxidants from fresh dill and garlic. They’re naturally gluten-free, keto-friendly, and vegan, making them accessible to many diets.
Just a heads-up: if you’re watching sodium intake, consider using less salt or rinsing pickles briefly before eating. Personally, I love how these pickles add flavor without extra calories, which helps me stay on track with healthy meal choices.
Conclusion
Quick refrigerator dill pickles are a little kitchen miracle — simple, speedy, and packed with that classic tang and crunch we all crave. I love how this recipe turns just a few ingredients and a bit of time into something unexpectedly satisfying, especially when life throws those unplanned moments at you.
Feel free to make it your own by adjusting spice levels or trying different vinegars. This recipe has earned a permanent spot in my fridge and my heart — especially when paired with fresh summer dishes like watermelon feta cucumber salad or a quick grilled chicken Caesar pasta salad.
I’d love to hear how you make these pickles your own — leave a comment below and share your twists or questions. Here’s to crunchy, tangy bites that brighten your day!
FAQs
How long do quick refrigerator dill pickles last?
They keep well in the fridge for up to 2 weeks. After that, they may start to soften and lose their ideal crunch.
Can I use regular cucumbers instead of pickling cucumbers?
You can, but pickling cucumbers are firmer and hold up better. Regular slicing cucumbers might get mushy faster.
Do I need to boil the cucumbers or blanch them first?
Nope! These pickles are made with fresh cucumbers straight into the brine — no cooking needed, which keeps them extra crisp.
Can I make these pickles spicy?
Absolutely. Adding red pepper flakes or sliced jalapeños to the jar will give you a nice spicy kick.
Is it necessary to use pickling salt?
Pickling salt is best because it dissolves cleanly and doesn’t contain additives that cloud the brine. If you use kosher or table salt, the pickles will still turn out fine but might look less clear.
Pin This Recipe!
Quick Refrigerator Dill Pickles Recipe Easy Ready in 24 Hours
A simple and fast recipe for crisp, tangy dill pickles ready in just 24 hours without canning or long waits. Perfect for last-minute cravings and summer meals.
- Prep Time: 12 minutes
- Cook Time: 0 minutes
- Total Time: 24 hours 12 minutes
- Yield: About 4 servings 1x
- Category: Condiment
- Cuisine: American
Ingredients
- 1 pound fresh cucumbers (preferably pickling or Kirby cucumbers)
- 2 to 3 fresh dill sprigs
- 2 large garlic cloves, peeled and smashed
- 1 cup white vinegar (240 ml) – can substitute apple cider vinegar
- 1 cup water (240 ml)
- 1 tablespoon pickling salt or kosher salt
- 1 teaspoon granulated sugar (optional but recommended)
- 1 teaspoon whole black peppercorns
- ¼ teaspoon red pepper flakes (optional)
Instructions
- Wash and dry about 1 pound (450 g) of fresh cucumbers. Slice into ¼-inch (6 mm) thick rounds or cut into spears depending on preference. Set aside.
- In a small saucepan, combine 1 cup white vinegar, 1 cup water, 1 tablespoon pickling salt, and 1 teaspoon granulated sugar. Heat gently over medium heat, stirring occasionally, until salt and sugar dissolve. Remove from heat and let cool slightly.
- Place 2 to 3 fresh dill sprigs, 2 smashed garlic cloves, 1 teaspoon black peppercorns, and ¼ teaspoon red pepper flakes (if using) into the bottom of a clean quart-sized glass jar.
- Layer the cucumber slices or spears tightly but without crushing into the jar.
- Pour the warm (not hot) brine over the cucumbers, ensuring they are fully submerged. Leave about ½ inch of headspace at the top. Press down gently if needed.
- Screw on the lid tightly and refrigerate for at least 24 hours before tasting. Flavor intensifies if left longer.
- Serve chilled straight from the fridge. Keep refrigerated and consume within 2 weeks for best freshness.
Notes
Use fresh, firm Kirby or pickling cucumbers for best crunch. Do not overheat the brine to avoid cooking cucumbers. Tight pack cucumbers without crushing to prevent mushiness. Fresh dill and garlic provide the best flavor. If pickles are too salty or sour after 24 hours, drain some brine and replace with fresh water to mellow flavor. For spicier pickles, add extra red pepper flakes or sliced jalapeños. Store refrigerated and consume within 2 weeks.
Nutrition
- Serving Size: About 3-4 pickle sli
- Calories: 1015
- Sugar: 1
- Sodium: 400
- Carbohydrates: 2
Keywords: quick pickles, refrigerator pickles, dill pickles, easy pickles, no canning pickles, summer pickles, crunchy pickles