
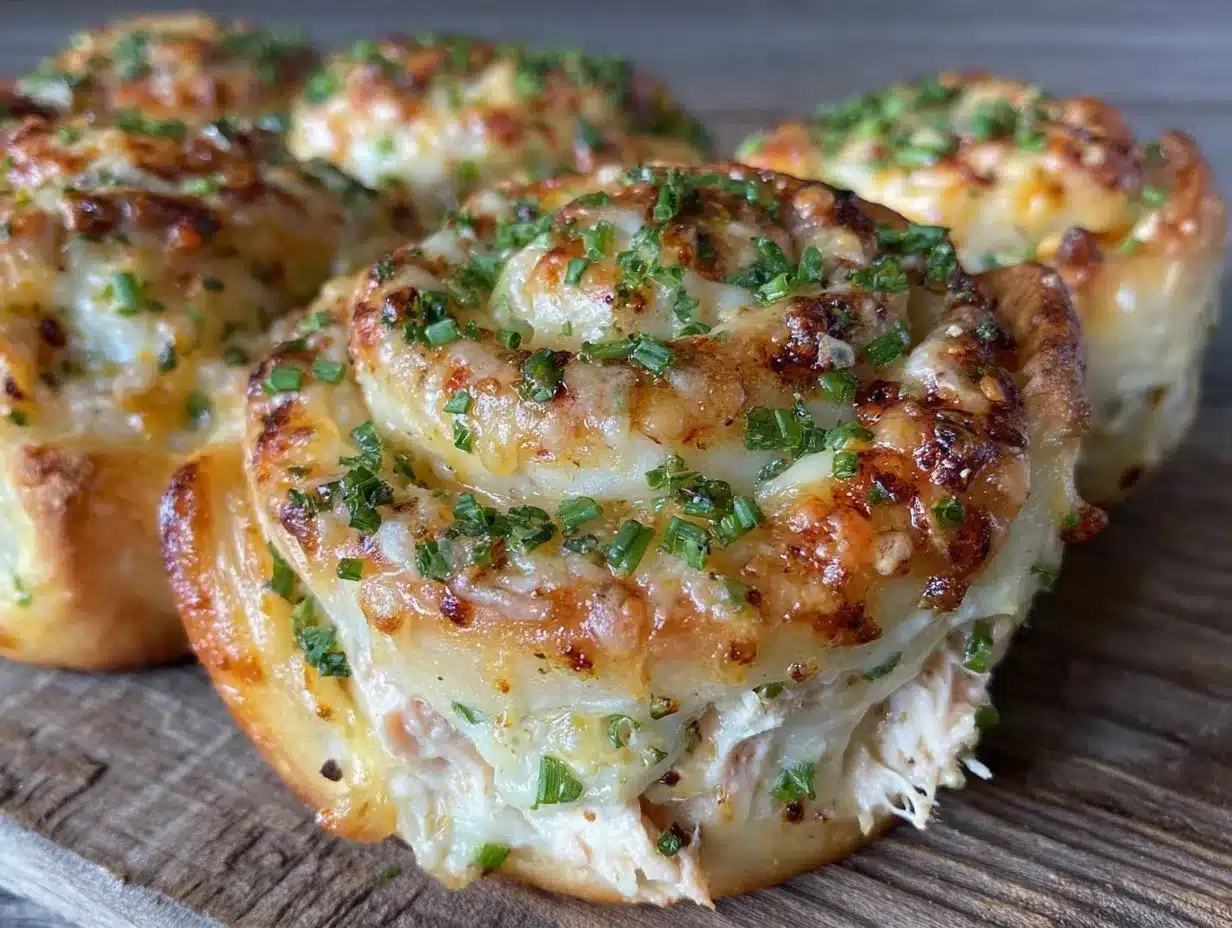
Scrambling to pack lunches when the clock’s already ticking down—half a pack of tortillas staring from the fridge and a wilted head of lettuce threatening to go bad. I’m in the kitchen, multitasking like a circus juggler, and honestly, the last thing I want is a complicated recipe. That’s when these crispy make-ahead chicken ranch pinwheels came together, almost by accident, but quickly became my go-to lifesaver. The ranch seasoning and tender chicken wrapped snugly in a tortilla, crisped to golden perfection, fills the kitchen with that irresistible scent that makes everyone pause and ask, “What’s that?”
It’s the kind of recipe born from chaos—kids needing lunch, me needing something fast, and a pantry that’s only half-stocked. And yet, somehow, it turned out to be more than just a quick fix. These pinwheels are crunchy, creamy, and packed with flavor, perfect for those hectic mornings or when you want a satisfying lunch without the fuss. I started making a batch on Sundays to have ready for the week, and it’s been a game-changer. No soggy sandwiches, no last-minute scrambling.
What stuck with me most is how these pinwheels satisfy that mid-day hunger with a little crunch and a whole lot of comfort. It’s not just lunch; it’s a tiny break, a moment of calm in the madness. And honestly, that’s why I keep coming back to this recipe—it’s simple, reliable, and just downright tasty.
Why You’ll Love This Recipe
After testing these pinwheels on my family (and myself on a busy workday), I can say this recipe ticks a lot of boxes. Here’s what makes it stick around in my kitchen rotation:
- Quick & Easy: Ready in under 30 minutes, so you’re not stuck in the kitchen for long.
- Simple Ingredients: Uses pantry staples and common fridge items—no last-minute grocery runs.
- Perfect for Meal Prep: Make a batch in advance, store in the fridge, and have easy lunches ready to go.
- Crowd-Pleaser: Kids love the crispy crunch and ranch flavor; adults appreciate the protein-packed filling.
- Unbelievably Delicious: The combination of crispy tortilla edges and creamy ranch chicken is just next-level comfort food.
What sets this apart from other chicken pinwheels? The secret is in the ranch seasoning blend—homemade or store-bought—and the crisping technique. I use a bit of melted butter brushed on the outside of the tortilla before baking, which gives that golden crunch without deep frying. Plus, I toss in shredded cheddar for a melty finish that pulls everything together. Honestly, it’s this little twist that makes these pinwheels more than just a sandwich roll-up.
This recipe also feels like a small win on a hectic day—comfort food without the wait or mess. If you’re the kind of person who loves prepping ahead but craves fresh, crispy bites, these pinwheels are going to be your new best friend.
What Ingredients You Will Need
This recipe uses simple, wholesome ingredients to deliver bold flavor and satisfying texture without the fuss. Most are pantry staples or easy to find in any grocery store. Here’s what you’ll need:
- Cooked chicken breast, shredded or finely chopped (about 2 cups / 300g) – rotisserie chicken works great for quick prep
- Ranch seasoning mix (2 tablespoons) – either your favorite store-bought packet or a homemade blend with dried herbs and garlic powder
- Cream cheese, softened (4 oz / 115g) – adds creaminess and helps bind the filling
- Shredded cheddar cheese (1 cup / 100g) – sharp or mild depending on your taste
- Flour tortillas, large size (8-inch / 20 cm diameter) – look for pliable ones; mission or similar brands work well
- Fresh spinach leaves or shredded lettuce (optional, about 1 cup) – adds a fresh crunch and color
- Melted butter (2 tablespoons) – for brushing the outside to get that crispy golden finish
- Black pepper, freshly cracked (to taste)
- Optional add-ins: diced green onions, crispy bacon bits, or a dash of hot sauce for a little kick
For homemade ranch seasoning, I recommend mixing dried dill, parsley, garlic powder, onion powder, paprika, salt, and pepper. It gives a fresher, less processed taste. If you need a dairy-free version, swap cream cheese for a plant-based alternative and cheddar for nutritional yeast or vegan cheese.
Equipment Needed
- Baking sheet – a rimmed sheet works best to catch any drips and keep the pinwheels intact
- Parchment paper or a silicone baking mat – for easy cleanup and to prevent sticking
- Mixing bowl – to combine the chicken filling
- Spoon or spatula – for spreading the filling evenly
- Pastry brush – handy for brushing melted butter on tortillas; if you don’t have one, a clean, small spoon works fine
- Sharp knife – to slice the rolled tortillas into pinwheels cleanly
- Measuring spoons and cups – for accurate ingredient amounts
Personally, I keep a small silicone brush in my kitchen arsenal because it’s easy to clean and doesn’t shed bristles. You can find budget-friendly baking sheets that last years—mine is a no-brand from a dollar store and still kicking. For slicing, a chef’s knife with a sharp edge makes all the difference for neat pinwheels.
Preparation Method
- Preheat your oven to 375°F (190°C). Line a baking sheet with parchment paper or a silicone mat for easy cleanup.
- Prepare the chicken filling: In a mixing bowl, combine the shredded chicken, softened cream cheese, ranch seasoning, shredded cheddar, and black pepper. Mix well until everything is evenly incorporated. If you want to add diced green onions or bacon bits, fold them in now.
- Lay a tortilla flat on a clean surface. Spread about 1/4 to 1/3 cup (60-80g) of the chicken mixture evenly over the tortilla, leaving about a half-inch border around the edges. If using fresh spinach or lettuce, sprinkle a thin layer on top of the filling.
- Roll the tortilla tightly: Starting from one edge, roll it up snugly like a jelly roll. You want it tight enough to hold its shape but not so tight that the filling squeezes out.
- Brush the outside of the rolled tortilla with melted butter: This step is crucial for that crispy, golden crust. Make sure to cover all sides evenly.
- Slice the roll into 1-inch (2.5 cm) pinwheels: Use a sharp knife and a gentle sawing motion to avoid squishing the roll. You should get about 6-8 pinwheels per tortilla.
- Arrange the pinwheels cut side up on the baking sheet: Leave some space between them so air circulates and they crisp up nicely.
- Bake for 15-18 minutes: Watch for the edges to turn golden brown and the cheese to melt. If you want extra crispness, you can broil them for an additional 1-2 minutes, but be careful not to burn.
- Let cool slightly before serving: The filling will be hot and melty, so give them a few minutes to settle.
If your chicken is already seasoned or has a smoky flavor (like from rotisserie), you might want to reduce the ranch seasoning slightly. Also, if the tortillas seem dry or stiff, warming them in the microwave for 10-15 seconds before spreading helps prevent cracking.
Cooking Tips & Techniques
Here are a few things I’ve learned from trial, error, and kitchen experiments with this recipe:
- Don’t skip the melted butter: Brushing the outside of the tortilla before baking is what creates that irresistible crispy shell. I’ve tried baking without it, and the texture just isn’t the same.
- Use warm tortillas: Cold or refrigerated tortillas can crack when rolling. Giving them a quick zap in the microwave makes them pliable and easier to work with.
- Roll tight, but not too tight: Overstuffing or rolling too tight can cause the filling to squeeze out or the pinwheels to lose shape. A snug roll keeps everything neat.
- Don’t overcrowd the baking sheet: Giving each pinwheel some breathing room helps them crisp evenly — crowded trays can steam rather than crisp.
- Watch your broiler time: A quick broil adds crunch but only for a minute or two. I learned this the hard way when mine went from golden to burnt in seconds.
Multitasking tip: While the pinwheels bake, clean up your prep area or start on simple sides like crunchy veggie sticks or a fresh salad. This way, the whole lunch comes together faster and with less stress.
Variations & Adaptations
This recipe is incredibly flexible, so you can tweak it to suit your tastes or dietary needs:
- Vegetarian version: Swap chicken for sautéed mushrooms and bell peppers, seasoned with ranch spices. Add extra cheese or a dollop of sour cream for creaminess.
- Low-carb option: Use low-carb or whole wheat tortillas, or even large lettuce leaves for wraps. The filling stays the same, just skip the butter crisping step and pan-sear gently instead.
- Spicy twist: Add chopped jalapeños or a few dashes of hot sauce to the chicken mixture for a zingy punch. You can also sprinkle some smoked paprika or cayenne in the ranch seasoning blend.
- Seasonal twists: In summer, add fresh diced tomatoes or avocado slices inside before rolling. In fall, toss in cooked butternut squash cubes for sweetness and texture.
- Make it kid-friendly: Keep it simple with plain chicken and cheese, or try mini ham and cheese quiche cups as another freezer-friendly lunch option.
Personally, I once tried a version with turkey and cranberry sauce (thanksgiving leftovers remix) — surprisingly delicious and a great way to switch it up after the holidays.
Serving & Storage Suggestions
Serve these pinwheels warm or at room temperature—both ways taste great. I like pairing them with a crisp side salad or crunchy homemade goldfish crackers for a fun lunch combo. For a refreshing contrast, a small cup of creamy cucumber salad is perfect; it’s a nice nod to ranch flavors but lighter (try this recipe).
To store, place pinwheels in an airtight container in the fridge for up to 3 days. When reheating, pop them in a toaster oven or regular oven at 350°F (175°C) for 5-7 minutes to regain crispness. Avoid microwaving if you want to keep that crunch.
You can also freeze unbaked pinwheels arranged on a baking sheet, then transfer to freezer bags once hardened. Bake straight from frozen, adding a few extra minutes to the baking time.
Flavors tend to meld beautifully overnight, so these are even better the next day — making them perfect for meal prep lunches that don’t feel boring.
Nutritional Information & Benefits
Each serving (about 3-4 pinwheels) offers a balanced mix of protein, fat, and carbs. The chicken provides lean protein essential for muscle repair and energy, while the ranch seasoning adds herbs with antioxidants.
Using whole wheat or low-carb tortillas can boost fiber intake and reduce simple carbs. Cream cheese and cheddar add calcium and vitamin D, but if you’re watching dairy, swapping for plant-based alternatives works well.
This recipe is gluten-free if you choose gluten-free tortillas, and naturally low in added sugars. It’s a satisfying option that keeps you fueled through busy afternoons without the crash.
Conclusion
These crispy make-ahead chicken ranch pinwheels are a kitchen hero when life gets hectic. They’re fast, tasty, and easy to customize, making lunchtime something to look forward to—not dread. I love how a little prep on Sunday means stress-free lunches all week long, plus that golden crispy bite never gets old.
Feel free to play around with the filling or add your favorite veggies to suit your family’s tastes. Cooking should be fun and flexible, and this recipe definitely fits that bill.
If you try them, I’d love to hear how you made them your own—drop a comment or share your tweaks. Here’s to quick, crunchy lunches that keep us going!
FAQs About Crispy Make-Ahead Chicken Ranch Pinwheels
Can I use store-bought rotisserie chicken for this recipe?
Absolutely! Rotisserie chicken is perfect for quick prep and adds great flavor. Just shred it finely before mixing with the filling.
How long can I store the pinwheels in the fridge?
Store in an airtight container for up to 3 days. Reheat in the oven to keep the crispy texture.
Can I freeze these pinwheels?
Yes, freeze unbaked pinwheels on a baking sheet, then transfer to freezer bags. Bake from frozen, adding extra baking time.
What’s the best way to keep the tortillas from cracking?
Warm tortillas for 10-15 seconds in the microwave before spreading the filling. This makes them more pliable and less likely to tear.
Are these pinwheels kid-friendly?
Definitely! Kids love the crispy texture and familiar ranch flavor. You can omit spicy ingredients and add more cheese to suit little palates.
Pin This Recipe!

Crispy Make-Ahead Chicken Ranch Pinwheels

These crispy make-ahead chicken ranch pinwheels are a quick, easy, and flavorful lunch option featuring ranch-seasoned chicken wrapped in tortillas and baked to golden perfection. Perfect for meal prep and satisfying mid-day hunger with a crunchy, creamy bite.
- Prep Time: 10 minutes
- Cook Time: 18 minutes
- Total Time: 28 minutes
- Yield: 4 servings 1x
- Category: Main Course
- Cuisine: American
Ingredients
- 2 cups (about 300g) cooked chicken breast, shredded or finely chopped (rotisserie chicken works great)
- 2 tablespoons ranch seasoning mix (store-bought or homemade blend)
- 4 oz (115g) cream cheese, softened
- 1 cup (100g) shredded cheddar cheese
- Large flour tortillas, 8-inch (20 cm) diameter
- 1 cup fresh spinach leaves or shredded lettuce (optional)
- 2 tablespoons melted butter
- Black pepper, freshly cracked to taste
- Optional add-ins: diced green onions, crispy bacon bits, or a dash of hot sauce
Instructions
- Preheat your oven to 375°F (190°C). Line a baking sheet with parchment paper or a silicone mat for easy cleanup.
- In a mixing bowl, combine the shredded chicken, softened cream cheese, ranch seasoning, shredded cheddar, and black pepper. Mix well until evenly incorporated. Fold in optional diced green onions or bacon bits if using.
- Lay a tortilla flat on a clean surface. Spread about 1/4 to 1/3 cup (60-80g) of the chicken mixture evenly over the tortilla, leaving about a half-inch border around the edges. Sprinkle fresh spinach or lettuce on top if desired.
- Roll the tortilla tightly from one edge like a jelly roll, snug enough to hold its shape but not so tight that filling squeezes out.
- Brush the outside of the rolled tortilla evenly with melted butter to create a crispy golden crust.
- Slice the roll into 1-inch (2.5 cm) pinwheels using a sharp knife with a gentle sawing motion. Expect about 6-8 pinwheels per tortilla.
- Arrange the pinwheels cut side up on the prepared baking sheet, leaving space between them for air circulation.
- Bake for 15-18 minutes until edges are golden brown and cheese is melted. Optionally broil for 1-2 minutes for extra crispness, watching carefully to avoid burning.
- Let cool slightly before serving to allow filling to settle.
Notes
Brush tortillas with melted butter before baking for a crispy crust. Warm tortillas briefly in microwave to prevent cracking. Do not overcrowd baking sheet to ensure even crisping. Broil briefly for extra crunch but watch carefully to avoid burning. Store pinwheels in airtight container in fridge up to 3 days; reheat in oven or toaster oven to maintain crispness. Freeze unbaked pinwheels on baking sheet, then transfer to freezer bags; bake from frozen adding extra time.
Nutrition
- Serving Size: About 3-4 pinwheels
- Calories: 320
- Sugar: 2
- Sodium: 550
- Fat: 18
- Saturated Fat: 8
- Carbohydrates: 22
- Fiber: 1
- Protein: 22
Keywords: chicken pinwheels, ranch chicken, make-ahead lunch, crispy pinwheels, easy lunch recipe, meal prep, chicken tortilla roll-ups