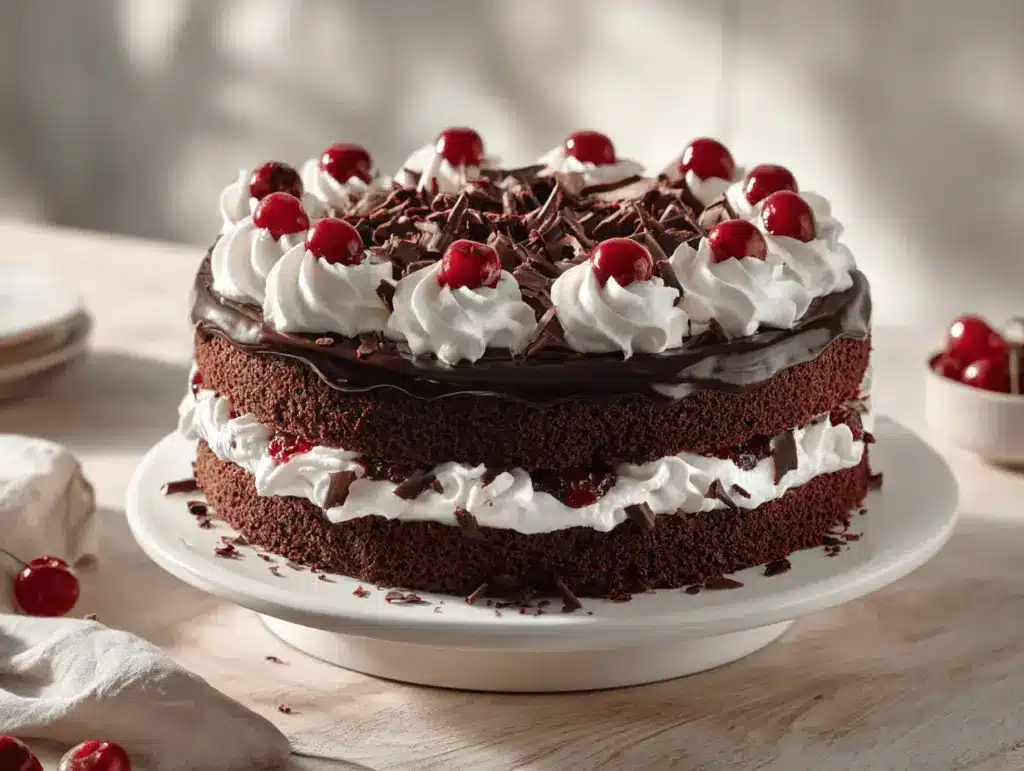
The first time I tasted homemade Black Forest cake, it was like a little party in my mouth—velvety chocolate, airy whipped cream, and juicy cherries all tangled together in one unforgettable bite. I’ll never forget the way the kitchen smelled as the chocolate layers baked: deep, dark cocoa mingling with a hint of almond and vanilla. It’s the kind of cake that makes you feel fancy, even if you’re still in your pajamas and baking just because it’s Sunday afternoon. Honestly, this Black Forest cake recipe became my go-to for birthdays and “just-because” celebrations after I nailed it during a baking binge one winter. There’s something magical about stacking those layers and spooning fresh, ruby-red cherries over whipped cream—almost therapeutic if you ask me.
Let’s face it, store-bought Black Forest cakes can sometimes taste a bit… blah. But when you make it at home, you control the richness of the chocolate, the burst of real cherries, and the pillowy cream filling. I’ve baked this cake for picky eaters, chocolate lovers, and friends who swear by fruit desserts—and it always wins them over. If you’re craving a showstopping dessert with real flavor, a homemade Black Forest cake is worth every minute. Plus, you get to sneak a cherry or two as you build the layers (I won’t tell!). Whether you’re a newbie or a seasoned baker, I promise you’ll love the process and the results.
As someone who’s baked this recipe over a dozen times (sometimes with a toddler tugging my apron), I can vouch for its reliability. This cake is rich but never heavy, indulgent but not cloying. So if you’ve ever wondered what makes a truly irresistible Black Forest cake—layers of moist chocolate sponge, creamy filling, and fresh cherries—this recipe is your answer. Let’s jump right in and create a dessert you’ll remember!
Why You’ll Love This Black Forest Cake Recipe
- Quick & Easy: You can whip up this cake in under 90 minutes, including assembly. It’s perfect for last-minute parties or when you need a bit of sweet comfort (trust me, it comes together faster than you’d think).
- Simple Ingredients: No weird stuff here—just pantry staples, fresh cherries, and good chocolate. You probably have most of what you need already.
- Ideal for Any Occasion: This cake is a star at brunches, birthday parties, or cozy nights in. I’ve even made it for holiday gatherings, and it always disappears quickly!
- Crowd-Pleaser: Kids love the creamy layers, adults swoon over the deep chocolate flavor, and cherry fans get excited about the real fruit.
- Unbelievably Delicious: The combo of silky chocolate cake, fluffy whipped cream, and bursting cherries is downright addictive. It’s comfort food in cake form—with a bold, grown-up twist.
What sets this Black Forest cake recipe apart? I blend my cocoa with hot coffee for a richer flavor and gently fold in melted butter for extra moistness. Fresh cherries (not canned!) give every bite a pop of tart-sweet goodness. And instead of just slapping on whipped cream, I stabilize it for a cake that holds up—no collapsing layers at your party. There’s a special satisfaction in seeing those layers stand tall and knowing your cake tastes just as good as it looks.
This isn’t just dessert—it’s the kind of cake that makes people pause, savor, and ask for seconds. It’s lighter than you’d expect, with a perfect balance of chocolate and fruit. I’ve made this cake for my own family, for friends with dietary restrictions, and for folks who swore they didn’t like fruit in cake—every single one came back for more. If you want a dessert that’s both beautiful and easy to love, this Black Forest cake recipe is your ticket.
What Ingredients You Will Need
This recipe uses simple, wholesome ingredients to deliver bold flavor and satisfying texture without the fuss. You don’t need fancy chocolate or imported cherries—just honest ingredients and a little kitchen magic.
- For the Chocolate Sponge Layers:
- All-purpose flour (190g / 1-1/2 cups) – gives structure without heaviness
- Unsweetened cocoa powder (45g / 1/2 cup) – use Dutch-processed for a deeper chocolate flavor
- Granulated sugar (200g / 1 cup) – regular white sugar works best
- Eggs (3 large, room temperature) – helps the cake rise and gives it richness
- Unsalted butter (85g / 6 tbsp, melted) – adds moisture
- Baking powder (1-1/2 tsp) – for a light, fluffy crumb
- Baking soda (1/2 tsp) – helps with leavening
- Salt (1/2 tsp) – don’t skip this; it brings out the chocolate flavor
- Whole milk (120ml / 1/2 cup) – you can use dairy-free milk if needed
- Hot brewed coffee (120ml / 1/2 cup) – don’t worry, it won’t taste like coffee; just intensifies the chocolate
- Vanilla extract (2 tsp) – for aroma and sweetness
- Almond extract (1/2 tsp, optional) – adds a subtle nutty note
- For the Cherry Filling:
- Fresh sweet cherries (400g / about 2 cups, pitted and halved) – I use Bing or Rainier when in season; frozen cherries work in a pinch
- Kirsch (2 tbsp, optional) – traditional cherry brandy for authentic flavor; omit for alcohol-free
- Granulated sugar (2 tbsp) – helps macerate the cherries
- Lemon juice (1 tbsp) – brightens the flavor
- For the Whipped Cream:
- Heavy whipping cream (500ml / 2 cups) – make sure it’s cold for best volume
- Powdered sugar (3 tbsp) – sweetens and helps stabilize
- Vanilla extract (1 tsp) – rounds out the flavor
- Cornstarch (1 tbsp, optional) – stabilizes the whipped cream so your layers don’t slide
- For Garnish:
- Dark chocolate shavings (50g / about 1/2 cup) – use a bar and a vegetable peeler
- Whole cherries with stems (optional, for topping)
If you’re baking for gluten-free friends, swap in a 1:1 gluten-free flour blend (I like King Arthur’s). For dairy-free, use coconut cream in place of whipped cream and vegan butter in the cake. And if cherries aren’t in season, go for frozen—they’re surprisingly good when thawed and drained.
Equipment Needed
- Cake pans (two 8-inch / 20cm round pans) – if you don’t have two, bake in batches
- Electric mixer or stand mixer – for whipping cream and cake batter (a sturdy whisk works if you’re feeling strong!)
- Mixing bowls – at least three; I always end up using more than I think
- Spatula – for folding and spreading
- Measuring cups and spoons – accuracy really helps with baking
- Baking paper (parchment) – for lining pans to prevent sticking
- Cake turntable (optional) – nice for easy assembly, but not required
- Vegetable peeler or box grater – for making chocolate shavings
- Cherry pitter – makes life easier, but you can use a small knife if you’re careful
- Offset spatula (optional) – handy for smooth frosting
I’ve baked this cake in everything from fancy nonstick pans to dollar-store aluminum ones—just line with parchment if you’re worried about sticking. Don’t have a cherry pitter? A sturdy straw or even a chopstick works. For whipped cream, a hand mixer is fine, but if you’re whipping by hand, chill your bowl first for better results. Clean your mixer thoroughly before whipping cream; any grease can deflate it!
Preparation Method
- Prep the Cake Pans: Grease two 8-inch (20cm) round cake pans and line the bottoms with parchment paper. Preheat your oven to 350°F (175°C). This step saves you from stuck cake disasters (I learned the hard way once—never again!).
- Make the Chocolate Sponge:
- In a large bowl, sift together 1-1/2 cups (190g) flour, 1/2 cup (45g) cocoa powder, 1-1/2 tsp baking powder, 1/2 tsp baking soda, and 1/2 tsp salt.
- In another bowl, whisk 3 large eggs and 1 cup (200g) sugar until pale and slightly thickened (about 2 minutes).
- Stir in 6 tbsp (85g) melted butter, 2 tsp vanilla, and 1/2 tsp almond extract.
- Add half the dry ingredients to the wet, mix gently, then pour in 1/2 cup (120ml) milk and 1/2 cup (120ml) hot coffee. Mix in the remaining dry ingredients until just combined—don’t overwork the batter.
- Batter should look glossy and smooth, with no dry pockets. If it seems thick, add a splash of milk.
- Bake the Cakes: Divide batter evenly between the prepared pans. Bake for 22-25 minutes or until a toothpick comes out clean. If you’re using one pan, bake half, cool, then repeat. Cakes should spring back when lightly pressed.
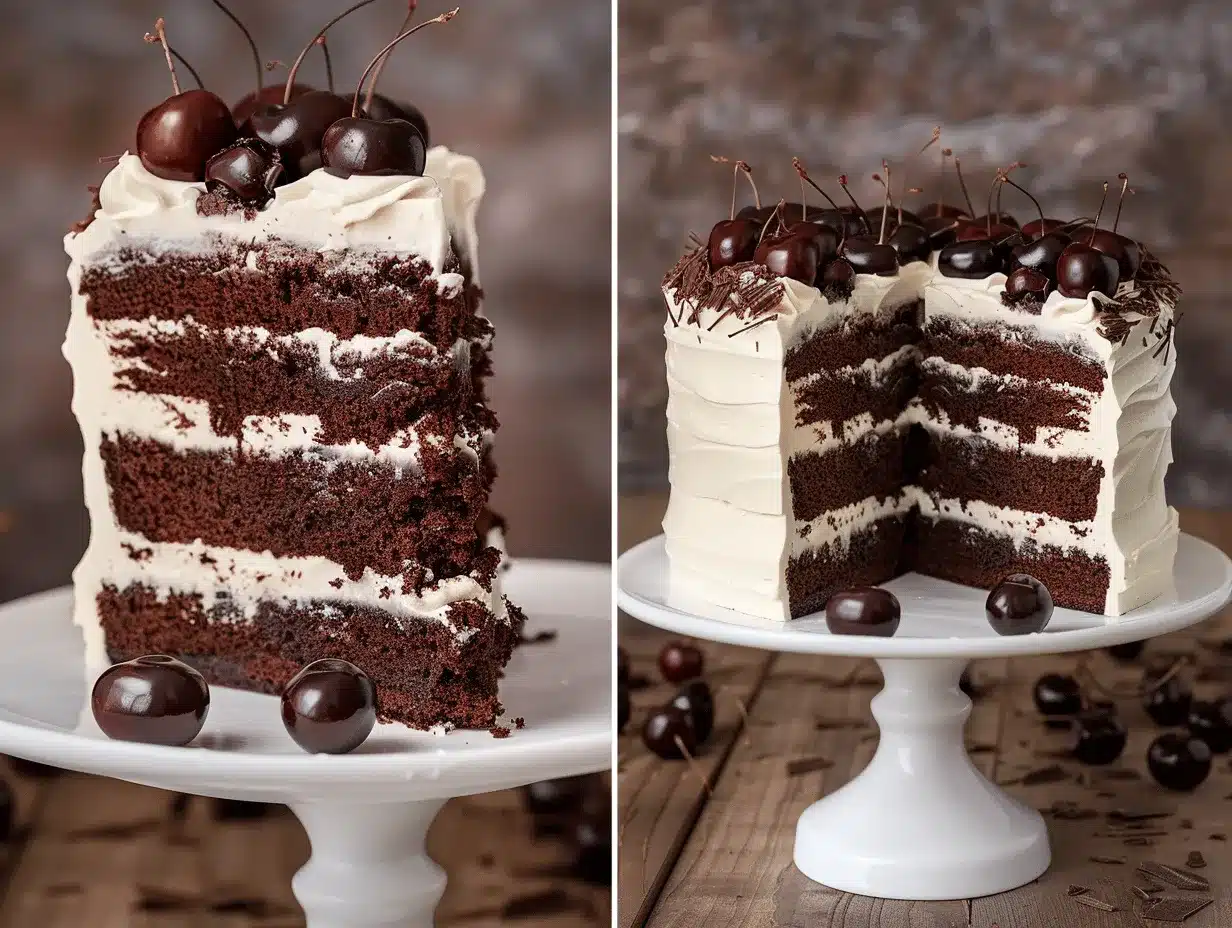
- Cool & Slice Cakes: Cool cakes in the pan for 10 minutes, then turn onto a wire rack. Peel off parchment. Once completely cool, slice each cake horizontally for four thin layers (I use a serrated bread knife for this).
- Prepare Cherry Filling:
- Toss 2 cups (400g) pitted, halved cherries with 2 tbsp sugar, 1 tbsp lemon juice, and 2 tbsp Kirsch (if using). Let sit for 15 minutes so juices develop.
- Drain off excess liquid and reserve for brushing the cake layers.
- Whip the Cream:
- In a chilled bowl, whip 2 cups (500ml) heavy cream, 3 tbsp powdered sugar, 1 tsp vanilla, and 1 tbsp cornstarch (optional) until stiff peaks form. Don’t over-whip or it’ll turn grainy.
- Assemble the Cake:
- Place one cake layer on your serving plate. Brush with reserved cherry juice.
- Spread a thick layer of whipped cream, then scatter a generous handful of cherries.
- Repeat with remaining layers, ending with a cake layer on top. Frost top and sides with the rest of the whipped cream.
- Press chocolate shavings all over the cake (I use a vegetable peeler to shave a chocolate bar—messy but so worth it). Top with whole cherries if you like.
- Chill & Serve: Refrigerate at least 1 hour before slicing. This helps the flavors meld and the cream set. Slice with a sharp knife and wipe between cuts for neat pieces.
If your cake layers break, don’t panic—just patch and cover with cream. If the whipped cream seems runny, whip a bit longer or add a spoonful of cornstarch. And if you’re short on time, assemble the cake with two thick layers instead of four!
Cooking Tips & Techniques
The secret to a perfect Black Forest cake lies in the details. Here’s what I’ve learned (sometimes the hard way):
- Don’t Overmix the Batter: Mixing too much after adding flour can make the cake dense. Gentle folding keeps it light.
- Use Hot Coffee: It deepens the chocolate flavor, but don’t let it scald the eggs—add slowly and stir constantly.
- Stabilize Whipped Cream: A little cornstarch or gelatin keeps layers from sliding, especially if you’re serving in warm weather.
- Fresh vs. Frozen Cherries: Fresh cherries are best, but frozen work if you thaw and drain them well. Canned cherries can be too sweet and mushy.
- Level Cake Layers: If your cakes dome in the center, trim with a serrated knife for easy stacking.
I once rushed assembly, skipping the cherry soaking step—it wasn’t the same. Trust me, letting cherries macerate is worth it! If your cream starts to separate, chill your bowl and whip again. For multitasking, prep cherries while cakes bake, and whip cream while layers cool. And always taste your cherry filling—sometimes a pinch more sugar or lemon can make all the difference.
Consistency is key: measure ingredients, use room temperature eggs, and don’t rush cooling. If you’re a perfectionist, use a cake turntable for smooth sides, but honestly, a rustic look is just as charming. That’s what makes homemade Black Forest cake so special—it’s a little messy, a lot delicious, and totally yours.
Variations & Adaptations
- Gluten-Free Version: Swap all-purpose flour for a 1:1 gluten-free blend. I’ve used King Arthur’s with great results—no one noticed the difference!
- Dairy-Free Option: Replace butter with vegan margarine and use chilled coconut cream for the whipped layers. It’s rich, creamy, and just as indulgent.
- Seasonal Twist: In summer, add a handful of fresh raspberries to the cherry filling for extra tang. In winter, warm up the cherries with a pinch of cinnamon.
- Flavor Boost: Try adding a layer of chocolate ganache between cake and whipped cream for a super-decadent treat. I did this once for a chocolate-obsessed friend—total hit!
- Kirsch-Free: Skip the cherry brandy and use cherry juice for a family-friendly version.
I once swapped in strawberries when cherries were out of season, and while it wasn’t traditional, it was still delicious. You can also add chopped toasted hazelnuts or almonds between layers for crunch. For a mini version, bake in cupcake tins—just adjust the bake time down to 18-20 minutes.
Allergy tip: If nuts are a concern, leave out almond extract and use only vanilla. And if you’re watching sugar, reduce it in the cake and cherry filling—this recipe is forgiving!
Serving & Storage Suggestions
Serve this Black Forest cake chilled—straight from the fridge is best, especially on warm days. Slice with a serrated knife, and wipe the blade between cuts for neat portions. I love presenting it on a footed cake stand, topped with glossy cherries and chocolate curls.
This cake pairs beautifully with strong coffee or a glass of cherry liqueur. For a full dessert spread, serve alongside vanilla ice cream or a simple fruit salad. If you’re feeling extra, drizzle a little melted chocolate on each plate!
To store, cover the cake loosely with foil or plastic wrap and refrigerate for up to 3 days. The flavors deepen overnight, and the cream stays fluffy. For longer storage, freeze individual slices wrapped tightly—thaw in the fridge overnight before serving. To reheat (if you want a slightly warm cake), microwave slices for 10 seconds, but honestly, it’s best cold.
The cake layers can be baked ahead and frozen for up to a month. Just thaw and assemble with fresh cream and cherries. If the cake sits out for a party, keep it in a cool spot; whipped cream can melt if it gets too warm.
Nutritional Information & Benefits
Each generous slice of Black Forest cake (about 1/10th of a whole cake) offers approximately:
- Calories: 370
- Protein: 5g
- Fat: 20g
- Carbs: 45g
- Fiber: 3g
- Sugar: 28g
Cherries are loaded with antioxidants and vitamin C—great for boosting immunity and fighting inflammation. Cocoa brings magnesium and iron to the table, while the whipped cream adds calcium. This cake is nut-free (if you skip almond extract), and can be adapted for gluten-free or dairy-free diets. Just a heads-up: contains eggs, dairy, and wheat unless you substitute.
I love knowing that a slice gives you real fruit, not just sugar. If you’re watching your sugar intake, reduce the sugar by 10-20%—it still tastes amazing. As a dessert lover who tries to balance health and indulgence, this cake checks all my boxes!
Conclusion
If you’re searching for a dessert that’s as beautiful as it is delicious, this Black Forest cake recipe is the one to make. It’s got rich layers, fresh cherries, and that “wow” factor—without being fussy or complicated. You can customize it for allergies, swap in seasonal fruits, or even make it dairy-free. Personally, I love how each bite is a mix of soft chocolate, creamy whipped topping, and tart-sweet cherries (it’s basically happiness on a plate).
Give this recipe a try and make it your own—whether that’s adding extra chocolate, skipping the Kirsch, or piling on more cherries. I’d love to hear about your results! Drop a comment below, share your photos on Pinterest, or tag me on social (seriously, seeing your cakes makes my day). Black Forest cake is more than dessert—it’s a celebration, and you deserve a slice. Happy baking!
Frequently Asked Questions
Can I use canned cherries for Black Forest cake?
Yes, you can use canned cherries if fresh aren’t available. Just be sure to drain them well and adjust sugar to taste, as canned cherries are often sweeter.
How do I keep whipped cream from melting?
Stabilize your whipped cream with cornstarch or gelatin, and always whip with a cold bowl and beaters. Keep the cake chilled until serving, especially in warm weather.
Can I make Black Forest cake in advance?
Absolutely! Bake the cake layers up to a month ahead and freeze. Assemble with fresh cream and cherries up to a day before serving for best texture.
Is this cake gluten-free?
Not as written, but you can easily substitute a 1:1 gluten-free flour blend. I’ve tried it and the texture is still fantastic.
How do I make chocolate shavings for garnish?
Use a vegetable peeler to shave a bar of dark chocolate. Chill the bar first for bigger curls, or grate for fine shavings—both look beautiful and taste great!
Pin This Recipe!
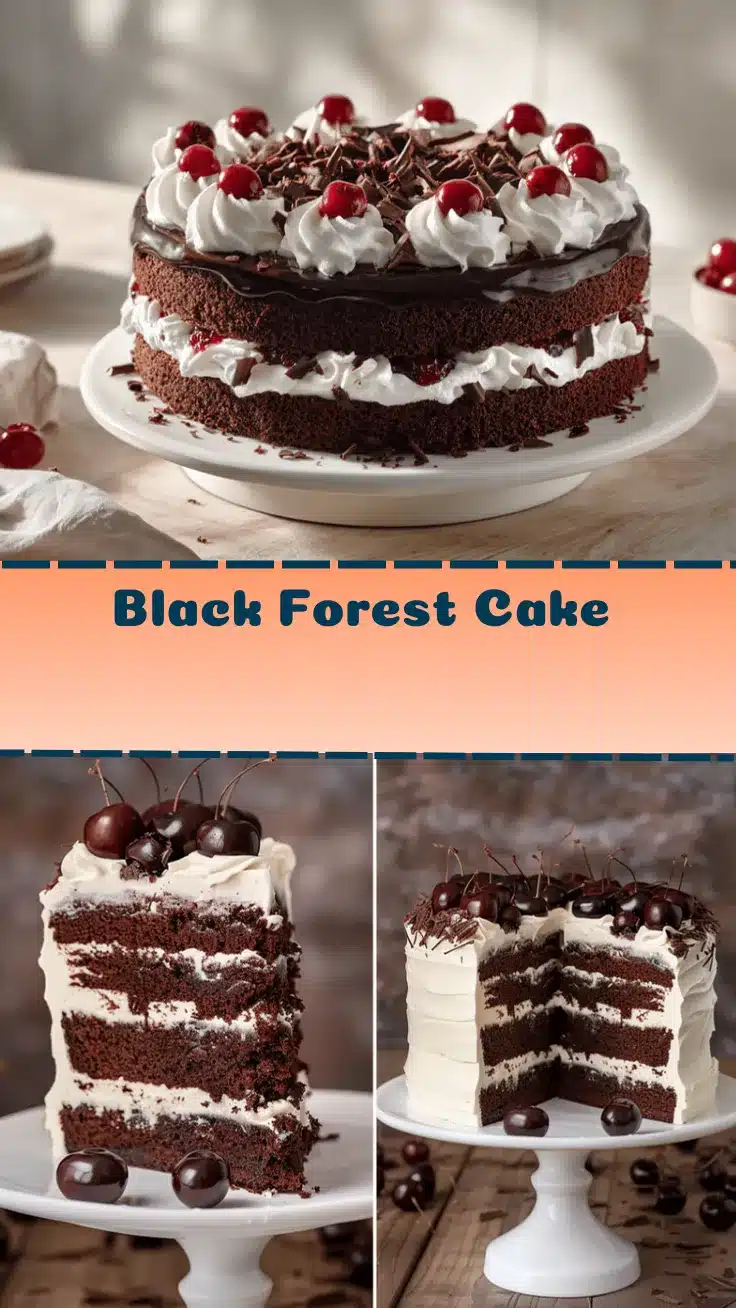
Black Forest Cake Recipe: Easy Homemade Layers with Fresh Cherries
This homemade Black Forest cake features moist chocolate sponge layers, airy stabilized whipped cream, and a fresh cherry filling for a showstopping dessert that’s surprisingly easy to make. Perfect for birthdays, celebrations, or just because, this cake is rich, light, and bursting with real flavor.
- Prep Time: 30 minutes
- Cook Time: 25 minutes
- Total Time: 1 hour 30 minutes
- Yield: 10 servings 1x
- Category: Dessert
- Cuisine: German
Ingredients
- 1 1/2 cups (190g) all-purpose flour
- 1/2 cup (45g) unsweetened cocoa powder (Dutch-processed preferred)
- 1 cup (200g) granulated sugar
- 3 large eggs, room temperature
- 6 tbsp (85g) unsalted butter, melted
- 1 1/2 tsp baking powder
- 1/2 tsp baking soda
- 1/2 tsp salt
- 1/2 cup (120ml) whole milk (or dairy-free milk)
- 1/2 cup (120ml) hot brewed coffee
- 2 tsp vanilla extract
- 1/2 tsp almond extract (optional)
- 2 cups (400g) fresh sweet cherries, pitted and halved (or frozen, thawed and drained)
- 2 tbsp Kirsch (optional, or cherry juice for alcohol-free)
- 2 tbsp granulated sugar (for cherry filling)
- 1 tbsp lemon juice
- 2 cups (500ml) heavy whipping cream, cold
- 3 tbsp powdered sugar
- 1 tsp vanilla extract (for whipped cream)
- 1 tbsp cornstarch (optional, for stabilizing whipped cream)
- 1/2 cup (50g) dark chocolate shavings (for garnish)
- Whole cherries with stems (optional, for garnish)
Instructions
- Grease two 8-inch (20cm) round cake pans and line the bottoms with parchment paper. Preheat oven to 350°F (175°C).
- In a large bowl, sift together flour, cocoa powder, baking powder, baking soda, and salt.
- In another bowl, whisk eggs and sugar until pale and slightly thickened (about 2 minutes).
- Stir in melted butter, vanilla extract, and almond extract (if using).
- Add half the dry ingredients to the wet mixture and mix gently. Pour in milk and hot coffee, then add remaining dry ingredients. Mix until just combined; do not overmix.
- Divide batter evenly between prepared pans. Bake for 22-25 minutes, or until a toothpick inserted in the center comes out clean.
- Cool cakes in the pans for 10 minutes, then turn out onto a wire rack and peel off parchment. Once completely cool, slice each cake horizontally to create four thin layers.
- For the cherry filling, toss pitted, halved cherries with sugar, lemon juice, and Kirsch (if using). Let sit for 15 minutes. Drain excess liquid and reserve for brushing cake layers.
- In a chilled bowl, whip heavy cream, powdered sugar, vanilla, and cornstarch (if using) until stiff peaks form. Do not overwhip.
- To assemble, place one cake layer on a serving plate and brush with reserved cherry juice. Spread a thick layer of whipped cream and scatter cherries over the cream.
- Repeat with remaining layers, ending with a cake layer on top. Frost top and sides with remaining whipped cream.
- Press chocolate shavings onto the sides and top of the cake. Garnish with whole cherries if desired.
- Refrigerate at least 1 hour before slicing. Slice with a sharp knife, wiping between cuts for neat pieces.
Notes
For gluten-free, use a 1:1 gluten-free flour blend. For dairy-free, substitute coconut cream for whipped cream and vegan butter in the cake. If cherries are out of season, use frozen (thawed and drained). Stabilize whipped cream with cornstarch or gelatin for best results. Chill cake before slicing for clean layers. Cake layers can be baked ahead and frozen.
Nutrition
- Serving Size: 1/10th of cake (about 1 slice)
- Calories: 370
- Sugar: 28
- Sodium: 220
- Fat: 20
- Saturated Fat: 12
- Carbohydrates: 45
- Fiber: 3
- Protein: 5
Keywords: Black Forest cake, chocolate cherry cake, German dessert, easy Black Forest, homemade Black Forest, whipped cream cake, cherry chocolate cake, birthday cake, celebration cake, fresh cherries


