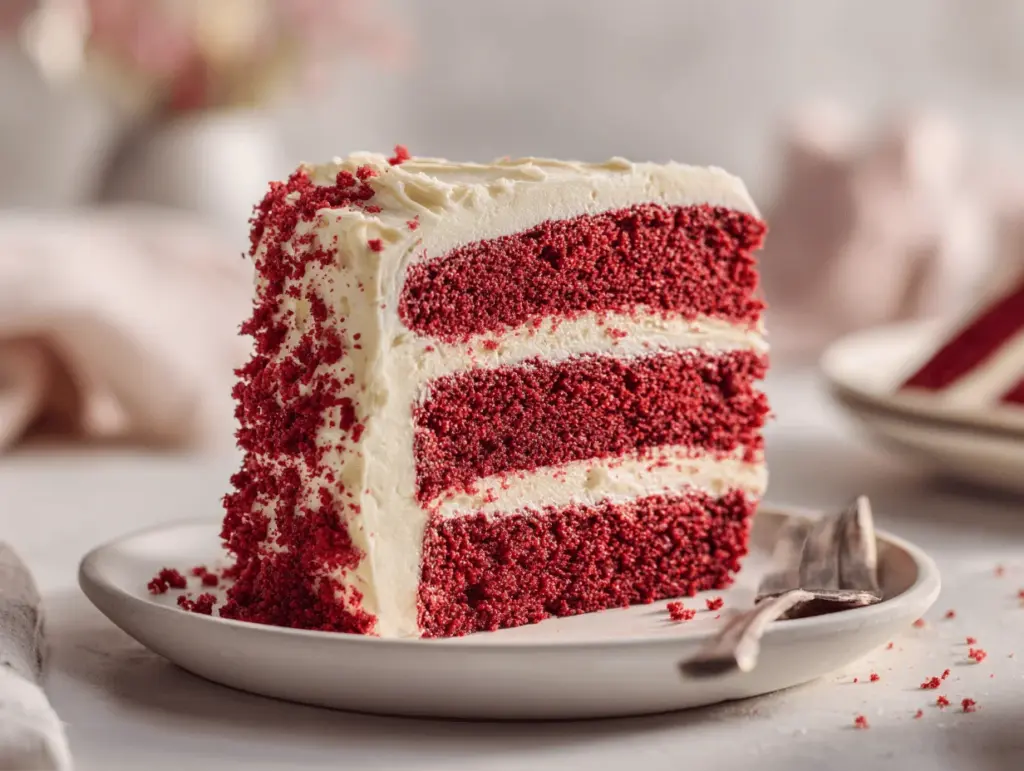
There’s something magical about slicing into a red velvet cake and seeing those vibrant, velvety layers—so rich and striking next to a cloud of cream cheese frosting. The first time I baked a red velvet cake, I was honestly just hoping it wouldn’t turn out brown. (Let’s face it, red velvet can be a little intimidating!) But after a few trial runs, a lot of taste-testing, and a couple of frosting mishaps, I finally landed on an irresistible red velvet cake recipe that’s both classic and beginner-friendly.
This cake isn’t just about the color—it’s about that subtle hint of cocoa, the tender crumb that almost melts on your tongue, and the tangy cream cheese frosting that pulls everything together. Red velvet cake is the kind of dessert that turns any occasion into a celebration, whether it’s a birthday, Valentine’s Day, or just a regular Tuesday when you’re craving something special. Over time, I’ve learned the little tricks that make each layer turn out perfectly plush, and now I can’t imagine a holiday season without it.
If you’re new to baking layer cakes, don’t worry. I’ve been there—wondering if I overmixed the batter, if the color would be right, if the layers would release from the pans (yes, I’ve had a few stick-to-the-pan disasters). But this red velvet cake recipe is designed with beginners in mind. You’ll get all my best tips, so you’ll feel confident from start to finish. And honestly, once you taste this cake, you’ll see why it’s been a staple in my kitchen for years. Let’s jump into the best red velvet cake recipe you’ll ever make—one that’s as beautiful as it is delicious.
Why You’ll Love This Red Velvet Cake Recipe
- Quick & Easy: You can whip up these classic layers in under two hours, including frosting—no need for fancy equipment or marathon baking sessions.
- Simple Ingredients: Everything on the list is a pantry staple or easy to find at any grocery store. No hunting for obscure cocoa or specialty flours.
- Perfect for Celebrations: This red velvet cake is a showstopper for birthdays, anniversaries, Valentine’s Day, and really any moment that needs a bit of wow.
- Crowd-Pleaser: It never fails to impress. Even folks who claim they “don’t like cake” usually end up asking for seconds.
- Unbelievably Delicious: The layers are moist and tender, subtly chocolatey, with that signature tang from buttermilk and cream cheese frosting. It’s comfort food in cake form.
What sets this red velvet cake recipe apart? For me, it’s the balance: just enough cocoa for depth, the perfect amount of buttermilk for tenderness, and a hint of vinegar to keep things authentically Southern. I always blend the wet ingredients extra well, which gives the crumb that signature velvety texture (hence the name!). And honestly, the cream cheese frosting recipe I use is so luscious, you might want to eat it with a spoon.
This recipe has been my go-to for years, not only because it’s basically foolproof, but because it’s the kind of cake that makes people light up. It’s the cake I bake when I want to make someone’s day or when I need a little edible hug. If you’ve ever been nervous about baking a layer cake, trust me—this recipe is your new best friend. Once you try it, you’ll never go back to boxed mixes or store-bought cakes again.
What Ingredients You Will Need
This red velvet cake uses classic, straightforward ingredients that come together to create something truly special. No need for complicated shopping trips—most of these are probably already in your pantry or fridge. Here’s what you’ll need for the cake and the frosting:
- For the Cake Layers:
- All-purpose flour (sifted for a light, even crumb)
- Granulated sugar (regular white sugar works best here)
- Unsweetened cocoa powder (just a hint, about 2 tablespoons—Dutch-process or natural, but I like Hershey’s for the classic flavor)
- Baking soda (for the perfect rise)
- Salt (don’t skip it—it balances the sweetness!)
- Buttermilk (room temperature, for tang and tenderness; you can use a buttermilk substitute—see notes below)
- Vegetable oil (I use canola or sunflower—keeps the cake moist for days)
- Large eggs (room temperature, for richness and structure)
- White vinegar (just a splash—trust me, it’s key for texture and that signature tang)
- Pure vanilla extract (for depth and warmth—Nielsen-Massey is my favorite, but any good vanilla works)
- Red food coloring (liquid or gel; gel gives a more intense color with less, but both work—use what you have!)
- For the Cream Cheese Frosting:
- Cream cheese (full-fat, softened—Philadelphia is my go-to)
- Unsalted butter (softened; don’t use margarine)
- Powdered sugar (sifted, for a smooth finish)
- Vanilla extract (brings all the flavors together)
- Pinch of salt (optional, but it really rounds out the sweetness)
Ingredient Tips & Substitutions:
- If you’re out of buttermilk, add 1 tablespoon of white vinegar or lemon juice to 1 cup of milk and let it sit for 5 minutes.
- For a gluten-free version, swap the all-purpose flour for a 1:1 gluten-free baking blend (I’ve had good luck with King Arthur’s).
- To make dairy-free cake layers, use unsweetened almond milk with vinegar and a dairy-free cream cheese for the frosting—though the flavor will be a little different.
- Want a deeper chocolate flavor? Add up to 1 extra tablespoon of cocoa powder, but the cake will lose a bit of that classic “red velvet” taste.
I love that you can make this cake your own, but trust me—the classic version is an absolute winner every single time.
Equipment Needed
You don’t need a fancy kitchen to bake a stunning red velvet cake. Here’s what I use (plus a few budget-friendly alternatives):
- Two or three 8-inch (20 cm) round cake pans (nonstick or metal; springform pans work in a pinch)
- Parchment paper (for lining the pans; makes for easy release)
- Hand mixer or stand mixer (a hand whisk works if you’re up for an arm workout—just be ready for a bit of a sweat!)
- Mixing bowls (one large, one medium)
- Measuring cups and spoons (for accuracy—baking is science!)
- Rubber spatula or wooden spoon (for folding and scraping down the bowl)
- Wire cooling rack (if you don’t have one, a clean oven rack works in a pinch)
- Offset spatula or butter knife (for spreading the frosting—an offset spatula makes it so much easier, but I’ve used a regular dinner knife in a pinch)
If your cake pans are older, I recommend greasing them well and dusting with flour, or using a quick spray of nonstick baking spray. My favorite trick for easy cleanup: cut parchment circles to fit the bottom of your pans. For maintenance, always hand-wash nonstick pans to preserve their coating, and store mixers with attachments tucked away to avoid losing pieces (speaking from experience… I’ve lost a whisk attachment more than once!).
Preparation Method
- Prep Your Pans and Oven:
- Preheat your oven to 350°F (175°C).
- Grease two or three 8-inch (20 cm) round cake pans. Line the bottoms with parchment paper and lightly dust with flour.
- Tip: If you only have two pans, bake in batches. Don’t try to squeeze all the batter into fewer pans—it’ll overflow!
- Mix Dry Ingredients:
- In a medium bowl, sift together:
- 2 1/2 cups (315g) all-purpose flour
- 2 tablespoons (12g) unsweetened cocoa powder
- 1 teaspoon (6g) baking soda
- 1/2 teaspoon (3g) salt
- Set aside. Sifting is key for that ultra-light crumb—don’t skip it!
- In a medium bowl, sift together:
- Combine Wet Ingredients:
- In a large bowl, whisk together:
- 1 1/2 cups (300g) granulated sugar
- 1 cup (240ml) vegetable oil
- 2 large eggs (room temp)
- 1 cup (240ml) buttermilk (room temp)
- 2 teaspoons (10ml) vanilla extract
- 1 teaspoon (5ml) white vinegar
- 2 tablespoons (30ml) red food coloring
- Mix until smooth and uniform in color. The batter should be a vibrant red!
- In a large bowl, whisk together:
- Combine and Mix:
- Add the dry ingredients to the wet mixture in two parts, mixing gently after each addition. Don’t overmix—just until you see no flour streaks.
- Tip: Overmixing leads to a tough cake. Batter should be smooth but not whipped.
- Bake:
- Divide the batter evenly among the prepared pans—about 2 cups (480ml) per pan.
- Bake for 22-26 minutes. Cakes are done when a toothpick comes out clean or with just a few moist crumbs.
- If your oven has hot spots, rotate the pans halfway through baking.
- Cool:
- Let cakes cool in the pans for 10 minutes. Carefully run a knife around the edge, then flip out onto a wire rack to cool completely (about 1 hour).
- Tip: Don’t frost warm cakes—it’ll melt the frosting and make a slippery mess.
- Make the Frosting:
- In a large bowl, beat together:
- 8 oz (225g) cream cheese, softened
- 1/2 cup (115g) unsalted butter, softened
- Mix until creamy. Gradually add 4 cups (480g) powdered sugar, beating on low speed until smooth and fluffy.
- Add 2 teaspoons (10ml) vanilla and a pinch of salt (optional). Beat until spreadable.
- If frosting seems too soft, chill for 15 minutes before using.
- In a large bowl, beat together:
- Assemble the Cake:
- Place one cake layer on a serving plate. Spread a thick layer of frosting on top.
- Add the second (and third, if using) layer(s), frosting between each.
- Frost the top and sides. For a “naked” look, use less frosting on the sides. For a traditional look, generously frost all over.
- Tip: If cake crumbs mix into the frosting, do a thin “crumb coat” first, chill, then finish with a final layer.
- Chill and Serve:
- Chill the cake for 30 minutes before slicing for neat layers.
- Enjoy! (Let’s be honest, licking the frosting bowl is part of the fun.)
With a little patience, you’ll end up with a bakery-worthy red velvet cake—promise!
Cooking Tips & Techniques
Baking a red velvet cake doesn’t have to be intimidating. Over the years, I’ve picked up a few tricks (and learned from a few flops) that will help your cake turn out picture-perfect every time.
- Room Temperature Ingredients: Don’t rush this. Using eggs, buttermilk, and butter at room temp keeps the batter smooth and helps the cake rise evenly. Cold ingredients can cause lumps or uneven baking.
- Don’t Overmix: Once you add flour, mix only until you can’t see streaks—overmixing makes the cake dense. If you’ve ever had a chewy red velvet cake, this is probably why!
- Color Cues: The batter should be a vibrant, slightly deep red—not neon. If it looks dull, add a tiny bit more food coloring, but don’t go overboard. Gel color gives a stronger hue with less product.
- Test for Doneness: Ovens can be finicky. Start testing at the lower end of the baking range. Cakes are done when a toothpick comes out with a few moist crumbs—no wet batter.
- Cool Completely Before Frosting: I’ve made the mistake of rushing this step and ended up with a sliding, melting mess. Frost only when cakes are totally cool to the touch.
- Frost Like a Pro: Use an offset spatula for smooth sides. For a rustic look, swirl the frosting with the back of a spoon. If you’re nervous about crumbs, do a thin “crumb coat,” chill, then finish with a final layer.
- Multitasking: While the cakes bake, wash your bowls and prep the frosting. This saves time and keeps your workspace manageable.
- Practice Makes Perfect: My first red velvet layer cake was lopsided and crumbly, but it still tasted amazing. Each time gets easier!
If you ever end up with a cracked cake layer, don’t panic—frosting covers a multitude of sins. And hey, the imperfect ones usually taste the best anyway.
Variations & Adaptations
Red velvet cake is a classic, but there’s plenty of room to make it your own. Here are some of my favorite twists and swaps:
- Gluten-Free Red Velvet Cake: Use a 1:1 gluten-free flour blend instead of all-purpose. Add 1/2 teaspoon xanthan gum if your blend doesn’t include it—I’ve had great results with King Arthur’s.
- Dairy-Free Version: Swap buttermilk for almond milk plus 1 tablespoon vinegar or lemon juice. Use a dairy-free cream cheese (like Kite Hill) and vegan butter for the frosting.
- Red Velvet Cupcakes: Divide the batter into lined muffin tins and bake at 350°F (175°C) for 18-22 minutes. Perfect for parties or bake sales.
- Chocolate Red Velvet: For a more chocolate-forward cake, increase cocoa powder to 1/4 cup (20g) and reduce flour by 2 tablespoons. The flavor will be deeper but still recognizable as red velvet.
- Nut-Free Adaptation: The cake is naturally nut-free, but always double-check your ingredients if allergies are a concern, especially with store-bought frosting or sprinkles.
- Personal Favorite: Sometimes I add a thin layer of raspberry preserves between the cake layers before frosting—sweet, tart, and totally unexpected.
Don’t be afraid to experiment! If you’re making this for kids, you can even skip the food coloring for a “naked velvet” cake with all the flavor but none of the dye.
Serving & Storage Suggestions
This red velvet cake is best served at room temperature so the layers are soft and the frosting is creamy. Slice with a sharp, warm knife for the cleanest cuts—just run your knife under hot water and dry it off before each slice.
Pair this cake with a cup of coffee or a tall glass of cold milk. For a special occasion, serve alongside fresh berries or a scoop of vanilla ice cream. The vibrant red and white look stunning on a simple cake stand or a vintage platter (I love using my grandma’s old cake plate—makes it feel extra special!).
To store, cover the cake tightly with plastic wrap or place in an airtight container. It’ll keep in the refrigerator for up to 5 days—just let it come to room temp before serving for the best texture. For longer storage, freeze individual slices wrapped in plastic and foil for up to 2 months. Thaw overnight in the fridge and bring to room temp before enjoying.
The flavors and texture actually improve after a day in the fridge (if you can wait that long!). The cake gets even more moist, and the tangy cream cheese frosting settles into the layers just right.
Nutritional Information & Benefits
A classic slice of red velvet cake (about 1/12 of the cake) clocks in at roughly 400-450 calories, with 23g fat, 48g carbs, and 4g protein—give or take, depending on how generous you are with the frosting!
This cake isn’t exactly “health food,” but it does have some redeeming qualities. The buttermilk provides a dose of calcium and protein, and the modest amount of cocoa offers a bit of antioxidant power. It’s nut-free and easily adaptable for gluten-free or dairy-free diets. Just watch for eggs, dairy, and wheat if you have allergies.
I like to see cake as a treat for the soul—sometimes the mental health benefits of a slice of homemade cake (especially when shared with friends) are just as important as the nutritional stats. Enjoy every bite!
Conclusion
If you’ve ever wanted to bake a red velvet cake that actually lives up to its looks, this is the recipe to try. It’s straightforward, beginner-friendly, and absolutely delicious—honestly, it’s my go-to for every special occasion (and more than a few “just because” days!).
Don’t be afraid to put your own spin on it, whether you’re going gluten-free, dairy-free, or adding a surprise filling. For me, it’s the memories tied to this cake—family birthdays, Valentine’s surprises, late-night baking with friends—that make it a forever favorite.
Give this irresistible red velvet cake recipe a shot, then come back and let me know how it turned out! Leave a comment, pin your cake on Pinterest, or tag me on Instagram—I’d love to see your twist. Here’s to making every day a little sweeter!
FAQs About Red Velvet Cake
How do I get my red velvet cake layers to come out of the pan easily?
Line the bottoms with parchment paper and grease the sides well. Let the cakes cool for 10 minutes, then run a knife around the edge and flip them out onto a rack. If they stick, just patch them together with frosting—nobody will know!
Can I make this red velvet cake ahead of time?
Yes! Bake the layers a day in advance and wrap them tightly. You can also freeze unfrosted layers for up to 2 months. Frost the cake the day you plan to serve it for the best texture.
Is it okay to use natural food coloring instead of artificial?
Absolutely. Beet powder or natural red food coloring work, but the color will be a bit more muted. The flavor stays delicious, though!
What if I don’t have buttermilk?
Stir 1 tablespoon lemon juice or vinegar into 1 cup of milk and let it sit for 5 minutes. It’s a perfect substitute in a pinch and gives the cake the right tang and texture.
How do I keep my frosting from being runny?
Make sure your butter and cream cheese are soft but not melted. If the frosting is too thin, chill it in the fridge for 15–20 minutes before spreading. Add a little more powdered sugar if needed for thickness.
Pin This Recipe!
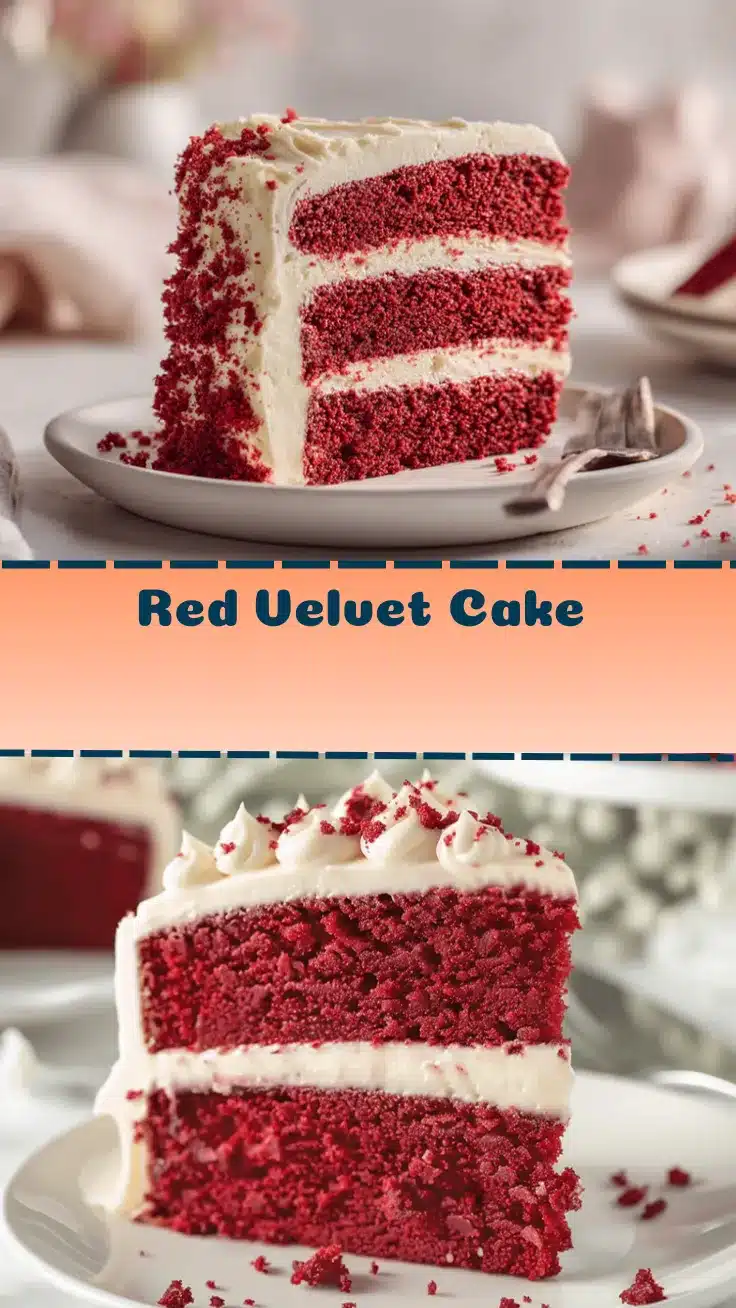
Red Velvet Cake Recipe – Best Classic Layers for Beginners
This classic red velvet cake features plush, vibrant layers with a subtle hint of cocoa and tangy cream cheese frosting. Beginner-friendly and perfect for celebrations, it’s a showstopper that’s moist, tender, and irresistibly delicious.
- Prep Time: 30 minutes
- Cook Time: 25 minutes
- Total Time: 1 hour 55 minutes
- Yield: 12 servings 1x
- Category: Dessert
- Cuisine: American
Ingredients
- 2 1/2 cups (315g) all-purpose flour, sifted
- 2 tablespoons (12g) unsweetened cocoa powder
- 1 teaspoon (6g) baking soda
- 1/2 teaspoon (3g) salt
- 1 1/2 cups (300g) granulated sugar
- 1 cup (240ml) vegetable oil (canola or sunflower)
- 2 large eggs, room temperature
- 1 cup (240ml) buttermilk, room temperature
- 2 teaspoons (10ml) pure vanilla extract
- 1 teaspoon (5ml) white vinegar
- 2 tablespoons (30ml) red food coloring (liquid or gel)
- 8 oz (225g) cream cheese, softened
- 1/2 cup (115g) unsalted butter, softened
- 4 cups (480g) powdered sugar, sifted
- 2 teaspoons (10ml) vanilla extract
- Pinch of salt (optional)
Instructions
- Preheat oven to 350°F (175°C). Grease two or three 8-inch round cake pans, line bottoms with parchment paper, and lightly dust with flour.
- In a medium bowl, sift together flour, cocoa powder, baking soda, and salt. Set aside.
- In a large bowl, whisk together granulated sugar, vegetable oil, eggs, buttermilk, vanilla extract, white vinegar, and red food coloring until smooth and uniform in color.
- Add dry ingredients to wet mixture in two parts, mixing gently after each addition. Mix just until no flour streaks remain; do not overmix.
- Divide batter evenly among prepared pans. Bake for 22–26 minutes, or until a toothpick comes out clean or with a few moist crumbs.
- Let cakes cool in pans for 10 minutes. Run a knife around the edge, then flip onto a wire rack to cool completely (about 1 hour).
- For the frosting: In a large bowl, beat together cream cheese and unsalted butter until creamy. Gradually add powdered sugar, beating on low speed until smooth and fluffy.
- Add vanilla extract and a pinch of salt (optional). Beat until spreadable. If frosting is too soft, chill for 15 minutes.
- To assemble: Place one cake layer on a serving plate and spread a thick layer of frosting on top. Add second (and third) layer(s), frosting between each. Frost top and sides as desired.
- Chill cake for 30 minutes before slicing for neat layers. Serve and enjoy!
Notes
For best results, use room temperature ingredients. Sift dry ingredients for a light crumb. Do not overmix the batter. If you don’t have buttermilk, substitute with 1 tablespoon vinegar or lemon juice in 1 cup milk. For gluten-free, use a 1:1 gluten-free flour blend. Frost only when cakes are completely cool. Cake can be made ahead and layers frozen. Store frosted cake in the fridge for up to 5 days; freeze slices for up to 2 months.
Nutrition
- Serving Size: 1 slice (1/12 of cake)
- Calories: 425
- Sugar: 38
- Sodium: 350
- Fat: 23
- Saturated Fat: 10
- Carbohydrates: 48
- Fiber: 1
- Protein: 4
Keywords: red velvet cake, classic cake, cream cheese frosting, beginner cake recipe, southern dessert, layer cake, holiday cake, birthday cake, easy cake recipe


