
The first time I tasted classic tiramisu, I swear I stopped mid-bite and just let the creamy, coffee-soaked goodness melt on my tongue. There’s something about the way rich mascarpone blends with bold espresso and a dusting of cocoa powder—it’s a flavor combination that feels like pure luxury, but with the comfort of home. Honestly, tiramisu is the kind of dessert you remember for years. I started making my own classic tiramisu recipe after a trip to Rome, when a friendly local chef insisted that homemade is always best and gave me a rundown of his family’s secret tips. (Spoiler: good espresso and a gentle hand with the eggs!)
This irresistible classic tiramisu recipe has become my go-to for every party, meal with friends, and special occasion. It’s a creamy Italian indulgence that feels sophisticated but is surprisingly easy to whip up. If you’re looking for a homemade Italian dessert that’s perfect for impressing guests—or just treating yourself after a long week—tiramisu delivers every time. The best part? You don’t need any crazy ingredients or complicated techniques. With a few pantry staples and a little patience (waiting for it to chill is the hardest part!), you’ll have a dessert that’s light, fluffy, and utterly irresistible.
As someone who’s tested this tiramisu recipe more times than I can count (including a few late-night experiments with friends), I can promise it never disappoints. Whether you’re a beginner baker or a seasoned home chef, this recipe has all the classic elements: delicate ladyfingers, creamy mascarpone, and the unmistakable kick of espresso. Honestly, it’s comfort food at its most elegant, and it’s always a hit with both kids and adults. So if you love desserts that bring people together, give this classic tiramisu recipe a try—you might just end up making it part of your regular routine!
Why You’ll Love This Recipe
- Quick & Easy: This classic tiramisu recipe comes together in under 30 minutes, plus chilling time—so you can prep it ahead and relax.
- Simple Ingredients: No need to hunt down fancy stuff; everything you need for classic tiramisu is probably already at your local grocery store.
- Perfect for Parties: Whether it’s a birthday, dinner gathering, or holiday celebration, tiramisu always feels a little bit special.
- Crowd-Pleaser: Seriously, I’ve never met anyone—kid, adult, picky eater, or dessert snob—who doesn’t love tiramisu. It’s always gone in minutes!
- Unbelievably Delicious: The creamy layers, bold coffee flavor, and hint of chocolate make every bite dreamy. It’s one of those desserts you close your eyes to savor.
What sets this classic tiramisu apart? For starters, I blend the mascarpone with whipped egg yolks and sugar until it’s cloud-like—no graininess, just smooth, creamy perfection. And I always use freshly brewed espresso (or very strong coffee) for soaking the ladyfingers. It makes all the difference! Plus, I’ve tweaked the balance of sweetness and coffee so it’s not too strong or too sugary. It’s just right.
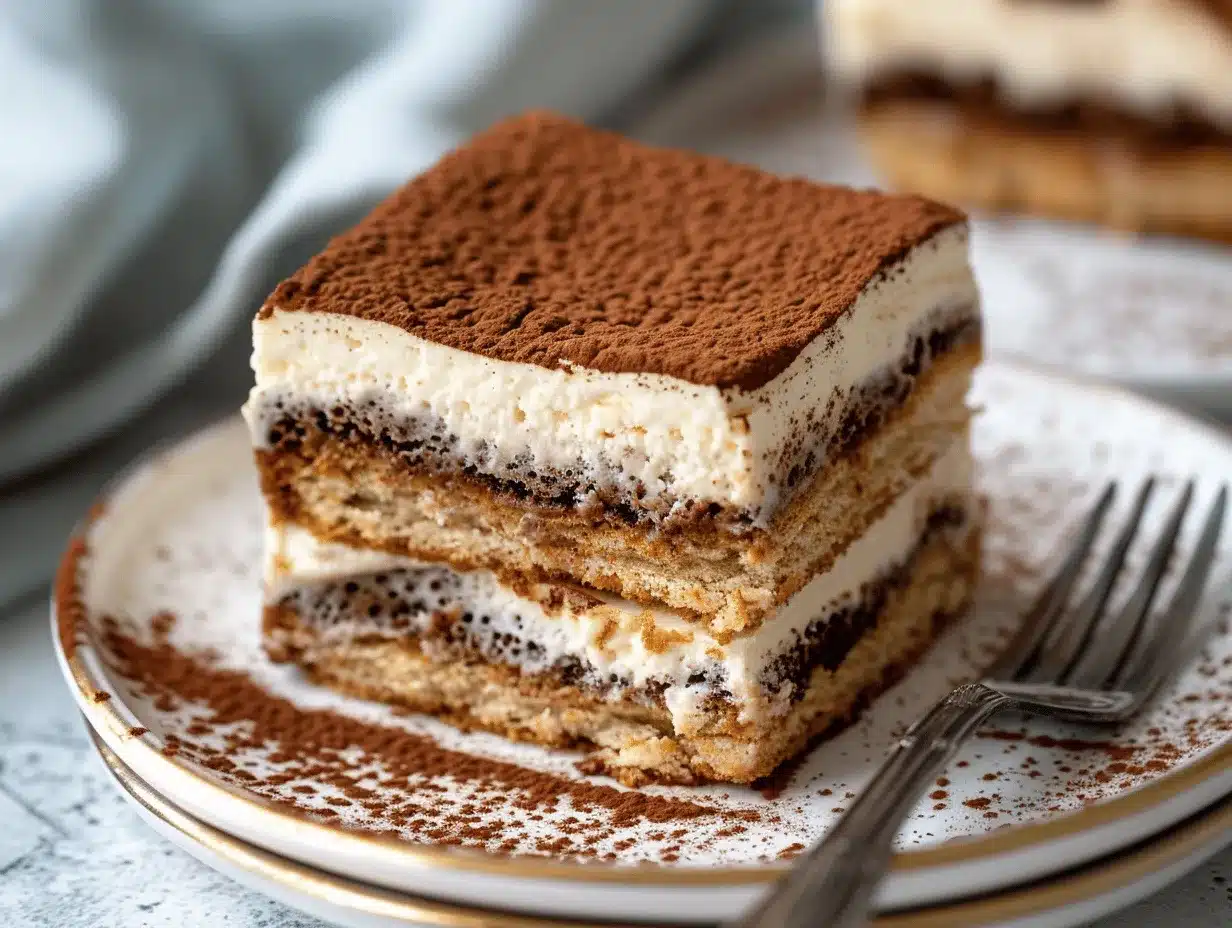
This recipe also skips the raw egg whites you’ll find in some traditional versions. Instead, I fold in whipped cream for a lighter texture and a bit more stability. The result is a classic tiramisu that’s easy to slice, yet still melt-in-your-mouth tender. And let’s face it, the cocoa powder dusting on top gives it that coffee shop vibe—perfect for photos, if you’re into sharing your bakes on Pinterest.
Above all, this tiramisu isn’t just dessert—it’s an experience. It’s comfort food, but with a dash of Italian elegance and a whole lot of heart. And you know, it’s the kind of recipe people ask for after one bite. So whether you’re making it for a special occasion or just because, you’ll love how easy, delicious, and memorable this tiramisu really is.
What Ingredients You Will Need
This classic tiramisu recipe uses honest, everyday ingredients to deliver rich flavor and a creamy texture—no fuss, just pure Italian goodness. Here’s what you’ll need:
- For the Creamy Filling:
- Mascarpone cheese (16 oz / 450g, chilled)—the heart of tiramisu; I always use Galbani or BelGioioso for best texture
- Heavy whipping cream (1 cup / 240ml, cold)—for lightness and stability
- Egg yolks (4 large)—adds richness and flavor
- Granulated sugar (1/2 cup / 100g)—sweetens the filling, but doesn’t overpower
- Vanilla extract (1 tsp / 5ml)—optional, but adds a subtle warmth
- For the Ladyfinger Layers:
- Ladyfingers (Savoiardi; 24–30 pieces)—firm, dry style works best
- Espresso or very strong coffee (1 1/2 cups / 360ml, cooled)—freshly brewed is key; decaf works if needed
- Dark rum or coffee liqueur (2–3 tbsp / 30–45ml)—optional, but adds depth (I swap in vanilla extract for kid-friendly)
- For Assembly & Garnish:
- Unsweetened cocoa powder (2–3 tbsp / 15–20g)—for dusting, gives tiramisu its signature look
- Chocolate shavings or curls—totally optional, but fun for extra flair
Ingredient Notes & Substitutions:
- If you need a gluten-free option, swap regular ladyfingers for gluten-free ones (Schar makes a good version).
- No mascarpone? Cream cheese works in a pinch, but the flavor isn’t quite as authentic.
- For dairy-free, use coconut cream in place of heavy cream and a vegan cream cheese substitute. Just know the texture will be a bit different.
- You can skip the alcohol or use almond extract for a nutty twist. I’ve tried both—honestly, it’s always tasty.
- If you don’t have espresso, use very strong coffee. Instant espresso powder works okay in a pinch (just mix it up strong!).
This ingredient list is all about balance—richness from mascarpone, punch from coffee, and just enough sweetness to keep things light. I recommend measuring everything out before you start. (It saves you from scrambling mid-recipe, trust me!)
Equipment Needed
- Mixing bowls (2–3): For whipping yolks, cream, and folding everything together. Glass or stainless steel works best.
- Electric mixer or hand whisk: You’ll need this for whipping cream and yolks. I use a simple handheld mixer (because the stand mixer is buried in the cabinet).
- 9×9 inch (23x23cm) square dish or similar: A glass baking dish shows off the layers, but any casserole dish works.
- Spatula or large spoon: For folding and spreading the creamy layers. Silicone spatulas make cleanup a breeze.
- Small shallow bowl: For dipping ladyfingers into the coffee mixture.
- Sifter or fine mesh strainer: For dusting cocoa powder evenly on top.
- Plastic wrap or lid: For covering the tiramisu while it chills.
I’ve used everything from vintage Pyrex to cheap supermarket pans for tiramisu—it always turns out delicious. If you don’t have a sifter for the cocoa, just use a small sieve or even sprinkle with your fingers. (It’s a little messy, but it works!) For budget-friendly options, stick to basic mixing bowls and a hand whisk—the creamy filling is very forgiving. Just wash everything right after so the mascarpone doesn’t stick.
Preparation Method
- Make the Coffee Mixture:
Brew 1 1/2 cups (360ml) fresh espresso or strong coffee. Let it cool to room temperature. Stir in 2–3 tbsp (30–45ml) rum or coffee liqueur, if using. Pour into a shallow bowl for dipping. (Tip: Too hot and the ladyfingers get mushy; too cold and they don’t soak up enough flavor!) - Prepare the Creamy Filling:
In a medium bowl, whisk 4 egg yolks with 1/2 cup (100g) granulated sugar until pale and thick (about 3–4 minutes with an electric mixer). The mixture should be light, almost like a soft ribbon when you lift the whisk.
Gently fold in 16 oz (450g) chilled mascarpone cheese until smooth. (Don’t overmix or it can get runny!) - Whip the Cream:
In a separate bowl, beat 1 cup (240ml) heavy cream to stiff peaks. (Takes about 2–3 minutes with a mixer on high.) Fold the whipped cream gently into the mascarpone/yolk mixture until fully combined. Add 1 tsp (5ml) vanilla extract if you like. - Layer the Ladyfingers:
Working quickly, dip each ladyfinger into the cooled coffee mixture for about 1–2 seconds (not longer, or they’ll fall apart!). Lay a single layer of soaked ladyfingers in the bottom of your dish. (You might need to break a few to fit—no worries.) - Spread Cream Layer:
Spoon half the creamy mascarpone filling over the ladyfingers and smooth gently with a spatula. Try not to press down too much; you want soft, fluffy layers. - Repeat Layers:
Dip and layer the remaining ladyfingers over the cream. Top with the rest of the mascarpone mixture, smoothing the surface. (Some folks use three layers, but two is classic and less likely to tip over.) - Chill:
Cover tightly with plastic wrap or a lid and refrigerate at least 6 hours, or overnight if possible. The longer it chills, the better the flavors meld! - Finish & Serve:
Just before serving, dust generously with unsweetened cocoa powder using a sifter or fine mesh strainer. Add chocolate shavings if you’re feeling fancy. Slice into squares and enjoy cold.
Troubleshooting Tips:
If your filling seems runny, chill it for 30 minutes before layering. Ladyfingers falling apart? Dip faster and work in batches. If the mascarpone won’t mix smoothly, let it sit out for 10 minutes (cold cheese can get clumpy). And if you end up with a messy top layer—don’t worry! A thick dusting of cocoa covers all sins.
Personal Notes: I always let mine chill overnight—it’s worth the wait for that classic tiramisu magic. And yes, licking the bowl is totally allowed.
Cooking Tips & Techniques
Here’s what I’ve learned (sometimes the hard way!) after making classic tiramisu for years:
- Ladyfinger Dip Speed: Don’t soak them too long! A quick dunk is all you need. If you leave them in the coffee, they turn to mush and ruin the layers.
- Mascarpone Temperature: Use chilled mascarpone for structure, but if it’s too cold, let it sit out briefly so it blends smoothly. Overmixing can make it runny, so fold gently.
- Egg Yolks: Whisk them with sugar until really pale and thick. This gives your filling that classic tiramisu richness and stability.
- Whipped Cream: Whip to stiff peaks. If you under-whip, the filling won’t hold up; over-whip, and it turns grainy. I check by lifting the whisk—if the cream stands straight up, you’re good!
- Layering: Don’t press down on the layers. Softly spread the filling so you get that cloud-like texture.
- Troubleshooting: If the cream looks runny, chill it for 15–30 minutes. If the ladyfingers are dry, add a touch more coffee to your soaking bowl.
Once, I tried using homemade sponge cake instead of ladyfingers—total disaster. It soaked up way too much coffee and turned to soup. Lesson learned! Also, using instant coffee that’s too weak leaves the tiramisu bland. Stick with espresso or brew your coffee strong.
If you’re multitasking, set up your bowls for dipping and filling before you start. It’s way easier to move quickly when everything’s ready. And don’t forget—the best tiramisu needs time to chill. Rushing it just never works.
Variations & Adaptations
Classic tiramisu is a dream, but you can easily tweak it to suit your taste, diet, or the season:
- Gluten-Free: Swap regular ladyfingers for gluten-free ones. The texture is almost identical, and no one will notice.
- Alcohol-Free: Use extra coffee or a splash of almond or vanilla extract instead of rum or liqueur. Perfect for kids or anyone skipping booze.
- Berry Tiramisu: Add a layer of fresh raspberries or strawberries between the mascarpone layers for a fruity twist. I did this last summer, and it was a hit at brunch!
- Chocolate Lovers: Mix a little grated dark chocolate (about 2 oz / 60g) into the cream filling, or add a layer of chocolate ganache between the ladyfingers and cream.
- Vegan Adaptation: Use coconut cream in place of heavy cream, vegan cream cheese for mascarpone, and egg replacer for yolks. The flavor’s a bit different, but it’s still delicious.
I’ve even made “mini tiramisu” cups for parties by layering ingredients in mason jars. It’s fun, portable, and super cute for Pinterest photos. Whatever variation you choose, the heart of tiramisu is creamy, coffee-soaked comfort—don’t be afraid to play around and make it your own!
Serving & Storage Suggestions
Tiramisu is best served chilled—straight from the fridge. Slice gently with a sharp knife or lift with a spatula for neat layers. For presentation, I like to dust the top with extra cocoa powder and add a few chocolate curls or coffee beans. It looks gorgeous on a pretty platter or in individual cups.
Want to pair it with something special? Serve alongside fresh berries, a crisp espresso, or even a glass of dessert wine for a true Italian experience. Tiramisu is a showstopper at parties, potlucks, or cozy dinners—trust me, everyone will ask for seconds.
For storage, cover tightly and refrigerate for up to 4 days. The flavors actually get better as it sits. You can freeze tiramisu for up to a month—wrap well and thaw overnight in the fridge. To reheat (if you must), let it come to room temperature, but never microwave (it ruins the texture!). And if you’re saving leftovers, the cocoa topping might darken a bit, but that’s normal. I think it’s even more delicious the next day!
Nutritional Information & Benefits
| Per Serving (1/8th of recipe) | Approximate Values |
|---|---|
| Calories | 370 |
| Protein | 7g |
| Carbohydrates | 34g |
| Fat | 21g |
| Sugar | 19g |
Key Ingredients & Health Benefits: Mascarpone is rich in calcium and protein, and eggs provide healthy fats. You can use reduced-sugar ladyfingers for a lighter touch. If you swap in gluten-free or vegan substitutes, the nutritional profile shifts a bit, but tiramisu remains a satisfying treat. Be mindful if you have dairy, gluten, or egg allergies—this recipe uses all three. I always serve it in moderation, as part of a balanced approach to dessert. Honestly, a little indulgence goes a long way for happiness!
Conclusion
If you’re looking for a dessert that’s creamy, classic, and always a crowd favorite, this irresistible tiramisu recipe is it. The combination of velvety mascarpone, coffee-soaked ladyfingers, and cocoa dusting creates a homemade Italian treat that’s both comforting and sophisticated. I love how easy it is—no baking, just simple steps—and how it transforms any meal into a celebration.
Don’t be afraid to experiment with flavors or make it your own. Whether you go traditional or try a berry or chocolate twist, tiramisu is all about sharing joy with family and friends. It’s the kind of recipe you’ll come back to again and again.
If you make this classic tiramisu recipe, let me know! Drop a comment below, share your Pinterest photos, or tell me about your favorite variation. Honestly, seeing your creations makes my day. Happy baking (and even happier eating)!
Frequently Asked Questions
Can I make tiramisu without alcohol?
Absolutely! Just skip the rum or liqueur, and add a splash of vanilla or almond extract to the coffee mixture for extra flavor. It’s still delicious and totally kid-friendly.
Is it safe to use raw eggs in tiramisu?
Traditional tiramisu uses raw egg yolks. To reduce risk, use very fresh eggs or pasteurized yolks. If you’re worried, you can find pasteurized eggs at most grocery stores.
How long does tiramisu need to chill before serving?
Six hours is the minimum, but overnight is best. Chilling lets the flavors meld and makes the texture perfect for slicing.
Can I freeze tiramisu?
Yes! Wrap tightly and freeze for up to a month. Thaw overnight in the refrigerator before serving. The texture is best if frozen before dusting with cocoa.
What’s the best way to get neat slices?
Use a sharp knife and wipe it clean between cuts. Serve tiramisu cold for the neatest layers—warm or room temperature slices tend to get messy, but taste just as good!
Pin This Recipe!

Classic Tiramisu Recipe: Easy Homemade Italian Dessert for Parties

This classic tiramisu recipe features creamy mascarpone, coffee-soaked ladyfingers, and a dusting of cocoa powder for an irresistible Italian dessert that’s perfect for parties and special occasions. It’s easy to make, requires no baking, and delivers sophisticated flavor with simple ingredients.
- Prep Time: 20 minutes
- Cook Time: 0 minutes
- Total Time: 6 hours 20 minutes
- Yield: 8 servings 1x
- Category: Dessert
- Cuisine: Italian
Ingredients
- 16 oz (450g) mascarpone cheese, chilled
- 1 cup (240ml) heavy whipping cream, cold
- 4 large egg yolks
- 1/2 cup (100g) granulated sugar
- 1 tsp (5ml) vanilla extract (optional)
- 24–30 ladyfingers (Savoiardi), firm and dry
- 1 1/2 cups (360ml) espresso or very strong coffee, cooled
- 2–3 tbsp (30–45ml) dark rum or coffee liqueur (optional, or substitute vanilla extract for alcohol-free)
- 2–3 tbsp (15–20g) unsweetened cocoa powder, for dusting
- Chocolate shavings or curls, for garnish (optional)
Instructions
- Brew 1 1/2 cups fresh espresso or strong coffee and let it cool to room temperature. Stir in rum or coffee liqueur if using. Pour into a shallow bowl for dipping.
- In a medium bowl, whisk egg yolks with granulated sugar until pale and thick (about 3–4 minutes with an electric mixer).
- Gently fold in chilled mascarpone cheese until smooth. Do not overmix.
- In a separate bowl, beat heavy cream to stiff peaks (about 2–3 minutes). Fold whipped cream gently into the mascarpone/yolk mixture. Add vanilla extract if desired.
- Quickly dip each ladyfinger into the cooled coffee mixture for 1–2 seconds. Lay a single layer of soaked ladyfingers in the bottom of a 9×9 inch dish.
- Spoon half the creamy mascarpone filling over the ladyfingers and smooth gently.
- Repeat with another layer of dipped ladyfingers and top with the remaining mascarpone mixture, smoothing the surface.
- Cover tightly and refrigerate at least 6 hours, or overnight for best results.
- Just before serving, dust generously with unsweetened cocoa powder and add chocolate shavings if desired. Slice and serve chilled.
Notes
For best results, chill tiramisu overnight to allow flavors to meld. Use chilled mascarpone for structure, and dip ladyfingers quickly to avoid soggy layers. Pasteurized eggs are recommended for safety. Gluten-free ladyfingers can be substituted. Tiramisu can be made alcohol-free by omitting rum or liqueur and using vanilla or almond extract. Store covered in the refrigerator for up to 4 days or freeze for up to a month.
Nutrition
- Serving Size: 1/8th of recipe (about 1 square from a 9x9 inch dish)
- Calories: 370
- Sugar: 19
- Sodium: 90
- Fat: 21
- Saturated Fat: 13
- Carbohydrates: 34
- Fiber: 1
- Protein: 7
Keywords: tiramisu, classic tiramisu, Italian dessert, easy tiramisu, party dessert, mascarpone, coffee dessert, no bake, homemade tiramisu


