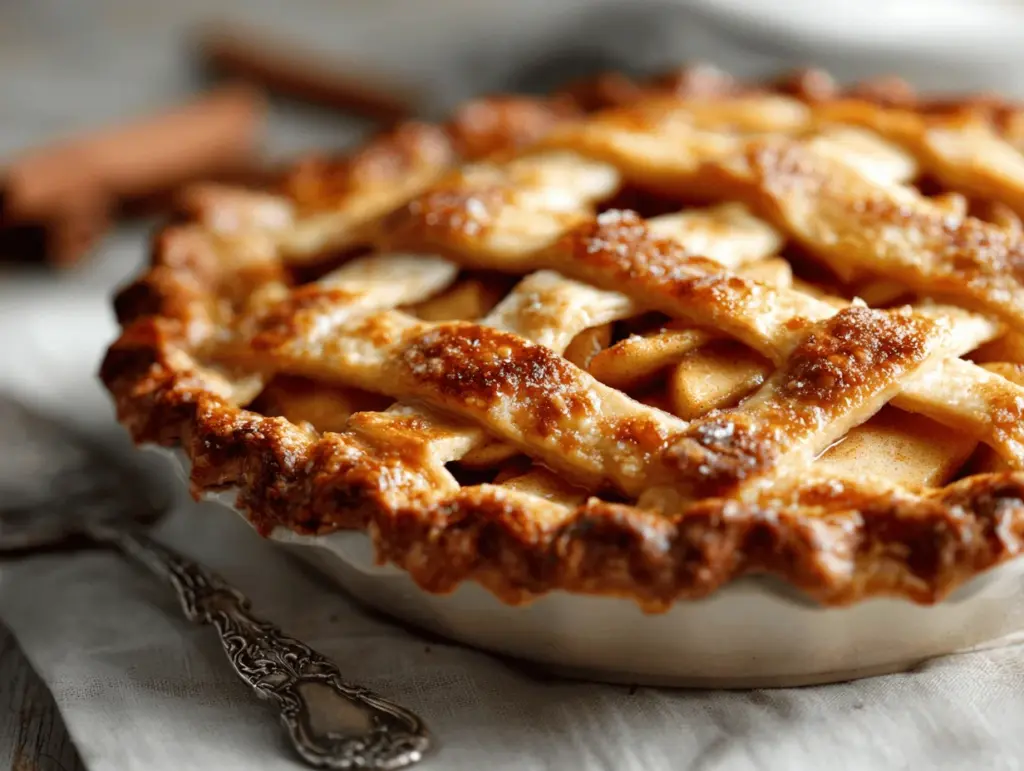
The first time I baked this classic apple pie, the whole house filled with a warm, sweet aroma that screamed autumn. Honestly, there’s something magical about pulling a bubbling, golden pie from the oven—especially when the weather cools down. My grandma used to say, “Apple pie fixes any mood,” and I’m pretty sure she was right. Whether you’re looking for a showstopper for Thanksgiving or just craving a slice of cozy nostalgia, this apple pie recipe is the one you’ll come back to again and again.
I started tinkering with apple pie recipes years ago (after a disastrous attempt that ended with a soggy crust and undercooked apples, yikes!). Through trial and error, I learned a few secrets to achieving homemade perfection every time—crisp crust, tender apples, rich cinnamon flavor. Now, it’s my family’s most requested dessert every fall, and I’ve baked it for everything from potlucks to birthdays. There’s nothing quite like the combination of flaky pastry and sweet-tart apples. It’s comforting, old-fashioned, and—let’s face it—totally irresistible.
This apple pie recipe isn’t just delicious; it’s reliable, easy to make, and perfect for beginner bakers (trust me, you don’t need fancy skills). It’s also packed with wholesome ingredients, so you can enjoy a slice without feeling too guilty. Whether you serve it warm with a scoop of vanilla ice cream or sneak a bite straight from the fridge, it delivers that classic homemade taste every time. If you’re searching for the ultimate apple pie recipe, you’re in the right place. Let’s get baking!
Why You’ll Love This Apple Pie Recipe
- Quick & Easy: You can prep this apple pie in about 30 minutes, making it ideal for last-minute cravings or busy fall gatherings.
- Simple Ingredients: Nothing fancy here—you probably have everything you need in your kitchen right now.
- Perfect for Fall Desserts: This apple pie is a must for Thanksgiving, holiday dinners, or cozy Sunday afternoons.
- Crowd-Pleaser: It’s always a hit with kids, adults, and everyone in between. Even self-proclaimed “non-dessert people” ask for seconds!
- Unbelievably Delicious: The balance of sweet-tart apples, warm spices, and buttery crust is classic comfort food at its best.
What sets this apple pie apart from the rest? For starters, I always use a mix of apple varieties for the perfect texture and flavor (Granny Smith for tartness, Honeycrisp or Fuji for sweetness). Plus, I chill the dough to make sure the crust bakes up extra flaky—no soggy bottoms here! I’ve tested this recipe dozens of times, tweaking the spice blend and sugar levels until it was just right. The filling isn’t too runny or too dry, and the apples stay tender but not mushy. If you’re like me and crave apple pie with a robust cinnamon kick, you’ll love the way the flavors develop as it bakes.
Honestly, this recipe is more than dessert—it’s a little slice of tradition. There’s something so satisfying about baking an apple pie from scratch, sharing it with friends, and seeing everyone’s eyes light up. Whether you’re baking for a crowd or just treating yourself, this apple pie is guaranteed to bring a little happiness to your table.
What Ingredients You Will Need
This apple pie recipe uses simple, wholesome ingredients to deliver bold flavor and that classic, satisfying texture—no complicated steps or weird additives. Most of these are pantry staples, but I’ll give you some tips for substitutions too.
For the Pie Crust:
- 2 1/2 cups (315g) all-purpose flour (unbleached is best for texture)
- 1 cup (226g) unsalted butter, cold and cut into cubes (I love using Kerrygold for extra flavor!)
- 1/2 tsp salt
- 1 tbsp granulated sugar (optional, for a hint of sweetness)
- 6-8 tbsp (90-120ml) ice water (start with less, add more as needed)
For the Apple Filling:
- 6-7 medium apples (about 2 1/2 lbs or 1.1 kg, peeled, cored, and sliced; a mix of Granny Smith and Honeycrisp is perfect)
- 3/4 cup (150g) granulated sugar
- 1/4 cup (50g) light brown sugar, packed
- 2 tbsp (16g) all-purpose flour (helps thicken the filling)
- 1 tsp ground cinnamon
- 1/4 tsp ground nutmeg
- 1/4 tsp ground allspice (optional, for warmth)
- 1/8 tsp salt
- 1 tbsp lemon juice (keeps apples bright and adds zing)
- 2 tbsp (28g) unsalted butter, cut into small pieces
For the Topping:
- 1 egg, beaten (for egg wash—makes the crust shiny and golden)
- 1 tbsp granulated sugar (for sprinkling, adds crunch)
Ingredient Tips & Substitutions:
- Apples: Use whatever mix you prefer, but avoid Red Delicious (they get mushy). In a pinch, all Granny Smith works for a more tart pie.
- Butter: For dairy-free, swap in plant-based butter sticks.
- Flour: Sub with gluten-free 1:1 blend if needed; crust will be slightly more crumbly but still tasty.
- Spices: No nutmeg? Add a little extra cinnamon, or try cardamom for a twist.
- Sugar: Adjust to taste—if your apples are very sweet, you can use less.
That’s it! No need for fancy ingredients—the real secret is how you prep and bake them.
Equipment Needed
- 9-inch (23cm) pie dish: Glass or ceramic works best for even browning. I’ve used metal pans before, but the crust tends to cook faster on the edges.
- Mixing bowls: One for the pie crust, one for the apple filling. If you’re short on bowls, just wash and reuse.
- Pastry cutter or forks: For cutting butter into the flour. If you don’t have a cutter, two butter knives work (I did this in my college apartment—it’s slower but gets the job done!).
- Rolling pin: For rolling out the crust. A wine bottle cleaned and floured in a pinch also does the trick.
- Peeler and corer: Peeling apples by hand is fine, but a corer makes things faster.
- Knife & cutting board: For apple slicing. Serrated knives help with firm apples.
- Measuring cups & spoons: Always worth double-checking your amounts.
- Pastry brush: For egg wash. If you don’t have one, a clean finger works (I’ve done this more times than I’d like to admit).
- Aluminum foil: To cover crust edges if browning too quickly.
Most of these are kitchen basics. If you’re missing a specialty tool, don’t stress! You can improvise and still bake a beautiful apple pie. I recommend washing your pie dish by hand to keep it from scratching, especially if it’s glass. Budget-wise, basic glass dishes are affordable and last for years.
Preparation Method
- Prepare the Pie Crust:
Ingredients: 2 1/2 cups (315g) flour, 1 cup (226g) butter, 1/2 tsp salt, 1 tbsp sugar, 6-8 tbsp (90-120ml) ice water.
In a large bowl, whisk together flour, salt, and sugar. Add cold butter cubes, then cut into the flour with a pastry cutter or forks until the mixture looks like coarse crumbs (pea-sized bits are ideal). Slowly add ice water, 1 tablespoon at a time, mixing just until the dough comes together—don’t overwork it! Divide in half, flatten into disks, wrap in plastic, and chill for at least 1 hour (overnight is fine).
Tip: If your dough seems dry, add another tablespoon of water. If sticky, sprinkle with a little flour. Cold ingredients make a flakier crust! - Prepare the Apple Filling:
Ingredients: 6-7 apples (2 1/2 lbs/1.1 kg), 3/4 cup (150g) sugar, 1/4 cup (50g) brown sugar, 2 tbsp (16g) flour, 1 tsp cinnamon, 1/4 tsp nutmeg, 1/4 tsp allspice, 1/8 tsp salt, 1 tbsp lemon juice, 2 tbsp butter.
Peel, core, and slice apples into 1/4-inch thick pieces. Toss apples with lemon juice in a large bowl. Add sugars, flour, spices, and salt; mix until apples are coated.
Tip: If your apples are extra juicy, add another tablespoon of flour to prevent runny filling. Smell the mixture—it should be fragrant and spicy! - Roll Out the Crust:
On a lightly floured surface, roll out one dough disk to fit your 9-inch pie dish (about 1/8-inch thick). Gently transfer to the dish, pressing into corners. Trim edges, leaving 1/2-inch overhang.
Warning: Crust may tear—patch with extra dough. If it gets soft, chill in the fridge for 10 minutes before continuing. - Fill the Pie:
Pile apple mixture into the crust, mounding slightly in the center. Dot apples with small pieces of butter.
Tip: Lay apples snugly for even baking. If you have leftover filling, save it for oatmeal! - Top the Pie:
Roll out second dough disk and lay over apples. Trim, pinch, and crimp edges to seal. Cut 4-5 slits in the top for steam to escape.
Tip: For lattice crust, cut dough into strips and weave. If dough sticks, chill again for 5 minutes. - Brush & Sprinkle:
Beat 1 egg and brush over crust. Sprinkle with 1 tbsp sugar for crunch.
Tip: Egg wash gives a glossy, golden finish. Don’t skip it! - Bake:
Oven: Preheat to 425°F (220°C).
Bake pie on lower oven rack for 20 minutes. Reduce temperature to 375°F (190°C) and bake another 35-45 minutes, until crust is deep golden and juices bubble.
Warning: If edges brown too quickly, cover with foil. The pie should smell caramelized and spicy! - Cool:
Let pie cool for at least 2 hours before slicing; this helps the filling set.
Tip: If you cut too soon, the filling may spill out (I’ve rushed before—still delicious, just messier).
For best results, use cold ingredients, don’t skip the chilling step, and pack those apples in tightly. And remember, a little imperfection gives it that rustic, homemade charm!
Cooking Tips & Techniques
- Cold Butter = Flaky Crust: Always use very cold butter for the dough. If it softens, pop the bowl in the freezer for 10 minutes before rolling.
- Mix Apple Varieties: Combining tart and sweet apples gives your pie depth. I’ve tried all Granny Smith—good, but a bit too tangy. A mix wins every time.
- Don’t Overmix Dough: This is a classic mistake. Overworking the dough makes the crust tough. Stop mixing as soon as it comes together.
- Watch Your Oven: Oven temps vary! If the pie browns too fast, tent with foil. If the filling isn’t bubbling, give it another 5-10 minutes.
- Steam Vents: Slits in the top crust prevent sogginess and keep the filling from bursting out.
- Blind Bake for Extra Crispiness: If you want a super crisp bottom, bake the crust empty for 10 minutes before adding filling (I do this for extra insurance).
- Let Cool Before Cutting: It’s tempting to slice right away, but cooling lets the juices thicken. I learned this the hard way—first pie was delicious but soupy.
- Multitasking: While the dough chills, prep apples and clean up the kitchen. It’s a time saver!
Consistency comes from practice—don’t worry if it’s not bakery-perfect. Homemade apple pie is all about flavor and love, not perfection!
Variations & Adaptations
- Gluten-Free: Swap all-purpose flour for a 1:1 gluten-free baking blend in both the crust and filling. The texture will be slightly different but still flaky.
- Vegan: Use plant-based butter and omit the egg wash (brush with almond milk instead). I’ve made vegan apple pie for friends—it’s just as comforting!
- Spiced Pear Pie: Substitute half the apples with ripe pears for a sweet, floral twist. Add a pinch of ground ginger.
- Seasonal Add-Ins: Toss in a handful of fresh cranberries or dried cherries for tartness, or chopped walnuts for crunch.
- Caramel Apple Pie: Drizzle 1/4 cup caramel sauce over apples before topping with crust for a richer dessert.
- Low-Sugar: Cut sugar by half, relying more on the natural sweetness of apples and a sprinkle of stevia if desired.
My favorite twist? Adding a splash of vanilla extract to the filling—it makes the pie taste even cozier. Don’t be afraid to experiment and make it your own!
Serving & Storage Suggestions
Apple pie is best served slightly warm, straight from the oven or reheated. I love dishing up generous slices with a scoop of vanilla ice cream or a dollop of whipped cream. For a festive touch, sprinkle with cinnamon sugar or pair with hot cider.
To store, cover pie loosely with foil or plastic wrap. It keeps at room temperature for 2 days, or refrigerate for up to 5 days. For longer storage, slice and freeze individual pieces—just wrap tightly and pop them in a freezer-safe container. When ready to eat, thaw overnight in the fridge and reheat at 350°F (175°C) for 10-15 minutes.
The flavor actually deepens after a day or two, so leftovers are a treat! Just avoid microwaving, as it can make the crust soggy. Oven reheating keeps it crisp and delicious.
Nutritional Information & Benefits
One slice (1/8 of the pie) contains approximately:
- Calories: 340
- Fat: 16g
- Carbs: 47g
- Protein: 3g
- Fiber: 3g
- Sugar: 26g
Apples are a great source of fiber, vitamin C, and phytonutrients. This recipe can be adapted for gluten-free, dairy-free, or vegan diets, making it accessible for most folks. Watch out for wheat, dairy, and eggs if you have allergies. I love that apple pie offers some antioxidants along with all that cozy flavor—it’s dessert you can feel good about enjoying (in moderation, of course!).
Conclusion
Classic apple pie is more than just a dessert—it’s a memory, a comfort, and a celebration of simple ingredients. Every time I bake this recipe, I’m reminded of family gatherings and the joy that comes from sharing something homemade. The flaky crust, tender apples, and warm spices make it a fall favorite for a reason.
Feel free to customize the recipe to suit your tastes, swap in your favorite apples, or tweak the spice blend. That’s the beauty of homemade baking—it’s personal, imperfect, and always delicious. I hope you love this apple pie as much as my family does!
If you try this recipe, leave a comment below with your tweaks or share your photos! I’d love to hear how it turned out and what you served it with. Here’s to homemade perfection and sweet moments around the table.
FAQs
What are the best apples to use for classic apple pie?
A mix of tart and sweet apples works best. Granny Smith and Honeycrisp are my go-to combo—firm, flavorful, and they hold up during baking.
Can I make the pie crust ahead of time?
Absolutely! You can prepare the dough up to 3 days in advance and keep it wrapped in the fridge. It also freezes well for up to a month.
How do I prevent a soggy bottom crust?
Use cold ingredients and chill the dough before baking. You can also blind bake the crust for 10 minutes before adding the filling for extra crispiness.
Can I freeze apple pie?
Yes! Bake the pie, cool completely, then wrap tightly and freeze. Thaw overnight in the fridge and reheat in the oven for best texture.
Is it possible to reduce the sugar in this recipe?
Definitely. You can cut the sugar by half, especially if your apples are naturally sweet, or use a sugar substitute like stevia for a lower-sugar version.
Pin This Recipe!
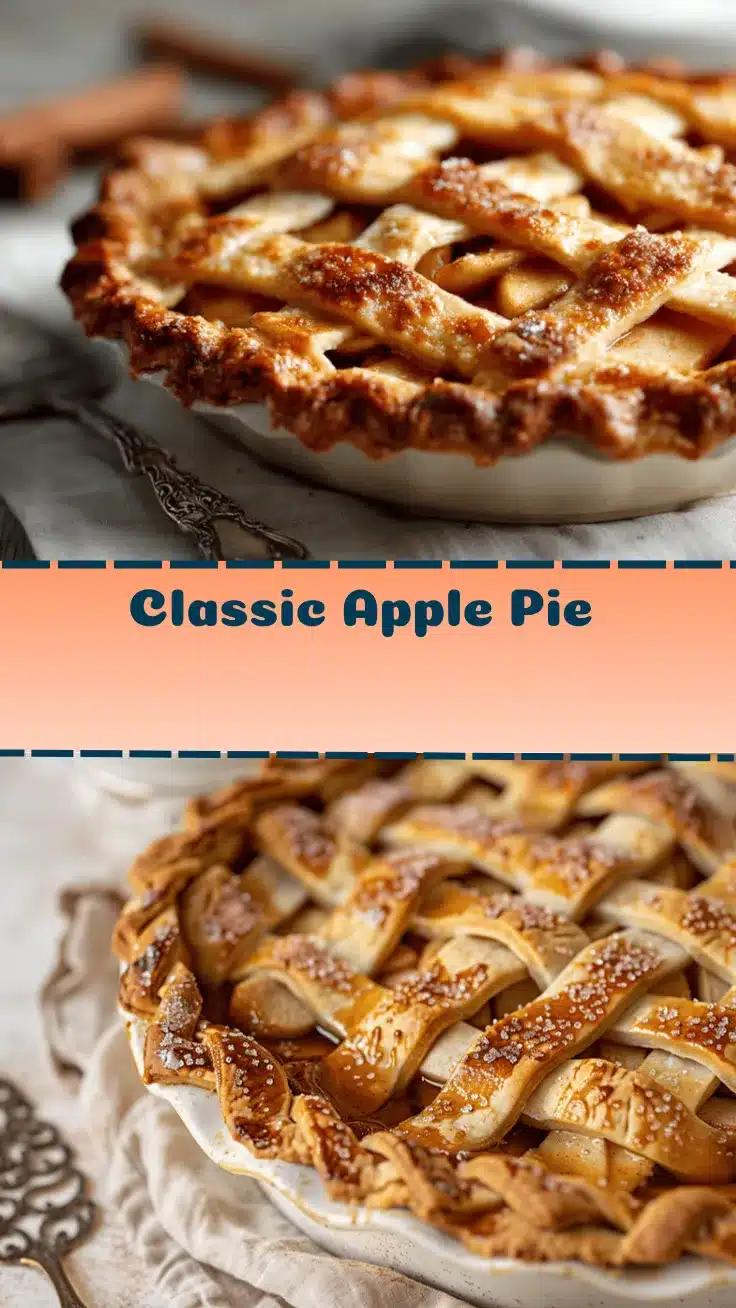
Apple Pie Recipe – Easy Homemade Classic for Perfect Fall Desserts
This classic apple pie features a flaky, buttery crust and a sweet-tart apple filling spiced with cinnamon and nutmeg. It’s an easy, reliable recipe perfect for fall gatherings, holidays, or whenever you crave a slice of cozy nostalgia.
- Prep Time: 30 minutes
- Cook Time: 55-65 minutes
- Total Time: 2 hours 30 minutes
- Yield: 1 9-inch pie (8 servings) 1x
- Category: Dessert
- Cuisine: American
Ingredients
- 2 1/2 cups (315g) all-purpose flour
- 1 cup (226g) unsalted butter, cold and cut into cubes
- 1/2 tsp salt
- 1 tbsp granulated sugar (optional)
- 6–8 tbsp (90-120ml) ice water
- 6–7 medium apples (about 2 1/2 lbs or 1.1 kg, peeled, cored, and sliced; a mix of Granny Smith and Honeycrisp is perfect)
- 3/4 cup (150g) granulated sugar
- 1/4 cup (50g) light brown sugar, packed
- 2 tbsp (16g) all-purpose flour
- 1 tsp ground cinnamon
- 1/4 tsp ground nutmeg
- 1/4 tsp ground allspice (optional)
- 1/8 tsp salt
- 1 tbsp lemon juice
- 2 tbsp (28g) unsalted butter, cut into small pieces
- 1 egg, beaten (for egg wash)
- 1 tbsp granulated sugar (for sprinkling)
Instructions
- Prepare the Pie Crust: In a large bowl, whisk together flour, salt, and sugar. Add cold butter cubes and cut into the flour with a pastry cutter or forks until the mixture resembles coarse crumbs. Slowly add ice water, 1 tablespoon at a time, mixing just until the dough comes together. Divide in half, flatten into disks, wrap in plastic, and chill for at least 1 hour.
- Prepare the Apple Filling: Peel, core, and slice apples into 1/4-inch thick pieces. Toss apples with lemon juice in a large bowl. Add sugars, flour, spices, and salt; mix until apples are coated.
- Roll Out the Crust: On a lightly floured surface, roll out one dough disk to fit a 9-inch pie dish (about 1/8-inch thick). Gently transfer to the dish, pressing into corners. Trim edges, leaving 1/2-inch overhang.
- Fill the Pie: Pile apple mixture into the crust, mounding slightly in the center. Dot apples with small pieces of butter.
- Top the Pie: Roll out the second dough disk and lay over apples. Trim, pinch, and crimp edges to seal. Cut 4-5 slits in the top for steam to escape, or create a lattice if desired.
- Brush & Sprinkle: Beat 1 egg and brush over the crust. Sprinkle with 1 tbsp sugar.
- Bake: Preheat oven to 425°F (220°C). Bake pie on the lower oven rack for 20 minutes. Reduce temperature to 375°F (190°C) and bake another 35-45 minutes, until crust is deep golden and juices bubble. Cover edges with foil if browning too quickly.
- Cool: Let pie cool for at least 2 hours before slicing to allow the filling to set.
Notes
For a flakier crust, use very cold butter and chill the dough thoroughly. Mix apple varieties for best flavor and texture. Blind bake the crust for 10 minutes before filling for extra crispiness. Let the pie cool completely before slicing to prevent a runny filling. For gluten-free or vegan adaptations, use a 1:1 gluten-free flour blend and plant-based butter; brush crust with almond milk instead of egg wash for vegan.
Nutrition
- Serving Size: 1 slice (1/8 of pie)
- Calories: 340
- Sugar: 26
- Sodium: 180
- Fat: 16
- Saturated Fat: 10
- Carbohydrates: 47
- Fiber: 3
- Protein: 3
Keywords: apple pie, classic apple pie, homemade apple pie, fall dessert, Thanksgiving dessert, easy apple pie, best apple pie, cinnamon apple pie, pie recipe, holiday dessert


