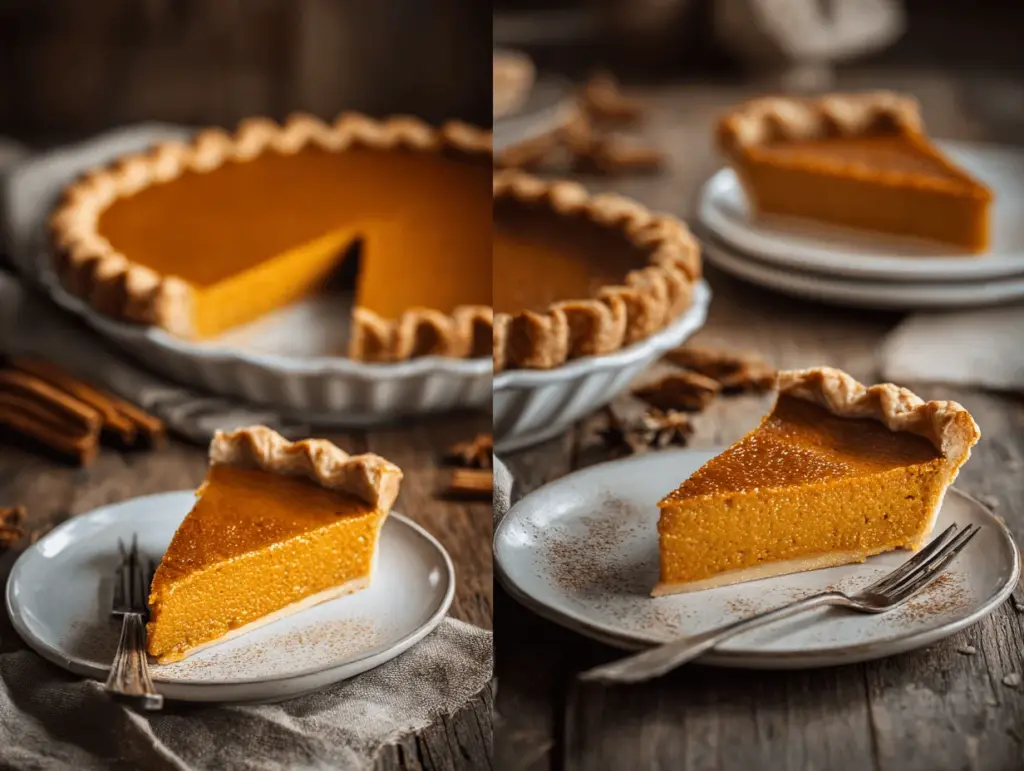
The first time I pulled a homemade pumpkin pie out of the oven, the whole house smelled like autumn had moved in for good. The scent of cinnamon, nutmeg, and clove mingling with creamy pumpkin… honestly, it’s the kind of aroma that stops you in your tracks. I’ve always believed the pumpkin pie recipe is more than just dessert—it’s a slice of tradition, a little bit cozy, and totally irresistible.
I discovered my favorite version of pumpkin pie years ago while hunting for a dessert that could please a crowd at Thanksgiving (including my picky uncle who swears he doesn’t like “vegetable pies”!). After dozens of tweaks—less sugar here, more spice there, and finally settling on a creamy texture that’s just right—this pumpkin pie recipe became a family classic. I even got the nod from my grandma, who’s notoriously tough to impress.
Whether you’re whipping this up for your big holiday dinner or just because you crave something spiced and sweet, this pumpkin pie recipe checks all the boxes. It’s smooth, rich, and full of warming spices, but not so heavy you regret it later. Plus, it’s simple enough that you don’t need a pastry chef’s skills—just a love for good food and maybe a little bit of patience. If you’ve ever felt intimidated by pie-making, I promise this recipe is forgiving. I’ve made it countless times, and it’s never let me down. Perfect for busy families, holiday gatherings, or anyone who just loves the classic taste of pumpkin pie… with a creamy twist.
Why You’ll Love This Pumpkin Pie Recipe
I’ve baked and tasted more pumpkin pies than I care to admit (seriously, my kitchen turns into a pie-testing lab every fall). Let me tell you why this one stands out—it’s not just another pumpkin pie recipe, it’s the one you’ll keep coming back to:
- Quick & Easy: This pie comes together in under an hour (plus some chill time), so you won’t be stuck in the kitchen all day.
- Simple Ingredients: No obscure spices or hard-to-find pumpkin blends. Everything is pantry-friendly and easy to grab at the grocery store.
- Perfect for Thanksgiving & Beyond: It’s a showstopper on the holiday table, but equally good for Sunday dinners or those “just because” dessert cravings.
- Crowd-Pleaser: I’ve yet to meet a kid (or adult) who turns down a slice. Even my pumpkin-skeptical relatives ask for seconds!
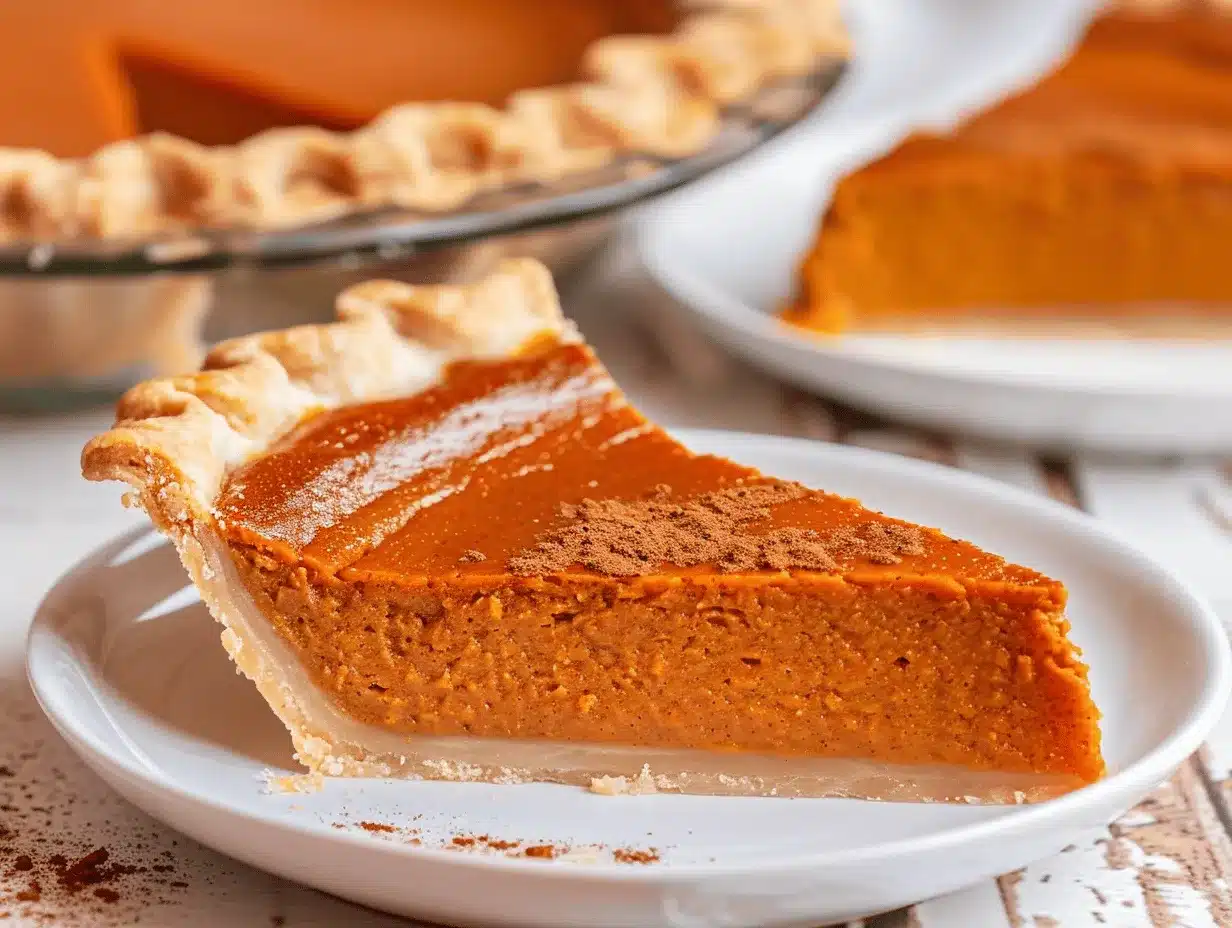
- Unbelievably Delicious: The blend of creamy filling and just-right spice makes every bite a little celebration. The crust holds up beautifully—no soggy bottoms here.
What makes this pumpkin pie recipe different? For starters, I blend the filling until it’s ultra-smooth—no grainy texture, just pure silk. The spice mix is balanced, not overpowering. I use evaporated milk for creaminess that’s not too heavy, and the crust is simple but sturdy (I’ll even share my trick for keeping it flaky!). This recipe doesn’t rely on shortcuts, but it also won’t demand hours of fiddly technique from you.
Honestly, this is the kind of dessert that makes people close their eyes when they taste it. It’s comfort food, but smart—lighter than some versions, still full of flavor, and downright satisfying. Whether you want to impress guests or just treat yourself to something special, this pumpkin pie recipe is a keeper.
What Ingredients You Will Need
This pumpkin pie recipe uses simple, wholesome ingredients you probably already have in your kitchen (or can easily snag at the store). Here’s what you’ll need for creamy, spiced perfection:
- For the Pie Crust:
- 1 9-inch unbaked pie crust (homemade or store-bought, your call)
- All-purpose flour (for dusting, if rolling out homemade dough)
- For the Pumpkin Filling:
- 1 (15-ounce / 425g) can pure pumpkin puree (Libby’s is my go-to, but any unsweetened variety works)
- 3/4 cup (150g) granulated sugar (can sub coconut sugar for a deeper flavor)
- 2 large eggs, room temperature
- 1 cup (240ml) evaporated milk (adds that perfect creaminess—can use half-and-half if needed)
- 1/2 teaspoon salt
- 1 teaspoon ground cinnamon
- 1/2 teaspoon ground ginger
- 1/4 teaspoon ground nutmeg
- 1/4 teaspoon ground cloves (optional, but I love the extra depth)
- 1 teaspoon pure vanilla extract (Madagascar vanilla gives a lovely aroma)
- Optional Toppings:
- Whipped cream (heavy cream, whipped with a touch of sugar)
- Pecans, toasted (for crunch)
- Extra cinnamon for dusting
I prefer Libby’s for pumpkin puree—never watery, always smooth. If you’re feeling adventurous, roast and puree your own pumpkin (just make sure it’s not too wet). For the crust, you can go classic with your own dough or use a reliable store-bought shell (Trader Joe’s is surprisingly good). If you’re gluten-free, swap in a gluten-free pie crust (Bob’s Red Mill mix works well) and ensure your filling ingredients don’t contain hidden gluten.
For the spices, fresher is always better. I keep separate jars of cinnamon, nutmeg, and clove just for pie season. If you love bolder flavor, add a pinch more ginger. If you want less sugar, reduce by 2 tablespoons—pie will still set nicely. Evaporated milk gives the filling its signature creaminess, but you can use full-fat coconut milk for a dairy-free twist. The vanilla rounds out all the flavors, so don’t skip it!
Feel free to customize your toppings—whipped cream is a must in my house, but toasted pecans or even a sprinkle of pumpkin seeds are delicious too. If you’re making this for a crowd with allergies, leave out the nuts and double-check your crust ingredients. This pie is flexible, so don’t stress if you need to make a swap!
Equipment Needed
- 9-inch pie pan (glass, ceramic, or metal—all work, but glass lets you peek at the crust’s doneness)
- Mixing bowls (one large for filling, one small for eggs)
- Whisk (for silky-smooth blending)
- Spatula (for scraping and smoothing)
- Measuring cups and spoons (accuracy matters—especially for spices)
- Rolling pin (if making homemade crust, though a wine bottle works in a pinch!)
- Baking sheet (to catch any drips and make transferring easy)
- Pie weights or dried beans (for pre-baking crust, if needed)
Honestly, you don’t need fancy gadgets. I’ve made this pumpkin pie recipe with IKEA bowls and a thrift-store whisk. If you use a metal pan, watch for quicker browning; ceramic gives even heat. For pie weights, dried beans in foil do the trick and you can reuse them year after year. Keep your rolling pin dusted with flour to avoid sticking—trust me, I learned the hard way after scraping dough off my countertop a few times!
If you’re on a budget, grab a simple glass pie dish—they’re sturdy and last forever. For clean-up, silicone spatulas are easy to wash and don’t stain. This recipe really is about comfort and simplicity, so use what you have and don’t sweat the small stuff.
Preparation Method
- Preheat the oven: Set your oven to 425°F (220°C). Position a rack in the lower third for even baking.
- Prepare the crust: If using homemade dough, roll it out on a floured surface to fit a 9-inch pie pan. Gently drape it into the pan, pressing into corners. Trim and flute the edges. For store-bought, just fit into the pan and pinch edges for a rustic look.
- Blind bake the crust (if desired): Line crust with parchment, fill with pie weights or dried beans. Bake for 12 minutes. Remove weights and bake another 5 minutes. This keeps the bottom crisp (especially important if your pumpkin puree is very moist).
- Mix the filling: In a large bowl, whisk together pumpkin puree, sugar, salt, cinnamon, ginger, nutmeg, cloves, and vanilla. Crack eggs into a small bowl, beat gently, then whisk into the pumpkin mixture until fully incorporated.
- Add evaporated milk: Pour in evaporated milk (or coconut milk), whisking until mixture is smooth and creamy. The filling should be pourable, not runny—if it seems thin, let sit for 5 minutes for spices to hydrate.
- Pour and smooth: Pour pumpkin filling into prepared crust. Use a spatula to smooth the top. Tap lightly on the counter to release any air bubbles.
- Bake the pie: Bake at 425°F (220°C) for 15 minutes, then reduce temperature to 350°F (175°C) and bake an additional 35-40 minutes. The pie is done when the center is just set (it should jiggle slightly, like Jell-O) and a knife inserted near the edge comes out clean.
- Cool completely: Transfer pie to a wire rack. Let cool at least 2 hours before serving—this helps the filling set and makes slicing easier. If you’re in a rush, chill in the fridge (just don’t slice too soon; it’ll be messy!).
- Troubleshooting: If the crust browns too quickly, cover edges with foil. If the filling cracks, don’t worry—it’ll still taste amazing. For extra creamy texture, blend filling ingredients before pouring.
- Serve: Top with whipped cream, toasted pecans, or a sprinkle of cinnamon. Slice and enjoy!
Personal tip: Let pie cool fully for perfect slices. I’ve rushed it before and ended up with pumpkin puddles—not pretty! Also, use fresh spices if possible—the difference is real. If your oven runs hot, check pie at 30 minutes after temperature is reduced. Every oven is quirky, so keep an eye out.
Cooking Tips & Techniques
Here’s what I’ve learned after baking many (and sometimes slightly wonky) pumpkin pies:
- Use room temperature eggs: They blend into the filling better and help it set evenly.
- Don’t overmix the filling: Whisk until smooth, but avoid vigorous beating (air bubbles can cause cracks).
- Blind baking is optional: If your crust tends to get soggy, blind bake. If you’re short on time, skip it and use a metal pan for extra crispness.
- Spice balance: Taste the filling before baking—if you love spice, add more ginger or nutmeg; for mild flavor, stick to the recipe.
- Watch baking times: Pumpkin pie filling firms up as it cools. Pull it out when the center jiggles a little (not soupy, but not solid).
- Cover crust edges: If they brown too fast, loosely wrap with foil halfway through baking.
- Multitasking: While the pie bakes, whip up fresh cream or prep toppings. Makes the wait feel productive!
- Consistency: Stick to evaporated milk for the classic creamy texture. If substituting, test with a small batch first.
I once tried baking two pies at once and ended up with uneven centers—turns out, rotating pies halfway through helps! If your filling cracks, a layer of whipped cream will cover it right up. Most important: don’t panic! Pumpkin pie is forgiving and always tastes good (even if it looks a little rustic).
Variations & Adaptations
This pumpkin pie recipe is a fantastic base for lots of creative twists. Here are my favorite variations:
- Gluten-Free: Use a gluten-free pie crust. Bob’s Red Mill mixes up beautifully, or try an oat-based crust for extra nutty flavor.
- Dairy-Free: Swap evaporated milk for full-fat coconut milk. The pie will be just as creamy with a subtle tropical note.
- Maple Pumpkin Pie: Replace half the sugar with pure maple syrup for extra depth and a hint of caramel flavor.
- Spiced Pumpkin Pie: Add a pinch of cardamom or allspice for more warmth. For a chai-inspired twist, use chai spice blend instead of classic pie spices.
- No-Bake Pumpkin Pie: Use a graham cracker crust and chill the filling (with gelatin added) for a lighter, mousse-like texture.
If you love nuts, add a layer of chopped pecans on the bottom of the crust before pouring in the filling—it’s a game-changer! For allergen-friendly pies, just double-check every ingredient and skip the nuts. I’ve made this recipe with coconut sugar, almond milk, and even sweet potato puree when I was out of pumpkin. Play around with what you have—pumpkin pie is all about comfort and creativity!
Serving & Storage Suggestions
This pumpkin pie recipe tastes best slightly chilled or at room temperature. For a classic look, slice and serve with a dollop of whipped cream or a sprinkle of cinnamon. It’s lovely alongside hot coffee, spiced tea, or even a festive apple cider.
For presentation, arrange pecans or candied ginger on top for a little flair (Pinterest loves those pretty pie shots, you know!). If you’re serving for a crowd, cut into smaller wedges and add whipped cream stars for each slice.
To store leftovers, cover the pie tightly with plastic wrap or foil and refrigerate for up to 4 days. The flavors deepen overnight, so it’s even better the next day. You can freeze pumpkin pie (wrap well, freeze for up to 2 months), but thaw overnight in the fridge before serving. For reheating, warm slices gently in the microwave or a low oven—just enough to take the chill off, but not so much that the filling gets watery.
Honestly, pumpkin pie rarely lasts long in my house. If you’re lucky enough to have leftovers, try it for breakfast—you won’t regret it!
Nutritional Information & Benefits
Here’s the estimated breakdown for one slice (1/8th of the pie):
- Calories: About 250
- Fat: 10g
- Saturated Fat: 4g
- Carbohydrates: 36g
- Sugar: 22g
- Protein: 5g
Pumpkin is packed with vitamin A, fiber, and antioxidants. The spices (cinnamon, ginger, nutmeg) are linked to anti-inflammatory benefits, and using evaporated milk keeps the filling creamy without excess fat. For gluten-free or dairy-free diets, swap crust and milk as needed—this recipe is easy to adjust.
Allergen notes: Contains wheat (unless using GF crust), eggs, and dairy (unless substituted). Personally, I love that a slice satisfies my sweet tooth while giving a little vitamin boost—perfect for fall wellness!
Conclusion
If you’re looking for a pumpkin pie recipe that’s creamy, spiced, and foolproof, this is the one. It’s rich in flavor, easy to make, and totally adaptable to your taste or dietary needs. I’ve made this pie for Thanksgiving, potlucks, and “just because” weekends—it always brings people together and makes the house feel like home.
Don’t be afraid to tweak the spices, swap the crust, or play with toppings to make it yours. That’s the best part of homemade pie! Personally, I love this recipe for its reliability and pure comfort—it’s the kind of dessert that never goes out of style.
Give it a try, share your results, and let me know your favorite twist in the comments! Whether you’re a pumpkin pie pro or a first-timer, this recipe is here to help you bake up something memorable. Happy baking—and happy feasting!
FAQs
Can I use fresh pumpkin instead of canned?
Absolutely! Roast and puree your own pumpkin—just make sure it’s well-drained so the filling isn’t watery. Homemade puree adds fresh flavor, but canned is more consistent for texture.
Can I make pumpkin pie ahead of time?
Yes! Bake the pie a day in advance and refrigerate. The flavors actually deepen overnight, making it even tastier for serving the next day.
How do I prevent my pie crust from getting soggy?
Blind baking helps! Bake the crust before adding filling, and use a glass or metal pan for crispier results. Also, don’t overfill with pumpkin puree—stick to the recipe measurements.
What’s the best dairy-free substitute for evaporated milk?
Full-fat coconut milk works great for a creamy texture. Almond or oat milk can be used, but the filling may be slightly less rich.
Can I freeze leftover pumpkin pie?
Definitely! Wrap slices tightly and freeze for up to 2 months. Thaw overnight in the fridge before serving. The texture holds up well, so it’s a good way to save extras.
Pin This Recipe!

Pumpkin Pie Recipe: Easy Homemade Thanksgiving Dessert Perfection
This creamy, spiced pumpkin pie is a classic Thanksgiving dessert that’s easy to make and always a crowd-pleaser. With a silky-smooth filling and perfectly balanced spices, it’s the ultimate comfort food for fall gatherings or any time you crave a slice of tradition.
- Prep Time: 15 minutes
- Cook Time: 55 minutes
- Total Time: 1 hour 10 minutes
- Yield: 8 servings 1x
- Category: Dessert
- Cuisine: American
Ingredients
- 1 9-inch unbaked pie crust (homemade or store-bought)
- All-purpose flour (for dusting, if rolling out homemade dough)
- 1 (15-ounce) can pure pumpkin puree
- 3/4 cup granulated sugar (or coconut sugar)
- 2 large eggs, room temperature
- 1 cup evaporated milk (or half-and-half, or full-fat coconut milk for dairy-free)
- 1/2 teaspoon salt
- 1 teaspoon ground cinnamon
- 1/2 teaspoon ground ginger
- 1/4 teaspoon ground nutmeg
- 1/4 teaspoon ground cloves (optional)
- 1 teaspoon pure vanilla extract
- Whipped cream (optional, for serving)
- Pecans, toasted (optional, for serving)
- Extra cinnamon for dusting (optional)
Instructions
- Preheat the oven to 425°F (220°C) and position a rack in the lower third.
- If using homemade dough, roll it out on a floured surface to fit a 9-inch pie pan. Drape into the pan, press into corners, trim, and flute the edges. For store-bought, fit into the pan and pinch edges.
- Optional: Blind bake the crust by lining with parchment, filling with pie weights or dried beans, and baking for 12 minutes. Remove weights and bake another 5 minutes.
- In a large bowl, whisk together pumpkin puree, sugar, salt, cinnamon, ginger, nutmeg, cloves, and vanilla.
- In a small bowl, beat eggs gently, then whisk into the pumpkin mixture until fully incorporated.
- Pour in evaporated milk (or substitute) and whisk until smooth and creamy. Let sit 5 minutes if mixture seems thin.
- Pour filling into prepared crust and smooth the top. Tap lightly to release air bubbles.
- Bake at 425°F (220°C) for 15 minutes, then reduce temperature to 350°F (175°C) and bake an additional 35-40 minutes, until the center is just set and a knife inserted near the edge comes out clean.
- Transfer pie to a wire rack and cool completely for at least 2 hours before slicing.
- Serve with whipped cream, toasted pecans, or a sprinkle of cinnamon.
Notes
For best results, use room temperature eggs and fresh spices. Blind baking the crust helps prevent sogginess, especially if your pumpkin puree is moist. Let the pie cool completely before slicing for clean cuts. For gluten-free or dairy-free adaptations, use a gluten-free crust and coconut milk. Store leftovers covered in the fridge for up to 4 days or freeze for up to 2 months.
Nutrition
- Serving Size: 1 slice (1/8th of pie)
- Calories: 250
- Sugar: 22
- Sodium: 300
- Fat: 10
- Saturated Fat: 4
- Carbohydrates: 36
- Fiber: 2
- Protein: 5
Keywords: pumpkin pie, Thanksgiving dessert, homemade pumpkin pie, easy pumpkin pie, classic pumpkin pie, fall dessert, holiday pie, creamy pumpkin pie, traditional pumpkin pie, best pumpkin pie