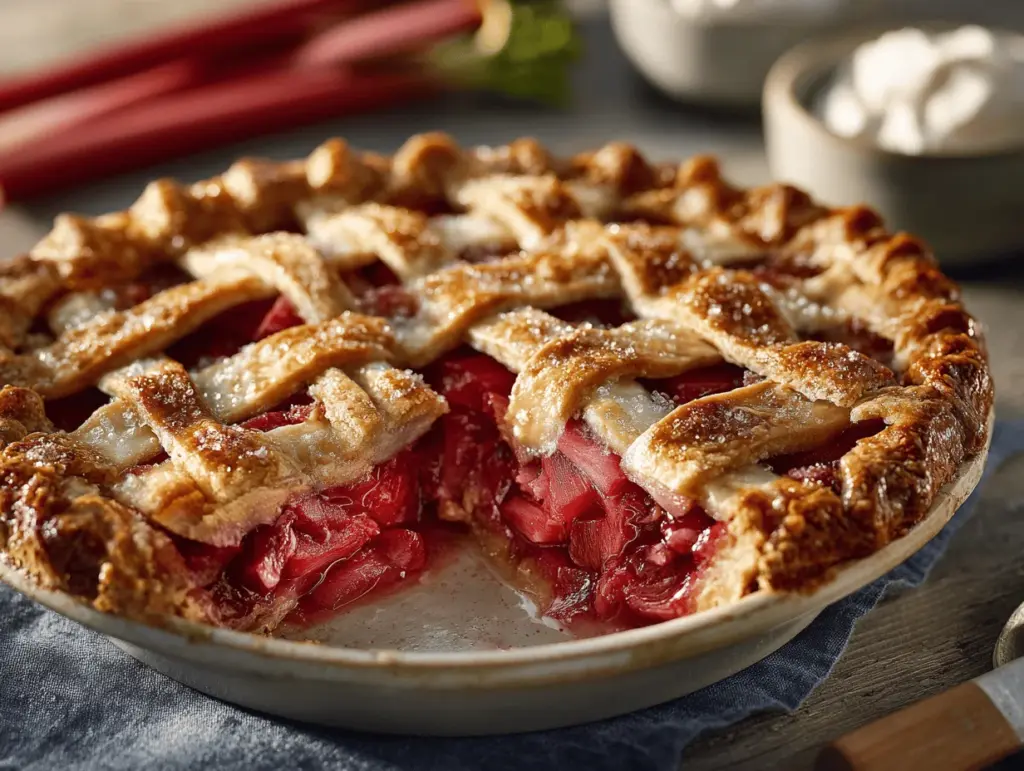
The sharp, sweet scent of bubbling rhubarb pie in the oven hits you like a wave of springtime nostalgia—honestly, it’s kind of magical. I remember my grandma’s kitchen, where stalks of ruby-red rhubarb would pile up on the counter every May, ready for their transformation. If you’ve never made a classic rhubarb pie, you’re in for a true comfort food journey. This isn’t just a dessert; it’s a slice of childhood, a little bit tart, a little bit sweet, and just the right amount of flaky. And let’s face it, there’s something so satisfying about turning a bunch of knobby, sour stalks into a pie that everyone wants seconds of.
I stumbled upon this rhubarb pie recipe years ago, after a neighbor dropped off a bag of fresh rhubarb from her garden. (I didn’t even like rhubarb back then, but I figured—why not?) Fast-forward hundreds of pies later, and this has become a family staple every spring. I’ve tweaked and tested this recipe so many times that I can practically make it with my eyes closed. It’s perfect for busy evenings, lazy weekends, or just about any moment when you need a little edible happiness.
A classic homemade rhubarb pie isn’t fussy. You’ll only need basic ingredients, a little patience, and a willingness to get your hands floury. Whether you’re baking for your family, showing off at a potluck, or just treating yourself, this pie delivers big flavor and that warm, homey vibe we all crave. Trust me—once you’ve tasted this easy rhubarb pie, it’ll earn a permanent spot in your spring dessert rotation.
Why You’ll Love This Recipe
Let me tell you why this rhubarb pie recipe is truly irresistible. After baking dozens of pies for family, friends, and even the occasional bake sale, I can say with total confidence—this one stands out. Here’s what makes it so special:
- Quick & Easy: From prep to oven in under an hour, you won’t be stuck in the kitchen all day. Even if you’re new to pie baking, the steps are straightforward.
- Simple Ingredients: No fancy stuff, no hard-to-find seasonings. Most of it is probably in your pantry right now.
- Perfect for Spring Gatherings: This pie is a showstopper for brunch, holiday dinners, or backyard picnics. (It’s especially good at making Mother’s Day feel extra special!)
- Crowd-Pleaser: It’s got that old-fashioned vibe that adults rave about, but the sweet-tart balance means even picky kids dig in for seconds.
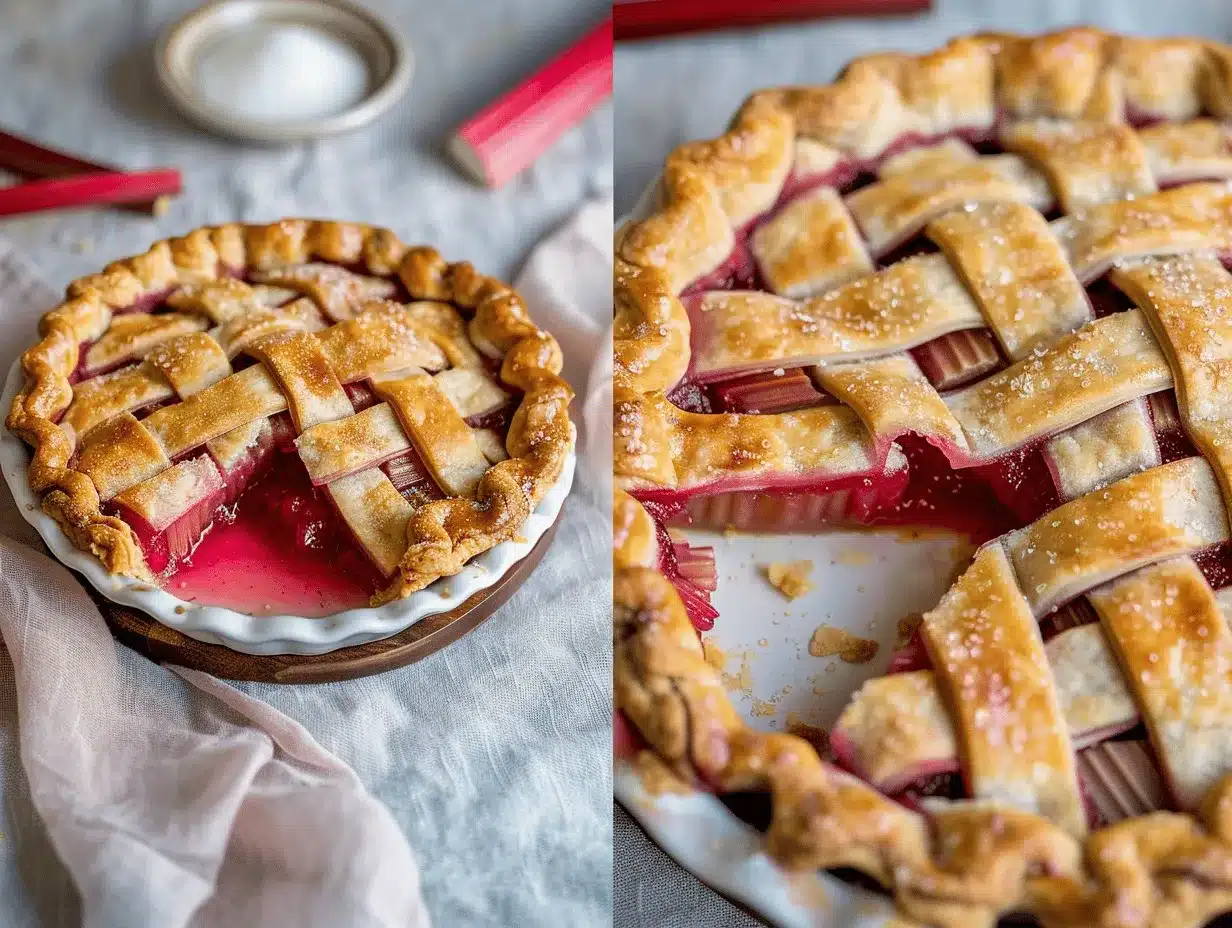
- Unbelievably Delicious: The filling is tangy and rich, and the crust—oh wow, the crust—comes out golden, flaky, and buttery. It’s comfort food, pure and simple.
What sets this rhubarb pie apart isn’t just flavor—it’s the technique. I always blend the rhubarb with just the right amount of sugar and a touch of orange zest (trust me, it brightens everything up). Unlike some pies that end up soupy or too stiff, this one lands right in the middle—juicy, but sliceable. You know, the kind of pie you eat warm with a scoop of vanilla ice cream and a big smile.
This recipe is my go-to for family get-togethers and lazy Sunday afternoons. It’s a little nostalgic, a little modern, and totally reliable. Honestly, it’s the kind of dessert you’ll want to share—and keep all to yourself at the same time.
What Ingredients You Will Need
This rhubarb pie recipe keeps things simple, but every ingredient has its job—bringing out bold flavor and perfect texture. I like that you don’t need exotic items, just a handful of fresh produce and pantry staples.
- For the filling:
- 4 cups (500g) fresh rhubarb, chopped (about 1/2-inch pieces; bright red stalks taste best, but green works too)
- 1 1/4 cups (250g) granulated sugar (adjust for tartness; sometimes I use a bit less for super sweet rhubarb)
- 1/4 cup (30g) all-purpose flour (thickens the filling; cornstarch works in a pinch)
- 1/2 teaspoon ground cinnamon (optional, but adds warmth)
- 1/8 teaspoon salt (balances sweetness)
- 1 tablespoon orange zest (optional, but I always use it for a citrusy note)
- 2 tablespoons unsalted butter, diced (for dotting on top of filling; adds richness)
- For the crust:
- 2 1/2 cups (315g) all-purpose flour (I recommend King Arthur for consistent texture)
- 1 teaspoon salt
- 1 tablespoon sugar (helps brown the crust)
- 1 cup (226g) unsalted butter, cold and cubed (seriously, cold butter makes the flakiest crust!)
- 6-8 tablespoons (90-120ml) ice water (start with 6, add more if needed; humidity can mess with this step)
- For finishing:
- 1 large egg, beaten (for egg wash; gives a golden finish)
- 1 tablespoon coarse sugar (optional, for sprinkling on top; Turbinado is my favorite)
If you’re gluten-free, swap the flour for a good 1:1 GF blend. Vegan? Use plant-based butter and skip the egg wash—brush with almond milk instead. Don’t have fresh rhubarb? Frozen works, just thaw and drain well before using. I’ve used both, and honestly, flavor stays spot-on. (Just don’t forget to taste the rhubarb first—sometimes it’s extra tart!)
Pro tip: If you want to bump up the color, toss in a handful of sliced strawberries. It’s not traditional, but the strawberry rhubarb combo is a classic for a reason!
Equipment Needed
- 9-inch (23cm) pie plate (glass or ceramic works best for a crisp bottom crust)
- Mixing bowls (at least two; one for filling, one for dough)
- Pastry blender or food processor (for cutting in the butter; or use your fingertips if you like the old-school way)
- Rolling pin (a wine bottle works in a pinch—been there, done that!)
- Measuring cups and spoons (accuracy matters for baking)
- Sharp knife (for chopping rhubarb and trimming dough)
- Fine grater or zester (for the orange zest, if using)
- Brush (for egg wash; a clean paintbrush will do)
- Parchment paper (makes cleanup easier, especially if your pie bubbles over)
I’ve made plenty of pies with just the basics, but a good pie plate really helps—metal pans tend to over-brown the crust. If you don’t have a pastry blender, two forks work for cutting in butter. For budget-friendly tools, check thrift shops; I found my favorite rolling pin for a dollar! And keep your pie plate clean and dry to avoid sticking—no one likes a stuck slice.
Preparation Method
-
Prepare the crust:
In a large bowl (or food processor), combine 2 1/2 cups (315g) flour, 1 teaspoon salt, and 1 tablespoon sugar. Add 1 cup (226g) cold, cubed butter. Cut in butter using a pastry blender or pulse in the food processor until mixture resembles coarse crumbs. (Some pea-sized butter chunks should remain—don’t overwork!)
Gradually add 6-8 tablespoons (90-120ml) ice water, stirring just until dough comes together. If it’s crumbly, add water 1 tablespoon at a time.
Divide dough in half, shape into discs, wrap in plastic, and chill for at least 30 minutes. (If you’re really rushed, the freezer for 15 minutes works too.) -
Make the filling:
In a bowl, toss 4 cups (500g) chopped rhubarb with 1 1/4 cups (250g) sugar, 1/4 cup (30g) flour, 1/2 teaspoon cinnamon, 1/8 teaspoon salt, and 1 tablespoon orange zest. Mix until rhubarb is evenly coated.
Let sit for about 10 minutes; it’ll get a bit juicy (that’s normal). -
Roll out the dough:
On a lightly floured surface, roll out one dough disc to about 12 inches (30cm) in diameter. Don’t worry if it cracks—patch with excess dough.
Fit into a 9-inch (23cm) pie plate, letting excess hang over the sides. -
Fill the pie:
Spoon rhubarb filling evenly into the crust. Dot top with 2 tablespoons butter.
If mixture seems super wet, sprinkle a bit more flour over the top. -
Top the pie:
Roll out the second dough disc and gently lay over the filling. Trim excess to about 1/2 inch (1.3cm) beyond the plate edge. Fold edges under and crimp decoratively.
Cut a few small slits in the top crust for steam to escape. -
Apply egg wash:
Brush top crust with 1 beaten egg. Sprinkle with 1 tablespoon coarse sugar (if desired). -
Bake:
Preheat oven to 425°F (220°C). Bake pie on the center rack for 15 minutes, then reduce heat to 350°F (175°C) and bake for another 35-40 minutes.
Pie is done when crust is golden and filling bubbles thickly through the vents. (If edges brown too fast, cover with foil strips.) -
Cool:
Let pie cool at least 1-2 hours before slicing. Filling needs time to set—trust me, I’ve rushed it and ended up with soup!
Sometimes the crust cracks or the filling bubbles over—don’t sweat it. The pie will taste amazing either way. If your kitchen is hot, chill the dough longer. And if your rhubarb is super tart, add an extra sprinkle of sugar to the filling.
Cooking Tips & Techniques
After baking rhubarb pies for years, I’ve picked up a bunch of tricks (some learned the hard way!). Here’s what helps:
- Cold butter makes the best crust: Don’t let it soften—pop it in the freezer for 10 minutes before chopping if needed.
- Don’t overwork the dough: Too much mixing equals tough crust. I always stop as soon as it comes together, even if it looks a bit shaggy.
- Juicy filling? If your rhubarb is extra watery, toss filling with a little extra flour or cornstarch. But don’t go overboard—too much thickener can make it gummy.
- Protect the edges: Pie edges burn quickly; foil strips or a pie shield are lifesavers. (Been there, done that—blackened crust is no fun!)
- Don’t skip the orange zest: It’s subtle but brings out the rhubarb’s flavor, especially if you’re pairing with ice cream or whipped cream.
I’ve definitely botched a few pies by cutting too soon—hot filling will run everywhere. Let the pie cool at least an hour (two is even better). If you’re multitasking, bake the pie first, then prep your dinner. The pie will be ready to serve after you eat.
For super flaky crust, chill every step: cold butter, cold water, cold dough. If you want extra shine, brush with milk instead of egg wash. And always taste your rhubarb before baking—sometimes a little extra sugar saves the day.
Variations & Adaptations
One of my favorite things about classic rhubarb pie is how easy it is to tweak. Here are a few variations I’ve tried (and loved):
- Strawberry Rhubarb Pie: Replace 1 cup (125g) rhubarb with sliced strawberries for a sweeter, more colorful pie. (My kids ask for this version every year!)
- Gluten-Free: Use a 1:1 gluten-free flour blend for the crust and swap flour in the filling for cornstarch. Texture stays pretty close; flavor is still great.
- Vegan: Use plant-based butter, skip the egg wash, and brush with almond or oat milk. Don’t worry, the crust still gets golden.
- Spiced Up: Add 1/4 teaspoon ground ginger or cardamom to the filling for a little zing—especially good if you like a more complex flavor.
- Lattice Crust: Instead of a full top crust, cut strips and weave a lattice. It looks fancy but isn’t hard (promise!).
Allergens? Rhubarb itself is safe, but watch out for butter and flour. Dairy-free and gluten-free swaps work well. I once tossed in a handful of blueberries—turned out gorgeous! The pie is easy to make your own, so experiment and see what you like best.
Serving & Storage Suggestions
This pie is best served slightly warm or at room temperature. I like to slice it, plate it with a scoop of vanilla ice cream, and sprinkle a little extra orange zest on top. For brunch, add a dollop of whipped cream and fresh berries for a pretty touch.
Pair it with strong coffee or a cup of herbal tea—rhubarb’s tartness plays well with both. If you’re serving at a party, pre-slice and arrange on a platter for easy grab-and-go.
Storage is easy: cover leftovers loosely and keep at room temp for up to 2 days. For longer storage, refrigerate up to 5 days. The flavors mellow and blend over time—some say it’s even better the next day. To freeze, wrap tightly and store for up to 2 months. Reheat slices in the oven at 350°F (175°C) for 10-15 minutes; avoid microwaving if you want to keep the crust crisp.
Nutritional Information & Benefits
Each slice (1/8 of pie) is about 320 calories, with 12g fat, 52g carbs, and 3g protein. Rhubarb is surprisingly low in calories, high in fiber, and packs in vitamin K and C. The pie itself isn’t exactly diet food, but it’s better than most desserts thanks to the fruit base.
If you use gluten-free flour or vegan butter, the nutrition shifts a bit, but the pie stays wholesome. Rhubarb is naturally tart, so you don’t need a ton of sugar to make it taste delicious. Just remember: people with allergies to wheat or dairy should use swaps. I love that this pie fits into spring wellness routines—treat yourself, but feel good about what’s inside!
Conclusion
If you’re looking for a spring dessert that’s classic, comforting, and downright delicious, this rhubarb pie recipe is it. You get flaky crust, tangy-sweet filling, and a slice of pure nostalgia. It’s easy to make, endlessly adaptable, and always a crowd-pleaser.
Feel free to play with the flavors—add berries, spices, or swap in your favorite crust. The best part? Every pie is a little different, and that’s half the fun. I honestly love sharing this recipe because it brings people together (and tastes amazing with coffee on the porch).
So grab some rhubarb, roll up your sleeves, and bake your own classic homemade rhubarb pie. If you try it, let me know in the comments—share your twists, your memories, and your favorite ways to serve it. Happy baking!
FAQs
Can I use frozen rhubarb for this pie recipe?
Yes, frozen rhubarb works great! Just thaw and drain it well before using—otherwise, your filling might be too watery.
Do I need to peel rhubarb before using it?
Nope, you don’t need to peel rhubarb. Just trim the ends and wash the stalks thoroughly.
What’s the best way to prevent a soggy bottom crust?
Bake the pie on the lower oven rack and use a glass or ceramic pie plate. You can also sprinkle a little flour or cornstarch on the bottom crust before adding the filling.
Can I make this pie ahead of time?
Definitely! Bake the pie and let it cool completely, then store at room temperature overnight or refrigerate for up to 5 days. The flavors even get better as they settle.
How do I know when the pie is done baking?
The crust should be golden brown, and the filling should bubble through the vents. If you’re not sure, gently poke the center—if it’s thick and not soupy, you’re good to go!
Pin This Recipe!
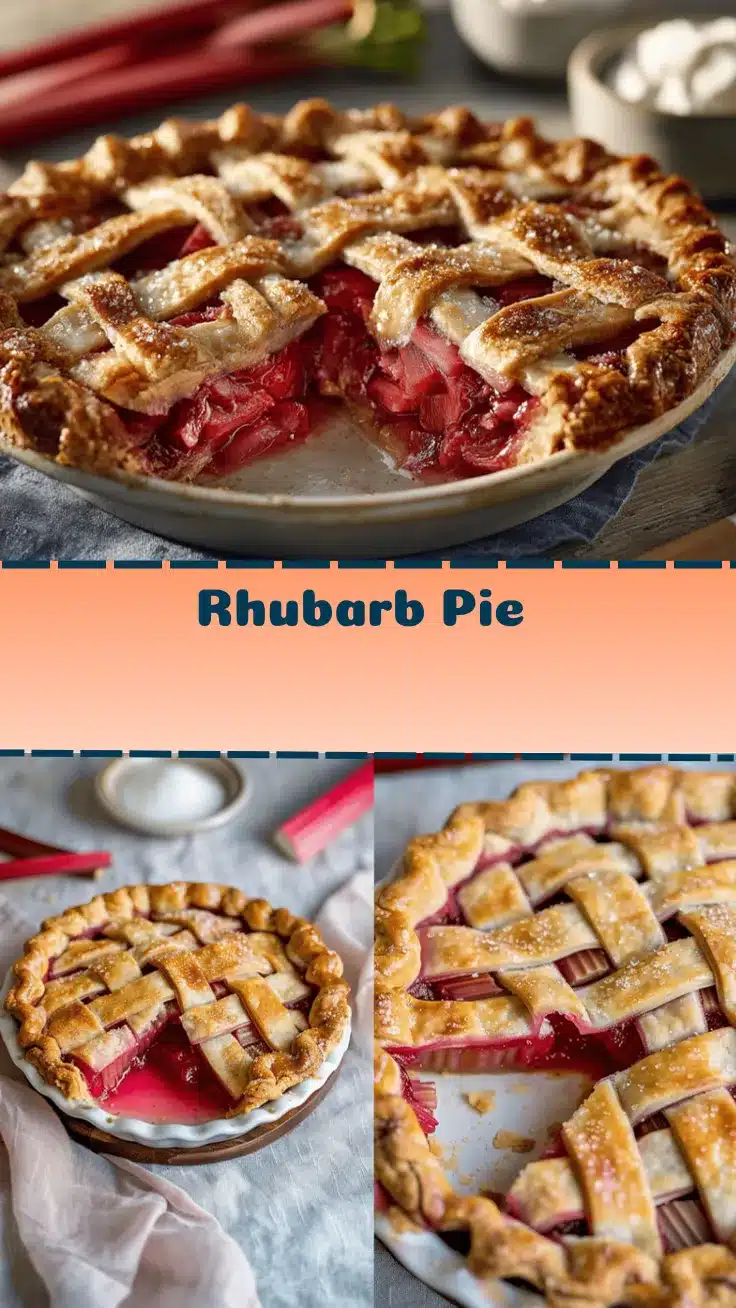
Rhubarb Pie Recipe – Easy Homemade Classic for Perfect Spring Dessert
This classic rhubarb pie features a flaky, buttery crust and a tangy-sweet rhubarb filling, making it the perfect nostalgic spring dessert. Simple ingredients and straightforward steps ensure a crowd-pleasing treat for any occasion.
- Prep Time: 30 minutes
- Cook Time: 50-55 minutes
- Total Time: 1 hour 30 minutes
- Yield: 8 servings 1x
- Category: Dessert
- Cuisine: American
Ingredients
- 4 cups fresh rhubarb, chopped (about 1/2-inch pieces)
- 1 1/4 cups granulated sugar
- 1/4 cup all-purpose flour
- 1/2 teaspoon ground cinnamon (optional)
- 1/8 teaspoon salt
- 1 tablespoon orange zest (optional)
- 2 tablespoons unsalted butter, diced
- 2 1/2 cups all-purpose flour (for crust)
- 1 teaspoon salt (for crust)
- 1 tablespoon sugar (for crust)
- 1 cup unsalted butter, cold and cubed (for crust)
- 6–8 tablespoons ice water (for crust)
- 1 large egg, beaten (for egg wash)
- 1 tablespoon coarse sugar (optional, for sprinkling on top)
Instructions
- Prepare the crust: In a large bowl or food processor, combine 2 1/2 cups flour, 1 teaspoon salt, and 1 tablespoon sugar. Add 1 cup cold, cubed butter. Cut in butter using a pastry blender or pulse in the food processor until mixture resembles coarse crumbs. Gradually add 6-8 tablespoons ice water, stirring just until dough comes together. Divide dough in half, shape into discs, wrap in plastic, and chill for at least 30 minutes.
- Make the filling: In a bowl, toss 4 cups chopped rhubarb with 1 1/4 cups sugar, 1/4 cup flour, 1/2 teaspoon cinnamon, 1/8 teaspoon salt, and 1 tablespoon orange zest. Mix until rhubarb is evenly coated. Let sit for about 10 minutes.
- Roll out the dough: On a lightly floured surface, roll out one dough disc to about 12 inches in diameter. Fit into a 9-inch pie plate, letting excess hang over the sides.
- Fill the pie: Spoon rhubarb filling evenly into the crust. Dot top with 2 tablespoons butter. If mixture seems very wet, sprinkle a bit more flour over the top.
- Top the pie: Roll out the second dough disc and gently lay over the filling. Trim excess to about 1/2 inch beyond the plate edge. Fold edges under and crimp decoratively. Cut a few small slits in the top crust for steam to escape.
- Apply egg wash: Brush top crust with 1 beaten egg. Sprinkle with 1 tablespoon coarse sugar if desired.
- Bake: Preheat oven to 425°F. Bake pie on the center rack for 15 minutes, then reduce heat to 350°F and bake for another 35-40 minutes. Pie is done when crust is golden and filling bubbles thickly through the vents. If edges brown too fast, cover with foil strips.
- Cool: Let pie cool at least 1-2 hours before slicing to allow the filling to set.
Notes
For best results, use cold butter and ice water for the crust. If using frozen rhubarb, thaw and drain well before using. Protect pie edges with foil if they brown too quickly. Let pie cool completely before slicing for a set filling. For a gluten-free or vegan version, use appropriate flour and butter substitutes and skip the egg wash.
Nutrition
- Serving Size: 1 slice (1/8 of pie)
- Calories: 320
- Sugar: 25
- Sodium: 320
- Fat: 12
- Saturated Fat: 7
- Carbohydrates: 52
- Fiber: 2
- Protein: 3
Keywords: rhubarb pie, classic rhubarb pie, spring dessert, homemade pie, easy rhubarb pie, fruit pie, American dessert, flaky crust, rhubarb recipe, comfort food


