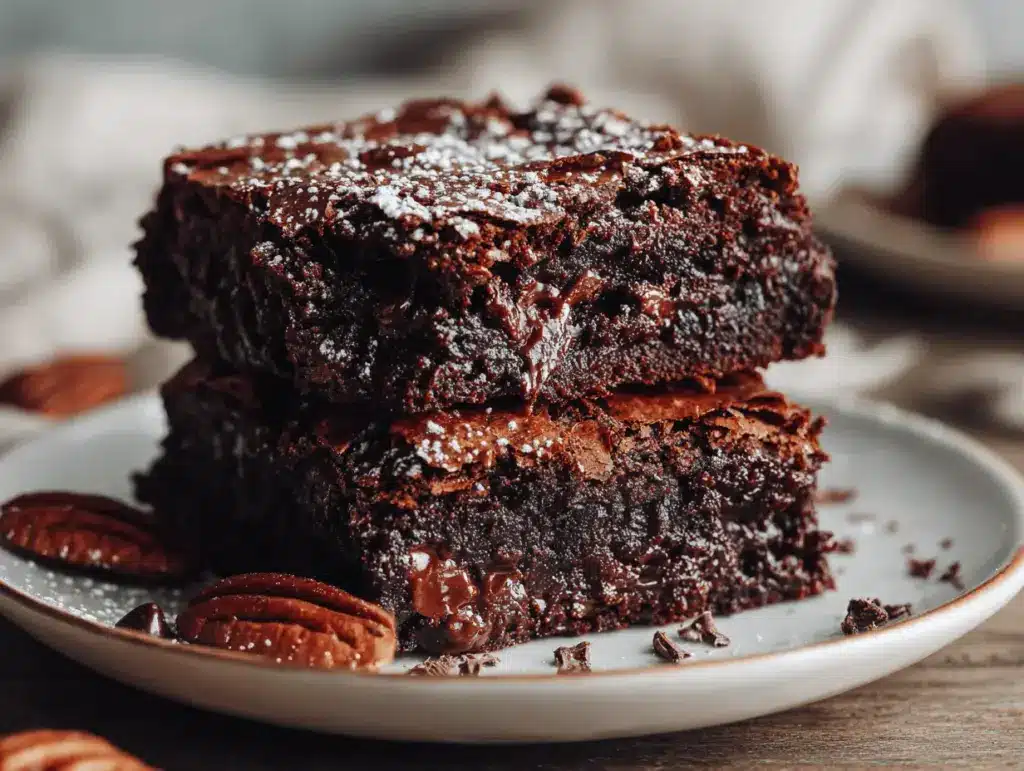
The second the aroma of rich, fudgy brownies starts drifting through my kitchen, my whole family perk up—like clockwork. There’s something about that deep chocolate scent, mingling with a hint of butter, that feels like an instant hug. I can’t even count how many times I’ve made these irresistible fudgy brownies with decadent layers—sometimes for a quick after-dinner treat, other times as a show-stopping dessert for friends who “just dropped by” (we all know that means they wanted brownies, right?).
I first stumbled upon this fudgy brownies recipe during a late-night baking spree. I’d run out of boxed mix—yep, desperate times—and decided to experiment with what I had on hand. After a few tweaks and maybe one or two chocolate-splattered disasters, I landed on a combination that delivers ultra-moist, dense, and chewy brownies with perfectly decadent layers. I’m talking about that crackly top, the gooey middle, and a hint of melty chocolate chips in every bite. Honestly, these brownies never last long in my house; even my pickiest eater can’t resist.
There’s a comforting nostalgia baked into each pan, but what I love most is how this recipe pulls double-duty: it’s easy enough for a casual weeknight, but impressive enough for birthdays or potlucks. If you’re after a fudgy brownies recipe that checks every box—rich flavor, melt-in-your-mouth texture, and those Instagram-worthy layers—this is the one you’ll want to keep in your back pocket. Trust me, after baking these irresistible brownies more times than I can count (and sneaking more than my fair share of corner pieces), I can say with confidence: this is the only recipe you’ll ever need.
Why You’ll Love This Recipe
Let’s be real—there are about a million brownie recipes out there. So, what makes these irresistible fudgy brownies with decadent layers the ones you’ll crave again and again? I’ve tested, tweaked, and tasted my way to what I think is brownie perfection, and I’m excited to share all the reasons this batch stands out.
- Quick & Easy: You can whip up these brownies in under an hour, making them perfect for spontaneous cravings or those “oops, I forgot dessert!” moments.
- Simple Ingredients: No fancy chocolate or hard-to-find ingredients—just classic pantry staples. If you’ve got cocoa powder, butter, and sugar, you’re halfway there.
- Perfect for Every Occasion: Whether it’s a birthday, a bake sale, or just a Tuesday night, these brownies fit right in. They’re a crowd-pleaser for parties and cozy nights alike.
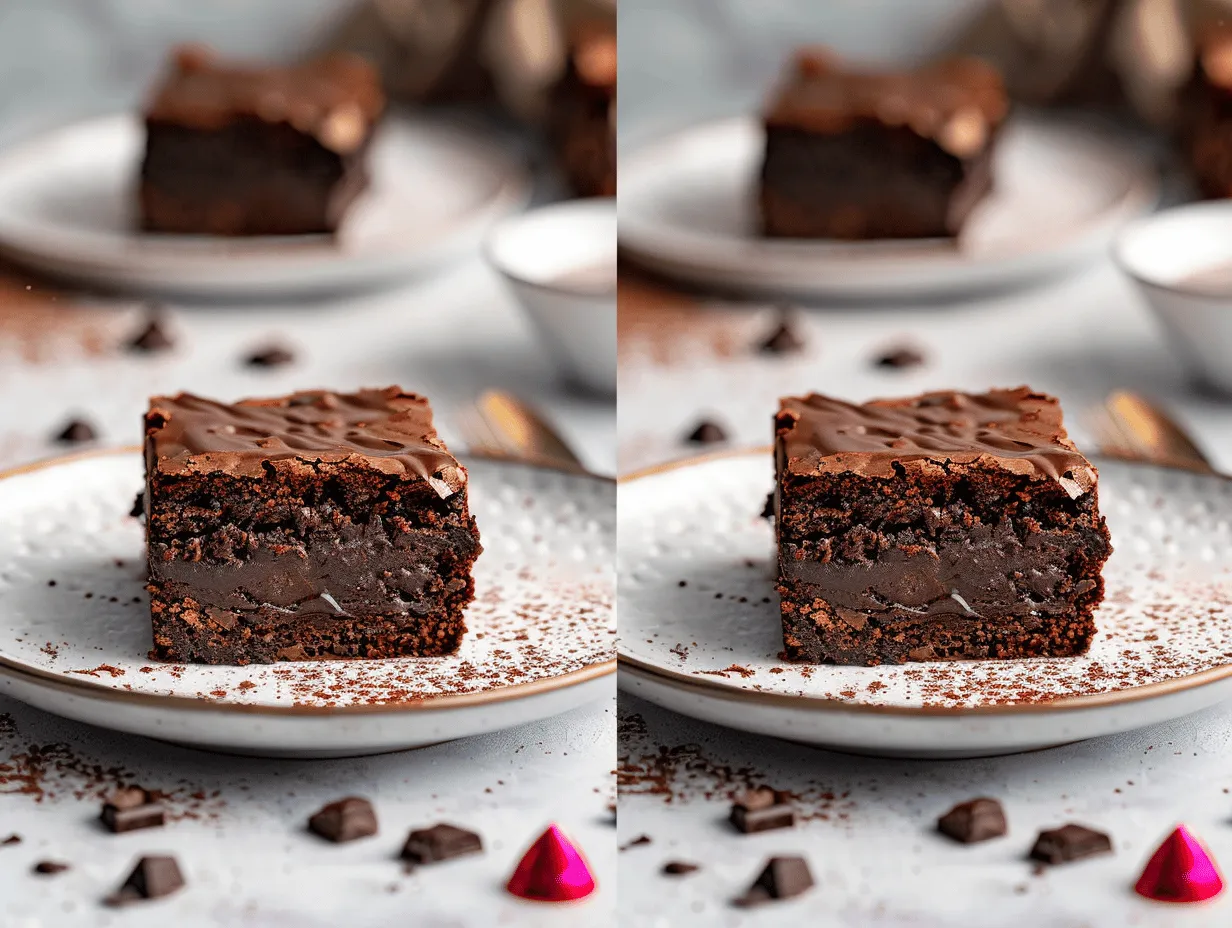
- Unbelievably Fudgy Texture: The magic here is the decadent layers—gooey in the middle with a shiny, crackly top and pockets of melted chocolate throughout. There’s no dry, cakey disappointment in sight!
- Customizable Decadence: Swirl in peanut butter, sprinkle sea salt, or add a handful of nuts—the base is perfect for whatever you’re in the mood for.
What really sets this recipe apart is the layering technique. Instead of mixing everything together, you’ll create two batters—one extra fudgy, one with chocolate chips folded in—and layer them for double the chocolate punch. I discovered this trick after years of searching for brownies that were both rich and visually stunning. Honestly, it’s the best of both worlds: a gooey center with a bit of bite from the chips, and that picture-perfect layered look for your Pinterest board.
These brownies have become a bit of a legend among my friends and family. There’s something so comforting about their flavor, but with a wow-factor that makes people think you spent hours in the kitchen (spoiler: you didn’t!). Make them once, and you’ll see why this fudgy brownies recipe is the one you’ll reach for over and over—whether you’re baking for yourself or anyone who needs a little chocolate-induced joy.
What Ingredients You Will Need
This fudgy brownies recipe keeps things simple, using classic ingredients that make every bite rich and satisfying. You probably have most of these tucked away in your pantry already—no need for last-minute grocery runs! Here’s what you’ll need for the brownies and those decadent layers:
- For the Brownie Batter:
- 1 cup (226g) unsalted butter, melted and slightly cooled (adds richness and moisture)
- 2 cups (400g) granulated sugar (for sweetness and that perfect crackly top)
- 4 large eggs, room temperature (binds everything together and keeps brownies dense)
- 1 tablespoon pure vanilla extract (for warm, deep flavor—use real vanilla if you can!)
- 1 cup (85g) unsweetened cocoa powder (Dutch-process for deeper chocolate, but regular works too)
- 1 cup (125g) all-purpose flour (the backbone—King Arthur is my go-to)
- 1/2 teaspoon salt (balances the sweetness)
- For the Decadent Layers:
- 1 cup (180g) semi-sweet chocolate chips or chunks (for melty pockets—Ghirardelli is my favorite)
- 1/2 cup (120ml) heavy cream (creates a luscious, soft layer—can sub coconut cream for dairy-free)
- 1/4 cup (50g) packed light brown sugar (adds a caramel undertone to the layers)
- 1/4 teaspoon espresso powder, optional (boosts chocolate flavor—skip if you don’t have it)
- Optional Add-ins & Toppings:
- 1/2 cup (60g) chopped walnuts or pecans (for crunch—toast lightly for more flavor)
- 2 tablespoons (30g) peanut butter or Nutella, swirled (for extra decadence)
- Flaky sea salt, for sprinkling on top (trust me, it makes a difference!)
Ingredient Tips & Substitutions:
- If you’re out of butter, you can use melted coconut oil (same amount) for a dairy-free twist, though the flavor will change a bit.
- Swap all-purpose flour for a 1:1 gluten-free blend if needed (Bob’s Red Mill works well).
- Different chips? Milk, dark, or white chocolate all work—just use what you love!
- If you want less sugar, try reducing by 1/4 cup (50g)—the brownies stay fudgy, just less sweet.
Honestly, these ingredients are forgiving. I’ve made them with whatever chocolate I had on hand, even once using half cocoa powder and half hot cocoa mix (not my best idea, but they still disappeared!). The key is balancing richness and moisture, so don’t skimp on the butter or eggs. If you really want to go wild, toss in a handful of chopped candy bars. There’s no wrong way to brownie.
Equipment Needed
Baking brownies shouldn’t mean hauling out your whole kitchen arsenal. Here’s what you’ll need for this fudgy brownies recipe (plus a few tips from lots of trial and error):
- 8×8-inch (20x20cm) or 9×9-inch (23x23cm) square baking pan – Metal pans bake more evenly, but glass works too. If using glass, decrease the oven temp by 25°F (15°C).
- Parchment paper – Makes lifting brownies out a breeze. You can use foil in a pinch, just grease it well.
- Medium and large mixing bowls – One for the brownie batter, one for the decadent layer.
- Whisk and rubber spatula – I prefer a sturdy silicone spatula for folding; it’s gentler on the batter.
- Measuring cups and spoons – Accurate measurements matter for fudginess.
- Kitchen scale (optional, but highly recommended) – For the most consistent results, especially with flour and cocoa.
- Small saucepan or microwave-safe bowl – To melt butter and prep the chocolate layer.
- Cooling rack – Cools brownies quickly and evenly.
If you don’t have a square pan, you can use a round one (just cut into wedges). For cleaning, I always soak bowls and whisks right after mixing—dried-on brownie batter is no joke! If your pans are a bit worn, line with parchment and you’ll never have to chisel brownies out again. And hey, budget tip: thrift stores are goldmines for sturdy metal pans!
Preparation Method
-
Prep the Pan and Oven (5 minutes):
- Preheat your oven to 350°F (175°C). Position the rack in the middle.
- Line your 8×8-inch (20x20cm) baking pan with parchment, leaving a bit of overhang for easy removal.
- Lightly grease the parchment and sides of the pan with butter or cooking spray.
- Tip: Pressing the parchment into corners helps avoid wrinkled sides.
-
Make the Decadent Layer (10 minutes):
- In a small saucepan over low heat, combine 1 cup (180g) chocolate chips, 1/2 cup (120ml) heavy cream, and 1/4 cup (50g) light brown sugar.
- Stir constantly until smooth and glossy, about 2-3 minutes. If using, add 1/4 teaspoon espresso powder and stir until dissolved.
- Remove from heat and set aside to cool slightly. The mixture should be thick but pourable.
- Note: If it seizes, add a splash more cream and whisk vigorously.
-
Mix the Brownie Batter (10 minutes):
- In a large bowl, whisk together 1 cup (226g) melted butter and 2 cups (400g) granulated sugar until glossy and combined.
- Add 4 large eggs, one at a time, whisking well after each. Stir in 1 tablespoon vanilla extract.
- Sift in 1 cup (85g) cocoa powder, 1 cup (125g) all-purpose flour, and 1/2 teaspoon salt.
- Switch to a rubber spatula and fold until just combined—don’t overmix!
- Personal tip: The batter will be thick and shiny. If it looks dry, add 1-2 tablespoons (15-30ml) milk.
-
Layer the Batters (5 minutes):
- Spoon half the brownie batter into the prepared pan and smooth into corners.
- Pour the decadent chocolate-cream layer evenly over the base.
- Dollop the remaining brownie batter on top; gently spread to edges (it’s okay if some chocolate layer peeks through).
- Note: For extra drama, swirl the batters with a butter knife, but don’t overdo it or you’ll lose the layered effect.
- Sprinkle with additional chocolate chips, nuts, or a pinch of sea salt if desired.
-
Bake (30-35 minutes):
- Bake for 30-35 minutes. The edges should be set, but the center will look slightly underbaked and jiggle a bit when shaken.
- Test doneness by inserting a toothpick—moist crumbs are good, but wet batter means more time.
- Warning: Overbaking leads to dry brownies, so err on the side of gooey!
-
Cool and Slice (20-40 minutes):
- Place the pan on a cooling rack for at least 20 minutes—longer if you want neater slices.
- Lift out brownies using the parchment overhang and slice into 16 squares (or 9 for jumbo pieces!).
- For super-clean edges, wipe your knife between cuts.
If you’re impatient like me, it’s hard to wait for them to cool. But trust me, slicing too soon means goo everywhere—delicious, but messy. And don’t panic if the top cracks; that’s the sign of a perfect, fudgy brownie!
Cooking Tips & Techniques
After dozens of batches (and a few kitchen mishaps), I’ve picked up a handful of tricks for flawless, irresistible fudgy brownies every time:
- Don’t Overmix: Once you add flour and cocoa, mix just until combined. Overmixing develops gluten, making brownies tough instead of fudgy.
- Room Temperature Ingredients: Eggs blend better and help create that shiny top if they’re not ice-cold. I usually pop them in a bowl of warm water for 5 minutes if I forget.
- Check Early: Ovens can be sneaky. Start checking at 28 minutes. Brownies should pull away from the edges, but the middle will look just a little wet (that’s perfect!).
- Use a Metal Pan: Metal conducts heat more evenly than glass or ceramic. If you substitute, adjust the baking time and temperature as noted earlier.
- Let Them Rest: For the ultimate gooey texture, cool brownies in the pan for at least 20 minutes. For clean cuts, chill them briefly first—it’s worth the wait.
- Swirl with Care: If adding peanut butter or Nutella, drop small spoonfuls and swirl gently. Too much swirling muddles the layers.
- Storage Smarts: Store cut brownies in an airtight container with a slice of bread—it keeps them soft longer. Learned that one the hard way after a batch turned rock-solid overnight!
If you’re multitasking (like baking while making dinner), measure out ingredients before you start. It saves time and makes sure you don’t forget anything. And if your brownies come out too gooey? Chill them—cold brownies are secretly amazing (almost like fudge!).
Variations & Adaptations
One of my favorite things about this fudgy brownies recipe is how adaptable it is. You can easily switch things up based on your mood, what’s in your pantry, or dietary needs. Here are a few tried-and-true variations:
- Gluten-Free Brownies: Swap the all-purpose flour for a 1:1 gluten-free baking blend. I’ve had great results with King Arthur and Bob’s Red Mill. The texture stays rich and fudgy, no one will notice the difference.
- Salted Caramel Swirl: Drop spoonfuls of store-bought or homemade caramel sauce on top before baking. Use a knife to gently swirl without mixing too much. Sprinkle with flaky sea salt before serving for that sweet-salty kick.
- Peanut Butter Lovers: Add 3-4 tablespoons of creamy peanut butter in dollops on the top layer. Swirl gently—honestly, this is my personal weakness!
- Vegan Adaptation: Use melted coconut oil instead of butter, flax eggs (1 tablespoon flaxseed + 3 tablespoons water per egg), and coconut cream for the decadent layer. Sub in dairy-free chocolate chips. The result is still gooey and rich!
- Extra Chocolatey: Double the chocolate chips or use chopped dark chocolate for big, melty pools in every bite.
- Nutty Crunch: Fold in 1/2 cup (60g) toasted walnuts, pecans, or hazelnuts for added texture. My grandma swears by this version.
If you’re baking for someone with allergies, always check your ingredients. For nut-free brownies, skip the nuts and use a nut-free chocolate. I’ve even made a Halloween batch with crushed pretzels and orange candies—totally kid-approved. The possibilities are endless, so don’t be afraid to get creative!
Serving & Storage Suggestions
Brownies are one of those treats that fit just about any occasion, but how you serve and store them can make a big difference in flavor and freshness.
- Serving: These brownies are best enjoyed slightly warm—just enough so the chocolate chips are soft and gooey. For a café-style dessert, plate with a scoop of vanilla ice cream and a drizzle of chocolate or caramel sauce. A sprinkle of sea salt or powdered sugar looks lovely, too.
- Pairing Ideas: Serve with a tall glass of cold milk for classic comfort. Coffee, espresso, or even a bold red wine make for grown-up pairings. At parties, add fresh berries or whipped cream for an extra pop.
- Storage: Store cooled brownies in an airtight container at room temperature for up to 4 days. For longer storage, refrigerate for up to a week—bring to room temp before eating for the best texture.
- Freezing: Wrap brownies (whole or sliced) tightly in plastic wrap and foil. Freeze for up to 2 months. Thaw in the fridge or at room temp. Quick tip: warm in the microwave for 10-15 seconds for that just-baked feel.
- Flavor Development: Brownies actually get fudgier and more flavorful after a day or two, so don’t be afraid to bake ahead for special events.
Honestly, they never last that long in my house, but when I do manage to stash a few away, it’s like finding treasure later in the week!
Nutritional Information & Benefits
Let’s talk numbers and benefits—because even decadent treats have a place in a balanced diet. Here’s a rough breakdown (per 1/16th piece):
- Calories: 260
- Total Fat: 15g (includes healthy fats from butter and, if used, nuts)
- Carbs: 32g
- Protein: 3g
- Sugar: 22g
These irresistible fudgy brownies offer more than just indulgence. Cocoa powder is a good source of antioxidants and can boost your mood (honestly, I notice it!). Using real butter and eggs brings in healthy fats and protein, making each bite a little more satisfying. You can easily adapt for gluten-free or dairy-free needs by swapping flour or using coconut oil and cream. Allergens to note: contains gluten, dairy, and eggs (plus nuts if you add them). As someone who believes in joyful eating, I see brownies as the ultimate treat—enjoyed in moderation, they’re a little celebration on a plate.
Conclusion
If you’re searching for a foolproof fudgy brownies recipe that nails every craving—gooey, chocolatey, and layered with decadence—this is the one to try. It’s easy, flexible, and guaranteed to impress, whether you’re sharing with friends or treating yourself after a long day. I love how each batch brings back memories and creates new ones, from messy family baking nights to fancy dinner parties where everyone sneaks seconds.
Don’t be afraid to make this recipe your own—add your favorite mix-ins, adjust the sweetness, or double the chocolate chips (I won’t judge). Honestly, there’s just something so satisfying about pulling a tray of these brownies from the oven and watching everyone’s eyes light up. I hope you’ll give them a try, snap a pic for Pinterest, and let me know your favorite twist!
Have you made these irresistible fudgy brownies with decadent layers? Drop a comment below, share your photos, or tell me your wildest brownie add-ins. Happy baking, and remember—life’s short, eat the brownie!
Frequently Asked Questions
How do I know when fudgy brownies are done baking?
Start checking at 28-30 minutes. The edges should be set, and a toothpick in the center comes out with moist (not wet) crumbs. A slightly underbaked center is perfect for gooey brownies.
Can I double this recipe for a larger crowd?
Absolutely! Double all ingredients and bake in a 9×13-inch (23x33cm) pan. Add 5-10 minutes to the baking time, checking for doneness as above.
What’s the best way to get clean brownie slices?
Let brownies cool completely, or chill in the fridge for 30 minutes before slicing. Use a sharp knife and wipe it clean between cuts for those picture-perfect edges.
Can I make these brownies ahead of time?
Yes! They taste even better the next day. Store at room temperature or in the fridge, and warm slightly before serving for the best texture.
Are these brownies freezer-friendly?
Definitely. Wrap brownies tightly and freeze for up to 2 months. Thaw at room temperature or in the fridge, then enjoy as usual.
Pin This Recipe!
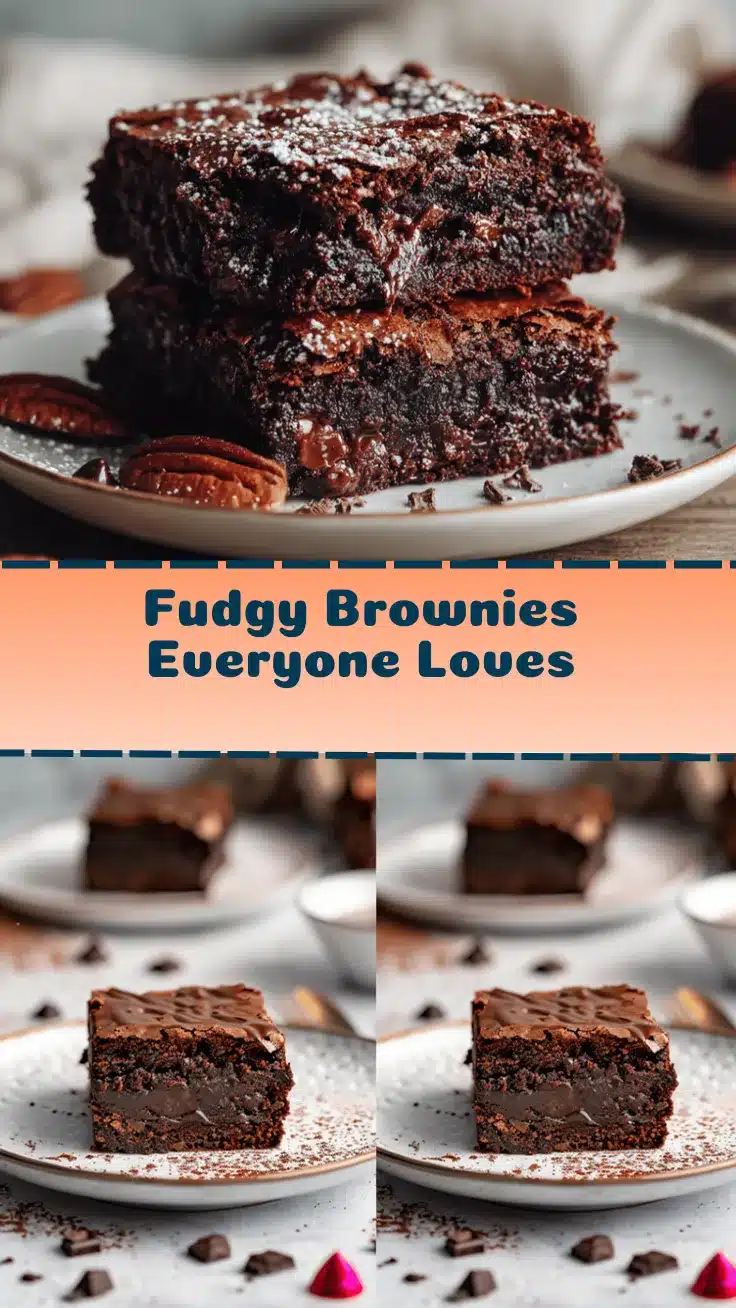
Fudgy Brownies Recipe: Easy Decadent Layers for Perfect Homemade Treats
These irresistible fudgy brownies feature decadent layers, a crackly top, and a gooey, ultra-moist center. Quick and easy to make, they’re perfect for weeknight treats or show-stopping desserts for any occasion.
- Prep Time: 15 minutes
- Cook Time: 35 minutes
- Total Time: 50 minutes
- Yield: 16 brownies 1x
- Category: Dessert
- Cuisine: American
Ingredients
- 1 cup (226g) unsalted butter, melted and slightly cooled
- 2 cups (400g) granulated sugar
- 4 large eggs, room temperature
- 1 tablespoon pure vanilla extract
- 1 cup (85g) unsweetened cocoa powder
- 1 cup (125g) all-purpose flour
- 1/2 teaspoon salt
- 1 cup (180g) semi-sweet chocolate chips or chunks
- 1/2 cup (120ml) heavy cream
- 1/4 cup (50g) packed light brown sugar
- 1/4 teaspoon espresso powder, optional
- 1/2 cup (60g) chopped walnuts or pecans, optional
- 2 tablespoons (30g) peanut butter or Nutella, optional, swirled
- Flaky sea salt, for sprinkling on top, optional
Instructions
- Preheat oven to 350°F (175°C). Line an 8×8-inch baking pan with parchment paper, leaving an overhang for easy removal. Lightly grease parchment and pan sides.
- In a small saucepan over low heat, combine chocolate chips, heavy cream, and light brown sugar. Stir constantly until smooth and glossy, about 2-3 minutes. Add espresso powder if using. Remove from heat and let cool slightly.
- In a large bowl, whisk together melted butter and granulated sugar until glossy. Add eggs one at a time, whisking well after each. Stir in vanilla extract.
- Sift in cocoa powder, flour, and salt. Switch to a rubber spatula and fold until just combined. If batter looks dry, add 1-2 tablespoons milk.
- Spoon half the brownie batter into the prepared pan and smooth into corners. Pour the chocolate-cream layer evenly over the base. Dollop remaining brownie batter on top and gently spread to edges. Swirl with a butter knife if desired. Sprinkle with additional chocolate chips, nuts, or sea salt.
- Bake for 30-35 minutes. Edges should be set, center slightly underbaked. Test with a toothpick—moist crumbs are good.
- Cool in pan on a rack for at least 20 minutes. Lift out using parchment and slice into 16 squares (or 9 for jumbo pieces). Wipe knife between cuts for clean edges.
Notes
For gluten-free brownies, substitute all-purpose flour with a 1:1 gluten-free blend. For dairy-free, use coconut oil and coconut cream. Don’t overmix the batter for maximum fudginess. Brownies are best slightly warm and get even fudgier after a day. Store in an airtight container with a slice of bread to keep them soft. For clean slices, chill before cutting and wipe the knife between cuts.
Nutrition
- Serving Size: 1 brownie (1/16th of pan)
- Calories: 260
- Sugar: 22
- Sodium: 90
- Fat: 15
- Saturated Fat: 9
- Carbohydrates: 32
- Fiber: 2
- Protein: 3
Keywords: fudgy brownies, decadent brownies, layered brownies, homemade brownies, easy brownies, chocolate dessert, gooey brownies, best brownies, brownie recipe


