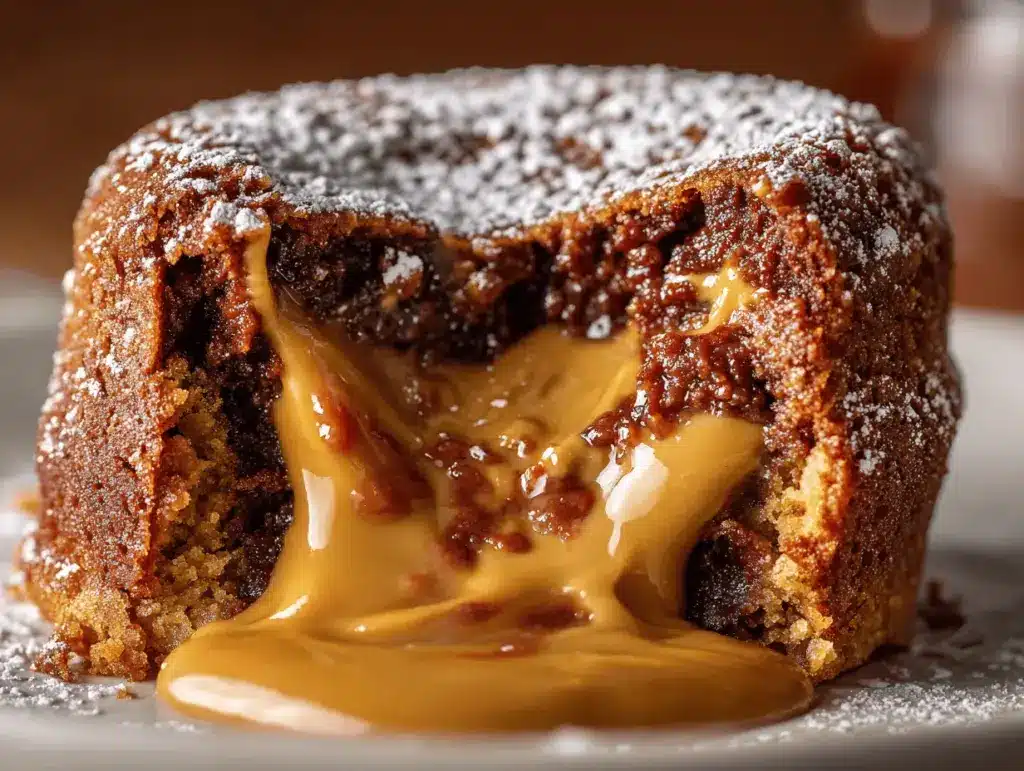
The aroma of warm chocolate and gooey peanut butter filling the kitchen is pure dessert magic. You know that moment when you crack open a cake and silky peanut butter comes oozing out? That’s exactly what you get with these irresistible peanut butter lava cakes. There’s something almost theatrical about digging your spoon into a little chocolate cake and watching the golden peanut butter center flow out—honestly, it’s the kind of dessert that stops conversation for a second, just so everyone can savor that first bite.
I first stumbled onto the idea for peanut butter lava cakes during a midnight Pinterest scroll. My sweet tooth was in overdrive, but I wanted something a little different from the usual molten chocolate cakes. After a few test runs (and, let’s be honest, a few happy “failures” eaten straight out of the ramekin with a scoop of vanilla ice cream), I landed on the perfect recipe. It’s rich, decadent, and surprisingly easy to whip up—no fancy equipment or culinary degree needed!
What I love most about this peanut butter lava cake recipe is how it brings people together. It’s perfect for dinner parties, birthdays, or just a cozy night in when you need a treat (because who doesn’t crave peanut butter and chocolate now and then?). You’ll get all the wow-factor of a restaurant dessert, but with ingredients you probably have hanging around your pantry. After making these more times than I care to admit, I can confidently say: this is dessert bliss in every bite. Whether you’re a peanut butter fanatic, a chocolate lover, or just looking to impress your friends, these lava cakes are about to become your new go-to. Let’s get baking!
Why You’ll Love This Recipe
- Quick & Easy: From start to finish, these peanut butter lava cakes can be on your table in under 30 minutes. Perfect for those last-minute dessert cravings or when you want something special without a lot of fuss.
- Simple Ingredients: No need to hunt down specialty items—everything you need is probably already in your kitchen. Just basic baking staples and, of course, a jar of your favorite peanut butter.
- Perfect for Celebrations: These lava cakes are a showstopper at birthday parties, holiday gatherings, or even just a cozy movie night. They look ultra-fancy but are secretly so simple to make.
- Crowd-Pleaser: Kids, teens, and adults all go wild for that moment when the peanut butter center oozes out. I’ve made these for family dinners and potlucks—never a crumb left behind!
- Unbelievably Delicious: The combination of tender chocolate cake and warm, molten peanut butter is pure comfort food. It’s the kind of dessert that makes you close your eyes and sigh with happiness.
What really sets this peanut butter lava cake recipe apart is the clever use of frozen peanut butter dollops. By freezing little scoops of peanut butter ahead of time, you get that dramatic lava flow when you break into the cake—no runny batter, no guesswork. Plus, I use a mix of good-quality chocolate and a touch of espresso powder to deepen the flavor. And if you’re worried about the cakes sticking, a quick brush of melted butter and dusting of cocoa in the ramekins means they pop out perfectly every time.
These cakes aren’t just good—they’re memorable. You get the classic chocolate-peanut butter combo, but in a way that feels indulgent and a little magical. I’ve found that even people who claim not to like peanut butter end up asking for seconds. If you want a dessert that’s quick, deeply satisfying, and a total crowd-pleaser, you’ve just found it.
What Ingredients You Will Need
This recipe uses straightforward, wholesome ingredients that come together for bold flavor and an unforgettable texture. You probably have most of these on hand already, and there’s plenty of room for swaps and tweaks if you need them.
- For the Cakes:
- Unsalted butter (114g / 1/2 cup) – plus extra for greasing ramekins (adds richness and flavor; salted is fine, just reduce the added salt)
- Semi-sweet or dark chocolate (113g / 4 oz, chopped or chips) – use a good brand like Ghirardelli or Guittard for best flavor
- Granulated sugar (100g / 1/2 cup) – for sweetness and structure
- Large eggs (2 whole + 1 yolk, room temperature) – extra yolk gives the cakes a fudgy texture
- All-purpose flour (32g / 1/4 cup) – just enough to bind everything together; swap with gluten-free blend if needed
- Espresso powder (1/2 tsp, optional) – deepens the chocolate flavor (don’t worry, it won’t taste like coffee!)
- Salt (1/4 tsp) – balances the sweetness
- Vanilla extract (1 tsp) – for warm, cozy undertones
- Cocoa powder (for dusting the ramekins) – helps with easy release and adds a chocolatey crust
- For the Peanut Butter Lava Centers:
- Creamy peanut butter (64g / 1/4 cup, divided into 4 heaping teaspoons) – use classic creamy style for best lava flow; natural peanut butter can work, but make sure it’s well-stirred and not too runny
- Optional Garnishes:
- Powdered sugar (for dusting)
- Chopped roasted peanuts (for crunch)
- Vanilla ice cream or whipped cream (for serving – highly recommended!)
- Chocolate shavings or a drizzle of melted chocolate (for extra drama)
If you want to switch things up, you can use almond butter or sunflower seed butter for a nut-free version. I’ve also tried dark chocolate peanut butter for a double-chocolate punch—honestly, you can’t go wrong. If you’re baking for someone with dietary restrictions, swap the flour for a 1:1 gluten-free flour and use dairy-free butter and chocolate. These cakes are incredibly forgiving, so experiment away!
Equipment Needed
- Ramekins (4-ounce/120 ml size): These create the perfect individual cakes. If you don’t have ramekins, a muffin tin works in a pinch—just keep an eye on baking time.
- Baking sheet: Makes transferring ramekins in and out of the oven a breeze, especially if you’re a bit clumsy like me.
- Microwave-safe bowl or double boiler: For melting chocolate and butter together smoothly.
- Medium mixing bowl: To mix up the cake batter.
- Whisk and spatula: A whisk blends everything quickly; a spatula helps you scrape every last bit of batter.
- Freezer-safe plate or tray: For freezing peanut butter dollops (makes the lava effect possible!)
- Measuring cups and spoons: Precision is key for that perfect molten center.
If you don’t have ramekins, you can use oven-safe teacups or even sturdy muffin liners in a muffin tin. I’ve tried both, and while ramekins make for a prettier presentation, the taste is just as decadent. For easy cleanup, grease your dishes well and dust with cocoa. If your ramekins have seen better days, a quick soak in hot soapy water will do the trick—just don’t use anything too abrasive on nonstick surfaces.
Budget tip: Most dollar stores carry ramekins, and you only need four for this recipe. They’re great for all kinds of desserts and even prepping ingredients for dinner.
Preparation Method
-
Freeze the Peanut Butter Centers:
Line a small plate or tray with parchment paper. Scoop 4 heaping teaspoons (about 16g each) of creamy peanut butter and place them on the tray. Freeze for at least 30 minutes, or until firm. (This step is what creates that dreamy lava effect—don’t skip it!) -
Prep the Ramekins:
While the peanut butter is freezing, preheat your oven to 425°F (220°C). Generously brush four 4-ounce (120 ml) ramekins with melted butter. Dust with cocoa powder, tapping out the excess. (This helps your lava cakes release easily and adds a bit of chocolatey crust.) -
Melt the Chocolate and Butter:
In a microwave-safe bowl, combine 113g (4 oz) semi-sweet or dark chocolate and 114g (1/2 cup) unsalted butter. Microwave in 20-second bursts, stirring between each, until smooth and glossy. (Or use a double boiler on the stovetop.) Let cool slightly while you prep the rest. -
Mix the Batter:
In a medium bowl, whisk together 100g (1/2 cup) granulated sugar, 2 large eggs, and 1 extra yolk until thick and pale—about 1 minute. Whisk in 1 tsp vanilla extract and 1/2 tsp espresso powder if using. Stir in the cooled chocolate-butter mixture. -
Add Dry Ingredients:
Sprinkle 32g (1/4 cup) all-purpose flour and 1/4 tsp salt over the batter. Fold gently with a spatula until just combined—don’t overmix, or your cakes may be tough. -
Fill the Ramekins:
Spoon about one-third of the batter into each ramekin (it’ll be thick—use the spatula to spread it out). Place a frozen peanut butter dollop in the center of each. Cover with the remaining batter, making sure the peanut butter is fully enclosed. -
Bake:
Arrange ramekins on a baking sheet. Bake at 425°F (220°C) for 11–13 minutes. The edges should look set, but the centers will still wobble slightly. (If you overbake, you’ll get a fudgy cake but lose the lava—set a timer!) -
Rest and Unmold:
Let the cakes cool for 1–2 minutes. Carefully run a thin knife around the edges, then invert onto plates. (If a cake sticks, gently tap and twist the ramekin—don’t panic, it happens.) -
Garnish and Serve:
Dust with powdered sugar, add a scoop of vanilla ice cream, and sprinkle with chopped peanuts or chocolate shavings if you like. Serve immediately for the full lava experience!
Personal tip: If you’re nervous about unmolding, serve straight from the ramekin with a spoon. It’s just as delicious and a little less stressful!
Warning: The cakes will be hot—don’t burn your tongue in your excitement (ask me how I know!).
Cooking Tips & Techniques
- Don’t skip freezing the peanut butter! It sounds fussy, but that’s what gives you the molten center. Room-temp peanut butter just blends into the batter and won’t “lava.”
- Use quality chocolate. It truly makes a difference in flavor and texture. I’ve tried cheaper brands, and the cakes always taste a bit flat.
- Timing is everything. Ovens vary, so keep a close eye on your first batch. The cakes should look set on the outside but jiggle in the center when you give the ramekin a gentle shake.
- Overbaking = no lava. If you go even a minute too long, you’ll still have a tasty fudgy cake, but the peanut butter might not flow. I start checking at 11 minutes and err on the side of underbaked.
- Grease and dust the ramekins well. Otherwise, your beautiful cake may stick. I once forgot this step—let’s just say we ate those cakes with a spoon, right out of the ramekin.
- Multitask like a pro. While the peanut butter freezes, get everything else prepped—mise en place is your friend here. It’ll make the assembly super quick.
- Room temperature eggs blend more easily. Cold eggs can shock the melted chocolate and cause it to seize up (not fun!).
Biggest lesson learned: Don’t stress if your first cake isn’t picture-perfect. Even a “failed” lava cake is still gooey, peanut buttery, and totally delicious. Practice makes you faster, and honestly, taste-testing is half the fun!
If you want super-consistent results for a crowd, bake one test cake first to nail your oven’s timing. That way, you’re not guessing when guests are waiting with their spoons ready.
Variations & Adaptations
- Gluten-Free: Use a 1:1 gluten-free flour blend in place of the all-purpose flour. I’ve done this for friends, and the results are just as decadent.
- Nut-Free: Swap peanut butter for sunflower seed butter or a thick chocolate spread (for a double-chocolate lava cake!). Always check labels to avoid hidden nuts if allergies are a concern.
- Chocolate Hazelnut Lava Cakes: Substitute hazelnut butter for the peanut butter—think Nutella vibes, but a bit fancier. You can also stir in chopped toasted hazelnuts for crunch.
- Vegan Variation: Use dairy-free chocolate and vegan butter, and substitute eggs with a commercial egg replacer or a blend of applesauce and flaxseed meal. The texture will be slightly different, but still delicious!
- Spicy Twist: Add a pinch of cayenne or chili powder to the batter for a Mexican hot chocolate feel. It’s subtle but adds warmth and complexity.
- Cooking Methods: If you don’t have an oven, these can be made in a sturdy air fryer at 375°F (190°C)—just check after 8 minutes, as they cook quickly!
My personal go-to? Swapping in almond butter and adding a splash of almond extract to the batter. It’s rich, nutty, and a little unexpected—perfect for shaking up your usual dessert routine.
Serving & Storage Suggestions
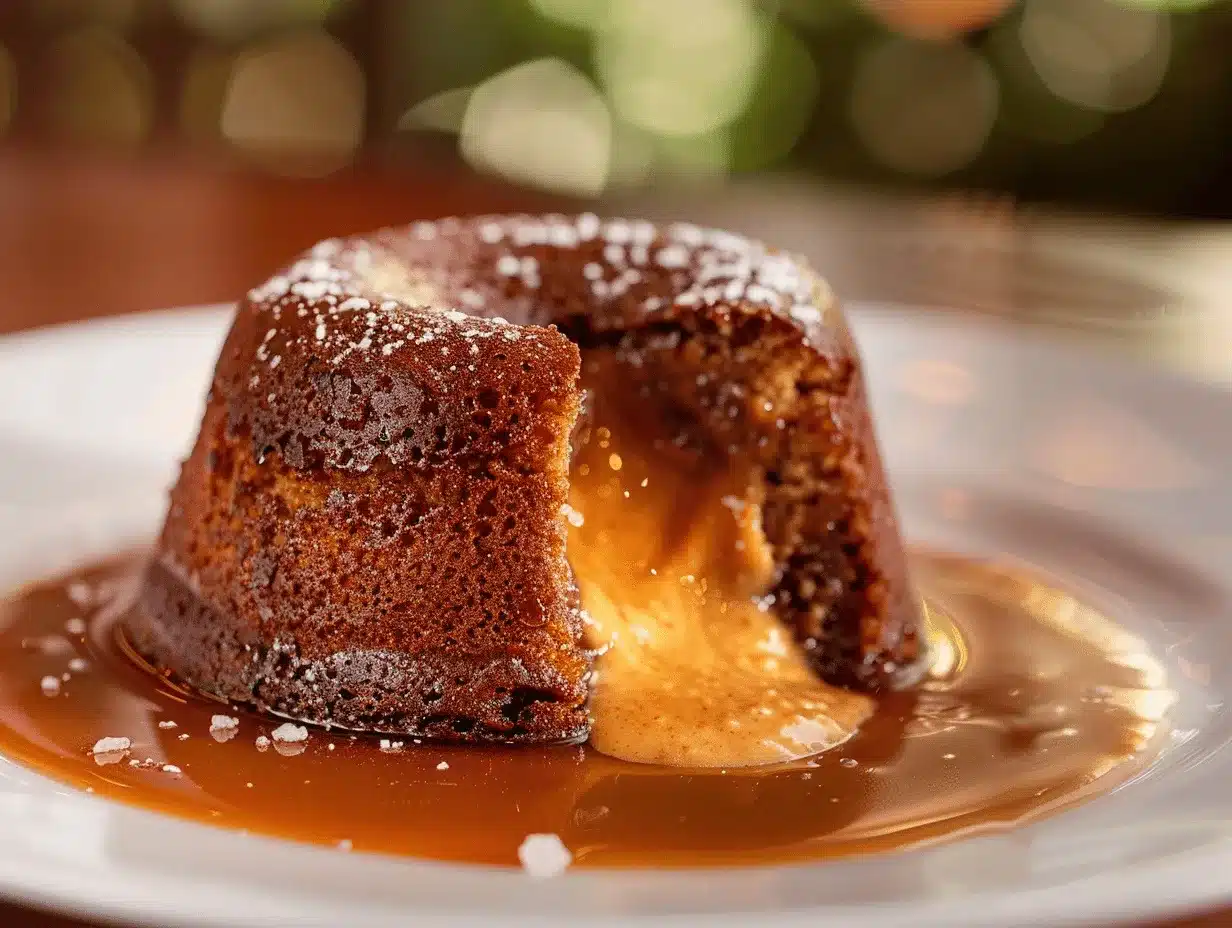
For the best experience, serve peanut butter lava cakes warm, right out of the oven. The centers are at their molten best within 10 minutes of baking. Place each cake on a dessert plate, dust with powdered sugar, and add a scoop of vanilla ice cream for that dramatic hot-cold contrast. A sprinkle of chopped peanuts or a drizzle of warm chocolate sauce takes it over the top.
Want to pair it with something? Try a cup of strong coffee or a glass of cold milk. For fancy occasions, serve with fresh berries or a dollop of whipped cream on the side.
Leftovers (if you have any!) can be stored, covered, in the fridge for up to 2 days. To reheat, microwave each cake for 10–15 seconds—just until the center is warm and gooey again. You can also freeze unbaked, assembled cakes for up to 1 month; bake straight from frozen, just adding another minute or two to the baking time. Flavors deepen a bit after a day—especially the chocolate—so they’re even richer the next day, though the lava center will be less pronounced after reheating.
Nutritional Information & Benefits
Each peanut butter lava cake is approximately 420 calories, with 24g fat, 45g carbs, and 8g protein. The protein boost comes from the peanut butter and eggs, making these a slightly more filling treat than your average chocolate cake.
Peanut butter is a good source of healthy fats and protein, while dark chocolate provides antioxidants and a dose of happiness (that counts, right?). If you go gluten-free or use a nut-free spread, these can fit many dietary needs. Just watch out for allergens—eggs, dairy, peanuts, and wheat are all present in the classic version. I personally love that this dessert satisfies a sweet tooth while still feeling a bit more substantial thanks to the peanut butter.
Conclusion
If you’re looking for a dessert that’s fast, show-stopping, and honestly addictive, these peanut butter lava cakes are it. They combine the unbeatable pairing of chocolate and peanut butter in a way that feels both nostalgic and new. Whether you’re baking for a crowd or just treating yourself, this recipe delivers gooey, decadent bliss with every spoonful.
Don’t be afraid to make these your own—try a new nut butter, add a pinch of spice, or go wild with toppings. I keep coming back to this recipe because it’s so easy to throw together, yet never fails to impress (and let’s face it, the “lava” moment never gets old!).
Give these a try, share your twists in the comments, and let me know how they turned out! I’d love to see your creations—tag me when you post them on Pinterest or Instagram. Happy baking, and may your cakes always be molten!
Frequently Asked Questions
Can I make peanut butter lava cakes ahead of time?
Absolutely! Assemble the cakes up to the baking step and refrigerate for up to 24 hours or freeze for up to a month. Bake straight from the fridge or freezer, adding a minute or two to the baking time.
Can I use a muffin tin instead of ramekins?
Yes, a muffin tin works if you don’t have ramekins. Just grease and dust each cavity well and check for doneness a little earlier—start checking at 9 minutes since they’re usually shallower.
Can I make these peanut butter lava cakes gluten-free?
Definitely! Swap the all-purpose flour for your favorite 1:1 gluten-free baking blend. The cakes will still be moist and gooey.
What’s the best way to know if the cakes are done?
The edges should look set and slightly puffed, but the center should still jiggle a little when you give the ramekin a shake. If you’re unsure, err on the side of underbaking for maximum lava!
Can I use crunchy peanut butter instead of creamy?
You can, but the lava will be less smooth and more textured. It’s delicious for a bit of crunch, though—just make sure it’s not too dry so it melts well inside the cake.
Pin This Recipe!
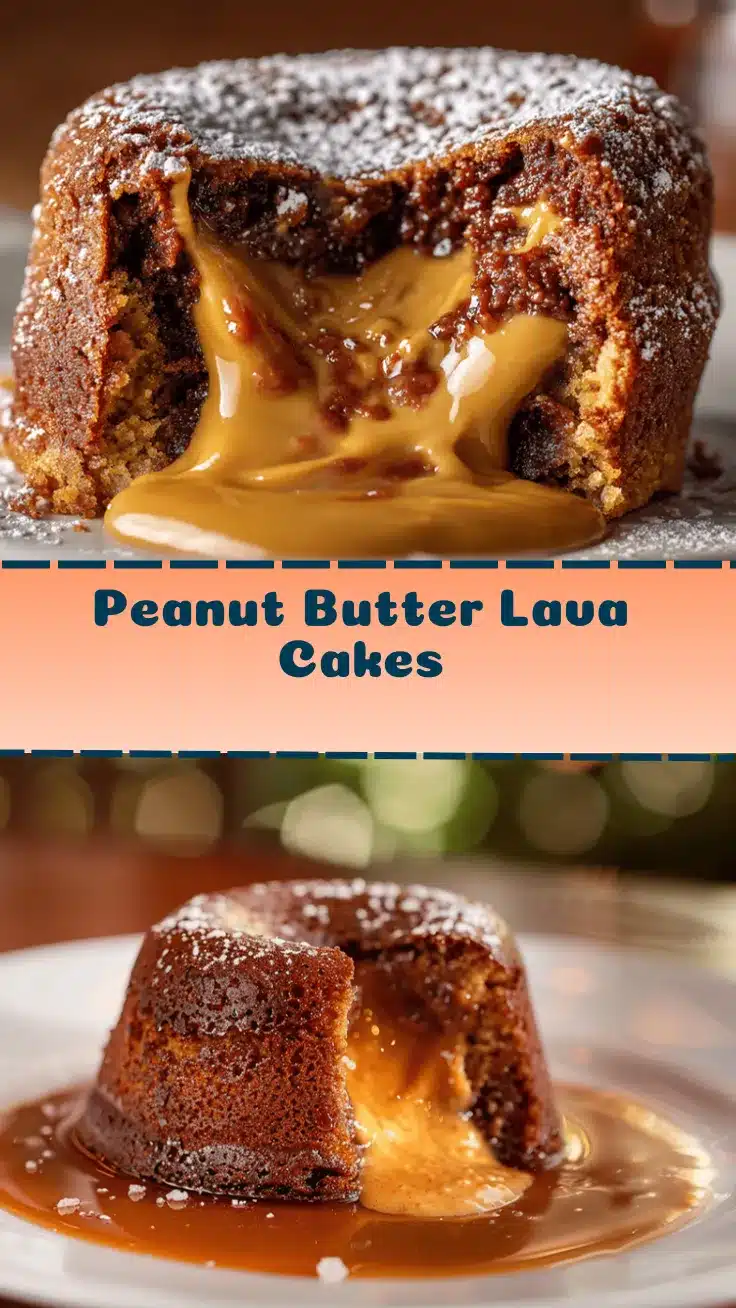
Peanut Butter Lava Cakes
These decadent peanut butter lava cakes feature a rich chocolate cake exterior with a molten, gooey peanut butter center. Quick and easy to make, they’re perfect for parties, celebrations, or whenever you need a show-stopping dessert.
- Prep Time: 15 minutes
- Cook Time: 12 minutes
- Total Time: 30 minutes
- Yield: 4 servings 1x
- Category: Dessert
- Cuisine: American
Ingredients
- 1/2 cup (114g) unsalted butter, plus extra for greasing ramekins
- 4 oz (113g) semi-sweet or dark chocolate, chopped or chips
- 1/2 cup (100g) granulated sugar
- 2 large eggs, room temperature
- 1 large egg yolk, room temperature
- 1/4 cup (32g) all-purpose flour (or 1:1 gluten-free blend)
- 1/2 teaspoon espresso powder (optional)
- 1/4 teaspoon salt
- 1 teaspoon vanilla extract
- Cocoa powder, for dusting ramekins
- 1/4 cup (64g) creamy peanut butter, divided into 4 heaping teaspoons (about 16g each), frozen
- Powdered sugar, for dusting (optional)
- Chopped roasted peanuts, for garnish (optional)
- Vanilla ice cream or whipped cream, for serving (optional)
- Chocolate shavings or melted chocolate, for garnish (optional)
Instructions
- Line a small plate or tray with parchment paper. Scoop 4 heaping teaspoons (about 16g each) of creamy peanut butter onto the tray and freeze for at least 30 minutes, or until firm.
- Preheat oven to 425°F (220°C). Generously brush four 4-ounce (120 ml) ramekins with melted butter and dust with cocoa powder, tapping out the excess.
- In a microwave-safe bowl, combine chocolate and butter. Microwave in 20-second bursts, stirring between each, until smooth and glossy. Alternatively, melt using a double boiler. Let cool slightly.
- In a medium bowl, whisk together sugar, eggs, and egg yolk until thick and pale, about 1 minute. Whisk in vanilla extract and espresso powder if using. Stir in the cooled chocolate-butter mixture.
- Sprinkle flour and salt over the batter. Fold gently with a spatula until just combined; do not overmix.
- Spoon about one-third of the batter into each ramekin. Place a frozen peanut butter dollop in the center of each. Cover with remaining batter, ensuring the peanut butter is fully enclosed.
- Arrange ramekins on a baking sheet. Bake for 11–13 minutes, until edges are set but centers still wobble slightly.
- Let cakes cool for 1–2 minutes. Carefully run a thin knife around the edges, then invert onto plates. If a cake sticks, gently tap and twist the ramekin.
- Dust with powdered sugar, add a scoop of vanilla ice cream, and sprinkle with chopped peanuts or chocolate shavings if desired. Serve immediately.
Notes
Freeze the peanut butter centers for the best lava effect. Use quality chocolate for superior flavor. Grease and dust ramekins well to prevent sticking. For gluten-free, use a 1:1 gluten-free flour blend. Serve warm for the best molten center. Cakes can be assembled ahead and baked from the fridge or freezer, adding a minute or two to baking time.
Nutrition
- Serving Size: 1 individual lava cake
- Calories: 420
- Sugar: 28
- Sodium: 180
- Fat: 24
- Saturated Fat: 12
- Carbohydrates: 45
- Fiber: 3
- Protein: 8
Keywords: peanut butter lava cake, molten chocolate cake, easy dessert, party dessert, chocolate peanut butter, individual cakes, gluten-free option, quick dessert, showstopper dessert


