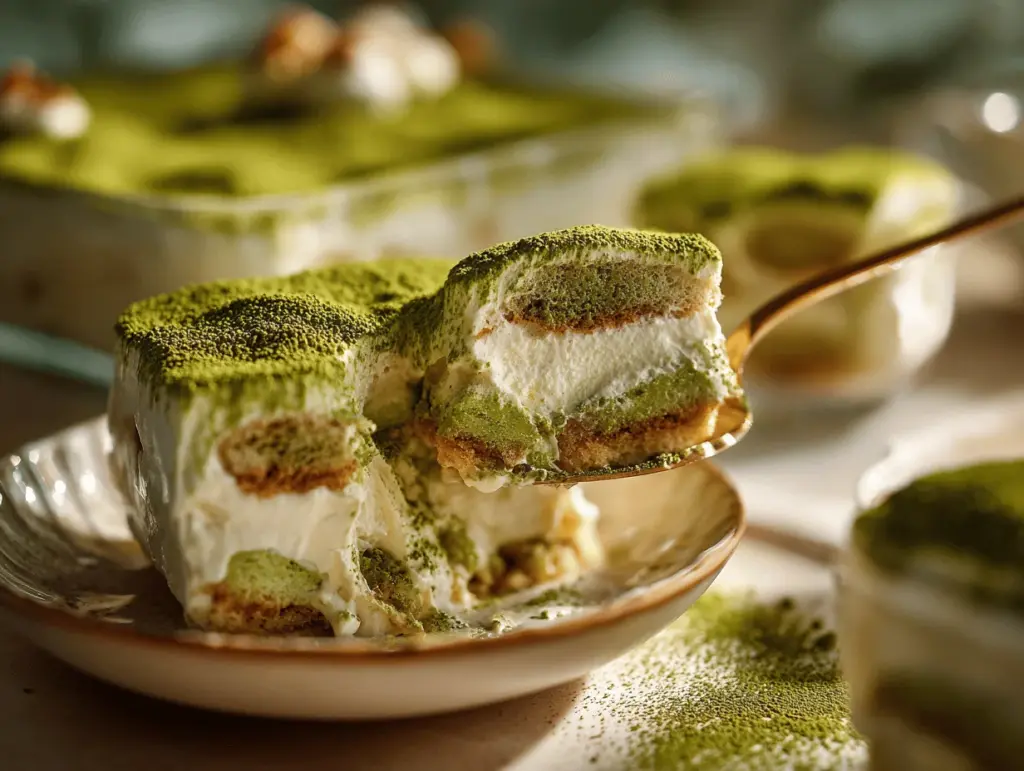
The first time I tasted matcha tiramisu, it was like a gentle jolt of surprise—the earthy, vibrant green tea fused with creamy, cloud-like mascarpone. You know how some desserts just stick in your memory for years? This was one of those moments. I’d been a traditional tiramisu fan for ages, but curiosity (and a deep love for matcha lattes) nudged me to experiment. It was during a rainy afternoon, with leftover ladyfingers and a fresh tin of matcha powder, that this light & creamy dessert came to life in my kitchen.
Honestly, this matcha tiramisu recipe is more than just a creative twist—it’s an experience. Every bite is a gentle balance between rich Italian tradition and the fresh, slightly bitter notes of Japanese green tea. I’ve tested it a dozen times, tweaking the layering method and switching up the matcha brands until I found one that really popped with flavor and color. The result? A dessert that’s not only visually stunning (that vibrant green is a Pinterest dream!) but also surprisingly easy to whip up for a crowd.
If you’re into desserts that look gorgeous and taste even better, you’ll love this. It’s perfect for anyone seeking a lighter treat, something unique for brunch, or a show-stopping potluck dish. And honestly, if you’ve got matcha powder and mascarpone in your fridge, you’re halfway there. This matcha tiramisu is my go-to when I want something comforting yet a little different from the usual.
So, whether you’re a seasoned baker or just dipping your toes in the dessert world, this recipe is worth trying. I’ll walk you through every step, share all my hard-earned tips, and show you why matcha tiramisu deserves a spot in your dessert rotation.
Why You’ll Love This Recipe
- Quick & Easy: Comes together in about 30 minutes of active prep—no baking required, just a little chilling!
- Simple Ingredients: Everything you need is probably already in your pantry or fridge, especially if you’re a fan of coffee or tea desserts.
- Perfect for Any Occasion: It’s a crowd-pleaser for brunch parties, spring holidays, or cozy dinners with friends.
- Unique Flavor: The matcha adds a fresh, slightly earthy note that’s totally different from the typical cocoa tiramisu—trust me, it’s addictive.
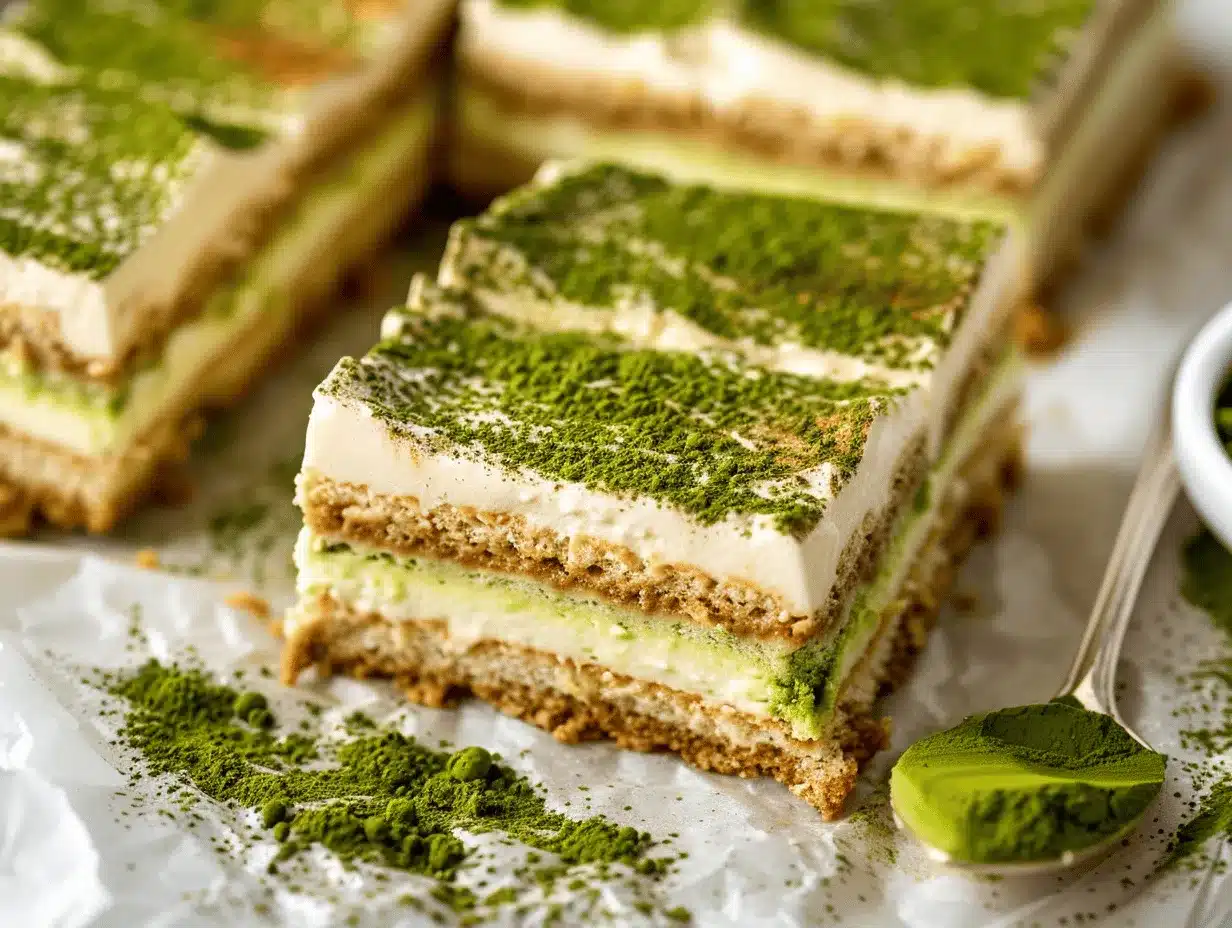
- Gorgeous Presentation: That vibrant green color layered with snowy cream makes for a Pinterest-worthy dessert.
- Lighter Texture: This version is less rich than classic tiramisu, thanks to whipped cream and matcha, so you don’t feel like you’ve overindulged.
- Customizable: Swap the ladyfingers for gluten-free, adjust the sweetness, or play with your favorite toppings—this matcha tiramisu is forgiving.
What makes this matcha tiramisu recipe stand out? For starters, I use a blend of premium culinary grade matcha (I love the Ippodo brand, but you do you) and a slightly sweetened cream that doesn’t overpower the green tea flavor. Blending the mascarpone with whipped cream gives you a feather-light texture, and soaking ladyfingers in a mild matcha syrup keeps them tender, not mushy.
I’ve made this for picky eaters, matcha skeptics, and my Italian relatives—everyone ended up asking for seconds. The first bite is a little revelation: creamy, refreshing, and not too sweet. If you love cozy, comforting desserts with a twist, this one’s for you.
Let’s face it, sometimes you want a dessert that’s impressive but doesn’t take hours to make. This matcha tiramisu delivers that wow factor with minimal effort. Once you see those layers come together and taste how the matcha infuses every bite, you’ll understand why I keep coming back to this recipe.
What Ingredients You Will Need
This matcha tiramisu relies on simple, wholesome ingredients to create bold flavor and a melt-in-your-mouth texture. Most are pantry staples, and you can easily swap a few things to suit your preferences or dietary needs.
- For the Cream Layers:
- Mascarpone cheese – 1 cup (250g), softened (I recommend BelGioioso for the creamiest texture)
- Heavy whipping cream – 1 cup (240ml), chilled
- Granulated sugar – 1/3 cup (65g) (can swap with coconut sugar for a warm flavor)
- Vanilla extract – 1 tsp (adds a subtle, sweet depth)
- For the Matcha Syrup:
- Matcha powder – 2–3 tbsp (20–25g), sifted (use premium culinary grade for vivid color)
- Hot water – 1 cup (240ml), just off the boil
- Honey or maple syrup – 2 tbsp (30ml), optional for a touch of sweetness
- For Layering:
- Ladyfinger biscuits (Savoiardi) – 1 package (about 24 pieces, 200g)
- For Topping:
- Extra matcha powder – 1–2 tsp, for dusting
- White chocolate shavings – optional, for a decorative touch
A few ingredient tips: If you need this gluten-free, swap the ladyfingers for gluten-free versions (Schar is a solid choice). For dairy-free, you can use plant-based cream cheese and coconut cream, though the texture changes slightly—it’s still delicious. If you want to ramp up the matcha flavor, use a little more powder in the syrup, but taste first—it can get intense!
I always sift my matcha before mixing—it keeps the color bright and the flavor smooth, avoiding those bitter lumps. For sweetener, I usually stick with granulated sugar, but maple syrup in the matcha syrup adds a gentle caramel undertone that’s pretty irresistible. The mascarpone is the star, so choose one that’s rich and creamy—it makes all the difference in the final texture.
If you’re out of vanilla, a splash of almond extract works too. And if you want an extra boost, stir a spoonful of Greek yogurt into the cream mixture—it adds tang and stability. The toppings are up to you; I love the look of matcha dusting for that bold green pop, but white chocolate shavings or edible flowers make it truly Pinterest-worthy.
Equipment Needed
- Mixing bowls (at least two medium-sized)
- Hand mixer or stand mixer (for whipping cream and mascarpone)
- Sifter or fine mesh strainer (for matcha powder)
- Whisk (helps smooth out any lumps in cream)
- Spatula (to fold and layer)
- 8×8 inch (20x20cm) glass dish or loaf pan (for layering the tiramisu)
- Measuring cups and spoons
- Kettle or small saucepan (for heating water)
- Small bowl (for mixing matcha syrup)
- Plastic wrap or lid (for chilling and storing)
If you don’t have a stand mixer, a sturdy hand whisk works in a pinch—just expect a mini arm workout when whipping up the cream. For the dish, I’ve used everything from ceramic baking pans to glass storage containers; honestly, as long as it’s deep enough for two layers, you’re good. If you’re making a smaller batch, halve the recipe and use a loaf pan.
My fine mesh strainer gets used constantly for matcha; it keeps the powder smooth and avoids those bitter clumps. If you don’t have one, you can use a small sieve. For measuring, I stick to stainless steel cups and spoons—they’re easy to clean and don’t warp. And if you want to get fancy, a small offset spatula makes those layers look extra neat.
Cleanup is easy, too—just rinse the whisk and spatula right after use to avoid sticky residue. If you’re on a budget, all these tools are pretty affordable at most big box stores or online.
Preparation Method
- Prepare the Matcha Syrup:
- In a small bowl, sift 2–3 tbsp (20–25g) matcha powder to remove lumps. Add 1 cup (240ml) hot water—just off the boil.
- Whisk vigorously until the matcha dissolves and the mixture is a vibrant green.
- Add 2 tbsp (30ml) honey or maple syrup, if desired. Taste and adjust sweetness. Set aside to cool.
Tip: If your matcha clumps, keep whisking or use an electric frother. The syrup should smell grassy and fresh—not bitter.
- Make the Cream Layer:
- In a mixing bowl, combine 1 cup (250g) mascarpone cheese and 1/3 cup (65g) granulated sugar.
- Beat with a hand mixer on medium speed until smooth—about 1–2 minutes.
- Add 1 tsp vanilla extract and blend briefly.
- In a separate bowl, whip 1 cup (240ml) heavy cream until stiff peaks form (about 2–3 minutes).
- Gently fold whipped cream into the mascarpone mixture with a spatula, using slow, sweeping motions. Don’t overmix—it should be light and fluffy.
Note: If the cream seems too runny, chill for 15 minutes before layering. It should hold its shape but still be spreadable.
- Layer the Tiramisu:
- Gather your 8×8 inch (20x20cm) dish. Quickly dip each ladyfinger into the cooled matcha syrup—no more than 2 seconds per side. (They soak up liquid fast!)
- Arrange dipped ladyfingers in a single layer at the bottom of the dish. Break a few to fit as needed.
- Spread half the mascarpone cream evenly over the ladyfingers, smoothing with a spatula.
- Repeat dipping and layering for a second layer of ladyfingers, then finish with the remaining cream mixture.
Warning: Over-soaked ladyfingers can get mushy and collapse, so be quick! The layers should look distinct and tidy.
- Chill and Decorate:
- Cover the dish with plastic wrap and refrigerate for at least 3 hours (overnight is even better).
- Before serving, sift 1–2 tsp matcha powder over the top for that signature bright green finish. Add white chocolate shavings if desired.
Tip: The flavors deepen as it chills. If you want clean slices, chill for at least 6 hours.
- Serve:
- Use a sharp knife to cut squares, wiping between slices for neat edges.
- Plate and serve chilled—watch those layers shine!
Sensory cue: The cream should be velvety and the ladyfingers tender, with a gentle matcha aroma rising as you cut.
If you notice the cream isn’t setting, pop it in the freezer for 30 minutes—just don’t let it freeze solid. For a little crunch, sprinkle toasted coconut or chopped pistachios on top before serving. I’ve found layering goes faster if you set up an assembly line: syrup, ladyfingers, cream, repeat.
Cooking Tips & Techniques
After making matcha tiramisu more times than I can count, I’ve picked up a few tricks to guarantee success every time. Here are my best tips:
- Don’t oversoak the ladyfingers: This is the #1 mistake. A quick dip is all you need. I ruined a batch once by letting them sit—total mush.
- Sift your matcha: Lumps are bitter and ruin the smooth look. Always sift before mixing into syrup or dusting.
- Use cold cream: Whipping cream whips up best when cold. If your kitchen’s warm, chill the bowl and beaters for 10 minutes.
- Fold gently: When combining whipped cream with mascarpone, use slow, deliberate motions—overmixing deflates the cream and makes it dense.
- Layer neatly: Spread the cream in a single direction to keep the layers clean. I learned this after a few messy, uneven batches.
- Chill thoroughly: The dessert needs time to set. If you rush, it won’t slice cleanly and the flavors won’t meld.
- Matcha strength: Some brands are stronger and more bitter. Start with less, taste the syrup, and add more if needed.
If you’re multitasking, prep the cream while the matcha syrup cools. I usually lay out all my tools and ingredients before starting—that way, nothing gets forgotten in the rush. If you ever have a batch where the cream is runny, just chill it longer or add a spoonful more mascarpone.
Consistency is everything. Try to keep the layers even and the cream fluffy. If you want perfectly smooth tops for photos, use an offset spatula and chill before dusting with matcha. And don’t worry if the first slice isn’t perfect—the flavors are what count!
Variations & Adaptations
One of the best things about matcha tiramisu is how easy it is to adjust for different tastes and dietary needs. Here are some flavorful twists I’ve tried and loved:
- Gluten-Free: Use gluten-free ladyfingers (Schar is reliable). Everything else stays the same—no compromise on texture.
- Dairy-Free: Substitute mascarpone with vegan cream cheese (like Kite Hill) and use coconut cream instead of heavy whipping cream. The flavor is a little different, but it’s still light and dreamy.
- Vegan: Go all dairy-free and use maple syrup for sweetness. You can also use homemade cashew cream for the filling.
- Seasonal Additions: Add sliced strawberries or raspberries between the layers in spring and summer for a fruity twist.
- Flavor Boost: Mix a little yuzu zest or lemon zest into the cream for a citrus kick. I tried this last summer and it was a hit with my zesty-loving friends.
- Alcoholic Version: Splash a tablespoon of sake or rum into the matcha syrup for an adult-only treat. Adds warmth and depth.
If you need to avoid eggs, look for egg-free ladyfingers or use sponge cake strips. For nut allergies, skip any nut toppings and double-check your cream cheese brand. I’ve even layered in toasted coconut flakes for extra crunch—so good!
My personal favorite variant is using coconut cream and fresh mango chunks in the summer. The tropical notes work beautifully with matcha and make it a lighter, fresher dessert for hot days.
Serving & Storage Suggestions
This matcha tiramisu shines brightest when served chilled. I like to slice it into squares and plate each piece with an extra dusting of matcha and a few white chocolate curls—totally Instagram or Pinterest worthy!
- Serving Temperature: Always serve straight from the fridge. The layers hold together and the flavors are mellow and balanced.
- Presentation Ideas: Garnish with edible flowers, berries, or pistachio crumbs for a pop of color. Serve in small glass jars for individual portions if you’re feeling fancy.
- Pairings: Goes perfectly with a hot matcha latte, green tea, or even a crisp sparkling wine. For brunch, serve alongside fresh fruit salad.
- Storage: Cover tightly with plastic wrap or a lid and refrigerate. It keeps well for 2–3 days.
- Freezing: For longer storage, freeze solid, then thaw in the fridge overnight. The texture remains creamy, though the ladyfingers soften more.
- Reheating: Don’t reheat—this dessert is best cold! If it’s been in the freezer, let it thaw slowly in the fridge.
- Flavor Development: The matcha flavor deepens after a day in the fridge, so leftovers taste even better.
If you’re making it ahead for a party, assemble the night before and add the final matcha dusting just before serving. I’ve found that flavors meld beautifully and the cream layers become even silkier with time.
Nutritional Information & Benefits
Here’s a quick look at the nutritional profile (per serving, based on 8 servings):
- Calories: ~320
- Protein: 5g
- Fat: 20g
- Carbohydrates: 28g
- Sugar: 16g
Matcha is loaded with antioxidants, especially EGCG, which is known for its health benefits. The mascarpone and cream supply calcium and healthy fats, while you can easily adjust sugar for lower-carb or keto diets by using monk fruit or stevia.
For gluten-free needs, swap the ladyfingers as mentioned earlier. Dairy-free and vegan options are just as easy to make. Allergens mainly include dairy, eggs (in traditional ladyfingers), and gluten unless you substitute.
Honestly, I love matcha tiramisu as a treat that feels indulgent but is lighter than most desserts. The green tea gives a gentle energy boost, and it’s lower in sugar than many cakes or pies. If you’re watching your diet, just tweak the sweetener and swap the cream!
Conclusion
There’s something magical about matcha tiramisu—it’s the kind of dessert that makes you pause after the first bite. The layers are light and creamy, the matcha brings freshness, and it’s easy enough for anyone to tackle at home. Whether you’re making it for a celebration, a cozy night in, or just because you want to try something new, this recipe delivers every time.
I encourage you to play around with the ingredients—make it gluten-free, vegan, or add your own twist. That’s the fun of home baking! I love this recipe because it’s forgiving, beautiful, and always impresses guests (plus, it never lasts long in my fridge).
If you try this irresistible matcha tiramisu, let me know in the comments! I’d love to hear your adaptations, see your Pinterest-worthy photos, and swap tips. Don’t forget to share this recipe with fellow dessert lovers. Happy layering and happy eating!
FAQs
Can I use regular green tea instead of matcha powder?
No, regular green tea won’t give the same vibrant color or flavor. Matcha powder is much more concentrated and makes the dessert stand out.
How long does matcha tiramisu need to chill?
At least 3 hours is best, but overnight is even better for flavor and texture. Don’t skip this step!
Can I make matcha tiramisu ahead of time?
Absolutely. It’s actually better when made a day in advance—the flavors meld and the texture sets perfectly.
What’s the best matcha powder for tiramisu?
Choose a premium culinary grade matcha. Ippodo and MatchaBar are great, but use what you love for the freshest taste.
Is it possible to make this recipe without eggs?
Yes! Just use egg-free ladyfingers or substitute with strips of sponge cake. The cream layers are already egg-free.
Pin This Recipe!
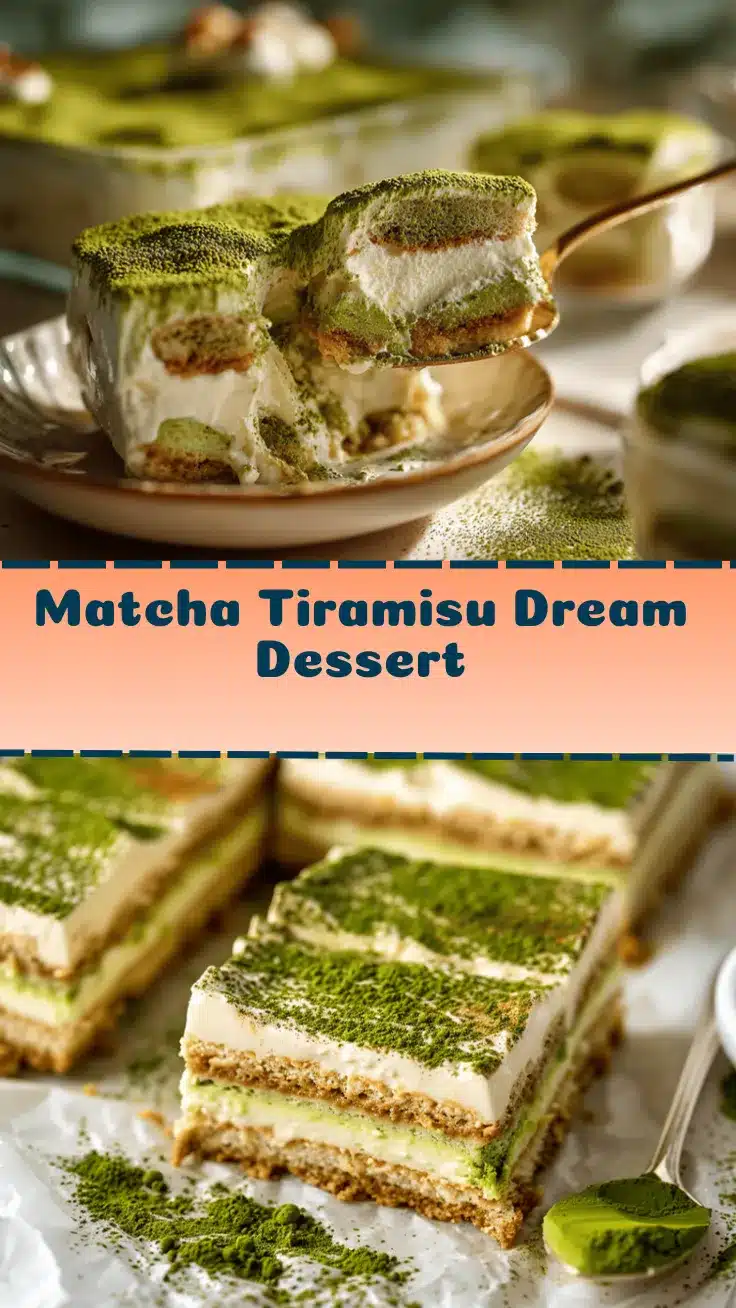
Matcha Tiramisu

This easy, light, and creamy matcha tiramisu is a stunning twist on the classic Italian dessert, featuring layers of mascarpone cream and matcha-soaked ladyfingers. The earthy, vibrant flavor of Japanese green tea pairs beautifully with the rich yet airy cream for a unique, crowd-pleasing treat.
- Prep Time: 30 minutes
- Cook Time: 0 minutes
- Total Time: 3 hours 30 minutes (includes chilling)
- Yield: 8 servings 1x
- Category: Dessert
- Cuisine: Fusion (Italian-Japanese)
Ingredients
- 1 cup (250g) mascarpone cheese, softened
- 1 cup (240ml) heavy whipping cream, chilled
- 1/3 cup (65g) granulated sugar
- 1 tsp vanilla extract
- 2–3 tbsp (20–25g) matcha powder, sifted (plus 1–2 tsp extra for dusting)
- 1 cup (240ml) hot water, just off the boil
- 2 tbsp (30ml) honey or maple syrup (optional, for matcha syrup)
- 1 package ladyfinger biscuits (about 24 pieces, 200g)
- White chocolate shavings (optional, for topping)
Instructions
- Prepare the matcha syrup: In a small bowl, sift 2–3 tbsp matcha powder to remove lumps. Add 1 cup hot water and whisk vigorously until dissolved and vibrant green.
- Add 2 tbsp honey or maple syrup to the matcha syrup if desired. Taste and adjust sweetness. Set aside to cool.
- Make the cream layer: In a mixing bowl, combine mascarpone cheese and granulated sugar. Beat with a hand mixer on medium speed until smooth (1–2 minutes). Add vanilla extract and blend briefly.
- In a separate bowl, whip heavy cream until stiff peaks form (about 2–3 minutes).
- Gently fold whipped cream into the mascarpone mixture with a spatula, using slow, sweeping motions. Do not overmix.
- Layer the tiramisu: Quickly dip each ladyfinger into the cooled matcha syrup (no more than 2 seconds per side) and arrange in a single layer at the bottom of an 8×8 inch dish. Break a few to fit as needed.
- Spread half the mascarpone cream evenly over the ladyfingers. Repeat dipping and layering for a second layer of ladyfingers, then finish with the remaining cream mixture.
- Cover with plastic wrap and refrigerate for at least 3 hours (overnight is best).
- Before serving, sift 1–2 tsp matcha powder over the top and add white chocolate shavings if desired.
- Cut into squares with a sharp knife, wiping between slices for neat edges. Serve chilled.
Notes
For best results, use premium culinary grade matcha and sift before mixing. Do not oversoak ladyfingers—dip quickly to avoid mushy layers. Chill thoroughly for clean slices and deeper flavor. Gluten-free and dairy-free adaptations are easy; see blog for details. Add fruit or citrus zest for a twist. The dessert is best served cold and keeps well for 2–3 days in the fridge.
Nutrition
- Serving Size: 1/8 of 8x8 inch pan
- Calories: 320
- Sugar: 16
- Sodium: 90
- Fat: 20
- Saturated Fat: 12
- Carbohydrates: 28
- Fiber: 1
- Protein: 5
Keywords: matcha tiramisu, green tea dessert, no bake tiramisu, Japanese Italian fusion, mascarpone, ladyfingers, easy dessert, potluck, brunch, creamy dessert, matcha recipe


