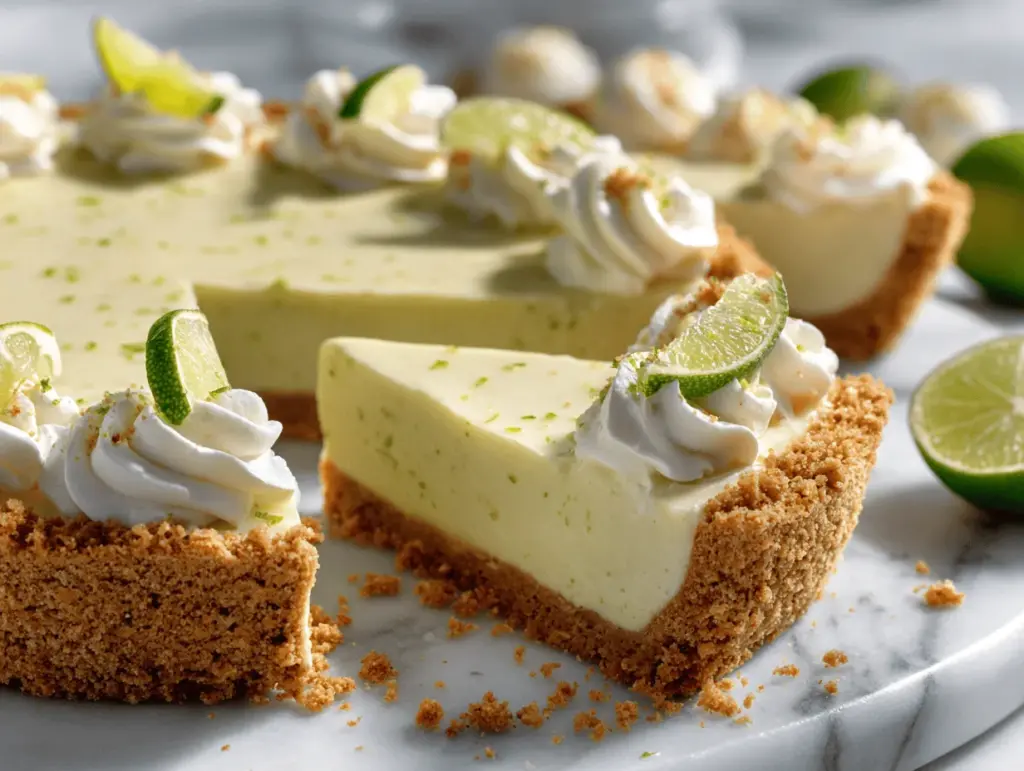
The first time I tasted frozen Key lime pie, it was pure sunshine in a slice—tangy, creamy, and so cold it almost made my teeth chatter (in a good way!). You know that feeling when you open the freezer on a hot day and the cool air hits your face? That’s exactly what this dessert does for your taste buds. Each bite is a perfect blend of zesty lime, silky smooth filling, and a buttery graham cracker crust that somehow tastes even better when icy. I started making this frozen Key lime pie last summer, desperate for something sweet but not heavy, and honestly, it’s become my go-to for every barbecue and pool party.
Frozen Key lime pie isn’t just any old pie—it’s a creamy dessert that feels like a vacation. The classic version is already beloved, but freezing it takes things to a whole new level of refreshing. I’ve tested this recipe with different limes, crusts, and toppings, and this version is my ultimate favorite. It’s ridiculously easy to make, requires no baking, and is a total crowd-pleaser (seriously, people ask for seconds before they’ve finished the first slice). If you love desserts with a kick of citrus and a texture that’s both rich and light, this is the recipe you need.
Whether you’re feeding a group, looking for something to wow your family, or just want a treat that screams “summer,” this frozen Key lime pie is for you. It’s great for busy folks—no oven required—and perfect for anyone craving a sweet treat that isn’t overwhelming. Plus, it’s a sneaky way to impress guests (no one has to know how simple it is). Trust me, after making this a dozen times, I can say with confidence: this frozen Key lime pie is pure happiness in pie form.
Why You’ll Love This Frozen Key Lime Pie Recipe
- Quick & Easy: You can whip up this pie in under 20 minutes, then just let the freezer do the rest. No complicated steps, no oven, and minimal cleanup!
- Simple Ingredients: Everything you need is probably already in your kitchen—graham crackers, butter, sweetened condensed milk, limes, and cream. That’s it!
- Perfect for Summer: Frozen Key lime pie is literally built for hot days, backyard parties, and family gatherings. It’s cool, light, and totally refreshing.
- Crowd-Pleaser: Kids love it, adults love it, and it’s one of those desserts that people remember (and request) again and again.
- Unbelievably Delicious: The creamy, tart filling paired with the crunchy, buttery crust is classic comfort food—but with a tropical twist.
I’ve made dozens of frozen pies, but this one stands out because of the way the Key lime flavor pops against the sweet base. The trick is using freshly squeezed Key limes, which make all the difference. If you can’t find them, regular limes work, but the taste is just a little brighter with the real thing. Another secret? A dash of salt in the crust brings out all the flavors (learned that one after a few bland attempts!).
This recipe is perfect for anyone who wants to enjoy dessert without feeling weighed down—and for those crazy busy days when you want something homemade but don’t want to fuss. The frozen texture makes it feel gourmet, and the flavor is so bold you’ll want to close your eyes with every bite. There’s just something magical about how the tartness of lime balances the creamy filling. It’s the kind of treat that makes ordinary moments feel special.
What makes my version different? I blend the filling until it’s super smooth, and I use a touch of vanilla for extra depth. I also go heavy on the lime zest for max zing. And honestly, freezing it instead of just chilling turns it into something you’ll crave all summer. This isn’t just another pie—it’s the best frozen Key lime pie I’ve ever made, and I’m excited for you to try it.
What Ingredients You Will Need
This frozen Key lime pie recipe uses straightforward ingredients to deliver a punchy, creamy flavor and that signature refreshing chill. Most items are pantry staples, and a few can be swapped out if needed (I’ll share my favorites below!).
- For the Crust:
- Graham crackers (about 10 full sheets, or 150g) – gives that classic, sweet crunch
- Unsalted butter, melted (6 tbsp / 85g) – brings the crust together and adds richness
- Granulated sugar (2 tbsp / 25g) – for a touch of sweetness
- Pinch of salt – (trust me, it makes the flavors pop!)
- For the Filling:
- Sweetened condensed milk (1 can, 14 oz / 396g) – the backbone of the creamy filling
- Heavy cream (1 cup / 240ml) – whips up fluffy and light
- Key lime juice (½ cup / 120ml, freshly squeezed preferred) – you can use regular limes if Key limes are out of season
- Key lime zest (from 4-5 limes) – adds extra zing (I always use a microplane for fine zest!)
- Vanilla extract (1 tsp / 5ml) – gives warmth and depth
- For the Topping (Optional but recommended):
- Whipped cream (for garnish, homemade or store-bought)
- Extra lime zest or thin lime slices – makes it pretty and amps the citrus flavor
- Graham cracker crumbs (a sprinkle for texture)
Ingredient Tips: For the best texture, use full-fat sweetened condensed milk and heavy cream. If you’re dairy-free, swap in coconut cream and coconut condensed milk (I’ve done this, and it’s delicious, just a bit more tropical!). When limes are expensive or hard to find, bottled Key lime juice works in a pinch—just check the label for pure juice, not a blend. For gluten-free friends, use gluten-free graham crackers (they work just fine, promise!).
I always recommend fresh lime juice for that sharp, tart flavor, but honestly, I’ve made this with bottled juice during winter and it still vanishes from the platter. For toppings, let your creativity shine—sometimes I add toasted coconut or a drizzle of honey for fun. If you want to get really fancy, try a meringue topping (but whipped cream is classic for a reason!).
Equipment Needed
- 9-inch (23cm) pie pan – glass or metal both work, but I prefer glass for easy slicing
- Food processor or sturdy zip-top bag and rolling pin – for crushing graham crackers (I love my processor, but smashing with a rolling pin is oddly satisfying!)
- Mixing bowls – one large for crust, one medium for filling
- Hand mixer or stand mixer – for whipping the cream to fluffy peaks
- Rubber spatula – for scraping every last bit of filling into the crust
- Microplane or fine grater – for zesting limes (the finer, the better)
- Measuring cups and spoons – accuracy matters for a creamy pie
- Plastic wrap or foil – for covering the pie while it freezes
- Sharp knife – for slicing clean, beautiful pieces
If you don’t have a food processor, don’t worry—just use a zip-top bag and a rolling pin to crush your graham crackers. I’ve made this pie with every kind of mixer, and even a whisk works in a pinch (though your arm might be tired!). For budget-friendly options, you can find pie pans and graters at most dollar stores—they work just as well as pricier ones. Keep your mixer beaters and bowls cold for faster whipping!
After lots of trial and error, I learned to line the bottom of my pie pan with parchment for easier removal. It’s not essential, but it makes serving a breeze. And always clean your microplane immediately—lime zest gets stuck fast!
Preparation Method
- Prepare the Crust: Crush the graham crackers (10 sheets / 150g) into fine crumbs using a food processor or by sealing them in a zip-top bag and smashing with a rolling pin. Add melted unsalted butter (6 tbsp / 85g), granulated sugar (2 tbsp / 25g), and a pinch of salt. Mix until the crumbs are evenly coated and resemble wet sand (about 1-2 minutes).
- Press the crumb mixture firmly into the bottom and up the sides of a 9-inch (23cm) pie pan. Use the bottom of a measuring cup for even pressing. Freeze the crust for 10-15 minutes while you make the filling.
- Make the Filling: In a large bowl, combine sweetened condensed milk (1 can, 14 oz / 396g), freshly squeezed Key lime juice (½ cup / 120ml), Key lime zest (from 4-5 limes), and vanilla extract (1 tsp / 5ml). Stir until smooth and well mixed (the lime juice will slightly thicken the mixture—don’t worry!).
- In a separate bowl, whip heavy cream (1 cup / 240ml) using a hand mixer or stand mixer until stiff peaks form (about 2-3 minutes). The cream should be thick and hold its shape when you lift the beaters.
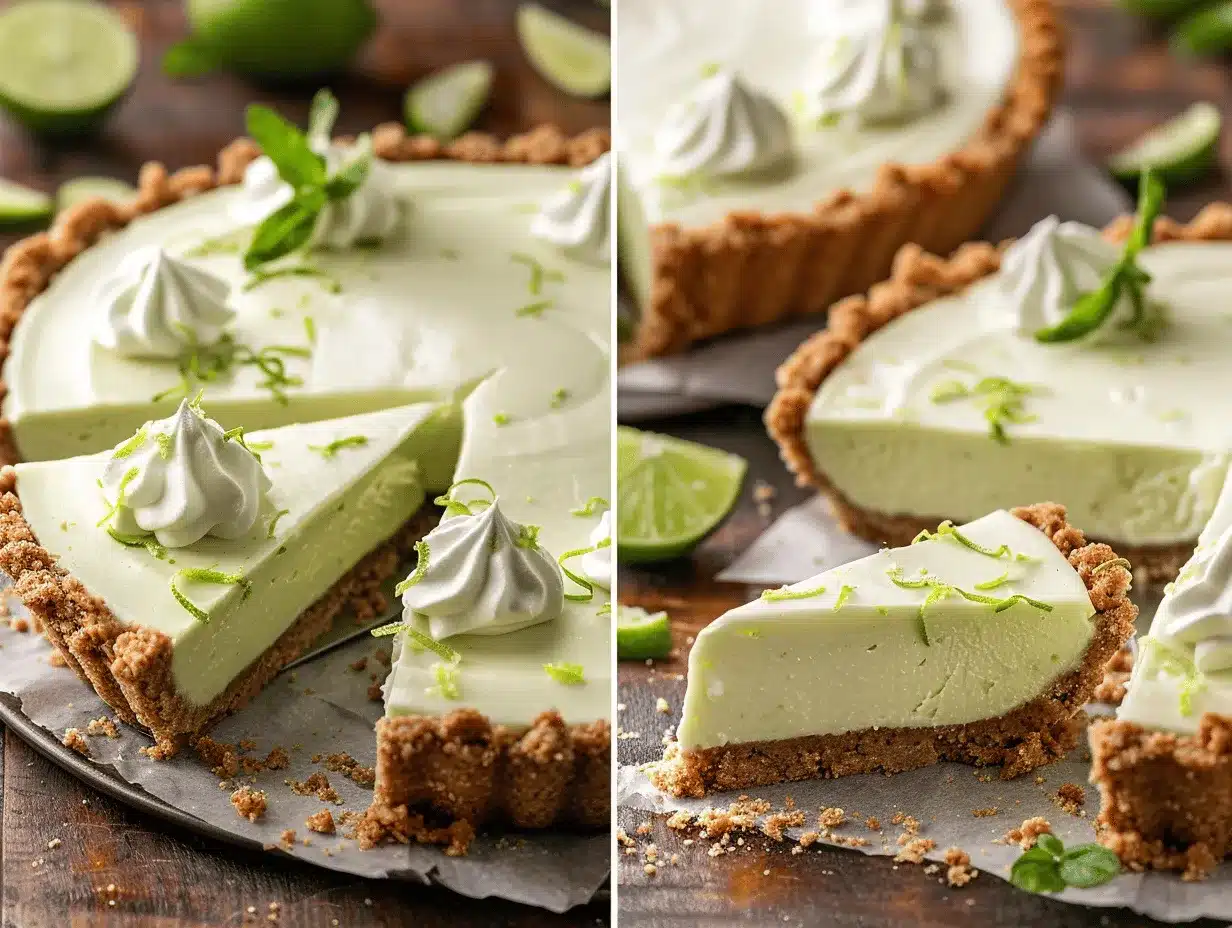
- Gently fold the whipped cream into the lime mixture using a rubber spatula. Go slowly to keep the filling light and airy. The mixture should be creamy and pale green, with flecks of lime zest throughout.
- Fill the Crust: Pour the filling into the chilled crust. Smooth the top with a spatula for a nice, even surface.
- Cover the pie with plastic wrap or aluminum foil. Freeze for at least 5 hours, preferably overnight, until firm. (If you’re impatient like me, 3 hours will get you a soft set—but overnight is best for slicing!)
- Serve: Remove the pie from the freezer 10-15 minutes before serving to soften slightly (it’ll be easier to cut). Top with whipped cream, extra lime zest, and lime slices if you like. Slice with a sharp knife for clean edges.
Preparation Notes: If the crust feels too crumbly when pressing, add another tablespoon of melted butter. If your filling looks grainy, double-check that the cream was whipped enough before folding. You’ll know the pie is ready when the filling is firm to the touch and doesn’t wobble in the pan. Don’t skip the chilling step for the crust—it keeps it crunchy!
Troubleshooting: If your pie cracks when slicing, warm your knife with hot water first. If the filling is too soft, just pop it back in the freezer for an hour. And if you over-whip the cream and it turns grainy, no worries—just start over with a fresh batch (been there, done that!).
Cooking Tips & Techniques
- Use cold ingredients: Cold cream whips faster and holds structure better. I always chill my bowl and beaters beforehand.
- Don’t rush the freezing: Let the pie set overnight for the firmest, creamiest texture. Cutting corners here leads to a soupy slice (I learned the hard way!).
- Zest before juicing: Always zest your limes before squeezing—much easier and less messy.
- Pressing the crust: Use a straight-sided measuring cup or glass for an even, compact crust. If you skip this, your crust may crumble when sliced.
- Folding with care: When combining whipped cream and filling, fold gently. Over-mixing deflates the cream and makes the pie denser.
- Clean slices: For picture-perfect slices, dip your knife in hot water and wipe between cuts. It’s a Pinterest-worthy trick!
- Balance flavors: Taste the filling before freezing. If you want it tangier, add more lime juice or zest. If it’s too sharp, a spoonful of sugar mellows things out.
Common Mistakes: Over-whipping the cream (it turns to butter!), under-freezing the filling (it won’t hold), and forgetting the pinch of salt (the pie ends up bland). I’ve made all these mistakes at least once, so don’t worry if things aren’t perfect. Just tweak and try again.
Timing & Multitasking: Prep the crust first, then make the filling while it chills. You can even zest and juice limes a day ahead to save time. If you’re entertaining, make two pies—one for now, one for later!
Variations & Adaptations
- Dairy-Free Version: Swap heavy cream and condensed milk for coconut cream and coconut condensed milk. The pie gets a tropical vibe—plus, it’s vegan-friendly!
- Gluten-Free Crust: Use gluten-free graham crackers (or almond flour mixed with butter for a nutty twist). The texture is slightly different, but the flavor is awesome.
- Berry Boost: Scatter fresh raspberries or blueberries over the filling before freezing. The tart fruit balances the lime and adds a gorgeous pop of color.
- Chocolate Drizzle: For chocoholics, drizzle melted dark chocolate over the top before serving. I did this once for a birthday—the pie disappeared in minutes!
- Meringue Topping: Skip the whipped cream and top with toasted meringue for a classic pie look. Broil for 1-2 minutes to get that golden finish.
I’ve played around with mixing in shredded coconut to the crust and it’s a fun twist—makes the pie taste even more like a beach vacation. If you’re making this for someone with nut allergies, stick with the classic graham crust and skip any nut-based variations. For lime lovers, double the zest for extra punch (my husband swears it’s the only way!).
Serving & Storage Suggestions
Serving Temperature: Always serve frozen Key lime pie straight from the freezer. Let it sit at room temperature for 10-15 minutes before slicing for the best texture. It should be firm but creamy—not rock hard.
Presentation Tips: Top slices with a swirl of whipped cream, a sprinkle of lime zest, and a thin slice of lime. It looks gorgeous and tastes even better. For parties, serve on chilled plates (keeps the pie extra cold!).
Pairing Ideas: Frozen Key lime pie goes perfectly with iced tea, lemonade, or a crisp white wine. For a full summer spread, pair with grilled chicken, fresh fruit salad, or shrimp tacos—trust me, it’s a hit.
Storage: Store leftovers covered in the freezer for up to 2 weeks. The flavor stays bright, and the texture remains creamy. To prevent freezer burn, press plastic wrap directly onto the surface before covering. If you want to freeze individual slices, wrap them tightly and store in a zip-top bag.
Reheating (sort of): If the pie gets too hard, just let it sit out for a few extra minutes. Don’t microwave—it’ll melt! The flavors actually deepen after a day or two, so sometimes it tastes even better as leftovers.
Nutritional Information & Benefits
Estimated Nutrition (per slice, based on 8 servings):
- Calories: ~380
- Fat: 18g
- Saturated fat: 11g
- Sugar: 32g
- Protein: 6g
Health Benefits: Key limes are loaded with vitamin C and antioxidants. The pie delivers a dose of citrus without being overly sugary. Using fresh juice and zest adds flavor and nutrients. If you use coconut cream, you get healthy fats and a plant-based boost.
Dietary Notes: Easily adaptable for gluten-free and dairy-free diets—just swap the crust and filling as needed. Contains dairy and wheat in the classic version. For nut allergies, avoid almond flour crusts. It’s not low-carb, but you can reduce the sugar by using unsweetened condensed milk (if you find it!) and skipping the topping.
Personally, I love that this dessert satisfies a sweet craving without feeling heavy. It’s a fun way to sneak citrus into your diet, and it’s honestly a mood booster every time I eat it.
Conclusion
This frozen Key lime pie recipe is everything a summer dessert should be—easy, creamy, and bursting with flavor. It’s made for sunny days, family gatherings, and those moments when you just want something cool and delicious. I love how it never fails to impress, whether I’m serving picky kids or food-loving friends. You can customize it with toppings, mix-ins, and crust swaps to make it your own.
If you’re looking for a dessert that’s simple but unforgettable, this is it. I hope you’ll give it a try, play with the variations, and share it with people you love. Leave me a comment below if you’ve made it, or tag your version on social media—I’m always excited to see how others enjoy it! Honestly, this pie is pure joy in every slice. Let’s make summer a little sweeter, one frozen Key lime pie at a time!
FAQs
Can I use regular limes instead of Key limes?
Yes! Regular limes work well if Key limes aren’t available. The flavor is slightly different—less floral—but still delicious and bright.
How long does frozen Key lime pie need to freeze?
Freeze for at least 5 hours, or overnight for best results. The pie should be firm but creamy when sliced.
Can I make this pie ahead of time?
Absolutely. This pie is ideal for making a day or two in advance. Just keep it tightly covered in the freezer until ready to serve.
How do I get clean slices?
Let the pie sit at room temperature for 10-15 minutes, then use a sharp knife dipped in hot water and wiped between cuts. Works like a charm!
Is this recipe gluten-free or dairy-free?
The classic version contains both gluten and dairy, but you can use gluten-free graham crackers and coconut-based ingredients for a dairy-free adaptation.
Pin This Recipe!
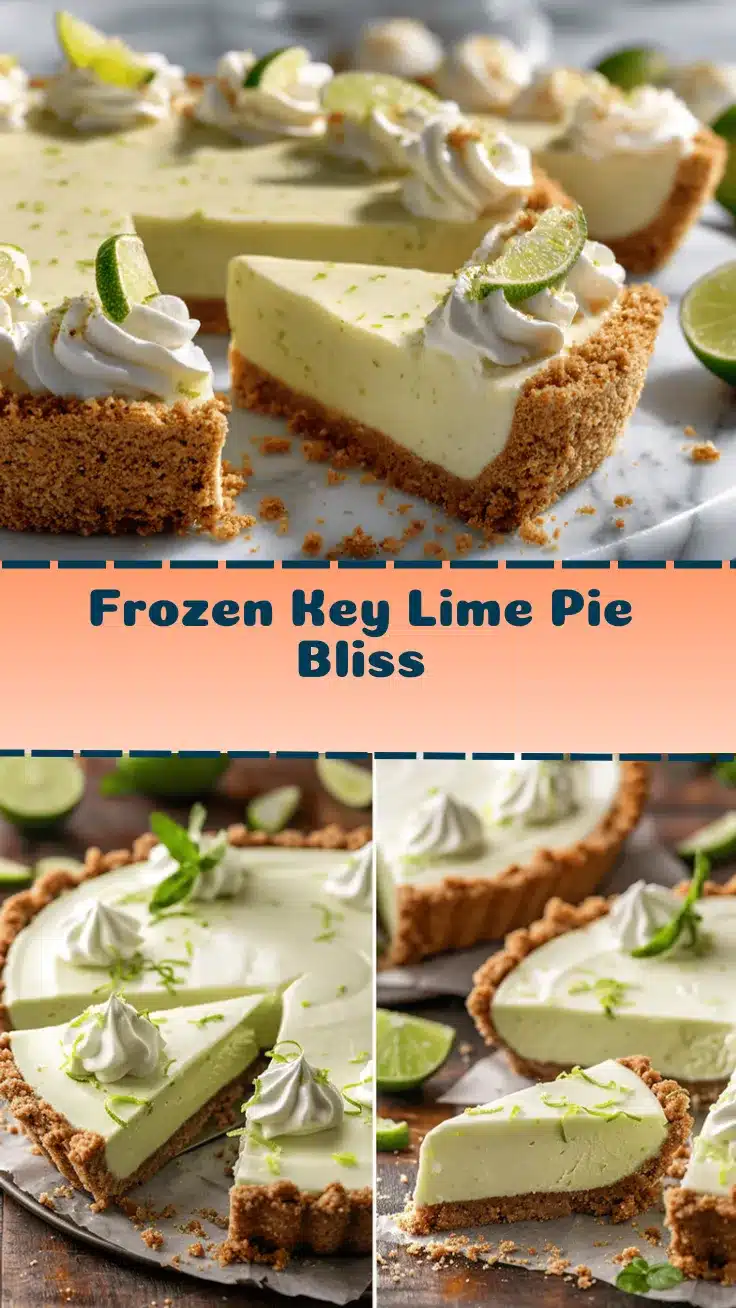
Frozen Key Lime Pie
This easy frozen Key lime pie is a creamy, tangy, no-bake dessert perfect for summer. With a buttery graham cracker crust and a zesty lime filling, it’s refreshing, crowd-pleasing, and simple to make ahead for any occasion.
- Prep Time: 20 minutes
- Cook Time: 0 minutes
- Total Time: 5 hours 20 minutes (includes freezing time)
- Yield: 8 servings 1x
- Category: Dessert
- Cuisine: American
Ingredients
- 10 full sheets graham crackers (about 1 1/2 cups crumbs or 150g)
- 6 tablespoons unsalted butter, melted (85g)
- 2 tablespoons granulated sugar (25g)
- Pinch of salt
- 1 can (14 oz) sweetened condensed milk (396g)
- 1 cup heavy cream (240ml)
- 1/2 cup Key lime juice (120ml, freshly squeezed preferred; regular lime juice okay)
- Zest from 4–5 Key limes
- 1 teaspoon vanilla extract (5ml)
- Whipped cream (for garnish, optional)
- Extra lime zest or thin lime slices (for garnish, optional)
- Graham cracker crumbs (for garnish, optional)
Instructions
- Crush the graham crackers into fine crumbs using a food processor or by placing them in a zip-top bag and smashing with a rolling pin.
- Add melted butter, granulated sugar, and a pinch of salt to the crumbs. Mix until evenly coated and the mixture resembles wet sand.
- Press the crumb mixture firmly into the bottom and up the sides of a 9-inch pie pan. Use the bottom of a measuring cup for even pressing. Freeze the crust for 10-15 minutes.
- In a large bowl, combine sweetened condensed milk, Key lime juice, lime zest, and vanilla extract. Stir until smooth and slightly thickened.
- In a separate bowl, whip the heavy cream with a hand mixer or stand mixer until stiff peaks form (about 2-3 minutes).
- Gently fold the whipped cream into the lime mixture with a rubber spatula until fully combined and light.
- Pour the filling into the chilled crust and smooth the top.
- Cover the pie with plastic wrap or foil and freeze for at least 5 hours, preferably overnight, until firm.
- Remove the pie from the freezer 10-15 minutes before serving to soften slightly. Top with whipped cream, extra lime zest, and lime slices if desired. Slice with a sharp knife for clean edges.
Notes
For best results, use freshly squeezed Key lime juice and zest before juicing. Chill your mixing bowl and beaters for faster whipped cream. Let the pie freeze overnight for the cleanest slices. For gluten-free, use gluten-free graham crackers. For dairy-free, substitute coconut cream and coconut condensed milk. Garnish with whipped cream, lime zest, or thin lime slices for a pretty presentation. Store leftovers tightly covered in the freezer for up to 2 weeks.
Nutrition
- Serving Size: 1 slice (1/8 of pie)
- Calories: 380
- Sugar: 32
- Sodium: 180
- Fat: 18
- Saturated Fat: 11
- Carbohydrates: 45
- Protein: 6
Keywords: frozen key lime pie, no bake dessert, summer pie, creamy lime pie, easy key lime pie, make ahead dessert, graham cracker crust, citrus dessert, crowd pleaser, refreshing dessert