The first time I made this caramel banana cream pie, the whole kitchen smelled like a bakery—rich caramel bubbling on the stove, sweet bananas, and velvety whipped cream all coming together. It was one of those days when comfort food just called my name. You know the feeling: cloudy afternoon, a little bit of nostalgia, and a craving for something insanely good.
I found myself tinkering with different versions of banana cream pie during my college years—sometimes using store-bought crust, sometimes making caramel from scratch (with a few sticky mishaps along the way, honestly). But this caramel banana cream pie recipe is the one I keep coming back to. It’s easy enough for a weeknight but looks and tastes so fancy, you’ll want to show it off at every party. The layering of ripe bananas, silky pastry cream, and a generous drizzle of caramel makes each bite a little celebration.
What I love most is how forgiving it is—you don’t need to be a pastry chef to pull this off. The hardest part is waiting for it to chill so the flavors meld together. If you’re a dessert lover looking for something impressive but totally doable, this caramel banana cream pie recipe is your go-to. Perfect for birthdays, potlucks, or just treating yourself after a long week. Trust me, I’ve baked this pie more times than I can count, and it never disappoints!
Why You’ll Love This Recipe
- Quick & Easy: Comes together in under an hour (excluding chilling), so you can whip it up even on busy days.
- Simple Ingredients: No need for fancy stuff—bananas, cream, caramel, and a basic pie crust are all you need.
- Perfect for Parties: This caramel banana cream pie recipe is a stunner on any dessert table. I’ve taken it to family gatherings and watched it disappear in minutes!
- Crowd-Pleaser: Kids love it for the sweet bananas, adults rave about the caramel layer. It’s “seconds please” kind of good.
- Unbelievably Delicious: The creamy, dreamy filling with pops of banana and gooey caramel… it’s just next-level comfort food.
After testing dozens of pie recipes, I can honestly say this one stands out because of the homemade caramel layer. Blending that into a classic banana cream pie gives it depth and richness you just don’t get from plain sugar. I like to use a buttery graham cracker crust, but you can also use a classic pastry base if you’re feeling traditional. The best part? You don’t need pastry school skills—just a bit of patience and a love for sweets.
This recipe isn’t just about taste—it’s about the experience. There’s something magical about slicing through the cloud-like whipped topping, letting the caramel ooze out, and getting that perfect forkful of pie. I’ve made this for birthdays, brunches, and even Friday movie nights. Every single time, someone asks for the recipe. It’s got that wow factor without the stress. Plus, the banana and caramel combo feels like a hug in dessert form—comforting, familiar, but with a twist that’ll keep you coming back.
What Ingredients You Will Need
This caramel banana cream pie recipe uses everyday ingredients, most of which you probably have in your pantry. Each one plays its part in creating the ultimate flavor and texture. Here’s what you’ll need:
- For the Crust:
- Graham cracker crumbs (200g / 2 cups) – for a crunchy, buttery base
- Unsalted butter, melted (80g / 6 tbsp) – holds the crust together and adds richness
- Sugar (25g / 2 tbsp) – just enough to sweeten the crust
- Pinch of salt – balances the sweetness
- For the Caramel:
- Granulated sugar (150g / 3/4 cup) – for that classic caramel flavor
- Unsalted butter (60g / 4 tbsp) – makes the caramel silky
- Heavy cream (120ml / 1/2 cup) – gives the caramel its luscious texture
- Vanilla extract (1 tsp) – adds warmth and depth
- Pinch of salt – helps the caramel pop
- For the Filling:
- Whole milk (480ml / 2 cups) – for a creamy custard base
- Large egg yolks (4) – thickens and enriches the filling
- Cornstarch (30g / 1/4 cup) – to set the cream
- Granulated sugar (100g / 1/2 cup) – sweetens the filling just right
- Unsalted butter (30g / 2 tbsp) – smooths out the texture
- Vanilla extract (1 tsp) – for extra flavor
- Ripe bananas (3–4), sliced – the star of the show! Go for bananas with a few brown spots for max flavor.
- For the Topping:
- Heavy whipping cream (240ml / 1 cup) – for the fluffy crown
- Powdered sugar (30g / 1/4 cup) – just a touch of sweetness
- Vanilla extract (1/2 tsp) – rounds out the flavor
- Additional caramel sauce – for drizzling
- Extra banana slices – optional, for garnish
If you’re gluten-free, swap the graham crackers for gluten-free cookies. Dairy-free? Use coconut cream and vegan butter. I’ve used supermarket brands for most ingredients and never had an issue. For the bananas, riper is better—think lots of spots but not mushy. And if you’re short on time, store-bought caramel works in a pinch (though homemade really steals the show).
Equipment Needed
- 9-inch pie dish – glass or ceramic works well; I’ve even used metal in a pinch.
- Medium saucepan – for caramel and custard prep. Nonstick pans make cleaning easier.
- Mixing bowls – at least two; glass or metal are ideal for whipping cream.
- Whisk – a balloon whisk helps get the custard smooth.
- Rubber spatula – for folding and scraping every last bit.
- Electric mixer or stand mixer – for whipping cream. A hand whisk works if you’re feeling energetic.
- Measuring cups and spoons – accuracy matters with caramel!
- Plastic wrap – to cover the filling and prevent skin from forming.
- Sharp knife – for slicing bananas and serving pretty wedges.
I’ve made this pie with just a hand whisk and a regular saucepan—no fancy gadgets needed. If you don’t have a pie dish, use a cake pan; your pie will be a bit taller, but still delicious. To keep your mixer in great shape, wipe it down after use and avoid overloading the bowl. Budget tip: thrift stores are great for pie dishes and mixing bowls!
Preparation Method
- Make the Crust (10 minutes):
Combine graham cracker crumbs, melted butter, sugar, and salt in a mixing bowl. Stir until everything looks like wet sand.
Press the mixture evenly into the bottom and sides of your pie dish. Use the back of a spoon or a flat-bottomed glass for a smooth finish.
Bake at 350°F (175°C) for 8–10 minutes until lightly golden. Let cool completely before filling.
Tip: If the crust seems crumbly, add another tablespoon of melted butter. - Prepare the Caramel (15 minutes):
In a clean saucepan, cook sugar over medium heat, stirring gently until it melts and turns a deep amber (don’t walk away—it can burn fast!).
Add butter and stir until melted. Pour in heavy cream slowly (it’ll bubble up, so be careful).
Continue stirring until smooth. Remove from heat, stir in vanilla and salt. Let cool to room temperature.
If caramel seizes up, return to low heat and whisk until smooth again. - Make the Banana Cream Filling (20 minutes):
Whisk together milk, egg yolks, cornstarch, and sugar in a medium saucepan. Cook over medium heat, whisking constantly, until thickened—about 5–7 minutes.
Remove from heat, stir in butter and vanilla. Transfer to a bowl and cover with plastic wrap directly on the surface (no custard skin!).
Cool to room temperature.
Consistency check: The custard should hold its shape and not be runny. - Assemble the Pie (15 minutes):
Slice bananas (about 1/4-inch thick). Arrange a layer over the cooled crust.
Spread half of the caramel sauce over the bananas.
Pour and spread the custard filling evenly. Add another layer of bananas, then drizzle more caramel.
Chill for at least 3 hours (overnight is even better!).
Note: Chilling makes slicing easier and lets flavors meld. - Whip the Cream & Garnish (5 minutes):
Beat heavy cream, powdered sugar, and vanilla until stiff peaks form.
Spread or pipe over the chilled pie. Garnish with banana slices and extra caramel drizzle.
If cream starts to droop, whip a bit more until it holds shape. - Serve:
Slice with a sharp knife and serve cold. Wipe knife between slices for cleaner cuts.
Pie is best eaten within 48 hours, but I’ve never seen it last that long!
Cooking Tips & Techniques
Here’s the real scoop—making caramel can be tricky the first few times. I’ve burned a batch (or three) by getting distracted. The key is to keep your eyes on the pan and stir gently—don’t rush. If you end up with grainy caramel, try adding a splash of cream and gently reheating until smooth.
For the custard, sift the cornstarch with sugar before whisking in the milk and eggs. This stops any lumps from forming. If your custard won’t thicken, keep stirring on medium heat; it usually takes a few extra minutes to come together. If it gets too thick, whisk in a tablespoon of milk at a time until it’s silky.
I’ve learned that layering bananas and caramel is best done right before chilling. This keeps the bananas from browning and helps the caramel stay gooey. When whipping cream, make sure your bowl and beaters are cold—cream whips faster and stays firm longer. If you want bakery-style swirls, use a piping bag with a star tip.
Multitasking tip: While the crust bakes and cools, prep your caramel and slice bananas. This saves time and keeps things moving. For consistent results, always use ripe bananas and measure ingredients accurately, especially for the custard and caramel. If you’re making the pie ahead, add whipped cream right before serving for the freshest look.
And if you’re feeling bold, sprinkle a pinch of flaky sea salt over the caramel on top—trust me, it’s a game changer!
Variations & Adaptations
- Gluten-Free: Use gluten-free graham crackers or your favorite gluten-free cookie for the crust. I’ve had great results with almond flour bases, too.
- Dairy-Free: Sub coconut cream for the whipped topping and vegan butter/milk alternatives in the custard and caramel. The flavor is a little different—more tropical—but still delicious.
- Chocolate Twist: Add a layer of melted chocolate or chocolate chips between the bananas and custard for a decadent touch. My nephew swears by this version!
If you’re making this pie in winter, swap bananas for caramelized apples or pears. For a nutty kick, sprinkle toasted pecans or walnuts on top of the whipped cream. Allergic to eggs? Use a cornstarch-only custard recipe—just increase the cornstarch to 1/3 cup and skip the yolks.
One variation I tried last summer: adding a dollop of peanut butter to the caramel sauce. It was salty, sweet, and totally addictive. This caramel banana cream pie recipe is super adaptable—don’t be afraid to put your own spin on it!
Serving & Storage Suggestions
This pie is best served chilled—straight from the fridge. Slice with a sharp knife and wipe between cuts for picture-perfect wedges. For parties, I love garnishing each slice with a drizzle of extra caramel and a fresh banana coin.
Pair with a hot cup of coffee or a scoop of vanilla ice cream if you’re feeling extra indulgent. It also goes well with a glass of cold milk (classic combo, right?). If you want to make it a real showstopper, serve with a sprinkle of toasted coconut or chocolate shavings.
To store, cover the pie tightly with plastic wrap and refrigerate for up to 3 days. The bananas stay fresh under the custard, and the crust holds up well. For longer storage, freeze individual slices on a baking sheet, then wrap and store for up to a month. Thaw overnight in the fridge and add whipped cream before serving.
Reheat is not recommended—this pie is meant to be enjoyed cold. If the whipped cream deflates, whip up a fresh batch and top just before eating. Flavors deepen after a day, so making ahead is totally fine!
Nutritional Information & Benefits
Each slice (based on 8 servings) of caramel banana cream pie has roughly:
- Calories: 390
- Fat: 23g
- Carbs: 45g
- Protein: 4g
Bananas offer potassium, vitamin B6, and fiber—so you get a bit of nutrition in every bite. The homemade caramel keeps added sugars under control compared to store-bought pies. If you use low-fat milk or dairy-free options, the fat content drops a bit. For gluten-free and dairy-free diets, substitutions work well and don’t sacrifice flavor.
Potential allergens: wheat (in crust), dairy, eggs. Always check labels if serving guests! Personally, I love that this pie satisfies my sweet tooth without being heavy or overly rich. Dessert can be a treat and still fit into a balanced lifestyle.
Conclusion
This caramel banana cream pie recipe is more than just dessert—it’s a little slice of happiness on a plate. With its lush layers, homemade caramel, and creamy filling, it’s the kind of treat you’ll want to make again and again. Whether you’re celebrating a special occasion or just craving something sweet, this pie always delivers.
Feel free to mix things up: switch out the crust, add more bananas, or try a chocolate drizzle. The recipe is forgiving, and you can make it your own. I make this pie whenever I need a pick-me-up or want to wow my friends—there’s just something about that caramel-banana combo that gets everyone smiling.
If you give this recipe a try, I’d love to hear how it turned out! Drop a comment below, share your creative twists, or tag me in your pie pics on Pinterest. Here’s to sweet moments, homemade treats, and pie that brings people together!
FAQs
Can I use store-bought caramel sauce?
Absolutely! While homemade caramel has a richer flavor, store-bought works in a pinch. Just warm it slightly so it spreads easily over the bananas and custard.
How do I keep the bananas from browning?
Layer the bananas under the custard and caramel to keep them fresh. You can also toss slices in a little lemon juice before assembling—just don’t overdo it or it’ll taste tart.
Can I make the pie ahead of time?
Yes! This pie actually tastes better after chilling overnight. Just add the whipped cream topping right before serving for the fluffiest texture.
Is there a nut-free version?
Sure thing. The base recipe doesn’t use nuts, but if you’re adding toppings, skip anything nutty and go for chocolate shavings or extra caramel drizzle instead.
Can I freeze leftover pie?
Definitely. Freeze individual slices on a tray, then wrap and store for up to a month. Thaw in the refrigerator and add fresh whipped cream before serving for best texture.
Pin This Recipe!
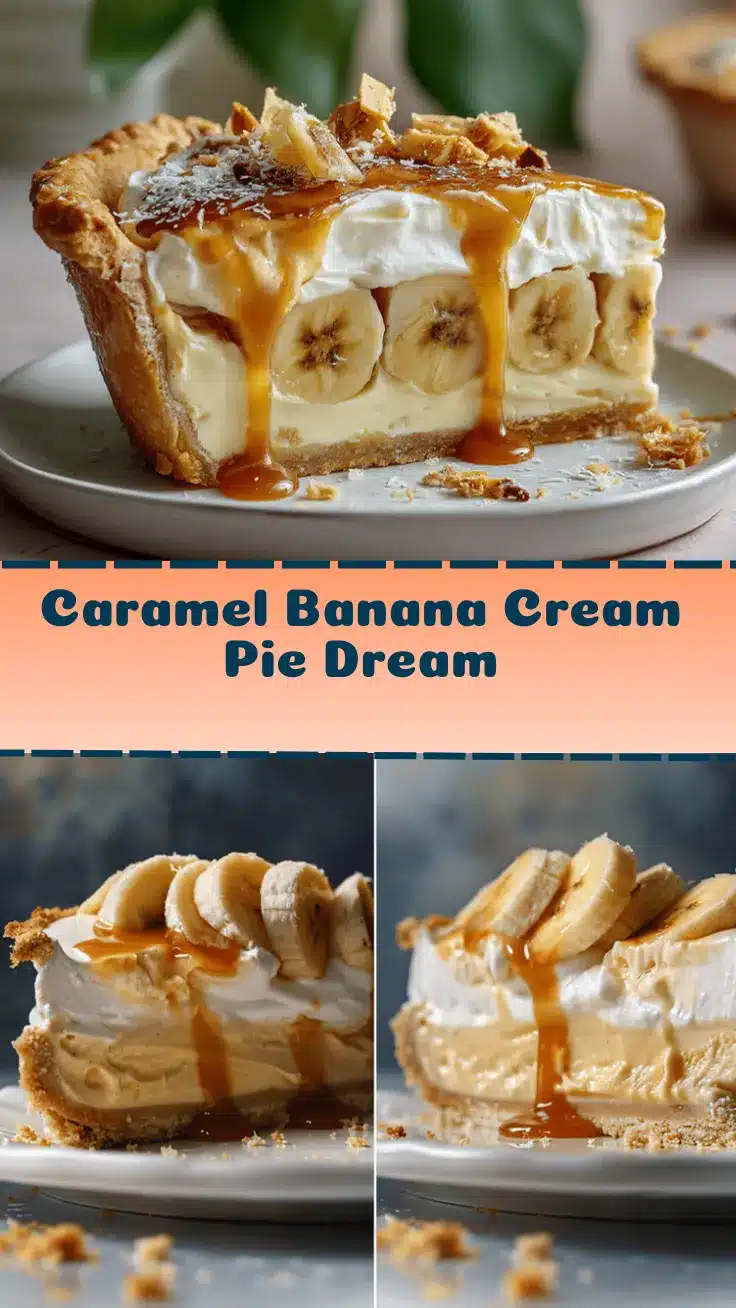
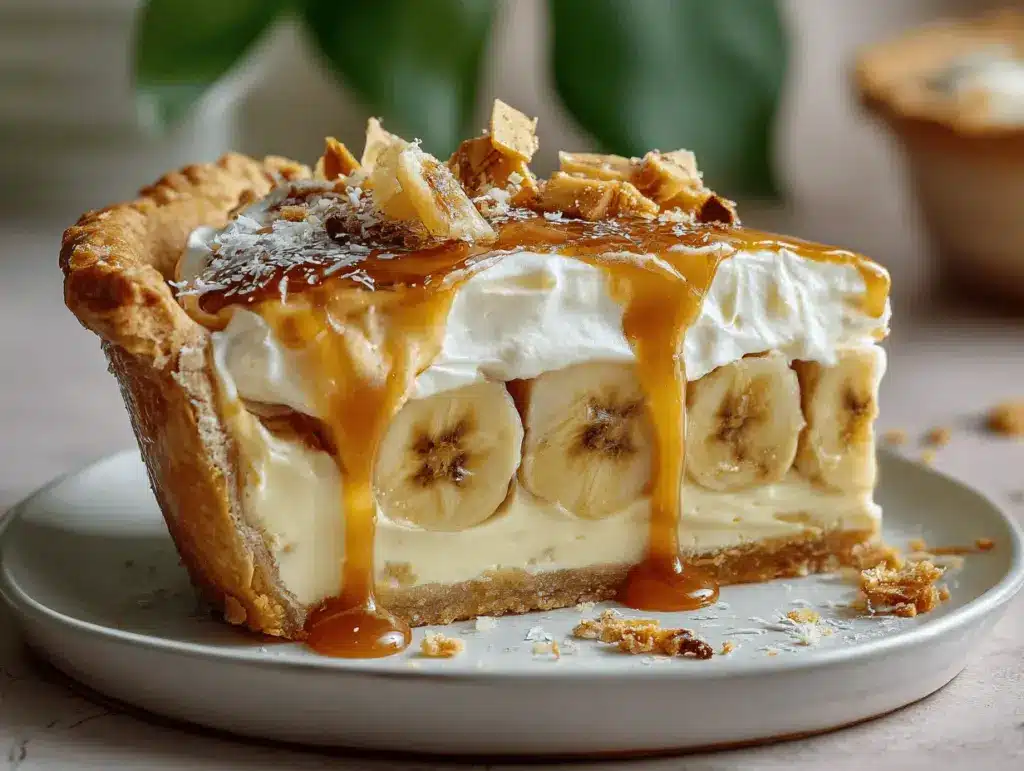
Caramel Banana Cream Pie
This easy homemade caramel banana cream pie features layers of ripe bananas, silky pastry cream, and a rich caramel drizzle in a buttery graham cracker crust. Perfect for parties or a comforting treat, it’s a crowd-pleasing dessert that looks impressive but is simple to make.
- Prep Time: 30 minutes
- Cook Time: 25 minutes
- Total Time: 55 minutes (plus 3 hours chilling)
- Yield: 8 servings 1x
- Category: Dessert
- Cuisine: American
Ingredients
- 2 cups graham cracker crumbs (200g)
- 6 tablespoons unsalted butter, melted (80g)
- 2 tablespoons sugar (25g)
- Pinch of salt
- 3/4 cup granulated sugar (150g)
- 4 tablespoons unsalted butter (60g)
- 1/2 cup heavy cream (120ml)
- 1 teaspoon vanilla extract
- Pinch of salt
- 2 cups whole milk (480ml)
- 4 large egg yolks
- 1/4 cup cornstarch (30g)
- 1/2 cup granulated sugar (100g)
- 2 tablespoons unsalted butter (30g)
- 1 teaspoon vanilla extract
- 3–4 ripe bananas, sliced
- 1 cup heavy whipping cream (240ml)
- 1/4 cup powdered sugar (30g)
- 1/2 teaspoon vanilla extract
- Additional caramel sauce, for drizzling
- Extra banana slices, for garnish (optional)
Instructions
- Preheat oven to 350°F (175°C).
- Combine graham cracker crumbs, melted butter, sugar, and salt in a mixing bowl. Stir until the mixture resembles wet sand.
- Press the mixture evenly into the bottom and sides of a 9-inch pie dish. Use the back of a spoon or a flat-bottomed glass to smooth.
- Bake for 8–10 minutes until lightly golden. Let cool completely.
- For the caramel, cook granulated sugar over medium heat in a clean saucepan, stirring gently until melted and deep amber in color.
- Add butter and stir until melted. Slowly pour in heavy cream (it will bubble), stirring until smooth.
- Remove from heat, stir in vanilla and salt. Let cool to room temperature.
- For the filling, whisk together milk, egg yolks, cornstarch, and sugar in a medium saucepan. Cook over medium heat, whisking constantly, until thickened (about 5–7 minutes).
- Remove from heat, stir in butter and vanilla. Transfer to a bowl and cover with plastic wrap directly on the surface. Cool to room temperature.
- Slice bananas (about 1/4-inch thick). Arrange a layer over the cooled crust.
- Spread half of the caramel sauce over the bananas.
- Pour and spread the custard filling evenly. Add another layer of bananas, then drizzle more caramel.
- Chill the pie for at least 3 hours (overnight is better).
- Beat heavy cream, powdered sugar, and vanilla until stiff peaks form.
- Spread or pipe whipped cream over the chilled pie. Garnish with banana slices and extra caramel drizzle.
- Slice with a sharp knife and serve cold. Wipe knife between slices for cleaner cuts.
Notes
For best results, use ripe bananas with brown spots. Chill the pie thoroughly before serving for clean slices and melded flavors. If making ahead, add whipped cream just before serving. For gluten-free, use gluten-free graham crackers; for dairy-free, substitute coconut cream and vegan butter. Sprinkle flaky sea salt on top for a flavor boost.
Nutrition
- Serving Size: 1 slice (1/8 of pie)
- Calories: 390
- Sugar: 28
- Sodium: 210
- Fat: 23
- Saturated Fat: 14
- Carbohydrates: 45
- Fiber: 2
- Protein: 4
Keywords: caramel banana cream pie, banana cream pie, caramel pie, easy dessert, party dessert, homemade pie, banana dessert, cream pie, graham cracker crust, whipped cream pie