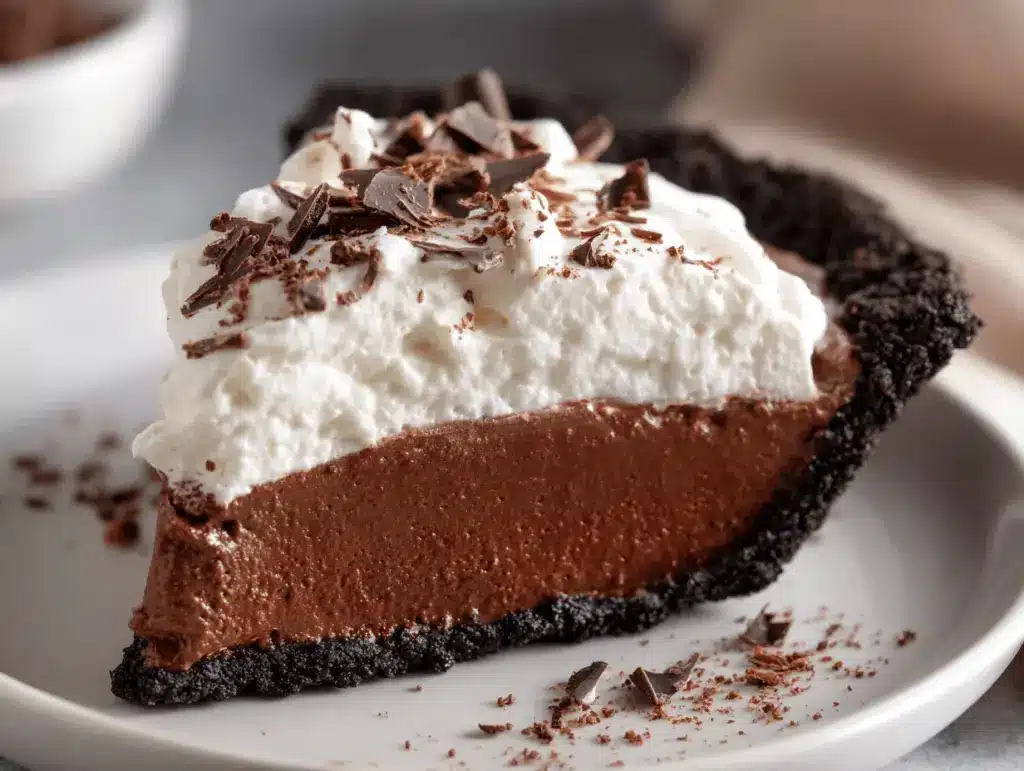
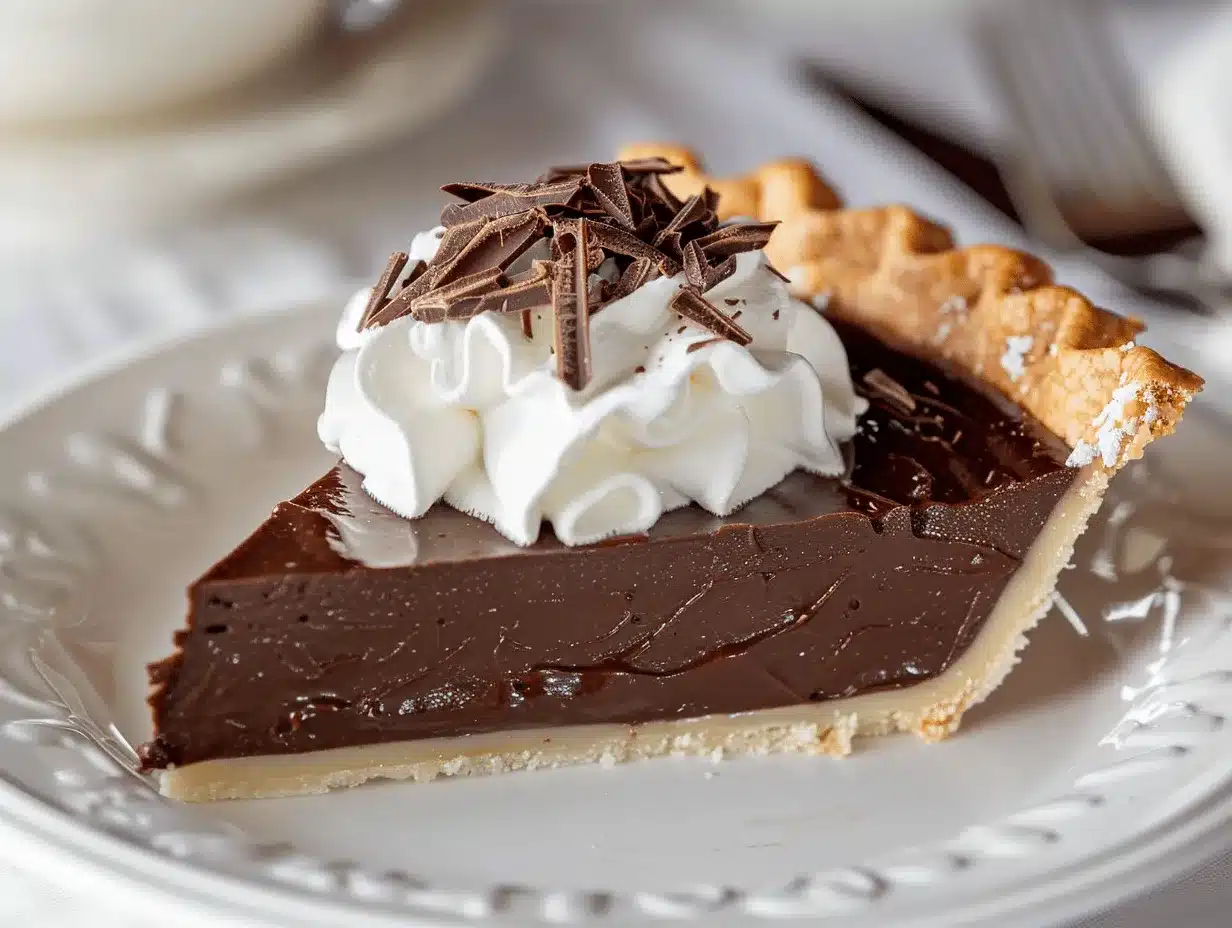
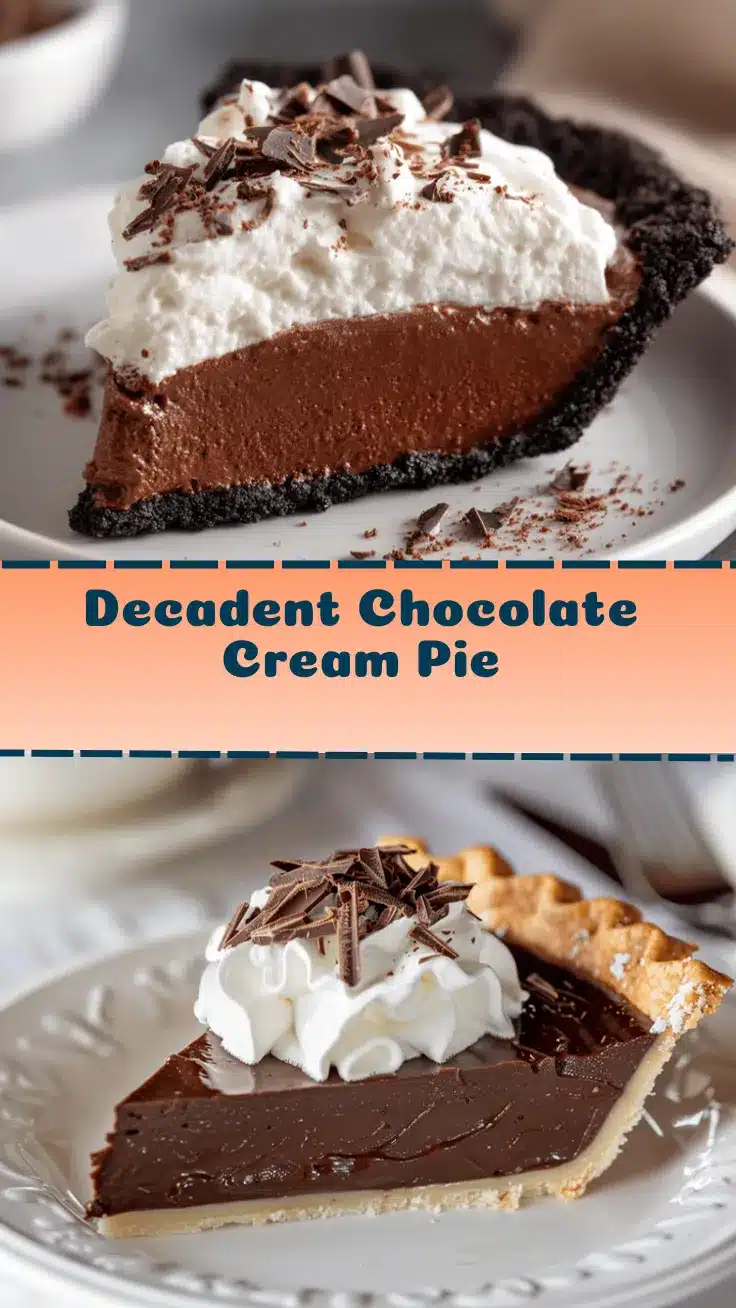
The first time I tasted chocolate cream pie, it felt like a revelation—imagine a velvety-smooth chocolate filling nestled inside a flaky crust, crowned with pillowy whipped cream. The aroma alone is enough to make you close your eyes and smile. I still remember sneaking a slice right out of the fridge late at night, spoon in hand, feeling like I’d discovered dessert gold!
Chocolate cream pie has become my go-to whenever I want to impress friends or treat myself after a long week. Honestly, there’s something magical about the contrast between the rich, silky chocolate and the light, airy topping. It’s the sort of dessert that feels fancy but is easy enough for a weeknight (yes, really!).
This chocolate cream pie recipe is a result of dozens of tweaks, taste tests, and a few pie-related mishaps (let’s just say, runny filling is now a distant memory). Whether you’re new to baking or a pie enthusiast, you’ll love how simple ingredients transform into something so luxurious. If you crave a dessert that’s both comforting and show-stopping, this one checks all the boxes.
The best part? It’s perfect for all kinds of occasions—family gatherings, potlucks, or just that random Tuesday when you’re craving something sweet. As someone who’s somewhat obsessed with chocolate desserts, I can promise that this chocolate cream pie delivers big on flavor, texture, and sheer satisfaction. So grab your apron; let’s make dessert memories together!
Why You’ll Love This Recipe
If you’re wondering what makes this chocolate cream pie recipe stand out, let me share a few secrets from my kitchen (and a bunch of happy taste testers):
- Quick & Easy: You can whip up this pie in under an hour (plus chill time), making it ideal for last-minute cravings or weekday celebrations.
- Simple Ingredients: No need for exotic chocolate or specialty thickeners—the basics shine here, and you probably have everything you need.
- Perfect for Occasions: This pie is a hit at brunch, dinner parties, birthdays, and even holiday gatherings. It’s always the first dessert to disappear!
- Crowd-Pleaser: Kids and adults both go wild for the silky chocolate filling and the billowy whipped cream. Honestly, I’ve never had leftovers.
- Unbelievably Delicious: The filling is rich but not heavy, and the flaky crust provides just the right contrast. Each bite is pure comfort food.
Unlike some chocolate pie recipes that end up dense or overly sweet, this version uses a blend of bittersweet and semisweet chocolate for a balanced flavor. The filling gets its silky texture from gently cooking the custard and straining it before pouring into the crust. This step makes all the difference, and you’ll notice it right away.
What really sets this pie apart is the way every layer complements the next. The crust is crisp, the chocolate filling is creamy, and the whipped topping is cloud-like. It’s the kind of dessert that makes everyone pause and savor the moment. I’ve made dozens of chocolate pies over the years, and this is the one my family always requests for special occasions (and sometimes just because!).
If you’re after a chocolate cream pie that’s silky, rich, and decadent without being fussy, this is it! Whether you’re a novice or a baking pro, you’ll love how approachable and rewarding this recipe is.
What Ingredients You Will Need
This chocolate cream pie uses straightforward ingredients to create a knockout dessert. You won’t need anything fancy—just a few pantry staples and some good chocolate.
- For the Pie Crust:
- 1 9-inch pie crust, baked and cooled (homemade or store-bought)
- For the Chocolate Filling:
- 2 cups (480 ml) whole milk
- 1/2 cup (120 ml) heavy cream
- 3/4 cup (150 g) granulated sugar
- 1/4 cup (30 g) unsweetened cocoa powder (Dutch-process preferred for deeper flavor)
- 1/4 cup (30 g) cornstarch
- 1/4 teaspoon salt
- 4 large egg yolks
- 4 ounces (115 g) bittersweet chocolate, finely chopped (I love Ghirardelli or Valrhona)
- 2 ounces (60 g) semisweet chocolate, finely chopped
- 2 tablespoons (28 g) unsalted butter, cut into cubes
- 1 teaspoon pure vanilla extract
- For the Whipped Cream Topping:
- 1 cup (240 ml) heavy whipping cream
- 2 tablespoons (24 g) powdered sugar
- 1/2 teaspoon vanilla extract
- Chocolate shavings or cocoa powder, for garnish (optional but highly recommended)
Ingredient Notes and Swaps:
- If you’re gluten-free, swap the pie crust for your favorite GF version (I’ve had great luck with almond flour crusts).
- For a dairy-free chocolate cream pie, use coconut milk and coconut cream in place of milk and heavy cream, and a vegan butter substitute.
- If you prefer a sweeter filling, use all semisweet chocolate instead of bittersweet.
- Egg yolks are crucial for setting the custard—don’t skip them! You can use pasture-raised eggs for a richer flavor.
- Powdered sugar in the whipped cream helps stabilize it for longer-lasting peaks.
I’ve tested this recipe with several brands of chocolate, and honestly, the quality of chocolate makes a difference. Go for real chocolate bars, not chips, if possible—they melt smoother and taste richer.
Equipment Needed
- 9-inch Pie Pan: Glass, ceramic, or metal—any works! I prefer glass so I can check the crust’s browning.
- Medium Saucepan: For cooking the custard filling. Stainless steel is easiest to clean.
- Heatproof Whisk: Crucial for stirring custard and avoiding lumps. Silicone whisks are gentle on nonstick pans.
- Fine-Mesh Sieve: For straining the chocolate filling, making it ultra-smooth.
- Mixing Bowls: Two or three for prepping ingredients and whipping cream.
- Electric Mixer (Hand or Stand): For whipping the cream topping to soft, billowy peaks.
- Spatula: Silicone spatulas work best for scraping every last bit of filling.
- Plastic Wrap: To cover the pie and prevent skin from forming on the filling.
If you don’t have a fine-mesh sieve, you can use cheesecloth or skip it (though your filling may be slightly less silky). For whipping cream, a whisk works if you have strong arms, but an electric mixer saves time! Pie pans can be budget-friendly—I’ve used dollar-store ones with great results.
Preparation Method
- Bake the Pie Crust: Preheat the oven to 375°F (190°C). If using a homemade crust, blind-bake with pie weights for 20 minutes, then remove weights and bake another 10–15 minutes until golden. Cool completely—this prevents a soggy pie bottom.
- Make the Chocolate Filling: In a medium saucepan, whisk together sugar, cocoa powder, cornstarch, and salt. Add milk and cream, whisking to combine. Place pan over medium heat and bring to a gentle simmer, whisking constantly (about 4–5 minutes). You want no lumps!
- Temper the Egg Yolks: In a bowl, whisk egg yolks. Slowly pour about 1/2 cup (120 ml) of the hot milk mixture into yolks, whisking to prevent curdling. Pour yolks back into the saucepan and return to medium heat.
- Cook Until Thickened: Continue whisking over medium heat until mixture thickens and bubbles (about 2–3 minutes). It should coat the back of a spoon. If you see any lumps, don’t panic—straining will fix it!
- Add Chocolate and Butter: Remove from heat. Add chopped bittersweet and semisweet chocolate, butter, and vanilla. Whisk until completely smooth and glossy.
- Strain the Filling: Pour mixture through a fine-mesh sieve into a clean bowl—this step makes the filling extra silky.
- Fill the Pie Shell: Pour chocolate filling into cooled pie crust. Smooth the top with a spatula. Press plastic wrap directly on the surface to prevent skin from forming.
- Chill: Refrigerate for at least 4 hours (overnight is best). The filling will set up firm but creamy.
- Make Whipped Cream: In a cold bowl, whip heavy cream, powdered sugar, and vanilla until soft peaks form (about 2 minutes with electric mixer).
- Top and Garnish: Remove plastic wrap from pie. Heap whipped cream onto the pie, swirling with a spoon. Sprinkle with chocolate shavings or dust with cocoa powder.
- Serve: Slice with a sharp knife, wiping between cuts for clean slices. Serve chilled!
If your filling seems runny, chill longer—sometimes it just needs more time. If it’s too thick, you may have overcooked; add a splash of milk and whisk gently. The pie is best sliced cold, but I won’t judge if you sneak a warm bite!
Efficiency tip: Prep the crust and filling the night before, then whip cream fresh before serving. The pie sets better overnight, so patience pays off!
Cooking Tips & Techniques
Making a chocolate cream pie isn’t hard, but there are a few tricks I’ve learned from kitchen mishaps and pie successes:
- Stir Constantly: When cooking the custard, don’t walk away! Stirring prevents lumps and keeps the eggs from scrambling.
- Temper Eggs Slowly: Pour hot milk mixture slowly into yolks, whisking all the while. Rushing can lead to scrambled eggs—been there, done that.
- Strain for Silky Texture: Even if you think your filling looks smooth, straining removes tiny bits and guarantees that classic silkiness.
- Cool Pie Crust Completely: Filling a warm crust can cause condensation and soggy bottoms. Always let it cool fully.
- Whipped Cream Timing: Whip cream just before serving for fluffiest results. Overwhipping can make it grainy; stop at soft peaks.
- Chocolate Quality: Use good chocolate bars, not chips. Chips contain stabilizers that can affect texture.
- Troubleshooting: If your filling splits or looks oily, it’s usually overheated—try whisking in a splash of cold milk to bring it back together.
One time, I got distracted by a text and ended up with scrambled bits in my filling. Straining saved it! If your filling ever seems dull, a bit of extra butter can restore glossiness.
Multitasking tip: Bake the crust while prepping filling ingredients. Clean-as-you-go keeps things stress-free and helps prevent forgotten steps.
Consistency is all about patience and attention. Take your time, trust your senses (look for glossy, thick filling), and don’t rush the chilling stage. That’s where the magic happens!
Variations & Adaptations
Chocolate cream pie is a classic, but you can definitely make it your own! Here are some fun and tasty twists:
- Dietary Variation: For a dairy-free version, use coconut milk and coconut cream. Vegan butter and dairy-free chocolate bars work surprisingly well!
- Seasonal Variation: In summer, top with fresh berries (strawberries, raspberries, or blueberries) for a bright, fruity finish.
- Flavor Boost: Add 1 tablespoon espresso powder to the filling for mocha chocolate cream pie—seriously decadent.
- Crust Swaps: Use an Oreo or graham cracker crust for extra chocolate crunch. Gluten-free cookies or almond flour crusts are great for allergies.
- Cooking Methods: If you don’t want to bake, use a no-bake cookie crust and set the filling in the fridge.
For nut allergies, skip nut-based crusts and be sure your chocolate is allergy-safe. If you like spice, a pinch of cinnamon or chili powder gives a subtle kick.
My personal favorite adaptation? Swapping the whipped cream for marshmallow fluff and torching the top—like a s’mores pie! You can get creative and customize every layer to suit your taste.
Serving & Storage Suggestions
Serving: Chocolate cream pie is best served chilled straight from the fridge. Slice with a sharp knife and wipe between cuts for neat slices. If you want to get fancy, pipe whipped cream or sprinkle with chocolate curls for a Pinterest-worthy look.
Pairings: This pie pairs beautifully with coffee, espresso, or a glass of cold milk. For a party, serve alongside fresh berries or a scoop of vanilla ice cream.
Storage: Cover leftover pie tightly with plastic wrap or foil and refrigerate for up to 3 days. The whipped cream may deflate a bit, but the filling stays creamy. For longer storage, skip the topping, wrap the pie well, and freeze (up to 2 months). Thaw overnight in the fridge and add whipped cream before serving.
Reheating: Not recommended, as the filling may separate. Enjoy cold! If you like a slightly softer texture, let slices sit at room temperature for 10–15 minutes before serving.
Honestly, the flavors deepen after a day in the fridge—making leftovers (if you have any) even more irresistible.
Nutritional Information & Benefits
This chocolate cream pie recipe yields about 8 servings. Each slice (with whipped cream) contains approximately:
- Calories: 410
- Fat: 26g
- Carbohydrates: 42g
- Protein: 5g
- Sugar: 31g
Health Highlights: Cocoa powder and real chocolate deliver antioxidants, while eggs add protein. Using whole milk and cream makes the filling rich, but you can lighten it with lower-fat milk if you prefer. For gluten-free diets, opt for a GF crust. If you’re watching carbs, try almond flour crust and dark chocolate for lower sugar.
Allergens: Contains dairy, eggs, and gluten (unless using GF crust). Always check labels if serving to guests with allergies.
From a wellness perspective, enjoying a homemade dessert like this chocolate cream pie in moderation is all about balance—sometimes you just need that slice of happiness!
Conclusion
Chocolate cream pie isn’t just dessert—it’s a slice of comfort, nostalgia, and pure joy. Every bite is creamy, chocolatey, and just the right amount of decadent. Whether you’re making it for a special occasion or just to treat yourself, this recipe is worth every minute.
Feel free to tweak and adapt based on your taste—add berries, switch out the crust, or make it dairy-free. That’s the beauty of homemade pie! Personally, I love the simple, classic version best (and I always sneak a second slice).
If you try this chocolate cream pie recipe, I’d love to hear about your experience. Leave a comment, share your photos, or let me know your favorite twist. Here’s to more sweet moments and chocolatey smiles—happy baking!
FAQs
Can I make chocolate cream pie ahead of time?
Yes! You can make the pie a day ahead and keep it chilled in the fridge. Add whipped cream just before serving for best texture.
How do I prevent lumps in the filling?
Whisk constantly while cooking and strain the filling through a fine-mesh sieve for extra smoothness.
Can I use dark chocolate only?
Absolutely. Using all dark chocolate gives a more intense, less sweet flavor. Adjust sugar to taste if you do.
What if my pie filling doesn’t set?
Chill it longer—sometimes it takes up to 6 hours. If it’s still too soft, you may need to increase the cornstarch slightly next time.
Is this recipe gluten-free?
The filling is naturally gluten-free, but you’ll need a gluten-free crust to make the whole pie GF.
Pin This Recipe!
Chocolate Cream Pie
This easy, decadent chocolate cream pie features a silky-smooth chocolate custard filling nestled in a flaky crust and topped with billowy whipped cream. It’s a show-stopping dessert that’s simple enough for a weeknight and perfect for any occasion.
- Prep Time: 20 minutes
- Cook Time: 30 minutes
- Total Time: 4 hours 50 minutes
- Yield: 8 servings 1x
- Category: Dessert
- Cuisine: American
Ingredients
- 1 9-inch pie crust, baked and cooled (homemade or store-bought)
- 2 cups whole milk
- 1/2 cup heavy cream
- 3/4 cup granulated sugar
- 1/4 cup unsweetened cocoa powder (Dutch-process preferred)
- 1/4 cup cornstarch
- 1/4 teaspoon salt
- 4 large egg yolks
- 4 ounces bittersweet chocolate, finely chopped
- 2 ounces semisweet chocolate, finely chopped
- 2 tablespoons unsalted butter, cut into cubes
- 1 teaspoon pure vanilla extract
- 1 cup heavy whipping cream
- 2 tablespoons powdered sugar
- 1/2 teaspoon vanilla extract
- Chocolate shavings or cocoa powder, for garnish (optional)
Instructions
- Preheat oven to 375°F (190°C). If using a homemade crust, blind-bake with pie weights for 20 minutes, then remove weights and bake another 10–15 minutes until golden. Cool completely.
- In a medium saucepan, whisk together sugar, cocoa powder, cornstarch, and salt. Add milk and cream, whisking to combine. Place pan over medium heat and bring to a gentle simmer, whisking constantly (about 4–5 minutes) until no lumps remain.
- In a bowl, whisk egg yolks. Slowly pour about 1/2 cup of the hot milk mixture into yolks, whisking to prevent curdling. Pour yolks back into the saucepan and return to medium heat.
- Continue whisking over medium heat until mixture thickens and bubbles (about 2–3 minutes). It should coat the back of a spoon.
- Remove from heat. Add chopped bittersweet and semisweet chocolate, butter, and vanilla. Whisk until completely smooth and glossy.
- Pour mixture through a fine-mesh sieve into a clean bowl to strain for extra silkiness.
- Pour chocolate filling into cooled pie crust. Smooth the top with a spatula. Press plastic wrap directly on the surface to prevent skin from forming.
- Refrigerate for at least 4 hours (overnight is best) until the filling is set.
- In a cold bowl, whip heavy cream, powdered sugar, and vanilla until soft peaks form (about 2 minutes with electric mixer).
- Remove plastic wrap from pie. Heap whipped cream onto the pie, swirling with a spoon. Sprinkle with chocolate shavings or dust with cocoa powder.
- Slice with a sharp knife, wiping between cuts for clean slices. Serve chilled.
Notes
For best results, use high-quality chocolate bars instead of chips. Straining the filling ensures a silky texture. Chill the pie overnight for optimal set. For gluten-free or dairy-free adaptations, swap the crust and dairy ingredients as needed. Whip cream just before serving for fluffiest results. If the filling is runny, chill longer; if too thick, add a splash of milk and whisk gently.
Nutrition
- Serving Size: 1 slice (1/8 of pie)
- Calories: 410
- Sugar: 31
- Sodium: 210
- Fat: 26
- Saturated Fat: 15
- Carbohydrates: 42
- Fiber: 3
- Protein: 5
Keywords: chocolate cream pie, chocolate pie, easy dessert, custard pie, whipped cream pie, holiday dessert, potluck dessert, classic pie, creamy chocolate pie, pie recipe