The moment the torch hits the sugar, and that golden crackly top forms—oh, it’s magic! Creme brulee cheesecake bars aren’t just a dessert; they’re an experience. The first time I made these, my kitchen smelled like a French bakery and my family hovered, spoons at the ready. If you’re chasing a treat that’s part creamy cheesecake, part caramelized sugar dream, and totally unforgettable, you’re in the right place. I’ve baked classic cheesecakes for years, but fusing them with creme brulee? Game changer.
I stumbled onto this idea one holiday when my cousin asked for something “fancy, but not fussy.” Honestly, these bars hit that sweet spot—elegant enough for a dinner party, easy enough for a Wednesday night. The best part? You get all that lush cheesecake flavor with a satisfying crack of brulee sugar, and they’re cut into bars for easy sharing (or, you know, not sharing at all). If you love desserts that look impressive and taste even better, creme brulee cheesecake bars are about to be your new favorite.
I’ve tested this recipe a bunch—with different crusts, sugar ratios, and brulee techniques. Each time, these bars come out creamy, decadent, and just a little indulgent. Whether you’re baking for a celebration, a cozy night in, or just because, this recipe is worth every minute. Creme brulee cheesecake bars are perfect for Pinterest-worthy dessert spreads, but honestly, they’re even better eaten straight from the pan with a fork. Let’s get started!
Why You’ll Love This Recipe
- Quick & Easy: These creme brulee cheesecake bars take less time than a full-sized cheesecake, but deliver all the wow factor. Bake, chill, brulee—done!
- Simple Ingredients: No hunting for special items. You probably have most of these in your fridge and pantry (cream cheese, eggs, sugar, vanilla, graham crackers).
- Perfect for Any Occasion: Ideal for family gatherings, birthdays, or just treating yourself after a long week. The bars are easy to transport and serve.
- Crowd-Pleaser: Whenever I bring these to parties, everyone asks for the recipe. Kids love the creamy filling, adults go wild for that burnt sugar topping.
- Unbelievably Delicious: The combo of creamy, tangy cheesecake with that sweet, crispy brulee layer is just unbeatable. Every bite has crunch and silkiness.
What sets these creme brulee cheesecake bars apart is the brulee finish—most cheesecake bars skip it, but here, you get the full crackly sugar experience. I blend the cream cheese until super smooth, so the texture is flawless. If you’ve ever struggled with dense or cracked cheesecake, this method is forgiving and fuss-free.
This dessert isn’t just good—it’s the kind that makes people close their eyes and sigh after the first bite. It’s comfort food with a touch of luxury. You get all the flavors of classic creme brulee and cheesecake, but without the stress of water baths or complicated steps. Whether you want to impress your guests or just treat yourself, creme brulee cheesecake bars deliver every time.
I’ve baked these for picky eaters, dessert snobs, and my own family (who are brutally honest!), and these bars always pass the test. Easy, luxurious, and totally crave-worthy—what’s not to love?
What Ingredients You Will Need
This recipe uses simple, wholesome ingredients to deliver bold flavor and that signature crackly top. Most of these are pantry staples, and you can swap a few things if needed. Here’s what you’ll need for the creme brulee cheesecake bars:
- For the Crust:
- Graham cracker crumbs — about 1 1/2 cups (150g)
- Granulated sugar — 2 tablespoons (25g)
- Unsalted butter, melted — 1/2 cup (115g)
- Pinch of salt — optional, but adds balance
- For the Cheesecake Filling:
- Cream cheese, softened — 16 ounces (450g), full-fat for best texture
- Granulated sugar — 3/4 cup (150g)
- Large eggs — 2, room temperature
- Sour cream — 1/2 cup (120g), adds tang and creaminess
- Heavy cream — 1/4 cup (60ml)
- Pure vanilla extract — 2 teaspoons (10ml)
- Pinch of salt — optional, for balance
- For the Brulee Topping:
- Granulated sugar — 1/4 cup (50g), for caramelizing
Ingredient Tips:
- Use brick-style cream cheese for best results (the tubs make the filling too soft).
- Graham crackers can be swapped for digestive biscuits or vanilla wafers.
- If you’re out of sour cream, plain Greek yogurt works (I’ve tried both—no one notices the difference).
- Heavy cream adds a silky texture, but you can sub with half-and-half or even a splash of milk if needed.
- For the brulee, regular granulated sugar works—no need for specialty sugars.
Substitution Guidance:
- Gluten-free graham crackers for a GF crust.
- Swap dairy-free cream cheese and sour cream for a lactose-free version (I’ve tested with Kite Hill—solid results!).
- Add a touch of lemon zest for a citrus twist.
I usually grab Philadelphia cream cheese and Challenge butter, but any trusted brand will do. These ingredients are easy to find, and you can personalize them a bit to match dietary needs or what’s in your pantry. If you want to get creative, some folks add a sprinkle of cinnamon to the crust—totally optional!
Equipment Needed
Good news—no fancy gadgets required! Here’s what you’ll need to make creme brulee cheesecake bars:
- 8×8-inch (20x20cm) baking pan — lined with parchment for easy removal
- Mixing bowls — at least two
- Hand mixer or stand mixer — for smooth cheesecake filling (whisk by hand in a pinch, but it’s a workout!)
- Measuring cups and spoons — accuracy matters for cheesecake
- Rubber spatula — helps scrape down the bowl
- Kitchen torch — for brulee topping (if you don’t have one, see tips below)
- Fine mesh sieve — optional, for dusting sugar evenly
Alternatives: No kitchen torch? You can use your oven’s broiler (keep a close eye!). I’ve tried both—torch gives more control. Parchment paper makes cleanup a breeze and guarantees those bars pop right out. If you only have a 9×9-inch pan, just watch baking time and adjust a few minutes less.
Maintenance Tips: If you use a torch, let it cool before cleaning. I keep my mixer attachments in a basket so I don’t lose them (learned that one the hard way!). Budget-friendly option: A sturdy hand mixer does the trick and costs less than a stand mixer—mine is still kicking after years of cheesecakes.
Preparation Method
- Prep Your Pan: Line your 8×8-inch (20x20cm) baking pan with parchment paper, leaving an overhang for easy removal. Preheat your oven to 325°F (163°C).
- Make the Crust: In a bowl, combine 1 1/2 cups (150g) graham cracker crumbs, 2 tablespoons (25g) sugar, and a pinch of salt. Pour in 1/2 cup (115g) melted butter and stir until evenly moistened. Press the mixture firmly into the bottom of your pan—use the bottom of a measuring cup for a smooth finish. Bake crust for 8 minutes, then let cool.
- Prepare the Filling: In a large mixing bowl, beat 16 ounces (450g) cream cheese until smooth and creamy. Add 3/4 cup (150g) sugar and mix until combined. Add 2 eggs, one at a time, mixing gently after each. Blend in 1/2 cup (120g) sour cream, 1/4 cup (60ml) heavy cream, and 2 teaspoons (10ml) vanilla extract. Add a pinch of salt if desired. Beat until just combined—don’t overmix (this prevents cracks).
- Pour & Bake: Spread the cheesecake filling evenly over the cooled crust. Tap the pan gently on the counter to release air bubbles. Bake for 35-40 minutes, or until the center is set but still slightly wobbly. If using a 9×9-inch pan, check at 32 minutes. The bars should not brown—just set.
- Cool & Chill: Remove from oven and cool on a wire rack for 1 hour. Then cover and refrigerate for at least 3 hours (overnight is best for flavor and texture).
- Slice: Once fully chilled, lift the bars out using the parchment overhang. Slice into 16 squares (or 12 for larger portions). Wipe the knife between cuts for clean edges.
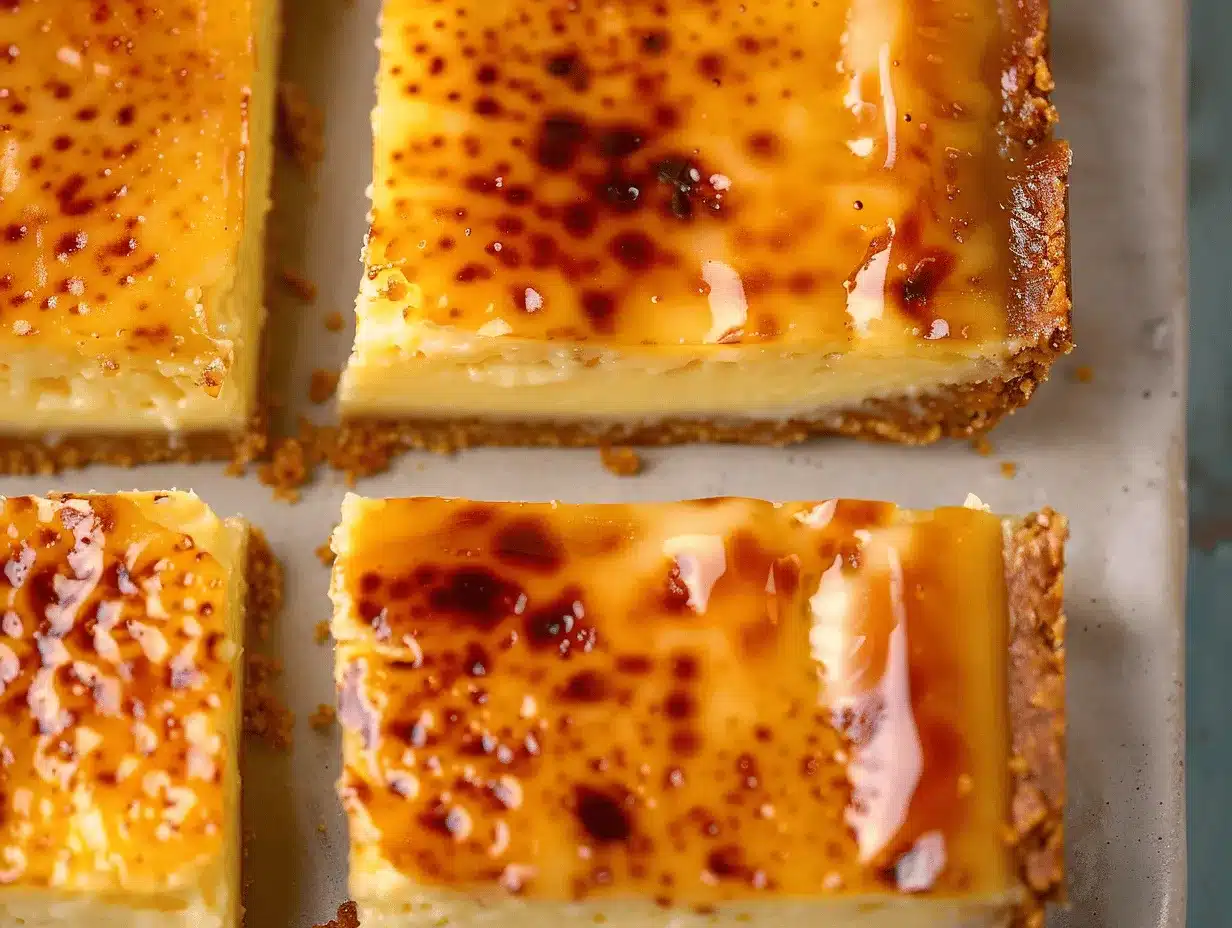
- Brulee the Topping: Sprinkle 1/4 cup (50g) granulated sugar evenly over the bars. Using a kitchen torch, caramelize the sugar until golden and crackly—move the flame in small circles and don’t linger too long. If using a broiler, place bars on a baking sheet and broil for 1-3 minutes, watching closely. Let sugar cool and harden before serving.
Troubleshooting Tips: If your cheesecake cracks, don’t panic—the brulee topping hides imperfections. Bars too soft? Chill longer. Sugar not caramelizing? Try a second layer and torch again. If you see separation in the filling, mix a bit less next time.
Sensory Cues: Filling should be silky, not runny. The crust will smell buttery and toasty after baking. The sugar should make a satisfying “crack” when tapped with a spoon—if it’s sticky, torch a bit more.
Personal tip: I freeze the bars for 15 minutes before bruleeing—the cold helps the sugar stay crisp and the cheesecake doesn’t soften under the torch.
Cooking Tips & Techniques
If you want perfect creme brulee cheesecake bars, here’s what I’ve learned after several attempts:
- Don’t Overmix: After adding eggs, mix just until combined. Overbeating makes the filling dense, not creamy.
- Room Temperature Ingredients: Cream cheese and eggs blend smoother and prevent lumps. I always set mine out an hour before baking.
- Crust Pressing: Pack the crust tightly—even a loose crust will crumble and make the bars messy.
- Chill Well: Patience pays off. Bars need to be cold for clean slicing and firm texture. Overnight is best, but 3 hours minimum.
- Brulee Just Before Serving: The sugar topping is crispest right after torching. If you brulee ahead, it can soften in the fridge.
- Broiler Backup: If you don’t have a torch, use your oven’s broiler—but watch closely, sugar burns quickly.
Common mistake? Rushing the chilling time. I learned the hard way—warm cheesecake bars don’t set up and the brulee melts right into the filling. Another tip: If you’re batch-making for a party, slice first, then brulee each bar individually for max crunch.
For multitasking, prep the crust while your cream cheese is softening. Clean up as you go, especially after torching—sugar gets everywhere. To keep bars uniform, use a ruler to mark even slices (yes, I’m that person). If you want extra-thick bars, use a smaller pan, but adjust baking time a bit longer.
Variations & Adaptations
Cream brulee cheesecake bars are super customizable. Here are some fun ways to switch it up:
- Gluten-Free Version: Swap regular graham crackers for gluten-free ones. I’ve baked this for celiac friends and it’s just as yummy.
- Chocolate Twist: Add 1/4 cup (25g) cocoa powder to the crust, or sprinkle mini chocolate chips over the filling before baking. Chocolate and brulee? Yes, please.
- Seasonal Fruit: Top finished bars with fresh berries or sliced stone fruit. The caramelized sugar pairs beautifully with tart raspberries or juicy peaches.
- Lemon Zest: Add 1 tablespoon of lemon zest to the filling for a bright citrus note. It lifts the whole dessert—especially in spring.
- Dairy-Free Adaptation: Use vegan cream cheese and coconut yogurt in place of dairy. I’ve tried this for a friend with lactose issues—turns out creamy and satisfying.
Different cooking methods? If you’re feeling brave, try making these in a muffin tin for mini cheesecake bites (bake 18-20 minutes, brulee individually). If you want to reduce sugar, swap half of the brulee topping for coconut sugar—it’s a little trickier to caramelize, but still tasty.
Personal favorite? I sometimes add a pinch of sea salt to the brulee topping before torching—gives a salted caramel vibe that’s addictive. Don’t be afraid to experiment; these bars are forgiving and welcome creativity.
Serving & Storage Suggestions
Serve creme brulee cheesecake bars chilled, straight from the fridge. The sugar crust will be crisp, the filling luscious. For a pretty presentation, arrange the bars on a platter and dust with a bit of powdered sugar or fresh berries (if you want to go Instagram-worthy).
Pair with coffee, espresso, or even dessert wine if you’re feeling fancy. These bars are rich, so smaller servings work well. If you’re serving a crowd, cut into bite-sized squares for easy snacking.
Storage: Cover bars tightly and refrigerate for up to 4 days. The brulee topping will stay crisp for about 24 hours; after that, it softens but still tastes great. To freeze, wrap bars individually and store up to a month—thaw overnight in the fridge and brulee the sugar just before serving.
Reheating: These bars are best cold, but if you want a slightly warmer filling, let them sit at room temp for 15 minutes before serving. Avoid microwaving, as it will melt the crust and brulee.
Flavor tip: As bars sit overnight, the cheesecake flavor deepens and the crust stays firm. Honestly, day-two bars are my favorite.
Nutritional Information & Benefits
Each creme brulee cheesecake bar is approximately 220 calories, with 14g fat, 3g protein, and 18g carbohydrate. The full-fat cream cheese provides calcium and a bit of protein, while sour cream and eggs add richness and texture.
Health Benefits: Compared to full-sized cheesecakes, these bars are portion-controlled and easy to share. You can use lighter dairy or sugar alternatives for a lower-calorie treat. Graham crackers offer some whole grain, and eggs bring nutrients like B12 and choline.
Dietary Considerations: Gluten-free and dairy-free swaps work well. There are eggs and dairy, so those with allergies should use replacements. If you’re watching sugar, use a sugar substitute for the filling (but regular sugar for the brulee—it caramelizes best).
From my wellness perspective, dessert should be about joy and balance. These bars are rich, so enjoy in moderation and savor every bite!
Conclusion
If you’re searching for a dessert that feels special but is secretly simple, creme brulee cheesecake bars are it. They blend the best of two classics—creamy, tangy cheesecake and the golden, crackly sugar of creme brulee. You can make them ahead, tweak them to fit your tastes, and they’re always a hit (even with picky eaters).
I love this recipe because it’s reliable and flexible. Whether you go classic, add a twist, or make it gluten-free, the results are always decadent. So grab your torch, line your pan, and treat yourself to a slice of something truly delicious.
Let me know how you make yours—drop a comment with your favorite variation or share on social (tag me!). Have you tried adding fruit, chocolate, or a flavor twist? Your feedback and photos always make my day. Happy baking, and don’t forget to savor that first crackle of brulee!
FAQs
Can I make creme brulee cheesecake bars without a kitchen torch?
Absolutely! Use your oven’s broiler. Watch closely and rotate the pan for even caramelization. The sugar may not get as evenly crisp as with a torch, but it’s still delicious.
How do I keep my cheesecake bars from cracking?
Don’t overmix after adding eggs and bake at a moderate temperature. If they do crack, the brulee topping hides imperfections—nobody will notice!
Can I freeze creme brulee cheesecake bars?
Yes, wrap them tightly and freeze for up to one month. Thaw overnight in the fridge, then add and caramelize the sugar topping just before serving.
Are these bars gluten-free?
They can be! Just use gluten-free graham crackers for the crust. The filling and topping are naturally gluten-free.
What’s the best way to cut cheesecake bars neatly?
Chill the bars well, use a sharp knife, and wipe the blade between cuts. For extra clean slices, freeze the bars for 15 minutes before cutting.
Pin This Recipe!
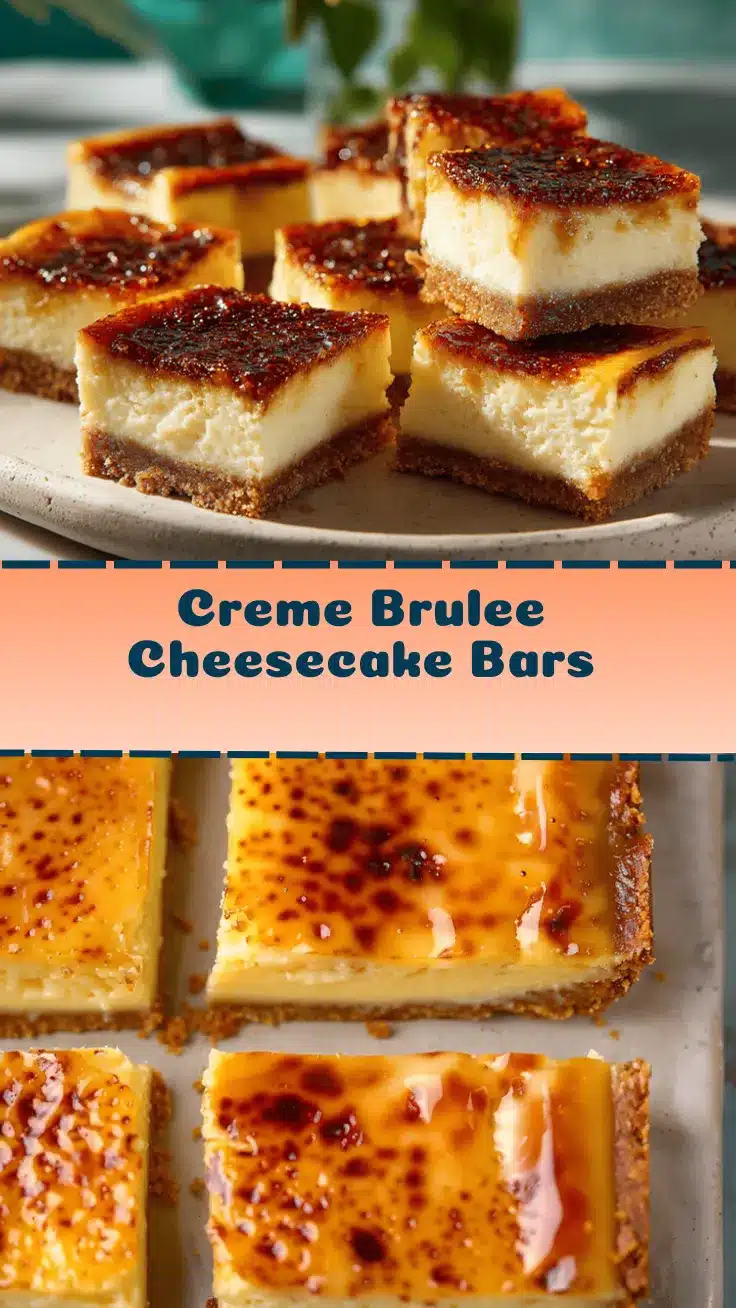
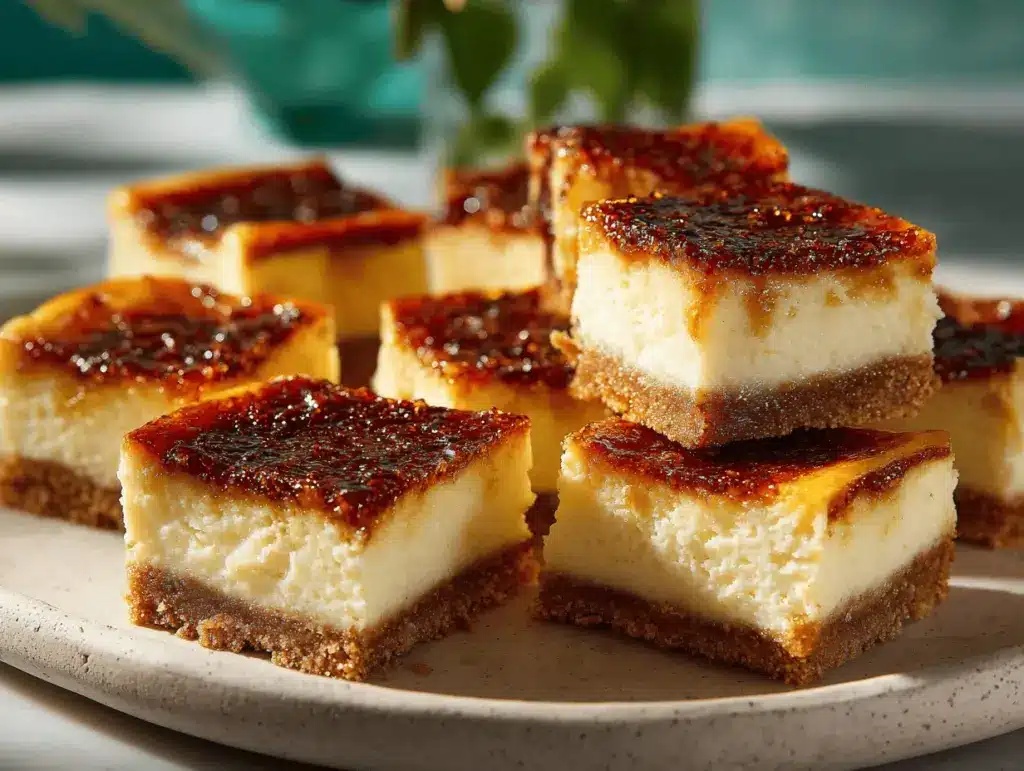
Creme Brulee Cheesecake Bars
These creme brulee cheesecake bars combine the creamy richness of classic cheesecake with the crackly caramelized sugar topping of creme brulee. Cut into bars for easy serving, they’re elegant enough for a party and simple enough for a weeknight treat.
- Prep Time: 20 minutes
- Cook Time: 48 minutes
- Total Time: 4 hours 8 minutes
- Yield: 16 bars 1x
- Category: Dessert
- Cuisine: American, French-inspired
Ingredients
- 1 1/2 cups graham cracker crumbs
- 2 tablespoons granulated sugar
- 1/2 cup unsalted butter, melted
- Pinch of salt (optional)
- 16 ounces cream cheese, softened
- 3/4 cup granulated sugar
- 2 large eggs, room temperature
- 1/2 cup sour cream
- 1/4 cup heavy cream
- 2 teaspoons pure vanilla extract
- Pinch of salt (optional)
- 1/4 cup granulated sugar (for brulee topping)
Instructions
- Line an 8×8-inch baking pan with parchment paper, leaving an overhang for easy removal. Preheat oven to 325°F (163°C).
- In a bowl, combine graham cracker crumbs, 2 tablespoons sugar, and a pinch of salt. Stir in melted butter until evenly moistened. Press mixture firmly into the bottom of the pan. Bake crust for 8 minutes, then let cool.
- In a large mixing bowl, beat cream cheese until smooth and creamy. Add 3/4 cup sugar and mix until combined. Add eggs one at a time, mixing gently after each. Blend in sour cream, heavy cream, vanilla extract, and a pinch of salt if desired. Beat until just combined—do not overmix.
- Spread cheesecake filling evenly over cooled crust. Tap pan gently to release air bubbles. Bake for 35-40 minutes, or until center is set but still slightly wobbly. Do not let bars brown.
- Remove from oven and cool on a wire rack for 1 hour. Cover and refrigerate for at least 3 hours, preferably overnight.
- Once chilled, lift bars out using parchment overhang. Slice into 16 squares (or 12 for larger portions), wiping knife between cuts for clean edges.
- Sprinkle 1/4 cup granulated sugar evenly over bars. Caramelize sugar with a kitchen torch until golden and crackly, moving flame in small circles. Alternatively, broil bars on a baking sheet for 1-3 minutes, watching closely. Let sugar cool and harden before serving.
Notes
For best results, use brick-style cream cheese and chill bars overnight. If you don’t have a torch, use your oven’s broiler, but watch closely. Freeze bars for 15 minutes before bruleeing for a crisp sugar top. Gluten-free and dairy-free adaptations work well. Slice bars before bruleeing for maximum crunch.
Nutrition
- Serving Size: 1 bar (1/16 of recipe)
- Calories: 220
- Sugar: 15
- Sodium: 140
- Fat: 14
- Saturated Fat: 8
- Carbohydrates: 18
- Protein: 3
Keywords: creme brulee cheesecake bars, cheesecake bars, creme brulee dessert, easy cheesecake, party dessert, caramelized sugar, brulee topping, creamy cheesecake, homemade dessert, elegant dessert