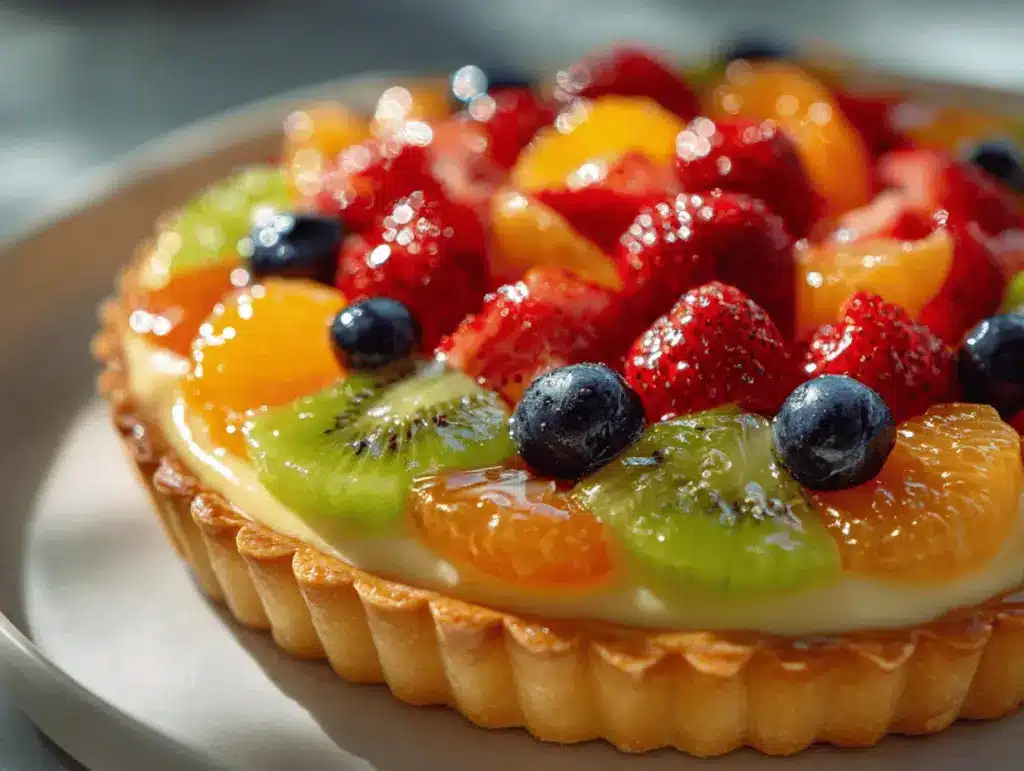
The first time I pulled a homemade fruit tart with pastry cream from my fridge, I couldn’t help but grin – those glossy berries, that silky custard, the crisp, buttery crust. My kitchen smelled like a fancy French patisserie, and honestly, I felt like a bit of a baking rockstar. If you’ve ever wanted to wow your guests (or just treat yourself after a long week), this stunning fruit tart is the answer.
I discovered fruit tarts years ago when I was looking for a dessert that felt special but wasn’t as fussy as a layer cake. Pastry cream has always been my secret weapon – rich, but not heavy, and a perfect match for all that juicy, sweet fruit. Over the years, I’ve tweaked this recipe: adjusting the tart shell for extra crunch, playing with different fruits, and perfecting the pastry cream so it sets just right every time.
This fruit tart with pastry cream isn’t just pretty – it’s surprisingly easy to pull off, even if you’re not a pro baker. The best part? You can use whatever fruit you love or have on hand. It’s a hit for brunches, birthdays, or when you just want to make something that looks (and tastes) like it belongs on a magazine cover. I’ve made this for everything from Mother’s Day to random Tuesdays when I needed a pick-me-up, and it never fails to make people smile. Plus, it’s a fantastic way to show off seasonal fruit in the most delicious way possible.
After a dozen test runs (and a few not-so-pretty ones along the way), I can promise this fruit tart with pastry cream is the one to bookmark. Let’s get into why you’re going to love it as much as my family and friends do!
Why You’ll Love This Fruit Tart with Pastry Cream
- Gorgeous and Impressive: There’s something magical about a fruit tart – the glossy fruit, the creamy filling, that golden crust. It’s the kind of dessert that makes jaws drop before the first bite.
- Easy to Make Ahead: Both the pastry cream and tart shell can be prepared in advance. That means less last-minute stress and more time to enjoy your company (or yourself!).
- Customizable for Any Season: Use strawberries in spring, peaches and blueberries in summer, figs and plums in fall – or even tropical fruits like kiwi and pineapple in winter. The tart is your blank canvas.
- Light Yet Decadent: The pastry cream is silky and rich, but paired with crisp fruit and buttery crust, it feels fresh and not-too-heavy. Perfect after any meal.
- No Fancy Ingredients Needed: You probably have most of the basics in your kitchen already. No specialty shop runs required.
- Family and Crowd Approved: Every single time I serve this, it disappears fast. Even picky eaters (and, let’s be honest, a few dessert snobs) have gone back for seconds.
- Beginner Friendly: Don’t let the gorgeous look fool you – if you can whisk, roll dough, and arrange fruit, you’ve got this. I’ve included all my best tips to help you succeed, even if it’s your first tart!
What sets this fruit tart with pastry cream apart from the rest is the attention to texture: the shell is crisp (never soggy), the pastry cream is smooth and not overly sweet, and the fruit stays vibrant thanks to a quick glaze. I love that you can adapt it for any occasion – make mini tarts for a tea party, a big tart for a birthday, or even a rustic version with whatever fruit is on its last legs.
This is the kind of recipe that creates memories – it’s special enough for celebrations, but simple enough to make just because. Trust me, you’ll want to make this again and again.
What Ingredients You Will Need
This fruit tart with pastry cream relies on a handful of fresh, simple ingredients that come together to create a truly stunning dessert. Most are pantry staples, and the fresh fruit is where you can really let your creativity sparkle.
For the Tart Shell
- 1 1/4 cups (155g) all-purpose flour
- 1/4 cup (30g) powdered sugar (adds a subtle sweetness)
- 1/2 teaspoon salt
- 1/2 cup (113g) unsalted butter, cold and cubed (for that perfect flaky texture)
- 1 large egg yolk (binds everything together and adds richness)
- 2-3 tablespoons ice water
For the Pastry Cream
- 2 cups (480ml) whole milk (full fat is key for a creamy filling)
- 1 vanilla bean pod, split (or 2 teaspoons pure vanilla extract)
- 1/2 cup (100g) granulated sugar
- 4 large egg yolks
- 1/4 cup (32g) cornstarch (for thickening)
- 2 tablespoons (28g) unsalted butter
- Pinch of salt
For the Fruit Topping
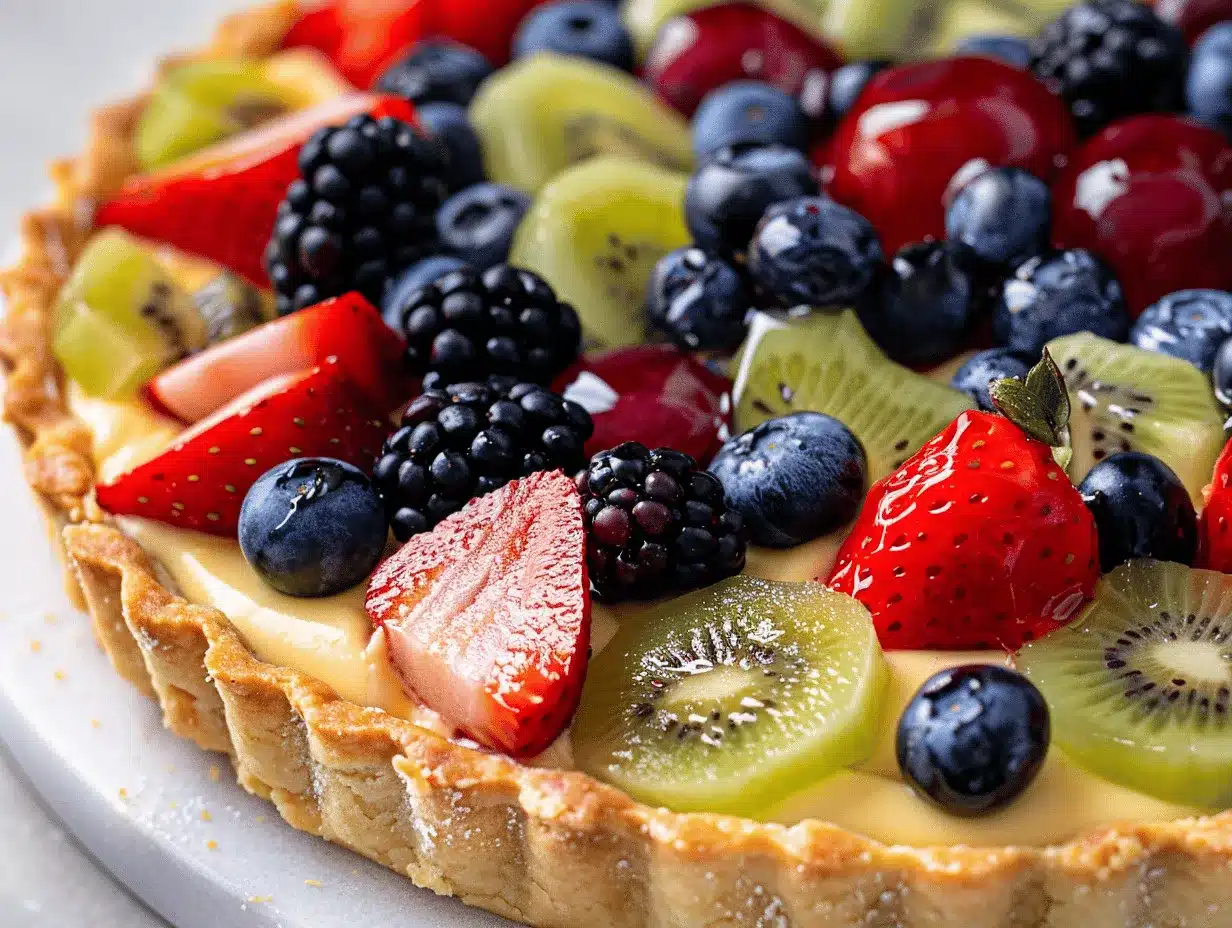
- 2-3 cups assorted fresh fruit (think strawberries, blueberries, raspberries, kiwi, mango, blackberries, peaches – use what’s in season or what you love!)
For the Glaze
- 1/4 cup (80g) apricot jam or jelly (for shine and to keep the fruit looking fresh)
- 1 tablespoon water
Ingredient Tips: For the best tart shell, I recommend King Arthur or Bob’s Red Mill flour. If you’re gluten-free, swap in a 1:1 gluten-free flour blend. For the pastry cream, use the freshest eggs you can find – it really does make a difference in flavor. When selecting fruit, go for firm, ripe pieces that won’t turn mushy. In winter, I love using canned mandarin oranges or poached pears when fresh fruit is scarce.
Substitutions: Dairy-free? Use coconut milk (full fat) and plant-based butter for the pastry cream and crust. You can also use a ready-made pie crust in a pinch, but homemade is honestly worth the extra few minutes. If you’re short on time, vanilla pudding works as a quick stand-in for pastry cream (just don’t tell the pastry purists!).
Equipment Needed
- Tart Pan (9-inch/23cm): The classic removable-bottom pan gives those crisp edges and makes unmolding a breeze. If you don’t have one, a pie plate or even a springform pan will work (just line with parchment for easy removal).
- Rolling Pin: For rolling out the tart shell. You can use a wine bottle in a pinch (been there, done that!).
- Mixing Bowls: At least two – one for dough, one for pastry cream.
- Whisk: Essential for smooth pastry cream. A hand mixer can work if you’re in a hurry.
- Saucepan: For cooking the pastry cream.
- Plastic Wrap or Parchment: To keep the pastry cream from forming a skin.
- Small Offset Spatula or Spoon: Helps spread the pastry cream evenly in the shell.
- Baking Weights or Dried Beans: For blind-baking the tart shell (so it doesn’t puff up). If you don’t have these, rice works too.
- Pastry Brush: For brushing on that glossy fruit glaze.
I’ve used both high-end and bargain tart pans, and honestly, even the cheaper ones do the trick if you grease them well and treat them gently. If your rolling pin sticks, dust it with flour or use parchment paper on top of the dough. To keep your tools in good shape, wash tart pans by hand and dry thoroughly to avoid rust.
Preparation Method
-
Make the Tart Shell:
- In a large mixing bowl, whisk together 1 1/4 cups (155g) flour, 1/4 cup (30g) powdered sugar, and 1/2 teaspoon salt.
- Add 1/2 cup (113g) cold butter. Use your fingers or a pastry cutter to work the butter into the flour until it looks like coarse sand with pea-sized bits (takes about 2-3 minutes; don’t overmix!).
- Stir in 1 egg yolk and 2 tablespoons ice water. Mix gently just until dough comes together. If it’s too crumbly, add another tablespoon water.
- Shape dough into a disk, wrap in plastic, and chill for at least 30 minutes. This step keeps the shell tender and prevents shrinking.
- Preheat oven to 375°F (190°C). On a lightly floured surface, roll dough into a 12-inch (30cm) circle. Fit into your tart pan and trim the edges (patch any cracks – nobody will know!).
- Prick the base with a fork, line with parchment, and fill with baking weights or beans.
- Bake 15 minutes, remove weights, then bake 10-12 minutes more or until golden. Cool completely before filling.
-
Prepare the Pastry Cream:
- In a saucepan, heat 2 cups (480ml) milk and the vanilla (bean seeds and pod or extract) until just simmering. Remove from heat.
- In a bowl, whisk 4 egg yolks and 1/2 cup (100g) sugar until pale. Sift in 1/4 cup (32g) cornstarch and a pinch of salt; whisk until smooth.
- Slowly pour hot milk into yolk mixture, whisking constantly to avoid scrambling eggs.
- Return mixture to saucepan over medium heat. Whisk non-stop until thickened and bubbling (about 3-5 minutes). If it looks lumpy, don’t panic – just keep whisking!
- Remove from heat, whisk in 2 tablespoons (28g) butter until smooth. Transfer to a bowl, press plastic wrap right on the surface, and chill until fully cold (at least 2 hours).
-
Assemble the Tart:
- Spread cooled pastry cream evenly in the tart shell using a spatula or the back of a spoon.
- Arrange your fruit on top. Start with larger pieces (like sliced strawberries or kiwi) and fill in with smaller berries. I always work from the outside in for a pretty, layered look.
-
Glaze the Fruit:
- Warm 1/4 cup (80g) apricot jam with 1 tablespoon water until melted, then strain if chunky.
- Using a pastry brush, gently coat the fruit for a glossy finish and to help it stay fresh.
-
Chill and Serve:
- Refrigerate the assembled tart for at least 1 hour before serving. This helps the flavors meld.
- Slice with a sharp knife, wiping between cuts for clean edges. Enjoy cold or at cool room temp!
Prep Time: About 1 hour active, 2-3 hours total including chilling.
Yields: 8-10 slices
Common troubleshooting: If your pastry cream seems runny, make sure it’s fully chilled – it thickens as it cools! If your tart shell shrinks, try chilling the dough longer next time and don’t stretch it when fitting into the pan.
Cooking Tips & Techniques
- Keep Ingredients Cold: A cold tart dough is key for a crisp, non-greasy crust. If your kitchen is warm, chill your flour and mixing bowl too.
- Don’t Overwork the Dough: Mix just until it comes together. Overmixing can make it tough instead of tender. If you see streaks of butter in the dough, you’re on the right track!
- Blind Bake Thoroughly: Take time to fully bake the shell. If it’s underdone, it can get soggy once filled. Look for a golden color on the edges and bottom.
- Pastry Cream Consistency: Whisk constantly and don’t walk away – it can go from perfect to lumpy fast. If you get lumps, strain it through a sieve right away. Learned this the hard way.
- Glaze Quickly: Brush the fruit with glaze as soon as you arrange it, especially if using fruits that brown easily (like bananas or apples). The glaze keeps everything looking fresh and pretty for hours.
- Multitasking: While the tart shell is baking, make the pastry cream. This saves time and helps everything cool at the same pace.
- Practice Makes Perfect: My first tart was a little rustic (okay, kinda messy), but each one gets easier. Don’t stress if it’s not bakery-perfect – it’ll taste amazing!
One mistake I made early on was not letting the pastry cream cool all the way before filling the shell. Trust me, a warm filling will make the tart soggy. Patience pays off here. Also, if you’re short on time, make the components a day ahead and assemble right before serving. That way, you get a fresh, crisp tart with minimal fuss.
Variations & Adaptations
- Gluten-Free: Use a 1:1 gluten-free flour blend for the tart shell. I’ve tested with Bob’s Red Mill and it works beautifully – just add an extra tablespoon of water if the dough feels dry.
- Dairy-Free: Swap in full-fat coconut milk for the pastry cream and plant-based butter for both the cream and crust. The tart will have a subtle coconut note – honestly, it’s delicious with tropical fruit like mango and pineapple.
- Chocolate Pastry Cream: For a fun twist, whisk 2 ounces (56g) melted dark chocolate into the pastry cream after thickening. Top with bananas and raspberries for a decadent, almost-banoffee vibe.
- Mini Tarts or Tartlets: Use a muffin tin or mini tart pans for individual servings. Great for parties or when you want to make several flavors at once!
- Different Fruit Combos: In spring, try strawberries and rhubarb. Summer? Peaches and blueberries. Fall is fantastic with figs and roasted pears. Winter works with canned mandarins or poached apples.
- Nut-Free Option: This recipe is naturally nut-free, but always check your ingredients if serving to those with allergies.
My personal favorite? A summer tart with juicy peaches, blueberries, and a sprinkle of fresh mint. It’s like sunshine on a plate. If you want an extra treat, add a little lemon zest to the pastry cream for a zippy twist.
Serving & Storage Suggestions
This fruit tart with pastry cream is best served chilled, straight from the fridge or at cool room temperature. For a picture-perfect presentation, arrange the fruit in concentric circles, starting from the outside and working your way in. A sprinkle of powdered sugar or a few mint leaves makes it extra lovely for photos (and Pinterest boards!).
Pair your tart with a hot cup of coffee, tea, or even a glass of sparkling wine for a special touch. It’s a dreamy addition to brunch spreads, summer BBQs, or as a showstopper birthday dessert.
To store: Cover leftovers tightly and refrigerate for up to 3 days. The fruit will stay freshest on day one but still tastes fantastic after a night in the fridge. For longer storage, you can freeze the baked tart shell (unfilled) for up to a month. Just thaw, fill, and top with fruit when ready.
To reheat: No need! This tart is best served cold. If the shell softens a bit after a day, a quick 5-minute chill in the freezer before serving helps revive the crispness.
One thing I love: the flavors deepen after a few hours in the fridge – the pastry cream sets just right, and the fruit juices mingle with the crust. It’s honestly even better the next day.
Nutritional Information & Benefits
An average slice of fruit tart with pastry cream (1/10th of the tart) contains approximately:
- Calories: 320
- Fat: 16g (mostly from butter and eggs)
- Carbohydrates: 38g (mostly from the crust and fruit)
- Protein: 5g
- Sugar: 20g (varies depending on fruit and glaze)
Health Benefits: You get a boost of vitamin C, antioxidants, and fiber from the fresh fruit. Eggs and milk in the pastry cream add protein and calcium. If you use whole wheat flour, you’ll get even more fiber (just swap up to half for a nuttier flavor).
This fruit tart is naturally nut-free but does contain gluten, dairy, and eggs. You can make it gluten-free or dairy-free with the swaps above. I find that a slice feels indulgent but not heavy – it’s a treat you can feel good about sharing.
Conclusion
If you’re searching for a dessert that’s as beautiful as it is delicious, this fruit tart with pastry cream is the one. It’s the kind of recipe you’ll turn to when you want to impress (but don’t want to stress). The combination of crisp crust, dreamy pastry cream, and colorful fruit is truly irresistible, and the endless variations mean there’s always a new version to try.
Honestly, I love making this fruit tart for special occasions, but it’s just as wonderful for a quiet weekend treat. Don’t be afraid to mix up the fruit or add your own twist – half the fun is making it your own. If you give it a try, leave a comment and let me know what fruit combo you used or tag me on Pinterest – I absolutely love seeing your creations!
Happy baking, and remember: even if your tart isn’t “perfect,” it’ll be perfectly delicious. Go ahead, treat yourself and your loved ones to a little homemade magic.
Frequently Asked Questions
Can I make the tart shell and pastry cream ahead of time?
Absolutely! Both can be made up to 2 days in advance. Store the shell at room temperature (covered), and keep the pastry cream chilled in the fridge. Assemble with fruit just before serving.
What fruits work best for this fruit tart with pastry cream?
Berries, kiwi, peaches, mango, and grapes are classic. Use firm, ripe fruit for best results. Avoid very juicy or soft fruits (like watermelon) as they can make the tart soggy.
How do I keep the tart crust from getting soggy?
Make sure the crust is baked until golden and fully cooled before filling. The fruit glaze also helps by forming a barrier. You can brush a thin layer of melted chocolate on the crust for extra insurance if you want!
Can I freeze the finished fruit tart?
I don’t recommend freezing the assembled tart, as the pastry cream and fruit can get watery when thawed. However, you can freeze the baked (unfilled) tart shell for up to a month.
Is this recipe easy enough for beginners?
Yes! With clear steps and a bit of patience, even first-timers can pull off this fruit tart with pastry cream. Just follow the instructions and don’t stress over perfection – it will taste amazing!
Pin This Recipe!
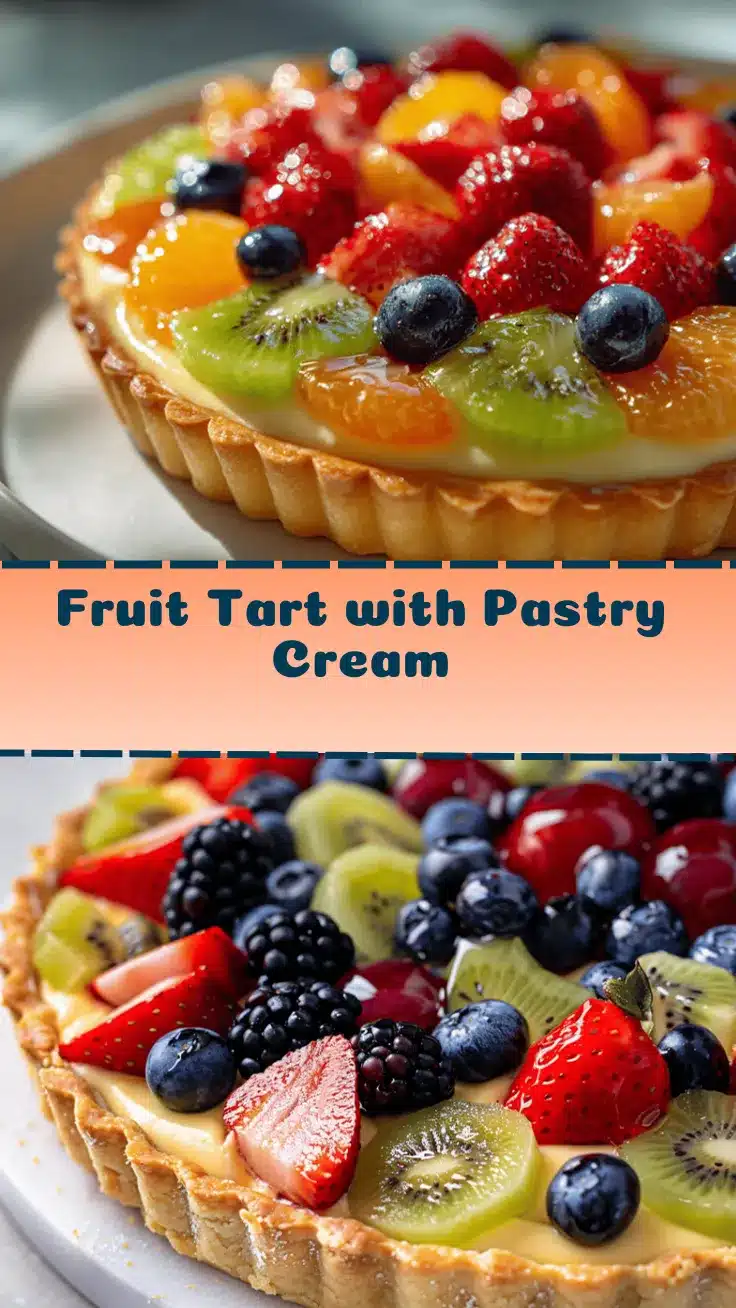
Fruit Tart with Pastry Cream

This stunning fruit tart features a crisp, buttery shell, silky pastry cream, and a vibrant array of fresh fruit, all finished with a glossy glaze. It’s an impressive yet approachable dessert perfect for any occasion, from brunches to birthdays.
- Prep Time: 1 hour
- Cook Time: 25-27 minutes
- Total Time: 2-3 hours (including chilling)
- Yield: 8-10 slices 1x
- Category: Dessert
- Cuisine: French
Ingredients
- 1 1/4 cups (155g) all-purpose flour
- 1/4 cup (30g) powdered sugar
- 1/2 teaspoon salt
- 1/2 cup (113g) unsalted butter, cold and cubed
- 1 large egg yolk
- 2–3 tablespoons ice water
- 2 cups (480ml) whole milk
- 1 vanilla bean pod, split (or 2 teaspoons pure vanilla extract)
- 1/2 cup (100g) granulated sugar
- 4 large egg yolks
- 1/4 cup (32g) cornstarch
- 2 tablespoons (28g) unsalted butter
- Pinch of salt
- 2–3 cups assorted fresh fruit (strawberries, blueberries, raspberries, kiwi, mango, blackberries, peaches, etc.)
- 1/4 cup (80g) apricot jam or jelly
- 1 tablespoon water
Instructions
- Make the Tart Shell: In a large mixing bowl, whisk together flour, powdered sugar, and salt.
- Add cold butter and use your fingers or a pastry cutter to work it into the flour until the mixture resembles coarse sand with pea-sized bits.
- Stir in egg yolk and 2 tablespoons ice water. Mix gently until dough comes together, adding another tablespoon water if needed.
- Shape dough into a disk, wrap in plastic, and chill for at least 30 minutes.
- Preheat oven to 375°F (190°C). On a lightly floured surface, roll dough into a 12-inch circle. Fit into a 9-inch tart pan and trim edges.
- Prick the base with a fork, line with parchment, and fill with baking weights or beans.
- Bake for 15 minutes, remove weights, then bake 10-12 minutes more until golden. Cool completely.
- Prepare the Pastry Cream: In a saucepan, heat milk and vanilla until just simmering. Remove from heat.
- In a bowl, whisk egg yolks and sugar until pale. Sift in cornstarch and salt; whisk until smooth.
- Slowly pour hot milk into yolk mixture, whisking constantly.
- Return mixture to saucepan over medium heat. Whisk constantly until thickened and bubbling (about 3-5 minutes).
- Remove from heat, whisk in butter until smooth. Transfer to a bowl, press plastic wrap on the surface, and chill until fully cold (at least 2 hours).
- Assemble the Tart: Spread cooled pastry cream evenly in the tart shell.
- Arrange fresh fruit on top, starting with larger pieces and filling in with smaller berries.
- Glaze the Fruit: Warm apricot jam with water until melted, then strain if chunky.
- Using a pastry brush, gently coat the fruit with the glaze.
- Chill and Serve: Refrigerate the assembled tart for at least 1 hour before serving. Slice with a sharp knife and enjoy cold or at cool room temperature.
Notes
For best results, keep ingredients cold when making the tart shell. Blind bake the shell thoroughly to prevent sogginess. Pastry cream and tart shell can be made up to 2 days ahead. Use firm, ripe fruit for topping and glaze immediately to keep fruit fresh. Gluten-free and dairy-free adaptations are possible. The tart is best served chilled and can be stored in the fridge for up to 3 days.
Nutrition
- Serving Size: 1 slice (1/10th of tart)
- Calories: 320
- Sugar: 20
- Sodium: 140
- Fat: 16
- Saturated Fat: 10
- Carbohydrates: 38
- Fiber: 2
- Protein: 5
Keywords: fruit tart, pastry cream, French dessert, easy tart, fresh fruit tart, summer dessert, brunch, birthday dessert, homemade tart, custard tart