Introduction
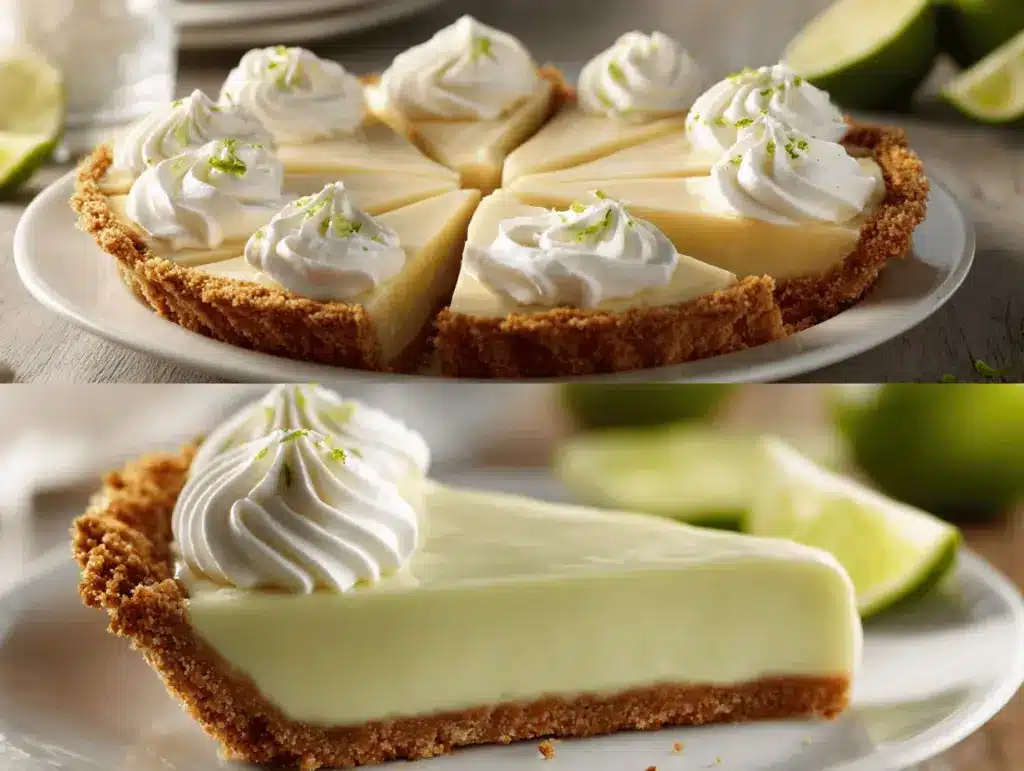
The first time I tasted key lime pie, the tangy-sweet burst was so good, I actually closed my eyes right at the table! There’s something about the creamy texture, vibrant citrus flavor, and golden, crumbly crust that just screams “summer.” You know that feeling when you bite into something and it’s like sunshine on a plate? That’s exactly what this key lime pie recipe delivers—every single time.
I started baking this pie years ago after a Florida vacation where every local diner seemed to have their own twist. When I got home, I couldn’t shake that fresh, zesty taste, so I was determined to make my own version (let’s face it, store-bought pies just don’t compare). After testing, tweaking, and plenty of “just one more slice” tastings, this easy homemade key lime pie became a family favorite. It’s now our go-to dessert for summer barbecues, birthdays, and honestly, any time we need a little pick-me-up.
What I love most? This key lime pie recipe is straightforward, no fancy steps or obscure ingredients. It’s perfect for busy folks, novice bakers, or anyone who wants that classic taste without fuss. Whether you’re whipping it up for a crowd or sneaking a solo treat after dinner, you’ll savor each bite of creamy, fresh bliss. As someone who’s made this pie at least a dozen times, trust me—this is the key lime pie recipe you’ll want in your summer dessert rotation.
Why You’ll Love This Key Lime Pie Recipe
I’ve tested dozens of key lime pie recipes, and this one always comes out on top. Here’s why you’ll fall in love with it (just like I did):
- Quick & Easy: Ready in under an hour, plus chill time—no complicated steps, no stress.
- Simple Ingredients: Uses pantry staples and fresh limes (no wild goose chase at the store).
- Perfect for Summer Gatherings: A refreshing dessert that’s always a hit at cookouts, picnics, or family dinners.
- Crowd-Pleaser: The creamy filling and crunchy crust win over kids, adults, and even skeptical “not a pie person” folks.
- Unbelievably Delicious: Tart, sweet, creamy, and just the right amount of richness—this pie is comfort food, but lighter.
What sets my key lime pie recipe apart? I use a blend of regular and key limes for a balanced flavor (the classic key limes are smaller and more tart, but not always easy to find). And instead of just whisking the filling, I beat it for a few extra minutes to make it extra silky. That little trick makes the difference, trust me.
This pie isn’t just dessert—it’s an experience. It’s the kind of recipe that makes you pause, smile, and maybe sneak a second slice when no one’s looking. If you want a dessert that’s refreshing, satisfying, and almost too easy to make, this is your answer. Whether you’re a seasoned baker or just starting out, the results are always impressive, and you’ll get rave reviews every time. Honestly, I’ve never brought home leftovers!
What Ingredients You Will Need
This recipe uses simple, wholesome ingredients to deliver bold flavor and a silky-smooth texture without the fuss. You probably have most of these in your kitchen already, and I’ve included a few tips for getting the best results.
For the Graham Cracker Crust:
- 1 1/2 cups (150 g) graham cracker crumbs (about 10 full sheets)
- 1/3 cup (67 g) granulated sugar
- 6 tablespoons (85 g) unsalted butter, melted (adds richness and helps bind the crust)
- Pinch of salt (rounds out the flavor)
For the Key Lime Filling:
- 3 large egg yolks, room temperature (helps the filling set and adds creaminess)
- 1 can (14 oz / 396 g) sweetened condensed milk (I always use Eagle Brand—consistently thick and sweet)
- 1/2 cup (120 ml) key lime juice (fresh is best, but bottled works in a pinch—look for Nellie & Joe’s brand)
- 1 tablespoon (8 g) key lime zest (adds extra zing—don’t skip this!)
- 1/4 cup (60 ml) regular lime juice (if you can’t get enough key limes, this balances the flavor)
For the Whipped Cream Topping:
- 1 cup (240 ml) heavy whipping cream, cold (for that dreamy, fluffy topping)
- 2 tablespoons (16 g) powdered sugar (keeps the cream stable and sweet)
- 1/2 teaspoon pure vanilla extract
- Extra lime zest or thin lime slices, for garnish (totally optional, but so pretty!)
Ingredient Substitutions & Tips:
- Graham Crackers: Swap for digestive biscuits or gluten-free graham crackers for a GF version.
- Butter: Use coconut oil for a dairy-free twist (adds a subtle tropical flavor).
- Sweetened Condensed Milk: There’s really no substitute for this, but you can use coconut condensed milk for dairy-free.
- Key Limes: If you can’t find fresh key limes, bottled key lime juice is surprisingly good. Regular limes work, but the flavor is a bit milder.
- Whipped Cream: Use coconut whipped topping for a non-dairy version.
In summer, I sometimes add a handful of fresh berries on top—trust me, it’s a fun twist. For best results, always zest your limes before juicing (it’s way easier!). This key lime pie recipe is fuss-free and adaptable for nearly any kitchen.
Equipment Needed
You don’t need fancy gadgets for this key lime pie recipe, just a few reliable kitchen basics. Here’s what I use every time:
- 9-inch (23 cm) pie pan: Glass, ceramic, or metal all work—I’ve used metal pans for faster baking and glass for prettier serving.
- Mixing bowls: One large for the crust, one medium for the filling.
- Hand mixer or stand mixer: Makes the filling extra creamy. A sturdy whisk works in a pinch, but electric is better.
- Measuring cups and spoons: Accuracy matters for the perfect balance.
- Microplane or fine grater: For zesting limes (a box grater works, but the microplane is magic).
- Rubber spatula: For scraping every last bit of filling into the crust.
- Citrus juicer: Optional, but saves your hands—especially if you’re juicing lots of little key limes!
- Cooling rack: Helps your pie set up evenly after baking.
If you don’t have a pie pan, you can use a springform pan or even a square baking dish (the slices might look different, but taste is the same). My hand mixer is an ancient, $20 model, and it’s survived years of pie duty. For budget-friendly options, thrift shops often have great pie pans and mixing bowls for a steal. Just wash everything well, especially your microplane—lime zest can be sticky!
Preparation Method
Let’s get baking! Follow these steps for a foolproof, creamy key lime pie that’ll wow your taste buds and guests.
-
Prep the crust:
Preheat your oven to 350°F (175°C). In a large bowl, mix 1 1/2 cups (150 g) graham cracker crumbs, 1/3 cup (67 g) sugar, pinch of salt, and 6 tablespoons (85 g) melted butter. Stir until the mixture looks like wet sand—if it still seems dry, add another tablespoon of melted butter. Press the mixture firmly into the bottom and up the sides of your 9-inch (23 cm) pie pan. Use the bottom of a measuring cup for a smooth, even layer.
Tip: If your crust keeps crumbling, don’t panic—just press harder, and the oven will help it set. -
Bake the crust:
Bake for 10 minutes until lightly golden and fragrant. Remove from oven and let cool while you prep the filling.
Warning: Don’t overbake, or the crust will get tough. -
Make the filling:
In a medium bowl, whisk or beat 3 large egg yolks until slightly thickened (about 2 minutes). Add 1 can (14 oz / 396 g) sweetened condensed milk and beat for another minute. Mix in 1/2 cup (120 ml) key lime juice, 1/4 cup (60 ml) regular lime juice, and 1 tablespoon (8 g) lime zest. Beat until smooth and creamy. The filling should be pale yellow and smell intensely citrusy.
Note: If your filling is too thin, add an extra yolk—sometimes eggs are smaller than you think! -
Fill and bake:
Pour the filling into the cooled crust. Smooth the top with a spatula. Bake at 350°F (175°C) for 15 minutes. The center should jiggle slightly when you shake the pan.
Tip: Overbaking can cause cracks—watch closely! -
Cool and chill:
Remove pie from oven and let it cool on a rack for 30 minutes. Then refrigerate for at least 2 hours (overnight is even better). The filling firms up and the flavors meld together.
Note: If you’re in a hurry, pop it in the freezer for 45 minutes—just don’t forget it in there! -
Whip the cream:
In a cold bowl, beat 1 cup (240 ml) heavy cream with 2 tablespoons (16 g) powdered sugar and 1/2 teaspoon vanilla until soft peaks form (about 2-3 minutes). Don’t over-whip, or you’ll get butter.
Tip: For extra-stable whipped cream, add a tablespoon of cold cream cheese to the mix. -
Top and garnish:
Spread or pipe whipped cream over the chilled pie. Garnish with lime zest or slices for a pop of color.
Tip: For Pinterest-worthy presentation, use a star tip and pipe little rosettes around the edge.
That’s it! Slice and serve your key lime pie recipe cold for maximum creamy-fresh impact. If you run into any issues (crust too crumbly, filling not set), don’t worry—these things happen, and it’s still delicious. I’ve had my share of “rustic-looking” pies and nobody ever complains!
Cooking Tips & Techniques
I’ve learned a lot about making the perfect key lime pie, sometimes the hard way—so here are my top tips and tricks:
- Chill is key: Don’t skip the chilling step. The pie needs at least 2 hours in the fridge to set properly. Overnight is best for flavor.
- Zest before juicing: Zest your limes first! It’s nearly impossible once they’re cut and squeezed.
- Use fresh limes: Bottled juice is fine in a pinch, but fresh limes give you that bright, zingy flavor.
- Don’t overbake: The filling should be slightly wobbly in the center when you take it out. Overbaking leads to cracks and a rubbery texture.
- Crust tricks: If your graham cracker crust is too crumbly, add a splash more melted butter. If it’s too greasy, add a tablespoon of extra crumbs.
- Whipped cream woes: Warm cream won’t whip. Use a cold bowl and beaters for best results.
- Egg safety: If you’re worried about undercooked eggs, you can use pasteurized yolks or bake a few minutes longer.
I once tried making this pie with store-bought crust—never again! Homemade is way better, and honestly, it only takes 5 minutes. Timing is everything: multitask by juicing limes while the crust bakes, and you’ll be done even faster. Don’t be afraid of imperfections—a little uneven whipped cream or a crumbly crust just means it’s homemade. Every pie is a bit different, and that’s part of the charm.
Variations & Adaptations
This key lime pie recipe is super flexible—here’s how you can make it your own:
- Gluten-Free: Use gluten-free graham crackers or almond flour for the crust. Tastes just as good, and no one will notice the swap.
- Dairy-Free: Substitute coconut oil for butter in the crust, coconut condensed milk for regular, and coconut whipped cream for topping. Adds a subtle tropical flavor (I’ve tried it, and it’s awesome!).
- Berry Burst: Top with fresh raspberries or blueberries for a burst of color and flavor—especially nice in summer.
- Chocolate Twist: Add a thin layer of melted chocolate between the crust and filling for a rich surprise.
- Mini Pies: Make individual pies in muffin tins—great for parties or portion control.
- Nutty Crust: Mix chopped pecans or walnuts into the graham cracker crust for extra crunch.
For allergen substitutions, you can swap eggs with a cornstarch-based filling (texture is a bit different but still tasty). If you want a less tart pie, reduce the key lime juice by a few tablespoons. My personal favorite adaptation is the coconut version—it’s light, tropical, and perfect for beach-themed gatherings. Whatever your needs, this recipe is easy to tweak for any taste or dietary preference.
Serving & Storage Suggestions
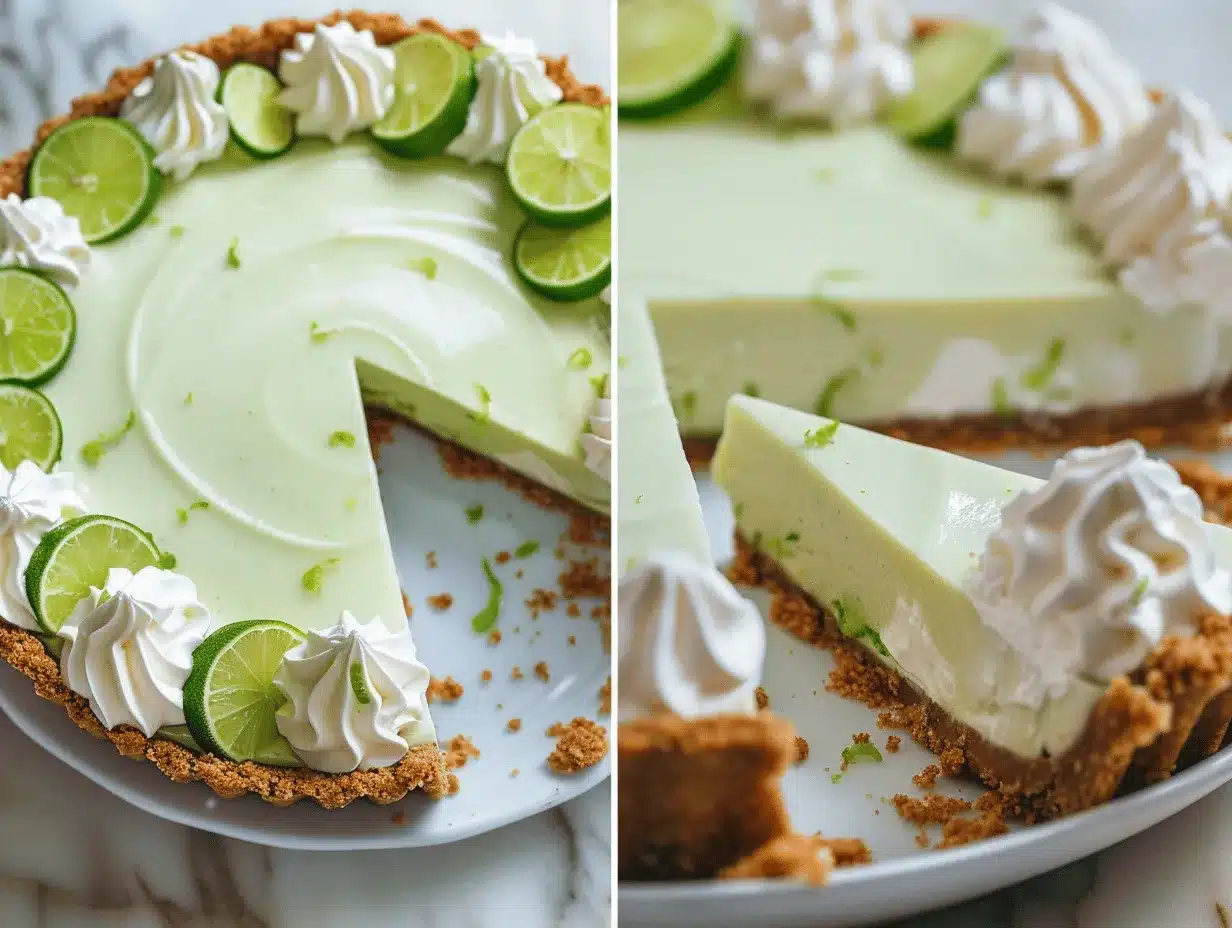
This key lime pie is best served cold, straight from the fridge. The creamy filling and crunchy crust taste heavenly when chilled, especially on a hot day. Slice with a sharp knife for clean edges, and wipe the blade between cuts for Pinterest-worthy presentation.
Pair with iced tea, lemonade, or a fruity cocktail—key lime pie and summer drinks are a match made in heaven. If you’re serving at a party, garnish each slice with a little whipped cream, a sprinkle of lime zest, and maybe a berry or two for color.
To store, cover the pie tightly with plastic wrap or foil and keep refrigerated for up to 3 days. For longer storage, wrap slices individually and freeze for up to 2 months. Thaw in the fridge overnight before serving. Reheating isn’t recommended—this pie is meant to be cold, and the filling can separate if warmed.
Pro tip: The flavors actually intensify after a day in the fridge, so leftovers (if you have any!) will taste even better. Just watch out for eager fridge-raiders—my family has been known to sneak midnight slices!
Nutritional Information & Benefits
Here’s a quick look at the nutritional profile for a typical slice (1/8 of the pie):
- Calories: About 350
- Fat: 18g (mostly from cream and butter—hello, creamy goodness)
- Protein: 4g
- Carbohydrates: 42g
- Sugar: 32g
Limes are packed with vitamin C, which helps support immune health and gives this pie its bright, tangy flavor. The eggs add a little protein, and using fresh lime juice means you get the benefits of natural antioxidants. For gluten-free or dairy-free eaters, simple swaps make this pie accessible to almost everyone. Just note: it does contain eggs, dairy, and wheat (unless you adapt).
From my wellness perspective, key lime pie is all about balance—indulge, savor, and know you’re getting a burst of citrusy goodness along with that creamy comfort. It’s a treat that feels special, but isn’t heavy.
Conclusion
If you’re searching for a dessert that captures the spirit of summer, this key lime pie recipe is a must-try. It’s easy, fresh, and absolutely irresistible—perfect for gatherings, celebrations, or just because. The flavors are bright, the texture is dreamy, and you can customize it for almost any diet.
I love how this pie brings people together—there’s something about that first creamy, tangy bite that gets everyone smiling. It’s one of those recipes I come back to again and again, whether I’m hosting a backyard barbecue or just want something special for myself.
So, grab your limes and give this recipe a go! Be sure to leave a comment below if you try it, share your own twists, or tag me with your Pinterest-worthy pie pics. Here’s to creamy, fresh, key lime bliss—happy baking!
Frequently Asked Questions
Can I make key lime pie with regular limes?
Yes! Regular limes work well if you can’t find key limes. The flavor is a little milder, but still delicious. Mix in a bit of extra zest for a bolder taste.
Is it safe to eat key lime pie since it has eggs?
The eggs are baked in the filling, so it’s safe to eat. If you’re concerned, use pasteurized eggs or bake a few minutes longer for peace of mind.
Can I make key lime pie ahead of time?
Definitely. This pie is even better the next day! Make it up to 24 hours ahead, chill overnight, and add whipped cream just before serving.
How do I prevent my pie crust from crumbling?
Be sure to use enough melted butter and press the crust firmly into the pan. If it’s still crumbly, add another tablespoon of butter and bake a bit longer.
Can I freeze key lime pie?
Yes! Wrap slices tightly and freeze for up to 2 months. Thaw in the fridge before serving—no need to reheat, since it’s best enjoyed cold.
Pin This Recipe!

Key Lime Pie Recipe: Best Easy Homemade Version for Summer

This easy homemade key lime pie features a creamy, tangy filling and a buttery graham cracker crust, making it the perfect refreshing dessert for summer gatherings or any time you crave a taste of sunshine. With simple ingredients and straightforward steps, it’s a crowd-pleaser that’s sure to become a family favorite.
- Prep Time: 20 minutes
- Cook Time: 25 minutes
- Total Time: 2 hours 45 minutes (includes chilling time)
- Yield: 8 servings 1x
- Category: Dessert
- Cuisine: American
Ingredients
- 1 1/2 cups graham cracker crumbs (about 10 full sheets)
- 1/3 cup granulated sugar
- 6 tablespoons unsalted butter, melted
- Pinch of salt
- 3 large egg yolks, room temperature
- 1 can (14 oz) sweetened condensed milk
- 1/2 cup key lime juice (fresh or bottled)
- 1 tablespoon key lime zest
- 1/4 cup regular lime juice
- 1 cup heavy whipping cream, cold
- 2 tablespoons powdered sugar
- 1/2 teaspoon pure vanilla extract
- Extra lime zest or thin lime slices, for garnish (optional)
Instructions
- Preheat your oven to 350°F (175°C). In a large bowl, mix graham cracker crumbs, sugar, pinch of salt, and melted butter until the mixture resembles wet sand. Press firmly into the bottom and up the sides of a 9-inch pie pan.
- Bake the crust for 10 minutes until lightly golden and fragrant. Remove from oven and let cool while you prepare the filling.
- In a medium bowl, whisk or beat egg yolks until slightly thickened (about 2 minutes). Add sweetened condensed milk and beat for another minute. Mix in key lime juice, regular lime juice, and lime zest. Beat until smooth and creamy.
- Pour the filling into the cooled crust and smooth the top with a spatula. Bake at 350°F (175°C) for 15 minutes. The center should jiggle slightly when you shake the pan.
- Remove pie from oven and let it cool on a rack for 30 minutes. Refrigerate for at least 2 hours (overnight is best) to allow the filling to set.
- In a cold bowl, beat heavy whipping cream with powdered sugar and vanilla until soft peaks form (about 2-3 minutes).
- Spread or pipe whipped cream over the chilled pie. Garnish with lime zest or slices if desired.
- Slice and serve cold. Store leftovers covered in the refrigerator for up to 3 days.
Notes
Chill the pie for at least 2 hours for best results; overnight is even better. Zest limes before juicing for ease. For gluten-free, use GF graham crackers; for dairy-free, substitute coconut oil and coconut condensed milk. Don’t overbake—the filling should jiggle slightly. Homemade crust is recommended for best flavor and texture.
Nutrition
- Serving Size: 1 slice (1/8 of pie)
- Calories: 350
- Sugar: 32
- Sodium: 180
- Fat: 18
- Saturated Fat: 11
- Carbohydrates: 42
- Fiber: 1
- Protein: 4
Keywords: key lime pie, summer dessert, easy pie recipe, homemade key lime pie, citrus dessert, graham cracker crust, whipped cream topping, Florida dessert, classic pie, creamy pie