The aroma of maple pumpkin pie baking in my kitchen is honestly one of my favorite signs that fall has truly arrived. The scent of cinnamon, nutmeg, and pure maple syrup swirling together is enough to make anyone’s mouth water. I still remember the first time I swapped out regular sugar for maple syrup in my pumpkin pie—let’s just say there were no leftovers that Thanksgiving.
This maple pumpkin pie recipe is my go-to for any holiday gathering, especially Thanksgiving. It’s got that dreamy, silky filling that just melts on your tongue (with a whisper of maple that makes you go back for seconds). It’s the kind of pie that turns even pumpkin pie skeptics into converts. Over the years, I’ve tweaked and tested this maple pumpkin pie dozens of times, making sure it’s foolproof, flavorful, and always a crowd-pleaser.
If you’re looking for a dessert that’s simple to make but feels special, this is it. Maybe you’re cooking for a big family dinner, or maybe you just want a slice of cozy comfort with your morning coffee. Either way, this maple pumpkin pie delivers. It’s packed with wholesome ingredients, doesn’t rely on fancy gadgets, and you won’t believe how easy it is to pull together. Seriously, if you can stir and pour, you can make this pie! Trust me—I’ve made it in tiny kitchens, with kids underfoot, and even once at a friend’s cabin with just a whisk and a lot of hope.
So, whether you’re a seasoned baker or a total beginner, this maple pumpkin pie recipe is about to become your new autumn tradition. Let’s get baking!
Why You’ll Love This Recipe
There’s no shortage of pumpkin pie recipes out there, but this maple pumpkin pie is truly something special. After baking this countless times for family, friends, and even the occasional bake sale, I can say with confidence it’s always the first dessert to disappear. Here’s why you’re about to fall in love:
- Quick & Easy: This maple pumpkin pie recipe comes together in under 20 minutes of prep—let’s face it, that’s a lifesaver during busy holidays.
- Simple Ingredients: Everything you need is probably already in your pantry or fridge. No oddball baking supplies or expensive specialty items.
- Perfect for Thanksgiving & Beyond: This pie steals the spotlight at holiday tables, but it’s honestly welcome at any cozy autumn brunch or potluck.
- Crowd-Pleaser: Even folks who claim they “don’t like pumpkin pie” end up sneaking seconds of this one. The maple twist just wins everyone over.
- Silky, Spiced, and Unbelievably Delicious: The texture is so smooth, and the balance of maple syrup and warm spices makes each bite feel like a hug. Seriously, it’s comfort food in pie form.
What sets this maple pumpkin pie apart? For starters, the pure maple syrup adds a layer of depth you just can’t get with regular sugar. The filling is velvety—not gritty or heavy—and the spices are just right, not overpowering. I blend the filling for extra silkiness, a trick I picked up after a few lumpy pies in my early days (we’ve all been there!).
This isn’t just a pumpkin pie with maple syrup thrown in. It’s the result of years of tweaking—balancing the spices, testing different crusts, and perfecting the bake time so you never end up with a soggy bottom (the baking kind, not the British drama kind). Whether you’re trying to impress your in-laws, or you just want a pie that makes you sigh with happiness, this is the recipe you need. I promise—it’s the kind of pie you remember long after the last crumb disappears.
What Ingredients You Will Need
This maple pumpkin pie uses simple, wholesome ingredients that come together to create a dessert packed with flavor and texture. You probably already have most of them on hand, and if not, they’re easy to find at any grocery store. Here’s what you’ll need for the best maple pumpkin pie:
- For the Filling:
- Pumpkin puree (1 ¾ cups / 425g – use pure pumpkin, not pumpkin pie filling)
- Pure maple syrup (¾ cup / 180ml – Grade A amber is my favorite for its mellow sweetness)
- Brown sugar (¼ cup / 50g – adds depth and a hint of molasses)
- Eggs (3 large, room temperature – helps give the filling that custardy texture)
- Heavy cream (1 cup / 240ml – makes the filling silky)
- Whole milk (¼ cup / 60ml – for perfect consistency; use all cream for extra richness)
- Vanilla extract (1 teaspoon – brings everything together)
- Ground cinnamon (2 teaspoons – don’t skimp on this!)
- Ground ginger (¾ teaspoon – adds a little zing)
- Ground nutmeg (½ teaspoon – freshly grated if you can)
- Ground cloves (¼ teaspoon – a little goes a long way)
- Fine sea salt (½ teaspoon – trust me, it makes the flavors pop)
- For the Crust:
- Unbaked 9-inch pie crust (homemade or store-bought – I love a flaky all-butter crust, but a graham cracker crust works in a pinch!)
- Optional Garnish:
- Whipped cream (homemade or store-bought)
- Maple candied pecans (for crunch – totally optional but so good)
- Extra ground cinnamon or nutmeg (for dusting before serving)
Ingredient Tips:
- Look for pumpkin puree with nothing added—Libby’s is my go-to brand for consistency.
- Use real maple syrup, not “pancake syrup,” for authentic flavor. Grade A amber or dark is wonderful.
- If you want a dairy-free version, swap heavy cream and milk with full-fat coconut milk—just shake well before using!
- For a gluten-free crust, I’ve had great luck with almond flour-based recipes or pre-made gluten-free shells.
- If you’re feeling adventurous, add a pinch of cardamom for an extra aromatic twist (I do this sometimes for a little surprise!).
With these ingredients, you’re set for a maple pumpkin pie that’s rich, autumnal, and just a little bit indulgent. You know, the kind of pie that disappears before you’ve even had a chance to sneak a second slice.
Equipment Needed
You don’t need a fancy kitchen to whip up this maple pumpkin pie—just a few trusty tools and a bit of counter space. Here’s what you’ll need (and a few real-life notes from my own pie-baking adventures):
- 9-inch pie pan (glass or ceramic works best for even baking—metal is fine in a pinch)
- Mixing bowls (one large for the filling, one smaller for eggs if you like to beat them separately)
- Whisk or hand mixer (I usually use a whisk, but a hand mixer gets the filling extra smooth)
- Measuring cups and spoons (accuracy matters for that perfect custard texture!)
- Rubber spatula (for scraping every last bit of filling into the crust)
- Baking sheet (makes it easier to transfer the pie in and out of the oven, and catches any drips)
- Aluminum foil or pie shield (to protect the crust from over-browning—trust me, this is a game-changer)
- Cooling rack (lets the pie cool evenly, avoiding soggy bottoms)
Alternative Tools: No pie shield? Just crimp strips of foil around the crust edge. If you don’t have a whisk, a sturdy fork works in a pinch! For easy cleanup, line your baking sheet with parchment paper.
Equipment Care: Wash your pie pan by hand to keep it in good shape, especially if it’s ceramic. If you’re using a glass pan, don’t go from oven to fridge right away—let it cool to avoid cracks.
On a budget? Thrift stores are treasure troves for pie pans and mixing bowls. I’ve found some of my favorites for just a couple of bucks!
Preparation Method
- Preheat & Prep:
- Preheat your oven to 425°F (220°C).
- Place your oven rack in the lower third (helps prevent a soggy crust).
- Roll out your pie crust and gently fit it into your 9-inch pie pan. Trim and crimp the edges as you like. Chill the crust in the fridge while you make the filling—this helps it stay flaky.
- Make the Filling:
- In a large mixing bowl, whisk together 1 ¾ cups (425g) pumpkin puree, ¾ cup (180ml) pure maple syrup, and ¼ cup (50g) brown sugar until smooth.
- Add 3 large eggs (one at a time), whisking well after each addition. The filling should look glossy and even. If your eggs are cold, the filling might look a bit separated at first, but keep whisking—it’ll come together!
- Pour in 1 cup (240ml) heavy cream and ¼ cup (60ml) whole milk. Stir in 1 teaspoon vanilla extract.
- Sprinkle in 2 teaspoons ground cinnamon, ¾ teaspoon ground ginger, ½ teaspoon ground nutmeg, ¼ teaspoon ground cloves, and ½ teaspoon fine sea salt. Whisk until everything is blended and no streaks remain.
- Blend for Extra Silkiness (Optional but recommended):
- If you want an ultra-smooth filling, transfer the mixture to a blender and blend for 20-30 seconds. This helps break up any pumpkin fibers and makes the pie super silky. I used to skip this step, but after trying it, I never looked back!
- Fill the Pie:
- Take the chilled crust from the fridge. Pour the pumpkin mixture into the crust, smoothing the top with a spatula.
- If your crust is homemade and very soft, place the pie pan on a baking sheet before filling—it’s easier to transfer to the oven.
- Bake:
- Bake at 425°F (220°C) for 15 minutes. Then, without opening the oven door, reduce the temperature to 350°F (175°C) and bake for another 35-40 minutes.
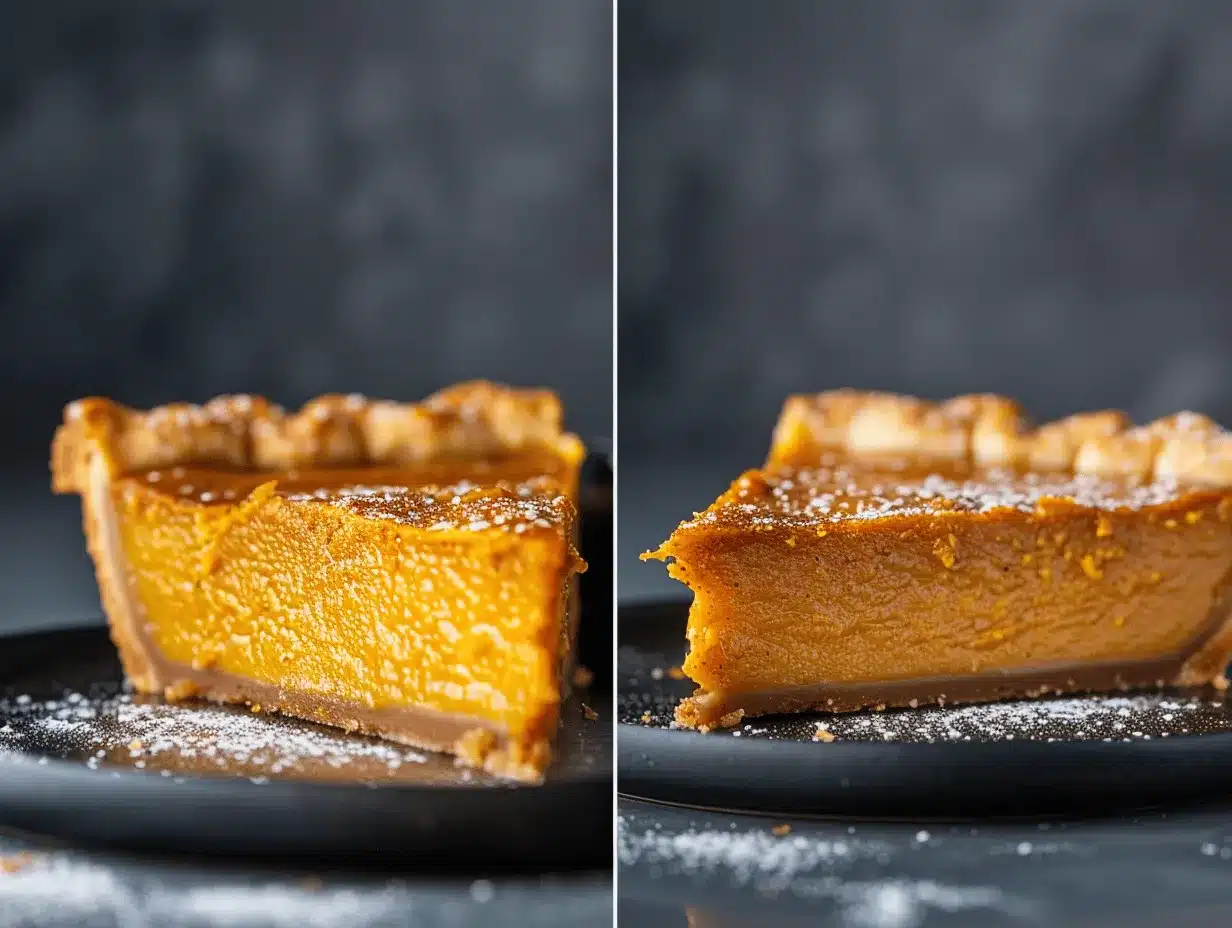
- The pie is done when the edges are set but the center jiggles slightly when you nudge the pan. A butter knife inserted about 2 inches from the crust should come out mostly clean.
- If the crust is browning too quickly, cover the edges with foil or a pie shield after the first 20 minutes.
- Cool:
- Remove the pie from the oven and place it on a cooling rack. Let it cool completely—at least 2 hours—before slicing. The filling sets as it cools, so don’t rush this step (I know, it’s hard!).
- Serve:
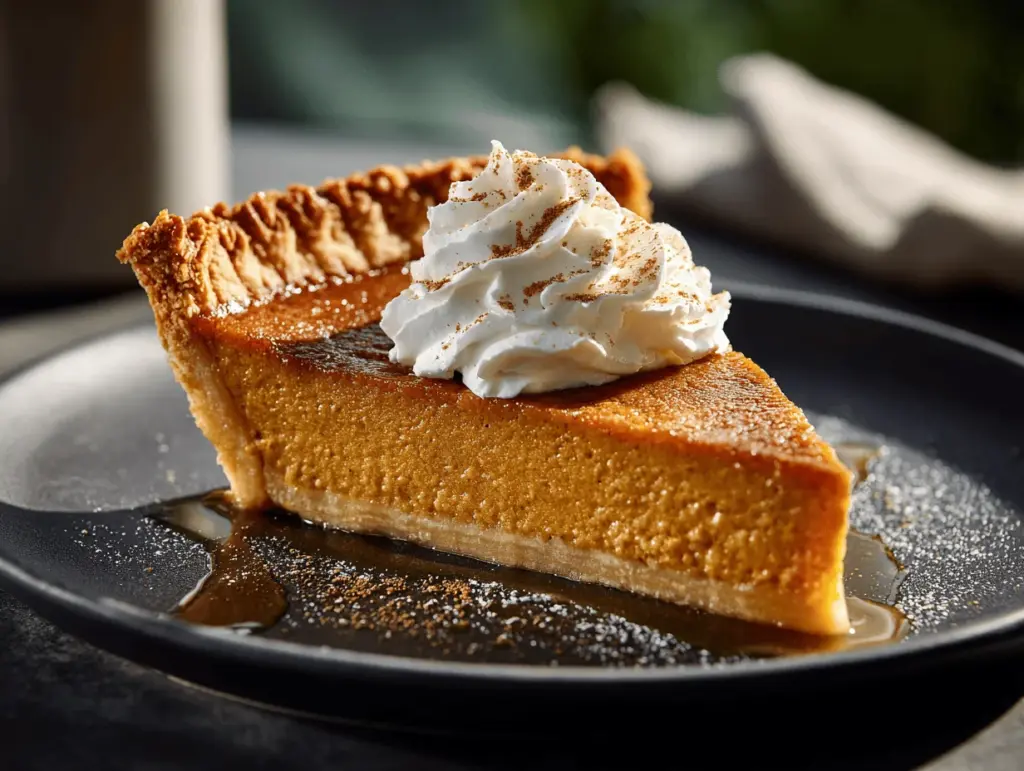
- Top with whipped cream, a sprinkle of cinnamon, and candied pecans if you want to make it fancy. Slice, serve, and watch the slices vanish!
Troubleshooting: If your pie cracks, don’t stress—it still tastes amazing. Cover with whipped cream. If the filling seems loose after cooling, chill it in the fridge for an hour or two.
Personal Note: I always make this pie the night before serving, which gives the flavors time to meld (and frees up my oven on the big day!).
Cooking Tips & Techniques
Over the years of baking maple pumpkin pie, I’ve picked up a few tricks you’ll want in your back pocket. Some came from cookbooks, some from kitchen fails, and a lot from “oh-no” moments during busy holidays. Here’s what you need to know for pie perfection:
- Blind-Bake the Crust (Optional): If you’re worried about soggy bottoms, you can blind-bake your crust for 10 minutes at 375°F (190°C) before filling. Just prick the base with a fork and use pie weights or dried beans.
- Don’t Overmix: Mix the filling just until everything is combined. Overmixing can make the filling bubbly or tough. I learned this the hard way after a pie with weird air pockets—lesson learned.
- Temperature Matters: Bake the pie on the lower oven rack. This helps the bottom crust cook through while the filling sets gently. If your oven runs hot, check the pie 5 minutes early.
- Foil Is Your Friend: Keep a roll of foil handy to cover the crust edges if they’re browning too fast. There’s nothing sadder than a burnt crust on a perfect pie.
- Let It Cool Completely: Cutting too soon results in a runny filling. I always want to dig in straight from the oven—don’t do it! The pie needs time to set properly.
- For Perfect Slices: Chill the pie for at least an hour after it’s cooled to room temperature. Use a sharp, thin knife and wipe between slices for those picture-perfect wedges.
Honestly, multitasking helps. While the pie bakes, I clean up and prep toppings. That way, everything’s ready when it’s time to serve. And if you make a mistake? Just call it “rustic” and enjoy—the flavor is what matters most.
Consistency comes with practice. If your first maple pumpkin pie isn’t picture-perfect, don’t stress. Every year mine gets a little better, but it’s always delicious. That’s the real magic of homemade pie.
Variations & Adaptations
One of the best things about this maple pumpkin pie recipe is how easy it is to tweak to fit your cravings or dietary needs. I’ve tried all sorts of spins over the years—some on purpose, some because I ran out of an ingredient! Here are a few favorites:
- Dairy-Free: Swap the heavy cream and milk for full-fat coconut milk. The pie turns out rich and luscious, with just a hint of coconut (which actually tastes amazing with pumpkin and maple).
- Gluten-Free: Use a gluten-free pie crust—either homemade with almond or oat flour, or one of the ready-made options. The filling itself is naturally gluten-free.
- Spiced Up: Add ¼ teaspoon ground cardamom or a splash of bourbon to the filling. I sometimes sneak in a little orange zest for a fresh twist—it brightens up the spices.
- Mini Maple Pumpkin Pies: Make individual pies using a muffin tin and mini crusts. Bake for 18-22 minutes at 350°F (175°C). These are a hit at potlucks and bake sales.
- Nuts & Crunch: Stir a handful of chopped toasted pecans into the filling or sprinkle on top before baking for a bit of texture.
- Vegan Version: Use flax eggs (1 tablespoon ground flaxseed + 2½ tablespoons water per egg, let sit 5 minutes) and coconut milk. The texture is slightly denser, but the flavor is spot-on.
Personal Favorite: My family loves when I top the chilled pie with whipped cream clouds and a drizzle of extra maple syrup. It’s over the top in the best way.
If you’re accommodating allergies, always double-check that your crust and filling ingredients are safe. Maple pumpkin pie is pretty forgiving—so don’t be afraid to experiment!
Serving & Storage Suggestions
Maple pumpkin pie tastes best when served slightly chilled or at cool room temperature. After the pie has cooled completely, I like to pop it in the fridge for about an hour before slicing. It firms up perfectly and the flavors really come alive. Presentation-wise, a dollop of whipped cream and a dusting of cinnamon make it Pinterest-pretty (and who doesn’t love a little extra cream?).
This pie pairs beautifully with a cup of strong coffee or chai tea. If you’re serving it for Thanksgiving, it’s the ultimate finish to a savory meal—especially with roasted turkey and cranberry sauce. For brunch, try it alongside spiced nuts or a fruit salad.
Storage: Store leftover maple pumpkin pie covered in the fridge for up to 4 days. The flavors actually get deeper after a day or two—if it lasts that long! To freeze, wrap individual slices in plastic wrap and place in a zip-top freezer bag. Thaw overnight in the fridge, then serve cold or warm gently in a low oven (300°F / 150°C) for 10-15 minutes.
One last tip: if the crust softens after a day or two, just toast slices in the oven for a few minutes to bring back that freshly-baked texture. Honestly, I think pie for breakfast is totally acceptable!
Nutritional Information & Benefits
Here’s the scoop on what’s in each slice of maple pumpkin pie (based on 1/8th of a 9-inch pie):
- Calories: ~320
- Fat: ~14g (mostly from cream and eggs)
- Carbohydrates: ~44g
- Protein: ~4g
- Fiber: ~2g
Pumpkin is packed with vitamin A and fiber, while maple syrup brings antioxidants and minerals like zinc and manganese. Using real pumpkin puree (not the pie filling) keeps things wholesome. The pie does contain dairy and eggs, so it’s not vegan unless adapted. For gluten-free diets, just use a GF crust. Watch out for nuts if you add pecan toppings—otherwise, the pie is nut-free.
Honestly, I see this dessert as a little seasonal treat—a slice of tradition with some nutritional perks. Homemade means you know exactly what goes in (and you can always make it lighter or richer to suit your needs).
Conclusion
There’s just something magical about baking a maple pumpkin pie from scratch and sharing it with people you love. The aroma, the golden filling, the cozy spices—it’s pure autumn comfort. This recipe is my standby for any holiday or chilly weekend, not just because it’s easy, but because it never fails to make folks smile (and reach for seconds).
Give this maple pumpkin pie recipe a try, and don’t be afraid to play with the spices or swap in your favorite crust. Make it your own! I hope it becomes a staple at your table just like it is at mine.
If you make this recipe, I’d love to hear how it turns out! Drop a comment below with your favorite variation, share a photo, or let me know if you have questions. Happy baking and happy fall!
Frequently Asked Questions (FAQs)
Can I use pumpkin pie filling instead of puree?
I wouldn’t recommend it. Pumpkin pie filling already has sugar and spices added, which can throw off the flavor and texture of this maple pumpkin pie recipe. Stick with pure pumpkin puree for best results.
Can I make maple pumpkin pie ahead of time?
Absolutely! In fact, it tastes even better after chilling overnight. Just cover and refrigerate until you’re ready to slice and serve.
How do I keep my pie crust from getting soggy?
Bake the pie on the lower oven rack and chill the crust before filling. For extra insurance, you can blind-bake the crust for 10 minutes before adding the filling.
Can I freeze maple pumpkin pie?
Yes! Wrap slices tightly and freeze for up to two months. Thaw overnight in the fridge and serve cold or reheat gently.
What’s the best way to get a smooth, silky filling?
Blend the filling before pouring it into the crust. This breaks up any pumpkin fibers and guarantees that dreamy, custard-like texture every time.
Pin This Recipe!
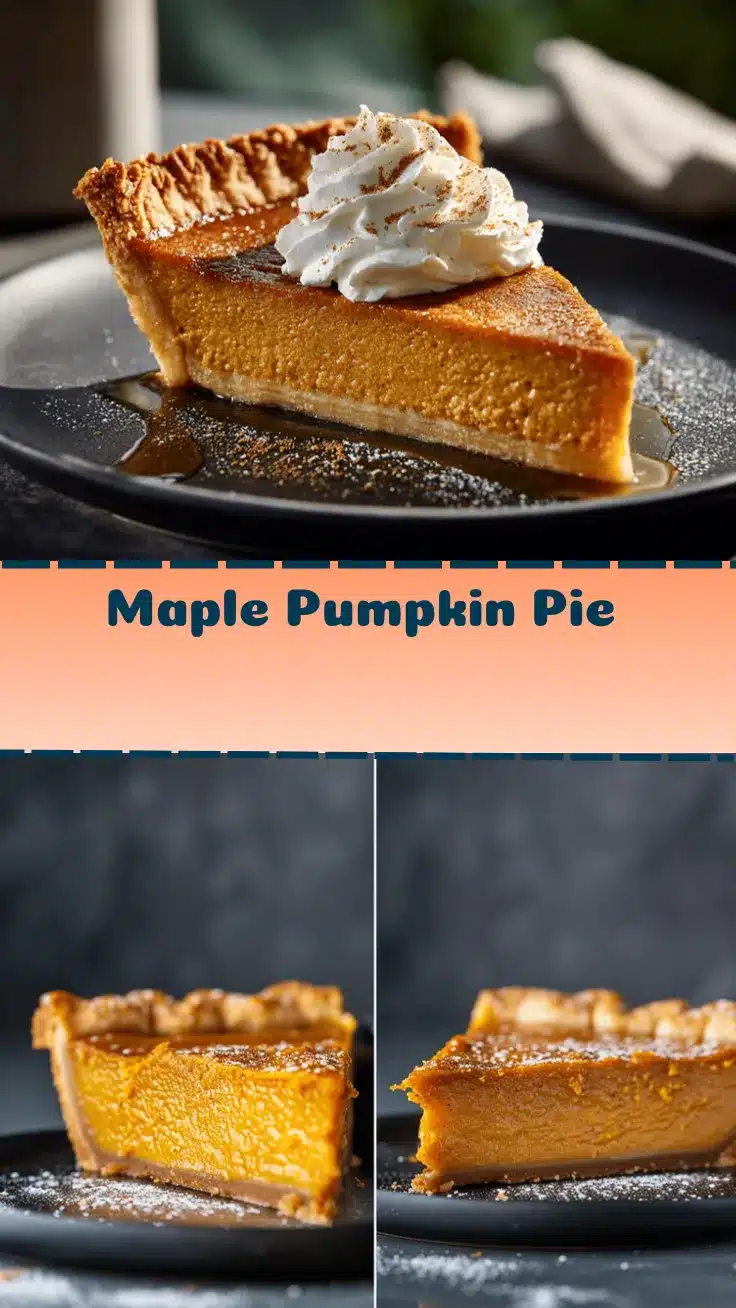
Maple Pumpkin Pie
This easy maple pumpkin pie features a silky, spiced filling sweetened with pure maple syrup, making it a crowd-pleasing Thanksgiving dessert. Simple ingredients and a foolproof method ensure a perfectly smooth, flavorful pie every time.
- Prep Time: 20 minutes
- Cook Time: 50-55 minutes
- Total Time: 2 hours 15 minutes (including cooling)
- Yield: 8 servings 1x
- Category: Dessert
- Cuisine: American
Ingredients
- 1 3/4 cups (15 oz) pure pumpkin puree (not pumpkin pie filling)
- 3/4 cup pure maple syrup (Grade A amber recommended)
- 1/4 cup brown sugar
- 3 large eggs, room temperature
- 1 cup heavy cream
- 1/4 cup whole milk
- 1 teaspoon vanilla extract
- 2 teaspoons ground cinnamon
- 3/4 teaspoon ground ginger
- 1/2 teaspoon ground nutmeg
- 1/4 teaspoon ground cloves
- 1/2 teaspoon fine sea salt
- 1 unbaked 9-inch pie crust (homemade or store-bought)
- Optional: whipped cream for garnish
- Optional: maple candied pecans for garnish
- Optional: extra ground cinnamon or nutmeg for dusting
Instructions
- Preheat oven to 425°F (220°C). Place oven rack in the lower third.
- Roll out pie crust and fit into a 9-inch pie pan. Trim and crimp edges as desired. Chill crust in fridge while preparing filling.
- In a large mixing bowl, whisk together pumpkin puree, maple syrup, and brown sugar until smooth.
- Add eggs one at a time, whisking well after each addition.
- Pour in heavy cream and milk. Stir in vanilla extract.
- Add cinnamon, ginger, nutmeg, cloves, and salt. Whisk until fully blended.
- Optional: For extra silky filling, blend mixture in a blender for 20-30 seconds.
- Pour filling into chilled crust and smooth top with a spatula.
- Bake at 425°F for 15 minutes. Without opening oven, reduce temperature to 350°F (175°C) and bake for 35-40 minutes more.
- Pie is done when edges are set and center jiggles slightly. If crust browns too quickly, cover edges with foil or pie shield.
- Remove pie from oven and cool on a rack for at least 2 hours before slicing.
- Serve topped with whipped cream, candied pecans, and a sprinkle of cinnamon or nutmeg if desired.
Notes
For a dairy-free version, substitute heavy cream and milk with full-fat coconut milk. Use a gluten-free crust for gluten-free diets. Blind-bake crust for 10 minutes at 375°F if you want extra insurance against soggy bottoms. Chill pie before slicing for perfect wedges. Pie can be made ahead and stored in the fridge for up to 4 days or frozen for up to 2 months.
Nutrition
- Serving Size: 1/8th of a 9-inch pie
- Calories: 320
- Sugar: 28
- Sodium: 220
- Fat: 14
- Saturated Fat: 8
- Carbohydrates: 44
- Fiber: 2
- Protein: 4
Keywords: maple pumpkin pie, Thanksgiving dessert, easy pumpkin pie, maple syrup pie, autumn baking, holiday pie, spiced pumpkin pie