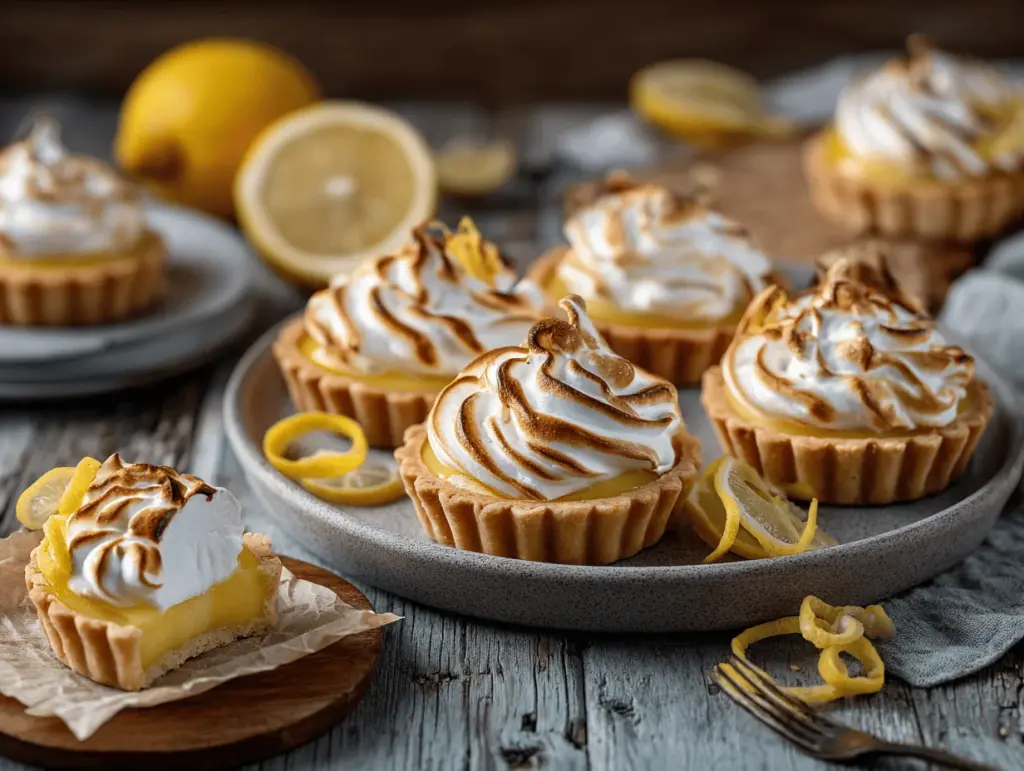
Zingy, sunshine-bright lemon filling, fluffy clouds of meringue, and a buttery crust that crumbles just so—honestly, mini lemon meringue tarts are pure joy packed into two bites! The first time I made these, I was testing recipes for my niece’s birthday tea party. I wanted something that looked fancy but was simple enough to pull together between soccer practice and homework duty. When I pulled these little beauties out of the oven, the whole kitchen smelled like a French patisserie (with a little extra citrus kick!).
These mini lemon meringue tarts are my go-to for gatherings. They’re easy to share, look adorable stacked on a tiered plate, and taste like a ray of sunshine. They’re the kind of treat that makes people pause mid-conversation and say, “Wait, did you make these?” I’ve tweaked the recipe over a dozen times, blending my love for classic lemon meringue pie with the fun, poppable format of mini tarts. You don’t need any fancy ingredients—just a few kitchen basics, a little patience, and a love for bold citrus flavor.
Whether you’re a seasoned baker or just dipping your toe into homemade desserts, this mini lemon meringue tarts recipe is worth adding to your repertoire. It fits perfectly with busy schedules, picky eaters, and anyone craving that classic sweet-tart combo. If you’re searching for easy bite-sized desserts for your next party or just a special treat after dinner, I promise these mini lemon meringue tarts won’t disappoint. I’ve tested, tasted, and (let’s face it) devoured more than my fair share, so you can trust they’ll come out just right!
Why You’ll Love This Recipe
- Quick & Easy: Ready in about 45 minutes (with a little time for cooling), these tarts fit right into weeknight dessert plans or last-minute celebrations.
- Simple Ingredients: Nothing wild here—you probably have most ingredients already (flour, eggs, lemons, sugar, butter—classic pantry stuff).
- Perfect for Any Occasion: From baby showers to backyard BBQs, these mini lemon meringue tarts always look elegant and taste amazing.
- Crowd-Pleaser: Kids adore the sweet meringue, adults love the tangy lemon, and everyone appreciates the bite-size format. They disappear fast!
- Unbelievably Delicious: That balance of tart and sweet is just…magic. The meringue is pillowy, the filling is silky, and the crust is perfectly crisp.
What really sets this mini lemon meringue tarts recipe apart is the technique. I whip the meringue to stiff peaks for maximum fluff and use fresh lemon juice for the filling. Trust me, the flavor pop is so much bigger than what you get from bottled juice. I also use a mini muffin tin for baking—no need for specialty tart pans. If you’ve ever struggled with soggy crust, my blind-baking trick keeps things crisp and golden.
These bite-sized desserts aren’t just another lemon treat—they’re a little celebration in every bite. They’re perfect when you want a treat that feels special but doesn’t take all day. I love watching people’s faces light up at the first taste. It reminds me why I keep coming back to these tartlets, especially when I want to make memories around the dessert table. They’re comfort food with a splash of citrus and a swirl of nostalgia.
What Ingredients You Will Need
This recipe uses simple, wholesome ingredients to deliver bold citrus flavor and a melt-in-your-mouth texture—no complicated shopping trips required! Here’s what you’ll need for mini lemon meringue tarts:
- For the Tart Shells:
- All-purpose flour – 1 1/2 cups (180g)
- Unsalted butter, cold and cubed – 1/2 cup (115g)
- Granulated sugar – 1/4 cup (50g)
- Salt – 1/4 tsp
- Cold water – 3-4 tbsp (45-60ml)
- For the Lemon Filling:
- Fresh lemon juice – 1/2 cup (120ml) (about 2-3 large lemons; Meyer lemons add sweetness)
- Lemon zest – 1 tbsp (from 1 large lemon)
- Granulated sugar – 2/3 cup (135g)
- Large eggs – 2, plus 2 large egg yolks
- Unsalted butter – 3 tbsp (45g), cut into pieces
- Cornstarch – 1 tbsp (8g) (for thickening)
- Pinch of salt
- For the Meringue:
- Large egg whites – 2 (save yolks for filling!)
- Granulated sugar – 1/4 cup (50g)
- Cream of tartar – 1/4 tsp (optional, but helps stabilize meringue)
- Pinch of salt
- Vanilla extract – 1/4 tsp (optional, for a subtle aroma)
If you want a gluten-free option, swap the flour for a blend like Bob’s Red Mill 1-to-1 gluten-free baking flour (I’ve tried it and it works great). For the filling, feel free to use coconut oil instead of butter if you’re dairy-free. You can even use store-bought mini tart shells to save time, though homemade is definitely worth it for flavor and crispness.
When picking lemons, go for ones that feel heavy and have a bright yellow color—they’re juicier and more flavorful. I usually grab organic ones for zest since you’re using the skin. You can use bottled lemon juice in a pinch, but the flavor isn’t as punchy (just my two cents!).
Equipment Needed
- Mini muffin tin (24-cup) – This is the perfect size for bite-sized tarts. If you don’t have one, regular muffin tins work but yield fewer, larger tarts.
- Mixing bowls – At least two: one for the crust, one for the filling.
- Hand mixer or stand mixer – For whipping up that pillowy meringue. I’ve used both and honestly, the hand mixer is easier to clean!
- Zester or microplane – To get that fresh lemon zest.
- Small saucepan – For cooking the lemon filling.
- Rolling pin – For rolling out tart dough (or use a sturdy glass in a pinch).
- Baking sheet – For blind-baking tart shells.
- Piping bag or zip-top bag (snip the corner) – For piping meringue. Spoon dollops work too if you’re feeling rustic.
- Wire rack – For cooling the tarts.
- Measuring cups and spoons – Precision matters for baking.
If you’re on a budget, you can use a regular muffin tin and halve the recipe. I’ve tried silicone molds too—they release the tarts easily but don’t brown the crust as much. Always dry your mixing bowl and mixer beaters before making meringue (a little water ruins the fluff!).
Preparation Method

- Prep the Tart Shells: Preheat your oven to 350°F (175°C). In a mixing bowl, combine 1 1/2 cups (180g) flour, 1/4 cup (50g) sugar, and 1/4 tsp salt. Add 1/2 cup (115g) cold, cubed butter. Using a pastry cutter (or your fingertips), blend until mixture resembles coarse crumbs. Add 3-4 tbsp (45-60ml) cold water, mixing just until dough holds together. (Don’t overwork it—crumbly is good!)
- Shape & Blind Bake: Roll dough to 1/8-inch thickness. Cut out circles using a 2.5-inch cookie cutter. Press into mini muffin tin cups, gently shaping edges. Prick bottoms with a fork. Chill for 10 minutes (this helps prevent shrinking). Bake for 12-15 minutes, or until lightly golden. Cool on a wire rack. If you notice the crust puffing, gently press it down with a spoon—just don’t burn yourself!
- Make Lemon Filling: In a small saucepan, combine 2/3 cup (135g) sugar, 1 tbsp cornstarch, and a pinch of salt. Whisk in 2 large eggs and 2 large yolks until smooth. Stir in 1/2 cup (120ml) lemon juice and 1 tbsp zest. Cook over medium heat, stirring constantly, until thickened and glossy (about 5-7 minutes). Remove from heat and whisk in 3 tbsp (45g) butter until melted. The filling should coat the back of a spoon. (If it’s lumpy, strain it!)
- Fill Tart Shells: Spoon or pipe lemon filling into cooled tart shells, filling nearly to the top. Let cool for 15 minutes, or chill for 30 minutes if you like a firmer filling. The lemon scent at this stage is so good you’ll want to taste-test…go ahead, I always do!
- Make the Meringue: In a clean bowl, whip 2 egg whites with 1/4 tsp cream of tartar and a pinch of salt until foamy. Gradually add 1/4 cup (50g) sugar, beating until stiff, glossy peaks form (about 3-4 minutes). Mix in 1/4 tsp vanilla if using. If the meringue looks runny, keep beating—it’ll firm up.
- Pipe & Toast Meringue: Spoon or pipe meringue onto lemon tarts, creating pretty peaks and swirls. Use the back of a spoon for rustic dollops or a piping bag for fancy tops. Toast meringue under the broiler for 1-2 minutes, watching closely. Or use a kitchen torch for extra drama—just keep it moving so you don’t burn the meringue. (I’ve scorched a few; they still taste great!)
- Cool & Serve: Let tarts cool for 10 minutes before serving. The crust should be crisp, filling silky, and meringue lightly golden. If you want to store them, let them cool completely before transferring to an airtight container.
Tip: If your tart shells stick, gently twist them out using a butter knife. For the filling, if it seems runny after chilling, add another minute of cooking next time. Meringue not peaking? Make sure your bowl is grease-free. I always wipe mine with a little vinegar before whipping.
Cooking Tips & Techniques
After making mini lemon meringue tarts more times than I can count, I’ve picked up some tricks—and a few “oops” moments worth sharing!
- Blind Baking: Always chill the dough before baking and prick the bottoms. If you skip this, you’ll get shrunken, puffy crusts (been there, done that).
- Meringue Mastery: Use room-temperature egg whites. Cold whites don’t whip up as fluffy. Add sugar slowly for smoother texture. If you overbeat, the meringue gets grainy—stop once you see stiff peaks!
- Timing Tricks: While tart shells bake, prep the lemon filling. Multitasking means you finish faster (and keep kitchen chaos in check).
- Consistency Counts: Strain lemon filling if it’s lumpy or curdled—no one wants scrambled eggs in their tarts. I’ve learned to keep stirring and stay patient.
- Piping Without Fuss: A zip-top bag works just as well as a fancy piping bag. If you don’t have either, spoon meringue on roughly—it’ll still toast into lovely peaks.
- Watch the Broiler: Broilers can go from golden to burnt in seconds. Stand by the oven (seriously, don’t walk away!).
I’ve had crusts stick, meringue weep, and fillings refuse to set. Every time, there’s a fix: more chilling, gentler mixing, or just eating the “ugly” ones before anyone sees. Baking is forgiving if you’re willing to experiment and learn on the fly!
Variations & Adaptations
- Gluten-Free: Swap all-purpose flour for gluten-free baking flour. I’ve used Bob’s Red Mill and King Arthur—both work well, just add an extra tablespoon of cold water for binding.
- Dairy-Free: Use coconut oil instead of butter in the crust and filling. The flavor is subtle and the texture is still crisp and creamy. For meringue, no change needed!
- Berry Burst: Add a teaspoon of raspberry puree to the lemon filling for a pink, tangy twist. My kids love this version—especially in summer.
- Mini Pie Format: Use a regular muffin tin for slightly larger tarts and double the filling. Adjust baking time up by 3-4 minutes for bigger crusts.
- Nutty Crust: Replace 1/4 cup (30g) of flour with finely ground almonds for a lovely texture and flavor boost.
Personally, I love making a batch with half lemon, half lime filling—just swap juice and zest. It’s a fun way to surprise guests or use up leftover citrus. For those with egg allergies, you can make a vegan meringue using aquafaba (chickpea brine); it takes a little longer to whip, but it’s fluffy and sweet!
Serving & Storage Suggestions
Serve mini lemon meringue tarts at room temperature for best flavor and texture. Arrange them on a pretty cake stand or tiered tray—trust me, they’ll be the first thing to vanish! For extra flair, sprinkle with a little extra lemon zest or add edible flowers.
Pair these tarts with light herbal teas, iced coffee, or sparkling lemonade. They’re lovely with fresh berries or a dollop of whipped cream if you want more decadence. At parties, I set them out as part of a dessert buffet—bite-sized means you can try more treats!
For storage, keep tarts in an airtight container in the fridge for up to 3 days. The crust stays crisp and the meringue holds up well. For longer storage, freeze unfilled shells for up to 1 month; just thaw and fill as needed. To reheat, pop them in a low oven (300°F/150°C) for 5 minutes—just enough to refresh the crust. The flavors actually deepen after a day, making leftovers almost better!
Nutritional Information & Benefits
| Per Tart (est. 24 tarts) | Approximate Values |
|---|---|
| Calories | 95 |
| Fat | 4g |
| Carbohydrates | 13g |
| Protein | 2g |
Lemons are a great source of vitamin C and antioxidants, making these mini lemon meringue tarts a refreshing treat that’s lighter than most desserts. The meringue adds a bit of protein, while the tart shells are low in sugar compared to traditional pies. For gluten-free or dairy-free diets, simple substitutions make these tarts accessible. Just be mindful—egg and wheat are common allergens here.
From a wellness perspective, I love that these tarts are portion-controlled. You get all the flavor without going overboard. Plus, the bright citrus always puts me in a good mood!
Conclusion
If you’re hunting for an easy bite-sized dessert that’s both stunning and scrumptious, these mini lemon meringue tarts are it. They’re a breeze to make, loved by adults and kids, and perfect for any celebration—or just a cozy night in. I’ve made them more times than I can count, and every batch brings smiles and requests for the recipe.
Feel free to tweak flavors, swap ingredients, or change up the presentation. That’s the beauty of baking—you get to make it your own! Personally, these tartlets remind me of sunny afternoons spent baking with family, and I hope they’ll bring that same warmth to your table.
Give this mini lemon meringue tarts recipe a try, and don’t forget to leave a comment with your tweaks or share on Pinterest! I’d love to hear how you make them your own. Happy baking, and may your kitchen always smell like citrus bliss!
FAQs
Can I make mini lemon meringue tarts ahead of time?
Absolutely! You can make and fill the tart shells a day in advance, then add and toast the meringue just before serving for best texture.
Can I use bottled lemon juice instead of fresh lemons?
Yes, you can—but honestly, fresh lemon juice gives a much brighter flavor. If you’re in a pinch, bottled works, but it’s not quite the same.
How do I prevent my meringue from shrinking or weeping?
Spread meringue all the way to the edge of the tart to seal in the filling. Bake or torch it until lightly browned. Using cream of tartar also helps stabilize it.
Can I freeze mini lemon meringue tarts?
It’s best to freeze unfilled tart shells. Filled tarts and meringue become soft after thawing, so fresh is best for serving.
What’s the easiest way to remove tarts from the mini muffin tin?
Let tarts cool completely, then gently twist them out using a butter knife. If the crust sticks, a quick run around the edges helps release them.
Pin This Recipe!
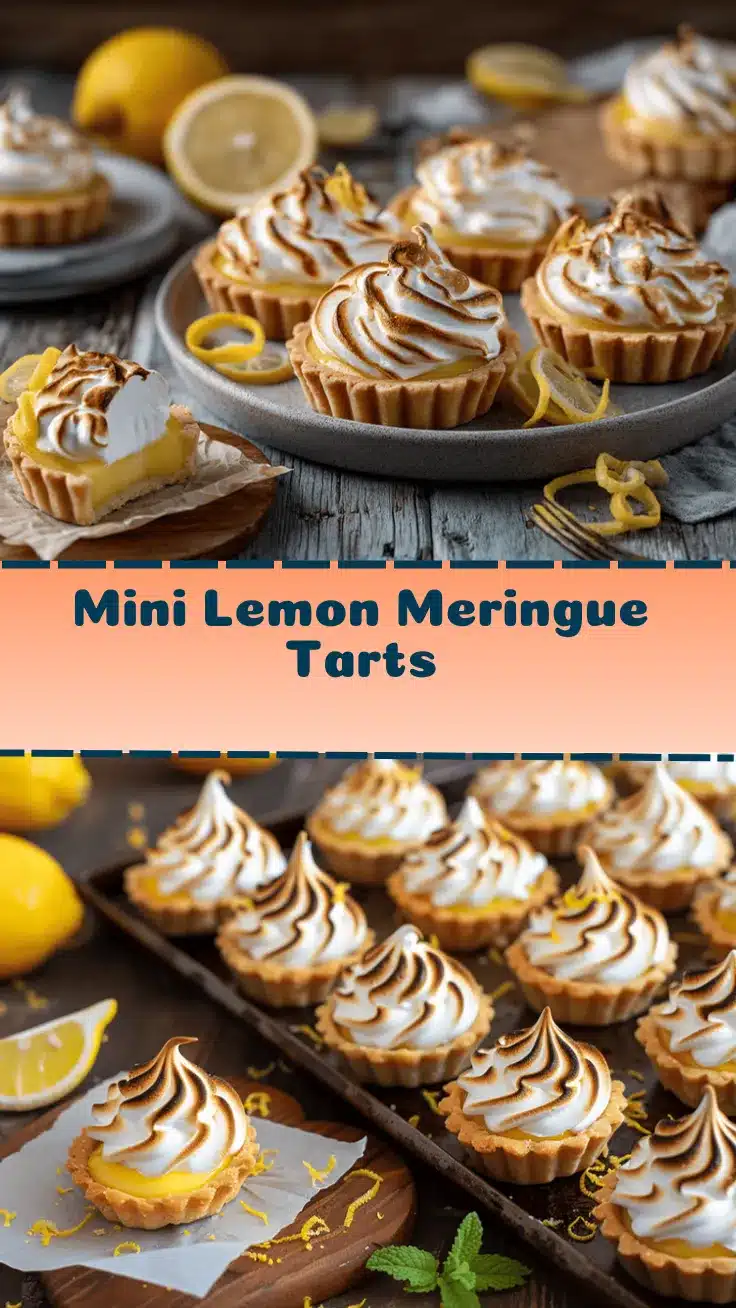
Mini Lemon Meringue Tarts

These mini lemon meringue tarts feature a zingy lemon filling, fluffy meringue, and a buttery crust. Perfect for parties or tea time, they’re easy to make, adorable, and packed with bright citrus flavor.
- Prep Time: 20 minutes
- Cook Time: 25 minutes
- Total Time: 45 minutes
- Yield: 24 mini tarts 1x
- Category: Dessert
- Cuisine: American
Ingredients
- 1 1/2 cups all-purpose flour
- 1/2 cup unsalted butter, cold and cubed
- 1/4 cup granulated sugar
- 1/4 tsp salt
- 3–4 tbsp cold water
- 1/2 cup fresh lemon juice (about 2–3 large lemons)
- 1 tbsp lemon zest (from 1 large lemon)
- 2/3 cup granulated sugar
- 2 large eggs
- 2 large egg yolks
- 3 tbsp unsalted butter, cut into pieces
- 1 tbsp cornstarch
- Pinch of salt
- 2 large egg whites
- 1/4 cup granulated sugar
- 1/4 tsp cream of tartar (optional)
- Pinch of salt
- 1/4 tsp vanilla extract (optional)
Instructions
- Preheat oven to 350°F (175°C). In a mixing bowl, combine flour, sugar, and salt. Add cold, cubed butter and blend until mixture resembles coarse crumbs. Add cold water, mixing just until dough holds together.
- Roll dough to 1/8-inch thickness. Cut out circles using a 2.5-inch cookie cutter. Press into mini muffin tin cups, shaping edges. Prick bottoms with a fork. Chill for 10 minutes.
- Bake tart shells for 12-15 minutes, or until lightly golden. Cool on a wire rack.
- In a small saucepan, combine sugar, cornstarch, and a pinch of salt. Whisk in eggs and yolks until smooth. Stir in lemon juice and zest. Cook over medium heat, stirring constantly, until thickened and glossy (about 5-7 minutes). Remove from heat and whisk in butter until melted.
- Spoon or pipe lemon filling into cooled tart shells, filling nearly to the top. Let cool for 15 minutes, or chill for 30 minutes for a firmer filling.
- In a clean bowl, whip egg whites with cream of tartar and a pinch of salt until foamy. Gradually add sugar, beating until stiff, glossy peaks form (about 3-4 minutes). Mix in vanilla if using.
- Spoon or pipe meringue onto lemon tarts, creating peaks and swirls. Toast meringue under the broiler for 1-2 minutes, watching closely, or use a kitchen torch.
- Let tarts cool for 10 minutes before serving. Store leftovers in an airtight container in the fridge for up to 3 days.
Notes
For gluten-free tarts, substitute flour with a 1-to-1 gluten-free blend. Use coconut oil instead of butter for dairy-free. Chill dough before baking for crisp crusts. Use room-temperature egg whites for fluffier meringue. Strain lemon filling if lumpy. Watch the broiler closely when toasting meringue.
Nutrition
- Serving Size: 1 mini tart
- Calories: 95
- Sugar: 8
- Sodium: 40
- Fat: 4
- Saturated Fat: 2
- Carbohydrates: 13
- Fiber: 0.5
- Protein: 2
Keywords: lemon meringue tarts, mini desserts, bite-sized dessert, lemon tartlets, party dessert, tea party, citrus dessert, easy baking, meringue, tart shells