Introduction
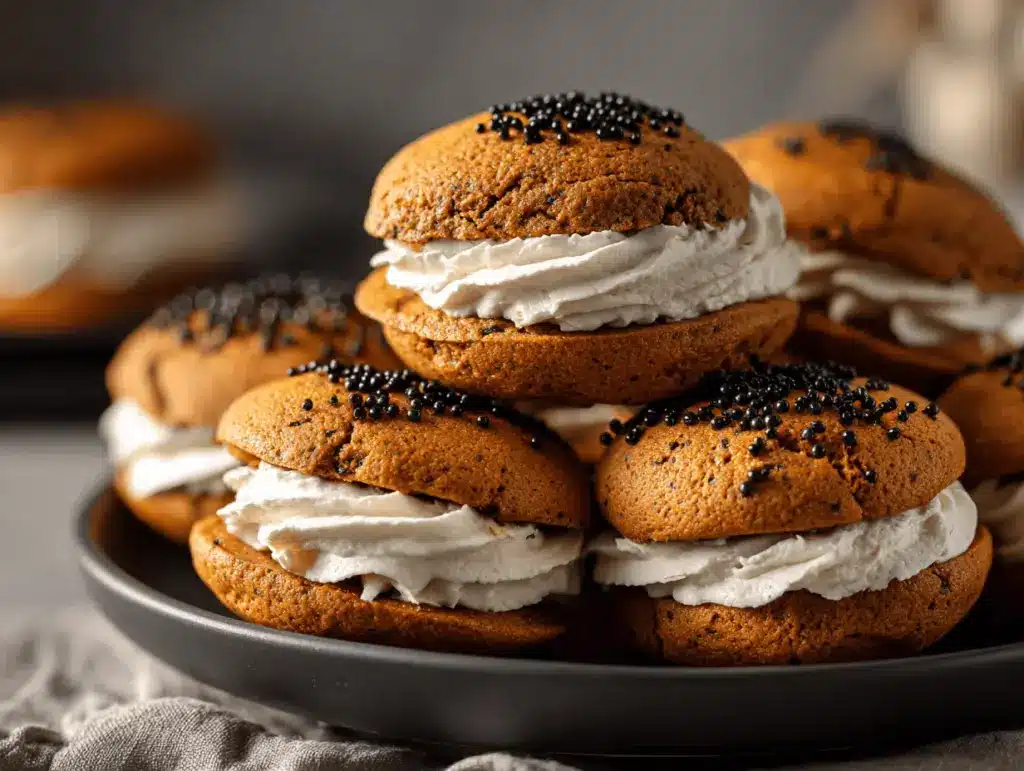
The first time I pulled a batch of pumpkin spice whoopie pies out of the oven, my whole kitchen smelled like autumn in a bakery—warm, spiced, and just a little bit magical. There’s something about that classic pumpkin aroma mixed with cinnamon and nutmeg that instantly makes you want to cozy up in a sweater, even if it’s still warm outside. If you’re anything like me, you know that pumpkin spice isn’t just a flavor; it’s a full-on mood!
I stumbled onto these pumpkin spice whoopie pies during a chilly October when I just couldn’t decide between cookies, cake, or something creamy. You know those moments when you want something extra special but don’t want to fuss with fancy equipment or supermarket runs? These whoopie pies are my answer every time. Pumpkin lovers, this one’s for you—especially if you’re looking for that perfect treat to bring to a potluck, bake sale, or just to enjoy with a giant mug of coffee.
After making these pumpkin spice whoopie pies at least a dozen times (and tweaking them every fall), I can promise they’re foolproof. The cake-like cookies are so fluffy, and the creamy filling is sweet without being overwhelming. I’ve shared these with my picky siblings, my neighbors, and even brought a batch to a holiday party—every time, someone asks for the recipe. Whether you’re a seasoned baker or just starting out, you’ll love how easy, comforting, and downright irresistible these whoopie pies are. Trust me—this is the pumpkin spice whoopie pies recipe you’ll come back to, year after year.
Why You’ll Love This Recipe
- Quick & Easy: These pumpkin spice whoopie pies come together in under an hour, so you won’t be stuck in the kitchen all afternoon. Perfect for last-minute cravings or when guests show up unexpectedly.
- Simple Ingredients: No trips to fancy stores required. Most of these ingredients are probably already hiding in your pantry—hello, canned pumpkin and basic baking staples!
- Perfect for Fall Gatherings: These treats absolutely steal the show at Thanksgiving, Halloween parties, or afternoon coffee breaks when the leaves start to turn. Honestly, they make any fall day feel special.
- Crowd-Pleaser: Kids, adults, pumpkin skeptics—everyone goes wild for these. I’ve seen people sneak seconds (and thirds) when they think no one’s looking.
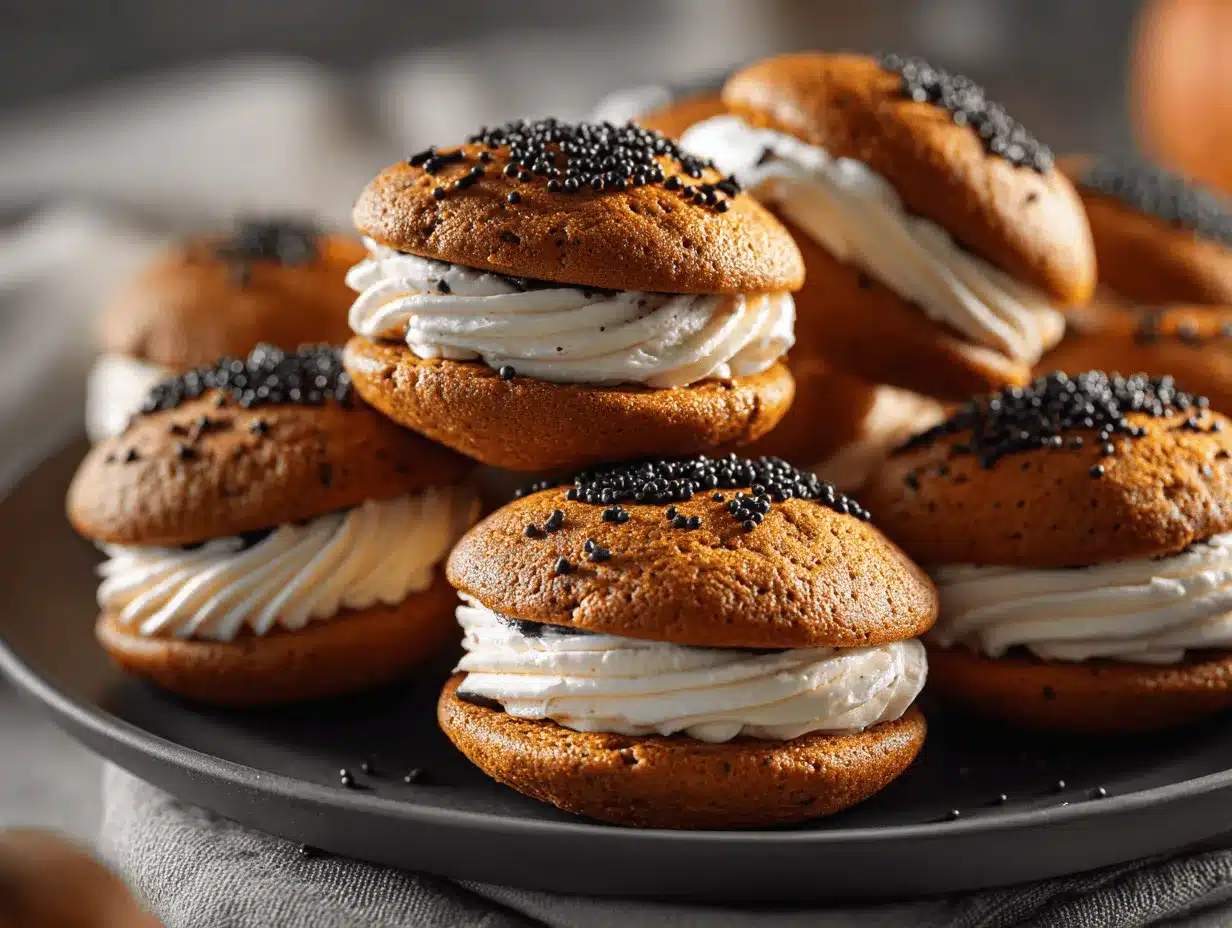
- Unbelievably Delicious: Soft, pillowy pumpkin cakes with just the right amount of spice, sandwiched with a creamy, tangy filling. They’re the kind of dessert that makes you sigh with the first bite.
What makes these pumpkin spice whoopie pies different? For starters, I blend the pumpkin puree directly into the batter, so every bite is moist and flavorful—not dry or bland like some store-bought versions. The spice blend is balanced—no single note overwhelms, but you still get that classic autumn warmth. The filling? Oh, it’s silky, sweet, and has just a hint of tang from the cream cheese.
This isn’t just another pumpkin dessert—it’s the perfect marriage of nostalgia and comfort with a modern twist. You get the “wow” factor (everyone asks for the recipe), but you don’t have to stress over complicated steps or endless bowls to wash. If you love all things cozy, crave that pumpkin kick during fall, or just want something homemade that feels like a big, edible hug, you’re in the right place.
What Ingredients You Will Need
This pumpkin spice whoopie pies recipe uses pantry staples and a few seasonal favorites to create the ultimate fall treat. I’ve grouped the ingredients by the cake and filling for easy shopping and prep. Don’t worry if you need to make a swap—I’ve included my favorite substitutions, too.
For the Pumpkin Spice Cakes:
- 2 cups (250g) all-purpose flour (or use a 1:1 gluten-free blend for allergy-friendly baking)
- 1 tablespoon pumpkin pie spice (or mix 2 tsp cinnamon, ½ tsp nutmeg, ½ tsp ginger, ¼ tsp cloves)
- 1 teaspoon baking powder
- ½ teaspoon baking soda
- ½ teaspoon salt
- 1 cup (200g) brown sugar, packed (adds a caramel note and keeps the cakes moist)
- ½ cup (100g) granulated sugar
- ½ cup (120ml) vegetable oil (can swap for melted coconut oil or light olive oil)
- 1 cup (240g) pure pumpkin puree (Libby’s is my go-to, but homemade works too!)
- 2 large eggs, room temperature
- 1 teaspoon vanilla extract
For the Creamy Filling:
- ½ cup (113g) unsalted butter, softened
- 4 ounces (115g) cream cheese, softened (I love using Philadelphia for the smoothest texture)
- 2 cups (240g) powdered sugar, sifted (plus extra for dusting, if you like a “snowy” finish)
- 1 teaspoon vanilla extract
- Pinch of salt (just a tiny bit—it makes the filling pop!)
Optional Add-Ins and Toppings:
- Chopped toasted pecans or walnuts (for crunch)
- Cinnamon sugar for dusting
- Mini chocolate chips (stir a few into the filling for a fun twist)
Ingredient tips: If you don’t have pumpkin pie spice, mix your own with cinnamon, nutmeg, ginger, and cloves—honestly, it’s just as good. For a dairy-free version, swap the butter and cream cheese for plant-based alternatives (I’ve tried Miyoko’s and Kite Hill with great results). And if you’re out of brown sugar, you can use all granulated, but the cakes won’t have quite the same depth—just keeping it real!
Equipment Needed
- Mixing bowls: You’ll need at least two—one for dry ingredients and one for wet. Glass or stainless steel both work fine.
- Electric mixer or stand mixer: A handheld mixer works great for the filling and batter, but you can use a sturdy whisk and some elbow grease if needed (I’ve been there on vacation with no mixer!).
- Baking sheets: Standard rimmed baking sheets lined with parchment paper prevent sticking and make cleanup a breeze.
- Cookie scoop or tablespoon: For evenly sized whoopie pies, a medium cookie scoop (about 1.5 tablespoons) is my secret weapon. A soup spoon will do in a pinch.
- Wire rack: For cooling the cakes quickly and evenly—no soggy bottoms!
- Offset spatula or butter knife: Makes spreading the creamy filling so much easier.
- Parchment paper: Keeps your pans clean and helps the cakes lift off easily.
If you’re short on specialty gear, don’t stress. I’ve made these with basic spoons and even used a Ziploc bag with the corner snipped off to pipe the filling (works like a charm). Just be gentle with nonstick pans—avoid metal utensils to keep them scratch-free.
Honestly, you don’t need to break the bank for good tools. My favorite mixing bowls came from a discount store, and they’ve lasted for ages. Just don’t forget to wash and dry everything well—especially if you’re using anything with residual oil, which can mess up the filling texture.
Preparation Method
-
Preheat the oven and prep your pans:
Set your oven to 350°F (175°C). Line two baking sheets with parchment paper. This helps the pumpkin spice whoopie pies bake evenly and prevents sticking. -
Mix the dry ingredients:
In a medium bowl, whisk together 2 cups (250g) flour, 1 tablespoon pumpkin pie spice, 1 teaspoon baking powder, ½ teaspoon baking soda, and ½ teaspoon salt. Whisking helps distribute the spices so you don’t get a bite of all nutmeg (not fun!). -
Combine the wet ingredients:
In a large bowl, beat 1 cup (200g) brown sugar, ½ cup (100g) granulated sugar, and ½ cup (120ml) vegetable oil on medium speed until well blended—about 2 minutes. Add 1 cup (240g) pumpkin puree, 2 eggs, and 1 teaspoon vanilla extract. Beat until smooth and creamy. The mixture should look thick and glossy. -
Combine wet and dry mixtures:
Add the dry ingredients to the wet, about half at a time, mixing gently after each addition. Don’t overmix—just until you see no more streaks of flour. Overmixing can make the cakes tough (and nobody wants a chewy whoopie pie). -
Scoop and shape the cakes:
Use a cookie scoop (about 1.5 tbsp per cake) to drop mounds of batter onto your prepared baking sheets, spacing them about 2 inches (5cm) apart. The batter is sticky; wet your fingers to gently pat down any peaks. -
Bake:
Bake for 12–14 minutes, or until the cakes are puffed, set, and a toothpick inserted in the center comes out clean. They should spring back lightly when touched. Let cool on the pan for 5 minutes, then transfer to a wire rack to cool completely. -
Make the creamy filling:
While the cakes cool, beat ½ cup (113g) softened butter and 4 ounces (115g) cream cheese together until smooth—about 2 minutes. Add 2 cups (240g) powdered sugar, 1 teaspoon vanilla, and a pinch of salt. Beat until fluffy and creamy, scraping the bowl as needed. If it’s too thick, add a spoonful of milk; too thin, add more powdered sugar. -
Assemble the whoopie pies:
Pair up the cooled cakes by size. Pipe or spread a generous tablespoon of filling on the flat side of one cake, then gently sandwich with another. Press lightly so the filling reaches the edges. -
Optional finishing touches:
Roll the edges in chopped nuts or mini chocolate chips, or dust with powdered sugar for a festive look. -
Chill (optional but recommended):
Place assembled pies in the fridge for 20–30 minutes to set the filling. They’re less messy this way and the flavors meld together beautifully.
Prep note: If your filling gets too soft, just pop it in the fridge for 10 minutes. And if your cakes spread too much, the batter may have been overmixed or the oven wasn’t hot enough—easy fix for next time!
Cooking Tips & Techniques
Let’s face it—baking pumpkin spice whoopie pies isn’t hard, but a few tricks can make them bakery-worthy every time. Here’s what I’ve learned from a few, uh, “interesting” batches along the way:
- Don’t overmix the batter: As tempting as it is to keep stirring, stop as soon as the flour disappears. Overmixed batter means dense, tough cakes instead of soft, fluffy ones.
- Use room temperature ingredients: This is especially true for the eggs, butter, and cream cheese. Cold ingredients can make the batter lumpy and the filling grainy—trust me, I’ve tried to rush it and regretted it!
- Space out your cakes: The batter spreads as it bakes. I’ve had a few “mega whoopie pies” when I got lazy and crowded the pan, so leave a solid 2 inches (5cm) between each scoop.
- Watch the baking time: Every oven is a little different. My first batch was a smidge dry because I left them in too long. Start checking at 12 minutes and pull them as soon as they’re set and springy.
- Cool cakes completely before filling: Warm cakes will melt your filling and you’ll have a sticky mess. I always get impatient, but it’s worth waiting!
- Pipe the filling for a cleaner look: If you want picture-perfect whoopie pies for Pinterest, pipe the filling with a zip-top bag. No fancy piping tips needed.
And if your filling turns runny, it’s usually because the butter and cream cheese were too soft. Pop the bowl in the fridge for a few minutes, then whip again. Multitask by making the filling while the cakes cool—that way, everything comes together at once.
Consistency is all about little details—measure flour by spooning it into the cup and leveling (not scooping straight from the bag). And remember, if something goes a little sideways, they’ll still taste amazing. My “ugly” ones always disappear first!
Variations & Adaptations
One of the best things about this pumpkin spice whoopie pies recipe is how easy it is to customize. Here are some of my favorite ways to switch things up:
- Gluten-Free: Swap the all-purpose flour for your favorite 1:1 gluten-free baking blend. I’ve had great results with Bob’s Red Mill—no one could tell the difference!
- Dairy-Free: Use vegan butter and dairy-free cream cheese (like Kite Hill or Miyoko’s) in the filling and batter. The pies stay soft and the filling whips up surprisingly well.
- Chocolate Lovers: Stir a handful of mini chocolate chips into the batter or filling. You could also add a drizzle of melted dark chocolate over the finished whoopie pies—extra decadent!
- Nutty Crunch: Add chopped toasted pecans or walnuts to the cake batter or roll the finished whoopie pies in nuts for a fun, crunchy edge.
- Maple Cream Filling: Swap out the vanilla in the filling for real maple syrup (about 2 tablespoons) for an extra hit of fall flavor. I do this for Thanksgiving and it’s always a hit.
If you want to try baking these in mini form for parties, just use a teaspoon of batter for each cake and reduce the bake time to 8–10 minutes. I once made a batch with a dash of cardamom in the spice blend—unexpected but so good! If you’re baking for someone with allergies, always double-check your ingredient labels (some canned pumpkin and baking powders can have hidden dairy or gluten).
Serving & Storage Suggestions
These pumpkin spice whoopie pies are best served at room temperature, when the cake is pillowy and the filling is creamy and soft. Arrange them on a pretty platter—dust with powdered sugar or sprinkle with cinnamon for that extra fall flair. They pair beautifully with hot apple cider, chai tea, or even a pumpkin spice latte (why not go all in?).
For storing, keep the assembled whoopie pies in an airtight container in the fridge—they’ll stay fresh for up to 4 days. If you want to make them ahead, store the cakes and filling separately and assemble the day you need them. You can also freeze the unfilled cakes for up to a month—just thaw, fill, and serve.
To reheat slightly stale pies, let them sit at room temperature for 30 minutes or microwave for 10 seconds. The flavors actually deepen after a day, so leftovers (if you have any) are a real treat. If packing for lunchboxes or picnics, wrap each pie in parchment to keep them from sticking.
Nutritional Information & Benefits
Each pumpkin spice whoopie pie (based on 16 pies) contains approximately 240 calories, 10g fat, 35g carbohydrates, and 3g protein. The pumpkin puree adds a dose of vitamin A, fiber, and beta-carotene (good for your eyes and immune system). Using real pumpkin and warming spices means you get natural flavor without any weird additives.
These whoopie pies are naturally nut-free if you skip the optional toppings, and you can easily make them dairy- or gluten-free with simple swaps. There’s a bit of sugar, sure, but sometimes, a homemade treat is just what you need for balance. Personally, I love knowing exactly what goes into my desserts—no mystery ingredients, just real, honest baking.
Conclusion
If you’re craving cozy autumn vibes or want a showstopper for your next fall gathering, this pumpkin spice whoopie pies recipe truly delivers. They’re soft, spiced, creamy, and absolutely unforgettable—a treat that brings people together and makes any moment feel just a little bit special.
Don’t be afraid to put your own spin on these—try a new filling, swap out spices, or get creative with toppings. That’s half the fun! Honestly, these whoopie pies have become a fall tradition in my house, and I hope they’ll earn a spot in yours, too.
If you give this recipe a try, let me know how it went! Drop a comment, share your photos, or tell me about your favorite twist. There’s nothing better than seeing these sweet pumpkin treats bringing smiles to more tables. Happy baking—and happy fall!
Frequently Asked Questions
How do I keep my pumpkin spice whoopie pies from spreading too much?
Make sure your batter isn’t overmixed and your oven is fully preheated. Chilling the batter for 10–15 minutes before baking can also help the cakes hold their shape.
Can I make these pumpkin spice whoopie pies ahead of time?
Yes! Bake the cakes and store them in an airtight container for up to 2 days. Assemble with the filling right before serving for the freshest taste.
What’s the best way to get even-sized whoopie pies?
A medium cookie scoop (about 1.5 tablespoons) works wonders for consistent size. If you don’t have one, use a tablespoon and try to keep the mounds uniform.
Can I freeze pumpkin spice whoopie pies?
Absolutely. Freeze the unfilled cakes in a single layer, then stack with parchment between layers. Thaw, fill, and serve. Filled pies can be frozen, but the texture is best if you fill them fresh.
Is there a way to make these whoopie pies vegan?
Yes! Use flax eggs (1 tbsp ground flax + 2.5 tbsp water per egg), plant-based butter, and vegan cream cheese. The pies turn out soft and the filling is still super creamy.
Pin This Recipe!

Pumpkin Spice Whoopie Pies
These easy homemade pumpkin spice whoopie pies feature soft, spiced pumpkin cakes sandwiched with a creamy, tangy filling. Perfect for fall gatherings, bake sales, or cozy afternoons with coffee.
- Prep Time: 20 minutes
- Cook Time: 14 minutes
- Total Time: 45 minutes
- Yield: 16 whoopie pies 1x
- Category: Dessert
- Cuisine: American
Ingredients
- 2 cups (250g) all-purpose flour (or use a 1:1 gluten-free blend for allergy-friendly baking)
- 1 tablespoon pumpkin pie spice (or mix 2 tsp cinnamon, ½ tsp nutmeg, ½ tsp ginger, ¼ tsp cloves)
- 1 teaspoon baking powder
- ½ teaspoon baking soda
- ½ teaspoon salt
- 1 cup (200g) brown sugar, packed
- ½ cup (100g) granulated sugar
- ½ cup (120ml) vegetable oil (can swap for melted coconut oil or light olive oil)
- 1 cup (240g) pure pumpkin puree
- 2 large eggs, room temperature
- 1 teaspoon vanilla extract
- ½ cup (113g) unsalted butter, softened
- 4 ounces (115g) cream cheese, softened
- 2 cups (240g) powdered sugar, sifted (plus extra for dusting, if desired)
- 1 teaspoon vanilla extract
- Pinch of salt
- Optional: Chopped toasted pecans or walnuts
- Optional: Cinnamon sugar for dusting
- Optional: Mini chocolate chips
Instructions
- Preheat oven to 350°F (175°C). Line two baking sheets with parchment paper.
- In a medium bowl, whisk together flour, pumpkin pie spice, baking powder, baking soda, and salt.
- In a large bowl, beat brown sugar, granulated sugar, and vegetable oil on medium speed until well blended (about 2 minutes). Add pumpkin puree, eggs, and vanilla extract. Beat until smooth and creamy.
- Add the dry ingredients to the wet mixture in two additions, mixing gently after each. Mix just until no streaks of flour remain.
- Using a cookie scoop (about 1.5 tablespoons per cake), drop mounds of batter onto prepared baking sheets, spacing about 2 inches apart. Wet fingers to gently pat down any peaks.
- Bake for 12–14 minutes, or until cakes are puffed, set, and a toothpick inserted in the center comes out clean. Let cool on the pan for 5 minutes, then transfer to a wire rack to cool completely.
- While cakes cool, beat softened butter and cream cheese together until smooth (about 2 minutes). Add powdered sugar, vanilla, and a pinch of salt. Beat until fluffy and creamy. Adjust consistency with a spoonful of milk if too thick, or more powdered sugar if too thin.
- Pair up cooled cakes by size. Pipe or spread a generous tablespoon of filling on the flat side of one cake, then gently sandwich with another. Press lightly so the filling reaches the edges.
- Optional: Roll edges in chopped nuts or mini chocolate chips, or dust with powdered sugar.
- Optional: Chill assembled pies in the fridge for 20–30 minutes to set the filling.
Notes
For gluten-free, use a 1:1 gluten-free flour blend. For dairy-free, substitute plant-based butter and cream cheese. Don’t overmix the batter for fluffier cakes. Chill the filling if it becomes too soft. Cakes and filling can be made ahead and assembled before serving. Store assembled pies in the fridge for up to 4 days or freeze unfilled cakes for up to a month.
Nutrition
- Serving Size: 1 whoopie pie
- Calories: 240
- Sugar: 22
- Sodium: 180
- Fat: 10
- Saturated Fat: 5
- Carbohydrates: 35
- Fiber: 1
- Protein: 3
Keywords: pumpkin spice, whoopie pies, fall dessert, easy pumpkin recipe, cream cheese filling, homemade, autumn, Thanksgiving, Halloween, nut-free, crowd-pleaser