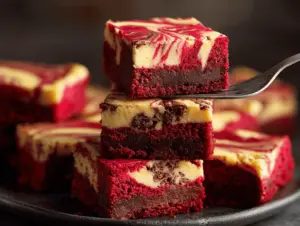
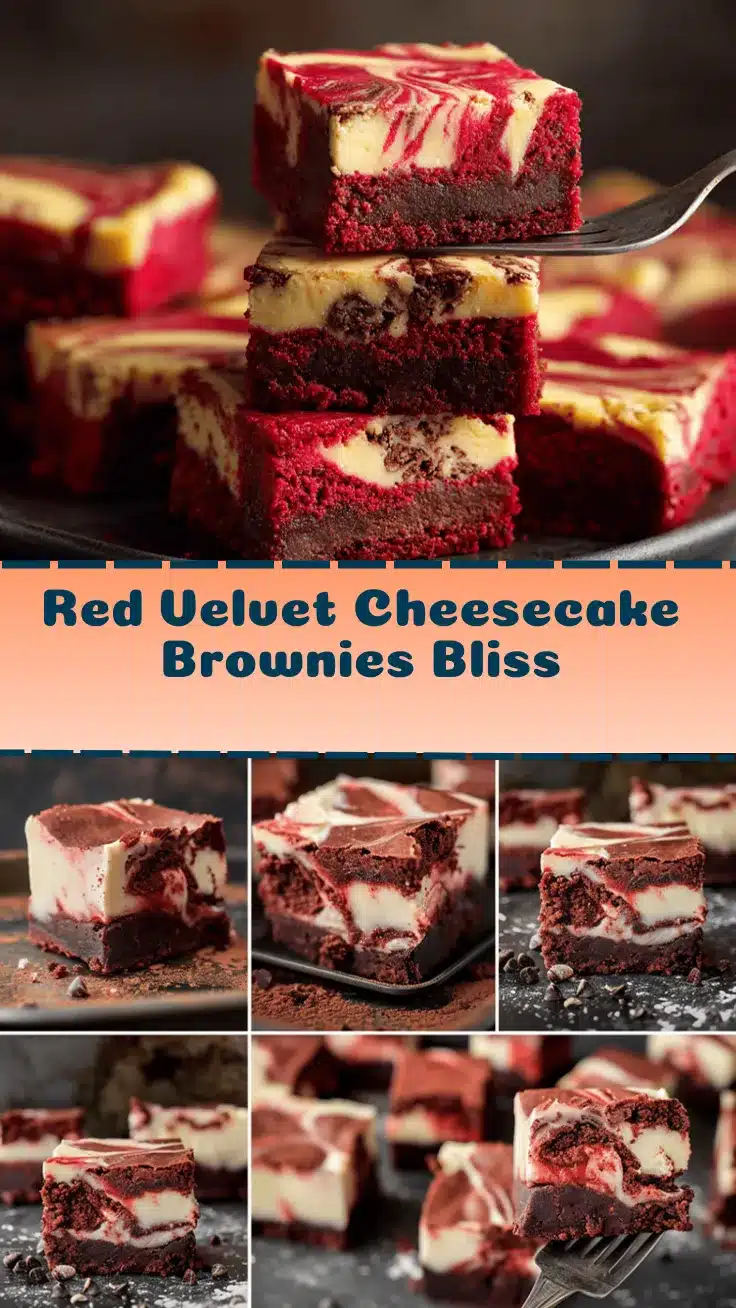
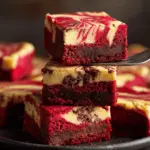
The first time I pulled a pan of red velvet cheesecake brownies out of the oven, I swear the kitchen smelled like a bakery in heaven. Imagine deep, chocolatey red velvet swirled with creamy cheesecake—every bite a little love letter to your sweet tooth. It’s that magic combo of fudgy brownie and tangy cheesecake, all topped with those swirls that look almost too pretty to eat (almost!).
Honestly, I stumbled onto this red velvet cheesecake brownies recipe by accident. I was craving something rich and chocolatey, but also a little tangy. So, I blended two of my favorite desserts—classic red velvet cake and creamy cheesecake—into one pan. Let’s just say, it was a very good day. I’ve tweaked and tested this recipe more times than I can count, and now, it’s my go-to for potlucks, birthday parties, or just when the craving hits.
Red velvet cheesecake brownies aren’t just beautiful—they’re easy, reliable, and always a hit. They look fancy enough for a holiday table but are simple enough to whip up on a Tuesday night. Plus, they’re perfect for sharing (or, honestly, for sneaking a piece as a midnight snack). If you’re looking for a dessert that combines the nostalgia of red velvet with the comfort of cheesecake, you’re in the right place. Let me show you how to make these irresistible red velvet cheesecake brownies—you’ll be hooked after the first swirl.
Why You’ll Love This Red Velvet Cheesecake Brownies Recipe
- Quick & Easy: These red velvet cheesecake brownies come together in under an hour. Even if you’re new to baking, you’ll get gorgeous results with simple steps.
- Simple Ingredients: No weird specialty items here—just pantry staples, cream cheese, and cocoa powder. You probably have most of it on hand already.
- Perfect for Any Occasion: Whether it’s Valentine’s Day, a birthday, or just a cozy weekend, these brownies fit right in. They’re also my secret weapon for bake sales and office parties.
- Crowd-Pleaser: I’ve never brought home leftovers. Kids, adults, even the “I don’t like sweets” folks—everyone asks for the recipe.
- Unbelievably Delicious: The fudgy red velvet base with creamy cheesecake swirls is pure comfort food, with a touch of elegance. That tangy-sweet balance is spot on.
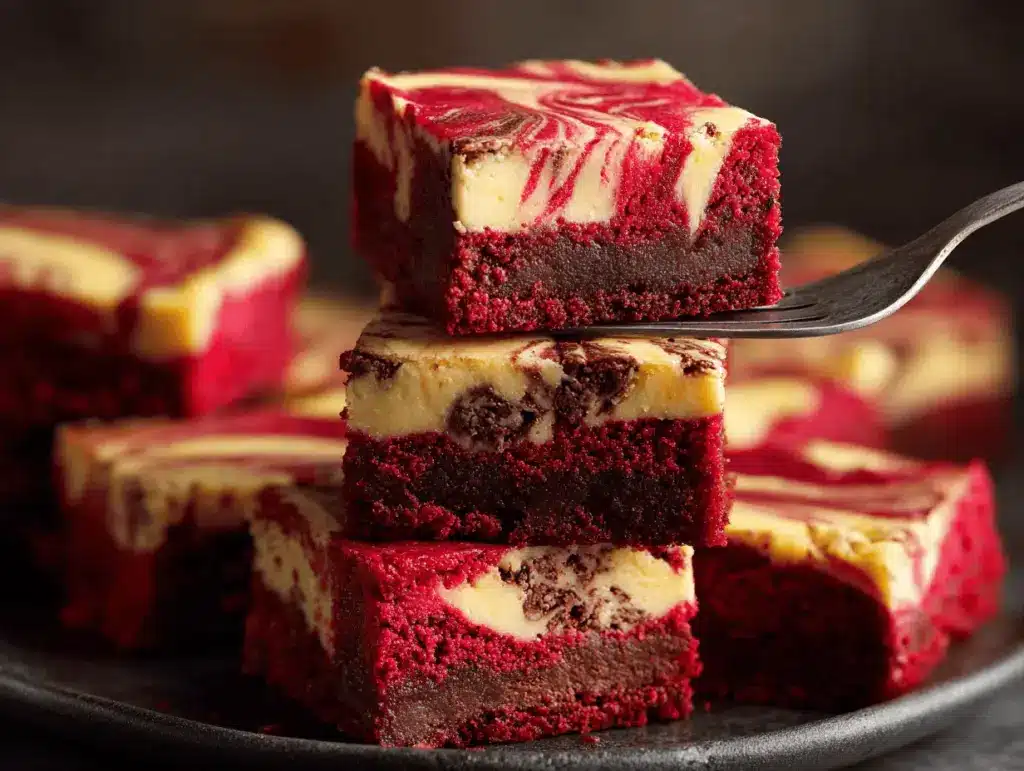
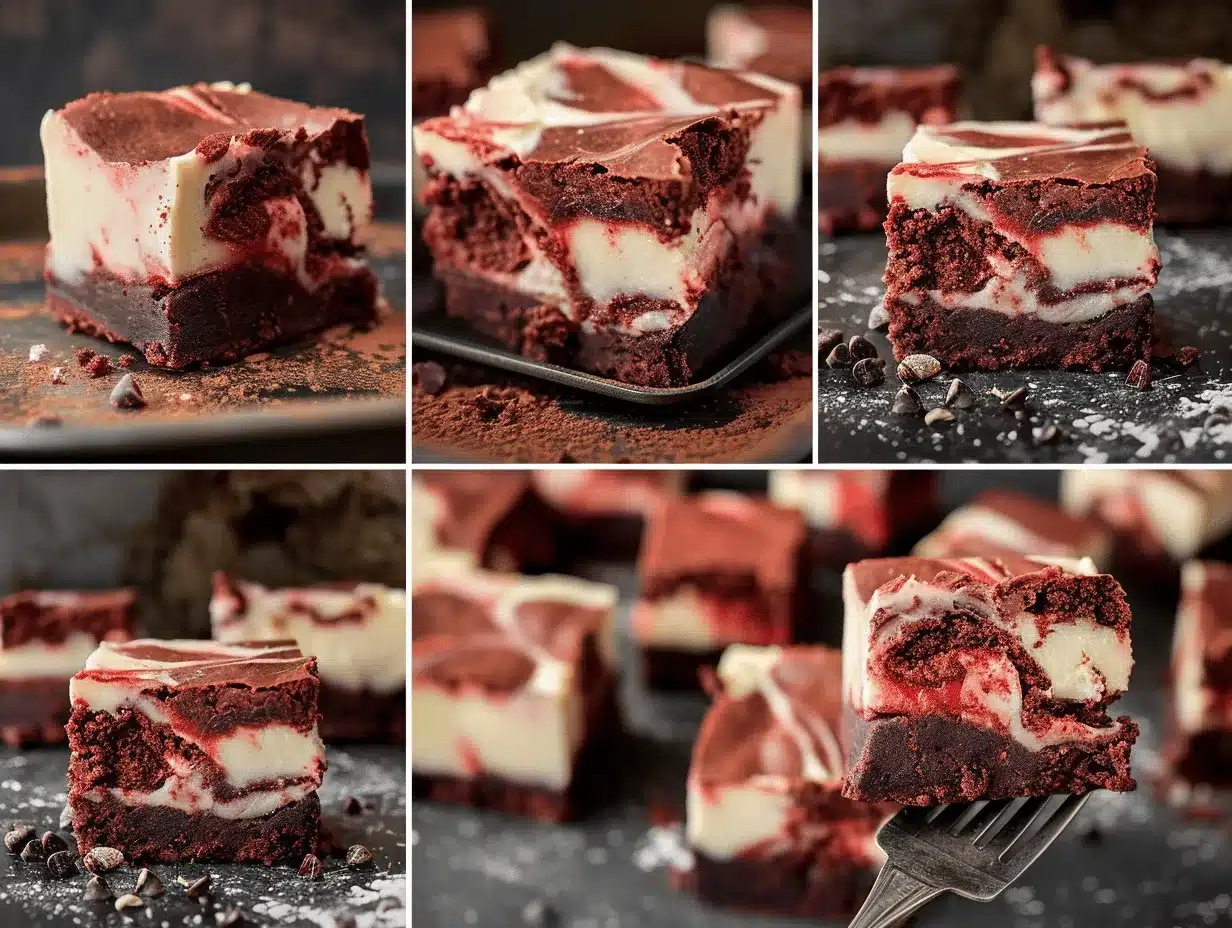
What sets this red velvet cheesecake brownies recipe apart? Instead of just dumping cheesecake on top, you swirl it in so every bite has that marbled effect—half fudgy, half creamy, all dreamy. I use a little extra cocoa for a richer flavor, and I’ve found that using room temperature ingredients makes the swirl come out perfectly.
This isn’t just another dessert bar. It’s the kind of treat that makes people pause, savor, and ask, “Did you really make these?” The velvety crumb, the bright red color, and the creamy swirl make them both eye-catching and totally craveable. If you want a dessert that feels like a celebration, even on an ordinary day, give these red velvet cheesecake brownies a try. Trust me—they’re worth every swirl.
What Ingredients You Will Need
This red velvet cheesecake brownies recipe keeps things simple but packs in bold flavor. You’ll find most of these ingredients in your pantry or fridge, and I’ll share my favorite brands and a few easy swaps in case you need them.
- For the Red Velvet Brownie Batter:
- All-purpose flour (120g) – Standard is best, but you can swap for gluten-free 1:1 blend if needed.
- Unsweetened cocoa powder (16g) – I prefer Dutch-process for a deeper chocolate flavor, but natural works too.
- Granulated sugar (200g) – Gives the brownies that perfect sweetness and chewy bite.
- Unsalted butter (113g, melted) – Adds richness and keeps things fudgy. (I use Kerrygold if I’m feeling fancy!)
- Large eggs (2, room temperature) – For structure and a tender crumb.
- Vanilla extract (1 tsp) – Don’t skip this; it’s the secret to that classic bakery-style flavor.
- Red food coloring (1 tbsp liquid or 2 tsp gel) – For that iconic red velvet hue. I like AmeriColor or Wilton gel for vibrant color.
- White vinegar (1 tsp) – Helps activate the cocoa and adds a subtle tang.
- Salt (1/4 tsp) – Balances everything out.
- For the Cheesecake Swirl:
- Cream cheese (226g, full-fat, softened) – Philadelphia is my go-to for consistency and flavor.
- Granulated sugar (50g) – Just enough to sweeten the swirl.
- Large egg yolk (1) – Makes the cheesecake extra creamy.
- Vanilla extract (1/2 tsp) – For that classic cheesecake flavor.
Ingredient Tips:
- If you need a dairy-free version, try plant-based butter and vegan cream cheese. The swirl will be a little softer but still delicious.
- For a gluten-free batch, use a 1:1 gluten-free flour blend (like Bob’s Red Mill).
- You can use natural cocoa powder, but Dutch-process gives a deeper color and flavor.
- If you don’t have red food coloring, you can use beet powder, but the color will be more muted. (Still tasty, though!)
I’ve tried this recipe with both store-brand and premium ingredients, and honestly, it comes out great either way. Just make sure your cream cheese is at room temperature for the smoothest swirl!
Equipment Needed
- 8×8-inch baking pan – Metal pans give the best edges and even baking. Glass works, but may need a few extra minutes in the oven.
- Parchment paper – Makes removal and cleanup a breeze. I always line the pan so I can lift out the brownies for easy slicing.
- Mixing bowls – You’ll need two: one for the brownie batter, one for the cheesecake swirl.
- Whisk & spatula – For smooth batter and gentle folding. A silicone spatula is great for scraping every bit out of the bowl.
- Hand mixer or stand mixer – Useful for the cheesecake swirl, but a sturdy whisk works in a pinch (just a little more elbow grease!).
- Toothpick or skewer – For creating those beautiful swirls on top.
If you don’t have an 8×8 pan, you can use a 9×9—just check for doneness a few minutes earlier. I once tried this in a loaf pan and, while it works, the bars are a bit thicker and take longer to bake. For budget-friendly options, I love my basic Wilton aluminum pan and $1 spatula from the dollar store—it’s not fancy, but it gets the job done. Just remember, parchment paper is your best friend for flawless brownie removal!
How to Make Red Velvet Cheesecake Brownies
- Preheat & Prep:
- Preheat your oven to 350°F (175°C). Line an 8×8-inch baking pan with parchment paper, leaving some overhang for easy removal.
- Mix the Brownie Batter:
- In a large bowl, whisk together 120g all-purpose flour, 16g unsweetened cocoa powder, 200g granulated sugar, and 1/4 tsp salt.
- In another bowl, whisk 2 large eggs, 113g melted unsalted butter, 1 tsp vanilla, 1 tbsp red food coloring, and 1 tsp white vinegar until fully combined.
- Pour the wet ingredients into the dry and gently fold until no flour streaks remain. Don’t overmix—the batter should be thick and glossy. (If it looks dry, add 1-2 tbsp milk.)
- Reserve & Spread:
- Scoop out about 1/4 cup (about 60g) of the red velvet batter and set aside for swirling. Spread the remaining batter evenly into the prepared pan. Use an offset spatula for smooth edges.
- Make the Cheesecake Swirl:
- In a medium bowl, beat 226g softened cream cheese with 50g sugar until smooth and creamy (about 2 minutes). Add 1 large egg yolk and 1/2 tsp vanilla, mixing until fully combined. The mixture should be silky with no lumps.
- Swirl Away:
- Dollop the cheesecake mixture over the brownie batter in big spoonfuls. Drop the reserved red velvet batter in between the cheesecake dollops.
- Use a skewer or butter knife to gently swirl the batters together. Don’t overdo it—aim for pretty marbling, not blending. (Think figure-eights rather than circles.)
- Bake:
- Bake in the preheated oven for 33-38 minutes, or until the center is just set and a toothpick inserted comes out with a few moist crumbs. The edges will look slightly puffed and the center should jiggle just a bit.
- Cool Completely:
- Let the brownies cool in the pan for at least 1 hour. For clean slices, chill them in the fridge for 30 minutes before cutting. (Warm brownies are tasty, but the cheesecake swirl can get messy if you slice too soon!)
- Slice & Serve:
- Remove brownies using the parchment overhang. Slice into 16 squares for party-sized treats, or 9 larger squares if you’re feeling extra indulgent.
Troubleshooting Tips:
- If your cheesecake swirl sinks, your cream cheese may have been too cold—always let it soften first.
- Brownies overbaked? Check them a few minutes early—the residual heat keeps cooking after you pull them out.
- Swirl not showing up? Don’t worry, just add a little extra reserved batter next time and swirl gently.
I’ve found that patience is key—let them cool fully for the best texture and most distinct swirls. And if you sneak a piece while they’re still warm, I won’t judge!
Pro Tips & Techniques for the Perfect Swirl
Making red velvet cheesecake brownies look (and taste) bakery-worthy is easier than you think, but there are a few tricks I’ve learned along the way.
- Room Temperature Ingredients: Always use softened cream cheese and room temperature eggs. This keeps the cheesecake swirl silky and lump-free.
- Don’t Overmix: When combining the batters, mix just until combined. Overmixing can make the brownies tough and the swirl less defined.
- Swirl Gently: Use a skewer or thin knife for swirling, and don’t go back and forth too many times. The goal is pretty marbling, not blending everything together.
- Check Early: Ovens vary. Start checking for doneness at 33 minutes. The edges should be set, but the center should have a slight jiggle—that’s the magic window for fudgy brownies.
- Cool Before Slicing: This is hard, but if you want clean, bakery-style slices, chill the brownies before cutting. A warm knife helps too.
I’ve made every mistake in the book—once I swirled too much and ended up with pinkish cheesecake instead of marbled. Another time, I used cold cream cheese and had weird lumps. If you run into issues, don’t stress—these brownies taste amazing no matter what. Just remember: gentle hands, patience, and don’t overthink the swirls!
Variations & Adaptations
One of the best things about red velvet cheesecake brownies is how easy they are to customize. Here are a few fun variations and swaps I’ve tried (and loved):
- Gluten-Free: Use a 1:1 gluten-free flour blend instead of all-purpose flour. The texture is a touch lighter, but still fudgy and rich.
- Chocolate Chip Swirl: Add 1/2 cup (90g) mini chocolate chips to the cheesecake swirl for extra chocolate bursts in each bite.
- Festive Flavors: Mix 1/2 tsp peppermint extract into the cheesecake swirl for a holiday twist, or top with crushed candy canes before baking.
- Low-Sugar: Substitute part of the sugar with a granulated sugar alternative, like monk fruit sweetener. The brownies will be a little less chewy but still delicious.
- Dairy-Free: Use plant-based butter and vegan cream cheese. It’s a little softer, so chill before serving for the cleanest slices.
- Nutty Crunch: Swirl in 1/2 cup (60g) chopped pecans or walnuts for a little crunch and flavor contrast.
Personally, I love making these brownies for Valentine’s Day with a heart-shaped swirl on top. If you’re baking for a crowd with allergies, you can easily skip the nuts or use a gluten-free flour. Don’t be afraid to play around with the flavors—this recipe is forgiving and totally customizable!
Serving & Storage Suggestions
These red velvet cheesecake brownies are best served chilled or at cool room temperature—the cheesecake swirl sets and the flavors really pop. For parties, I like to cut them into small squares and stack them on a tiered platter (they look so pretty!).
Pair with a glass of cold milk, a hot cup of coffee, or even a scoop of vanilla ice cream for an extra-indulgent treat. If you want to get fancy, drizzle a little melted chocolate or dust with powdered sugar just before serving.
To store, place brownies in an airtight container in the fridge for up to 4 days. They actually taste even better on day two, once the flavors meld. For longer storage, wrap tightly in plastic wrap and freeze for up to 2 months. Thaw overnight in the fridge before enjoying. To reheat, zap individual squares in the microwave for 10-15 seconds, but I honestly prefer them cold—they hold their shape and taste amazing straight from the fridge.
Nutritional Information & Benefits
Each brownie (based on 16 squares) contains approximately 180 calories, 11g fat, 18g carbs, and 3g protein. Thanks to the cream cheese swirl, you get a little protein and calcium boost, and a more satisfying treat overall. If you use a gluten-free flour, these bars are friendly for gluten-sensitive folks. Just keep in mind they contain dairy, eggs, and wheat (unless you swap them out).
I love that these brownies offer a more balanced dessert experience—creamy, tangy, and not overly sweet. When I’m craving something decadent but don’t want a sugar crash, this recipe is my go-to. You can easily adapt it to suit your needs, whether you’re watching carbs, cutting gluten, or just want a treat with a little more staying power!
Conclusion
Red velvet cheesecake brownies are the kind of dessert that makes even an ordinary day feel special. They’re gorgeous, easy, and absolutely delicious—plus, you can tweak them to fit just about any dietary need or occasion. I love how every bite is a little different, thanks to those beautiful swirls.
If you’re looking for a dessert that’s sure to impress (but won’t stress you out!), this is it. Don’t be afraid to make it your own—try new flavors, add a topping, or get creative with the swirls. I’d love to hear how your batch turns out, so leave a comment, share your photos, or tell me how you made these brownies your own.
Bake a pan, share with friends, and enjoy every decadent bite. Trust me, once you try red velvet cheesecake brownies, they’ll have a permanent spot in your recipe box!
Frequently Asked Questions
Can I double this red velvet cheesecake brownies recipe?
Absolutely! Just bake in a 9×13-inch pan and add 5-10 more minutes to the baking time. Keep an eye on the center for doneness.
Why did my cheesecake swirl sink into the brownies?
If your cream cheese was too cold or the brownie batter too thin, the swirl can sink. Next time, make sure everything’s at room temperature and the brownie batter is thick.
Can I make these brownies ahead of time?
Yes! They actually taste better after chilling for a few hours or overnight. Store them in the fridge and slice just before serving for the best texture.
How do I get clean, bakery-style brownie slices?
Chill the brownies before slicing and use a sharp knife, wiping it clean between cuts. A warm knife (run under hot water) also helps.
Are these brownies freezer-friendly?
You bet! Wrap squares tightly in plastic wrap and freeze for up to 2 months. Thaw overnight in the fridge for best texture.
Pin This Recipe!
Red Velvet Cheesecake Brownies
These Red Velvet Cheesecake Brownies combine fudgy red velvet brownie with a creamy cheesecake swirl for a decadent, bakery-worthy dessert bar. Easy to make and perfect for any occasion, they’re as beautiful as they are delicious.
- Prep Time: 15 minutes
- Cook Time: 35 minutes
- Total Time: 50 minutes
- Yield: 16 brownies 1x
- Category: Dessert
- Cuisine: American
Ingredients
- 1 cup all-purpose flour (120g)
- 3 tablespoons unsweetened cocoa powder (16g)
- 1 cup granulated sugar (200g)
- 1/2 cup unsalted butter, melted (113g)
- 2 large eggs, room temperature
- 1 teaspoon vanilla extract
- 1 tablespoon liquid red food coloring or 2 teaspoons gel food coloring
- 1 teaspoon white vinegar
- 1/4 teaspoon salt
- 8 ounces cream cheese, full-fat, softened (226g)
- 1/4 cup granulated sugar (50g)
- 1 large egg yolk
- 1/2 teaspoon vanilla extract
Instructions
- Preheat your oven to 350°F (175°C). Line an 8×8-inch baking pan with parchment paper, leaving some overhang for easy removal.
- In a large bowl, whisk together flour, cocoa powder, granulated sugar, and salt.
- In another bowl, whisk eggs, melted butter, vanilla extract, red food coloring, and white vinegar until fully combined.
- Pour the wet ingredients into the dry and gently fold until no flour streaks remain. Do not overmix. If the batter looks dry, add 1-2 tablespoons milk.
- Scoop out about 1/4 cup of the red velvet batter and set aside for swirling. Spread the remaining batter evenly into the prepared pan.
- In a medium bowl, beat softened cream cheese with 1/4 cup sugar until smooth and creamy (about 2 minutes). Add egg yolk and 1/2 teaspoon vanilla, mixing until fully combined.
- Dollop the cheesecake mixture over the brownie batter in big spoonfuls. Drop the reserved red velvet batter in between the cheesecake dollops.
- Use a skewer or butter knife to gently swirl the batters together for a marbled effect.
- Bake for 33-38 minutes, or until the center is just set and a toothpick inserted comes out with a few moist crumbs.
- Let the brownies cool in the pan for at least 1 hour. For clean slices, chill in the fridge for 30 minutes before cutting.
- Remove brownies using the parchment overhang. Slice into 16 squares for party-sized treats, or 9 larger squares.
Notes
For best results, use room temperature cream cheese and eggs. Don’t overmix the batters to keep the swirl defined. Chill brownies before slicing for clean, bakery-style squares. You can substitute gluten-free flour for a gluten-free version or use plant-based butter and vegan cream cheese for dairy-free brownies.
Nutrition
- Serving Size: 1 brownie (1/16 of pan)
- Calories: 180
- Sugar: 13
- Sodium: 120
- Fat: 11
- Saturated Fat: 7
- Carbohydrates: 18
- Fiber: 1
- Protein: 3
Keywords: red velvet, cheesecake brownies, dessert bars, easy brownies, swirled brownies, red velvet dessert, cream cheese swirl, holiday dessert, potluck dessert, chocolate brownies