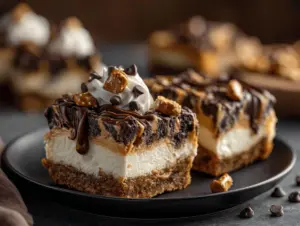
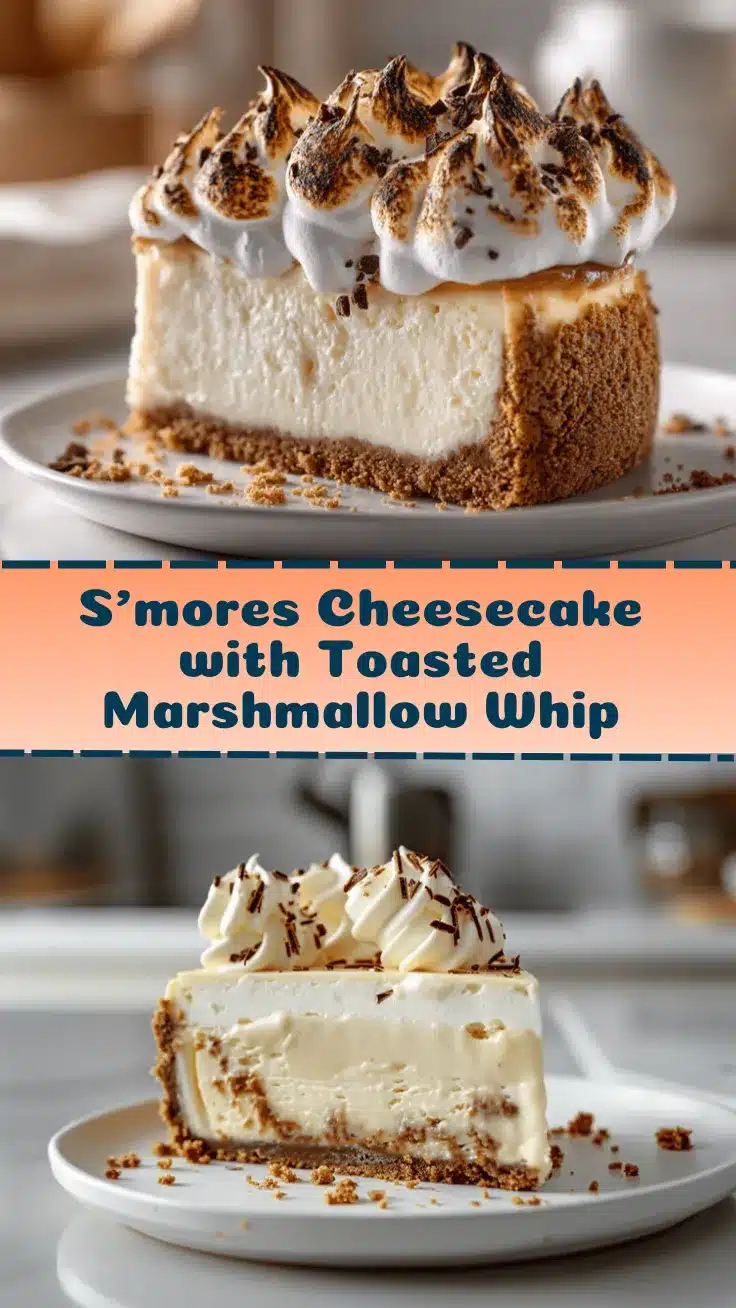
The crackle of graham cracker crust, a silky chocolate layer, and a cloud of toasted marshmallow whip—honestly, that’s the kind of dessert you dream about. The first time I made this s’mores cheesecake recipe, my kitchen smelled like a campfire and a bakery got together for a midnight snack. I still remember my brother sneaking spoonfuls of the marshmallow whip while I was busy with the cheesecake filling.
If you’ve ever loved s’mores around a campfire, this easy s’mores cheesecake is pure nostalgia with a grown-up twist. It’s got everything: the crunch, the gooeyness, and that unmistakable toasted marshmallow flavor. I started making this during a summer heatwave when outdoor fires were a big nope—and honestly, I never looked back. You get all the s’mores magic without fretting about smoke or bugs. Plus, that cheesecake base? It’s creamy, chocolatey, and just the right amount of sweet.
This recipe is perfect if you want to wow a crowd, treat your family, or just bake something that feels like a hug. I’ve tested tweaks for gluten-free crusts, different marshmallow brands, and even faster prep for busy days. As someone who’s made cheesecakes for years, I can vouch for this one—it’s simple, reliable, and ridiculously good. So if you’re craving a dessert that’s both comforting and impressive, this s’mores cheesecake recipe is calling your name.
Why You’ll Love This Recipe
- Quick & Simple: You can whip up the crust and filling in under 30 minutes, with only a bit more time for baking and cooling.
- Easy Ingredients: Nothing fancy or hard to find—just graham crackers, cream cheese, chocolate, eggs, and marshmallows.
- Perfect for Parties: Whether it’s a summer BBQ, birthday, or holiday gathering, this s’mores cheesecake is always a showstopper.
- Kid-Approved: My niece and nephew literally beg for seconds every time I bring this out. Adults are usually fighting for the last piece too!
- Unbelievable Flavor: The contrast of crunchy crust, creamy chocolate filling, and fluffy toasted marshmallow whip is next-level comfort food.
What sets this s’mores cheesecake apart? I blend the crust extra fine for a smoother bite—and I always use a mix of milk and dark chocolate in the filling. The toasted marshmallow whip isn’t just a topping; it’s a full-on flavor experience, and the broiler (instead of a kitchen torch) gives it that classic golden look. If you’ve had trouble with soggy crusts or cracks in your cheesecakes before, don’t worry—I’ve picked up a ton of tricks over the years to keep things foolproof.
This isn’t just another chocolate cheesecake with some marshmallows thrown on top. It’s a recipe that feels like an event. The first bite is gooey, then creamy, then a little crunchy—it’s the kind of dessert you close your eyes for and just savor. Honestly, s’mores cheesecake is my go-to for making memories and impressing guests without the stress. You’ll taste the difference in every forkful.
What Ingredients You Will Need
This irresistible s’mores cheesecake recipe relies on simple, classic ingredients to capture that campfire magic—no weird stuff, no complicated steps. Most of these are pantry staples, but I’ve included quick swaps in case you’re missing something. Here’s what you’ll need:
- For the Graham Cracker Crust:
- Graham crackers (about 10 sheets, or 140g; honey or cinnamon varieties work)
- Unsalted butter, melted (6 tbsp / 85g; adds richness and crunch)
- Granulated sugar (2 tbsp / 25g; helps crisp and sweeten the crust)
- Pinch of salt (balances flavors)
- For the Chocolate Cheesecake Filling:
- Cream cheese, softened (24 oz / 680g; full-fat for best texture)
- Sour cream (1 cup / 240g; gives a tangy balance)
- Granulated sugar (1 cup / 200g)
- Eggs, large (3, room temperature)
- Vanilla extract (2 tsp / 10ml)
- Semi-sweet chocolate chips (1 cup / 170g; or half milk/half dark for more depth)
- Heavy cream (1/4 cup / 60ml; helps the chocolate blend smoothly)
- For the Toasted Marshmallow Whip:
- Marshmallows (regular or mini; 3 cups / about 150g)
- Heavy cream (1 cup / 240ml; for whipping)
- Powdered sugar (2 tbsp / 15g; helps stabilize the whip)
- Vanilla extract (1 tsp / 5ml)
If you need gluten-free, swap graham crackers for a certified GF brand. For dairy-free, use vegan cream cheese and coconut cream. Don’t have sour cream? Greek yogurt works in a pinch. I love using Ghirardelli chocolate chips for that rich flavor, but any good-quality chocolate will do. In summer, try adding a layer of fresh strawberries before topping with marshmallow whip—it’s a fun twist. Honestly, the ingredients are flexible, so don’t stress if you need to swap something out.
Equipment Needed
- 9-inch springform pan (essential for easy release and classic cheesecake shape)
- Food processor or sturdy zip-top bag + rolling pin (to crush graham crackers)
- Mixing bowls (at least two; one for crust, one for filling)
- Electric mixer or stand mixer (makes whipping and blending a breeze)
- Rubber spatula (for scraping bowls and smoothing layers)
- Measuring cups and spoons (accuracy matters here!)
- Oven and broiler (for baking and toasting the marshmallow whip)
- Parchment paper or foil (to line the pan and prevent leaks)
If you don’t have a springform pan, a deep cake pan lined with parchment works. I’ve used a hand mixer for years—stand mixers are faster, but not essential. For crushing crackers, a food processor is fastest, but smashing them in a zip bag is honestly kind of satisfying. If your mixer is old and tends to overheat, let it cool between steps. For budget options, supermarket brands of pans and bowls are just fine—no need to break the bank.
Preparation Method
- Prepare the crust: Preheat oven to 325°F (163°C). Crush graham crackers into fine crumbs using a food processor or by hand. Mix crumbs, melted butter, sugar, and salt until evenly moistened. Press mixture firmly into the bottom of your 9-inch springform pan. Bake for 10 minutes, then cool completely. (Tip: If the crust looks too dry, add another tablespoon of melted butter.)
- Make the chocolate cheesecake filling: Melt chocolate chips with 1/4 cup heavy cream in a microwave-safe bowl (30-second bursts, stirring after each, until smooth). In a large bowl, beat softened cream cheese until creamy and lump-free. Add sugar and mix again. Blend in eggs, one at a time, scraping the sides after each addition. Mix in sour cream and vanilla extract. Finally, pour in the melted chocolate and mix until just combined. (Prep note: Don’t overbeat—air bubbles mean cracks later!)
- Assemble and bake: Pour cheesecake filling over the cooled crust. Smooth the top with a spatula. Tap the pan gently on the counter to release air bubbles. Bake for 55-65 minutes, or until the center is just set but still slightly wobbly. (Sensory cue: The edges should look firm and slightly puffed.) Turn off oven, crack the door, and let cheesecake cool inside for 1 hour—this helps prevent cracks. Chill in the fridge for at least 4 hours, preferably overnight.
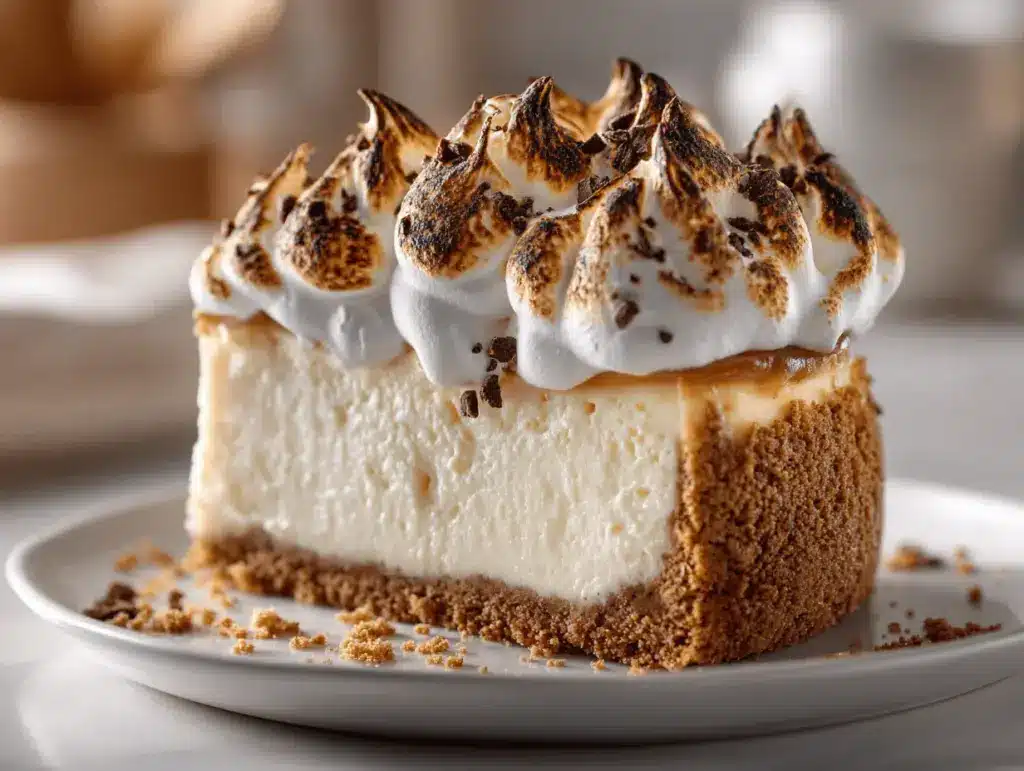
- Prepare the toasted marshmallow whip: Place marshmallows on a parchment-lined baking sheet. Broil for 1-2 minutes, watching closely, until golden and toasted. (Warning: Marshmallows burn fast—don’t walk away!) Let cool slightly. In a mixing bowl, whip heavy cream, powdered sugar, and vanilla until soft peaks form. Add toasted marshmallows and whip again until fluffy and well combined. (Tip: If whip isn’t thickening, chill the bowl and try again.)
- Finish and serve: Remove cheesecake from pan and transfer to a serving plate. Pile marshmallow whip on top, swirling with a spatula for that classic s’mores look. Optional: Use a kitchen torch or broiler to re-toast marshmallow whip for extra color. Slice and serve chilled. (Efficiency note: If you’re short on time, use store-bought marshmallow fluff instead. Not as dramatic, but still tasty!)
Troubleshooting: If your cheesecake cracks, cover with extra marshmallow whip—no one will know! If your crust is crumbly, add a tad more butter next time. Cheesecake too dense? Mix filling less and use room-temperature ingredients. Trust me, the more you make it, the easier it gets.
Cooking Tips & Techniques
After baking a dozen cheesecakes over the years, here’s what I’ve learned (sometimes the hard way):
- Room Temperature Ingredients: Always use room-temp cream cheese and eggs—cold ingredients make for lumpy filling and uneven baking.
- Don’t Overmix: Mix just until combined. Overmixing adds air, which leads to cracks. I once ruined a batch by getting carried away with the mixer—lesson learned!
- Bake Low and Slow: Cheesecakes love gentle heat. If you rush it, you’ll get a dry, cracked top. I always bake mine at 325°F and let it cool gradually.
- Crust Consistency: If your crust seems too wet or too dry, adjust butter or cracker amounts slightly—feel with your fingers, it should hold together but not be greasy.
- Broiling Marshmallows: Watch closely! Marshmallows go from golden to burnt in seconds. I’ve had more than one pan go up in smoke.
- Multitasking: Prep the filling while the crust is baking, and chill your mixing bowl for the whip while the cheesecake bakes. Makes the whole process way smoother.
- Consistency: Always scrape your bowls and use a rubber spatula for even mixing. For smooth slices, dip your knife in hot water between cuts.
If you’re worried about cracks, try a water bath (wrap the pan with foil and set in a baking dish with hot water). I skip this for s’mores cheesecake because the marshmallow whip covers any imperfections. For perfect marshmallow whip, use chilled cream and whip until just fluffy—not grainy. Practice makes perfect, and even if it’s not flawless, it’ll still taste amazing.
Variations & Adaptations
You can totally make this s’mores cheesecake recipe your own. Here are a few ways I’ve switched it up over the years:
- Gluten-Free: Use gluten-free graham crackers or chocolate cookies for the crust. Works just as well, and my cousin (who’s celiac) didn’t notice the difference!
- Dairy-Free: Swap cream cheese and sour cream for plant-based versions, and use coconut cream for the whip. It’s a little different, but still super tasty.
- Seasonal Flavors: Add a layer of sliced bananas or strawberries before the marshmallow whip for a fruity twist. In fall, a dash of cinnamon or pumpkin spice in the crust is amazing.
- Cooking Methods: You can make mini cheesecakes in muffin tins (just reduce baking time to 20-25 minutes). It’s great for parties or portion control.
- Allergen Substitutions: For nut allergies, avoid adding nuts to the crust or topping. For egg-free, use a commercial egg replacer in the filling—texture is a bit softer, but still delicious.
- Personal Favorite: Sometimes I mix crushed pretzels into the crust for salty-sweet vibes. It’s unexpected and really addictive!
Don’t be afraid to experiment—this recipe is forgiving, and there’s no wrong way to enjoy s’mores cheesecake. Just keep an eye on baking times if you change pan sizes or fillings.
Serving & Storage Suggestions
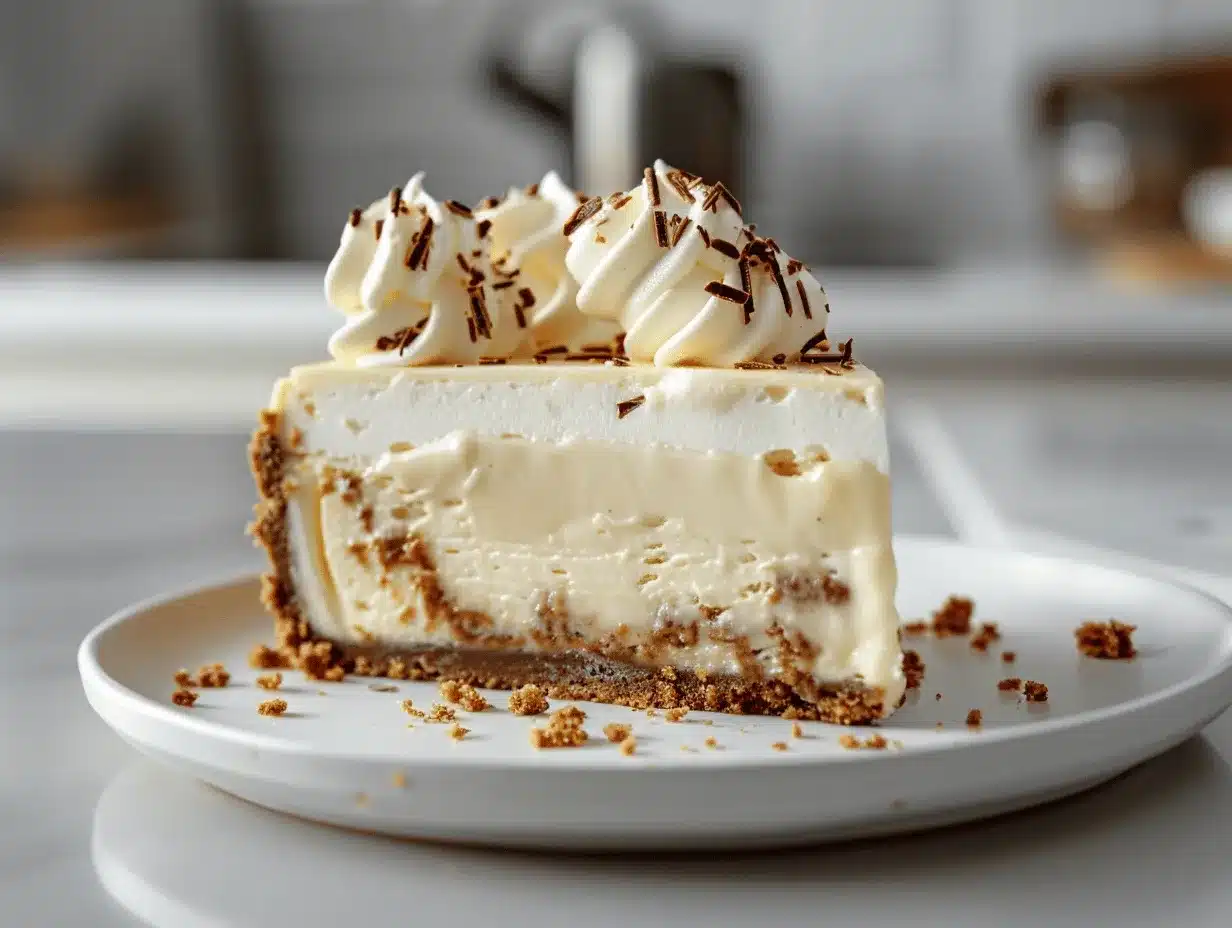
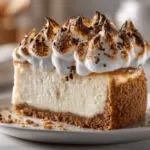
This s’mores cheesecake is best served chilled, right out of the fridge. I like to slice it with a hot knife for clean edges and pile extra marshmallow whip on top for drama. For a Pinterest-worthy look, sprinkle a few crushed graham crackers or chocolate shavings over the whipped topping. It pairs perfectly with iced coffee, hot chocolate, or even a glass of cold milk (for the full campfire effect!).
To store, cover tightly and keep in the fridge for up to 5 days. The flavors actually deepen after a day or two, so leftovers are a treat. For longer storage, wrap individual slices and freeze for up to 2 months—just thaw overnight in the fridge before serving. If you’re reheating, a quick zap in the microwave (10 seconds) softens the whip but won’t melt it. Pro tip: Save a piece for yourself, because it disappears fast.
Nutritional Information & Benefits
Here’s a quick look at the nutrition per slice (based on 12 servings):
| Nutrient | Estimate per slice |
|---|---|
| Calories | 380 |
| Fat | 24g |
| Carbs | 35g |
| Protein | 6g |
Key benefits: Cream cheese and eggs add some protein, while dark chocolate brings antioxidants. If you go gluten-free, this recipe fits most dietary needs. Beware of dairy and egg allergens, and always check ingredient labels if you have sensitivities. I love that this s’mores cheesecake lets you indulge a little while still using real ingredients—I think balance is important in any diet, and this dessert feels worth every bite.
Conclusion
This s’mores cheesecake recipe is the kind of dessert you’ll want to make again and again. It’s simple but impressive, comforting but a little bit fancy. Whether you’re baking for a crowd or just treating yourself, you’ll love how easy it is—and how much it tastes like the best campfire memory ever. Honestly, I think everyone needs a go-to cheesecake, and this one is mine.
Don’t be afraid to customize it! Switch up the crust, add fruit, try a new chocolate blend—the recipe is yours to play with. I hope you love it as much as my family does, and I’d love to hear how yours turns out. Drop a comment below, share your photos, or let me know your own twists. Happy baking, and may your marshmallows always be perfectly toasted!
FAQs
Can I make s’mores cheesecake ahead of time?
Absolutely! You can bake the cheesecake a day or two in advance. Just add the marshmallow whip right before serving for best texture.
How do I prevent cracks in my cheesecake?
Use room temperature ingredients, don’t overmix, and let the cheesecake cool slowly in the oven. Even if it cracks, the marshmallow whip covers it up!
Can I use store-bought marshmallow fluff instead of making my own whip?
Yes! It’s a quick shortcut and works fine. Homemade whip is fluffier and has that toasted flavor, though.
What’s the best way to slice cheesecake cleanly?
Dip your knife in hot water and wipe it between slices. This gives you neat, Pinterest-worthy pieces every time.
Is this recipe easy to make gluten-free?
Definitely! Just swap the graham crackers for a gluten-free brand. The rest of the ingredients are naturally gluten-free.
Pin This Recipe!
Smores Cheesecake Recipe Easy Toasted Marshmallow Dessert Guide
This s’mores cheesecake combines a crunchy graham cracker crust, creamy chocolate cheesecake filling, and a fluffy toasted marshmallow whip for a nostalgic campfire-inspired dessert. It’s simple to make, crowd-pleasing, and perfect for parties or family gatherings.
- Prep Time: 30 minutes
- Cook Time: 65 minutes
- Total Time: 6 hours
- Yield: 12 servings 1x
- Category: Dessert
- Cuisine: American
Ingredients
- 10 sheets (about 1 1/2 cups) graham crackers (honey or cinnamon)
- 6 tablespoons unsalted butter, melted
- 2 tablespoons granulated sugar
- Pinch of salt
- 24 ounces cream cheese, softened
- 1 cup sour cream
- 1 cup granulated sugar
- 3 large eggs, room temperature
- 2 teaspoons vanilla extract
- 1 cup semi-sweet chocolate chips (or half milk/half dark)
- 1/4 cup heavy cream
- 3 cups marshmallows (regular or mini)
- 1 cup heavy cream (for whipping)
- 2 tablespoons powdered sugar
- 1 teaspoon vanilla extract
Instructions
- Preheat oven to 325°F (163°C). Crush graham crackers into fine crumbs using a food processor or by hand. Mix crumbs, melted butter, sugar, and salt until evenly moistened. Press mixture firmly into the bottom of a 9-inch springform pan. Bake for 10 minutes, then cool completely.
- Melt chocolate chips with 1/4 cup heavy cream in a microwave-safe bowl (30-second bursts, stirring after each, until smooth). In a large bowl, beat softened cream cheese until creamy and lump-free. Add sugar and mix again. Blend in eggs, one at a time, scraping the sides after each addition. Mix in sour cream and vanilla extract. Pour in the melted chocolate and mix until just combined.
- Pour cheesecake filling over the cooled crust. Smooth the top with a spatula. Tap the pan gently on the counter to release air bubbles. Bake for 55-65 minutes, or until the center is just set but still slightly wobbly. Turn off oven, crack the door, and let cheesecake cool inside for 1 hour. Chill in the fridge for at least 4 hours, preferably overnight.
- Place marshmallows on a parchment-lined baking sheet. Broil for 1-2 minutes, watching closely, until golden and toasted. Let cool slightly. In a mixing bowl, whip heavy cream, powdered sugar, and vanilla until soft peaks form. Add toasted marshmallows and whip again until fluffy and well combined.
- Remove cheesecake from pan and transfer to a serving plate. Pile marshmallow whip on top, swirling with a spatula. Optional: Use a kitchen torch or broiler to re-toast marshmallow whip for extra color. Slice and serve chilled.
Notes
For gluten-free, use certified GF graham crackers. For dairy-free, swap cream cheese and sour cream for plant-based versions and use coconut cream for the whip. Don’t overmix the filling to avoid cracks. Chill ingredients and bowls for best marshmallow whip texture. Store leftovers tightly covered in the fridge for up to 5 days or freeze slices for up to 2 months.
Nutrition
- Serving Size: 1 slice (1/12 of cheesecake)
- Calories: 380
- Sugar: 26
- Sodium: 220
- Fat: 24
- Saturated Fat: 14
- Carbohydrates: 35
- Fiber: 1
- Protein: 6
Keywords: smores cheesecake, toasted marshmallow, chocolate cheesecake, graham cracker crust, easy dessert, campfire dessert, party dessert, summer baking, kid-friendly, make ahead