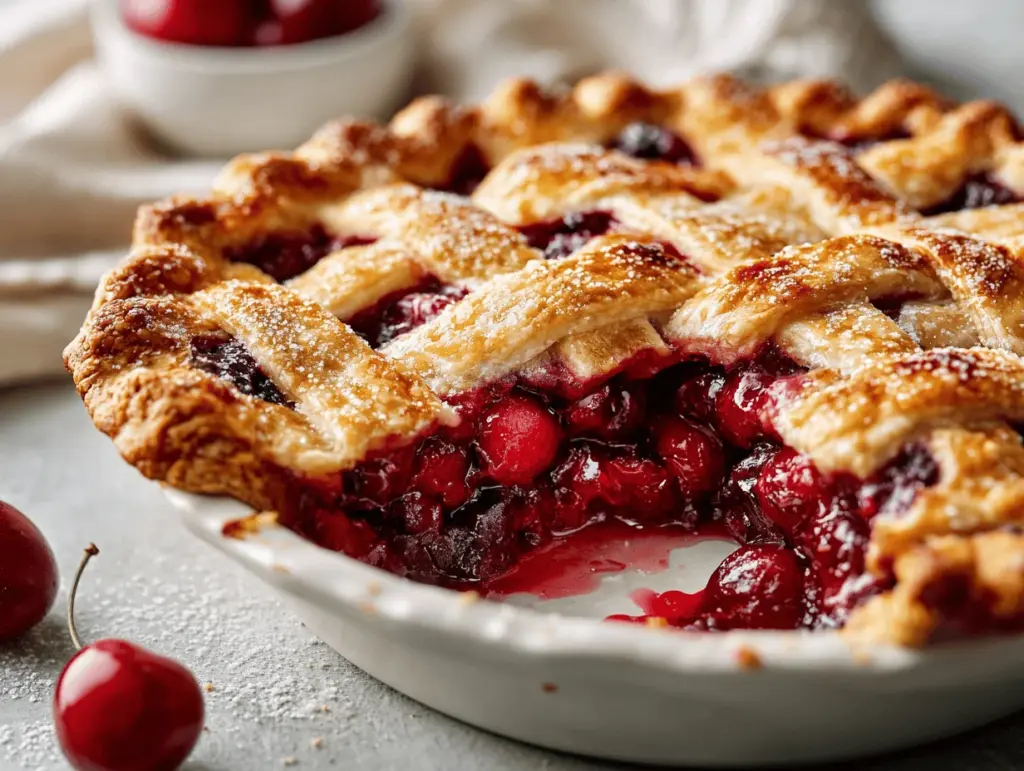
The first time I pulled a bubbling, golden sour cherry pie from my oven, the kitchen filled with a sweet-tart aroma that instantly made my mouth water. There’s something magical about that mix of buttery crust and juicy sour cherries—it smells like summer and grandma’s kitchen all at once. I’ll never forget the way my kids hovered around the counter, sneaking little tastes of the filling and asking, “Is it ready yet?”
Let’s face it: a homemade sour cherry pie is the kind of comfort food that brings people together, no matter the season. I stumbled upon this recipe years ago after a neighbor gifted me a basket of fresh sour cherries, and—honestly—it’s become a family tradition every time cherries are in season. Even if you’re brand new to pie baking, you’ll be amazed how approachable and forgiving this recipe is. The flaky crust, the punchy cherry filling, and that hint of almond extract… oh, it’s just pure bliss.
What I really love about this sour cherry pie recipe is how it takes humble, simple ingredients and turns them into something extraordinary. Whether you’re baking for a holiday, a summer picnic, or just a random Wednesday night, this pie is always the first to disappear. And if you’re nervous about homemade pie dough? Don’t be! I’ll walk you through every step—because, trust me, if I can do it (after a few less-than-perfect attempts), so can you. Let’s roll up our sleeves and make a pie that’ll have everyone asking for seconds!
Why You’ll Love This Sour Cherry Pie Recipe
- Super Easy for Beginners: You don’t need fancy tools or advanced baking skills. This sour cherry pie recipe is friendly for first-timers and seasoned bakers alike.
- Uses Simple Ingredients: No need for a special trip to a gourmet store—just fresh or frozen sour cherries, pantry basics, and a few flavor-boosting extras.
- Ready for Any Occasion: Serve it warm at a backyard barbecue, bring it to a holiday gathering, or just enjoy a cozy slice on the couch. It fits every mood and moment.
- Unbeatable Flavor: Tangy-sweet cherries, a hint of almond, and a golden, flaky crust—it’s a classic combination that never gets old.
- Perfect Texture: The filling is juicy but not runny, the crust is crisp yet tender, and every forkful is just right.
- Crowd-Pleaser: I’ve yet to meet someone who doesn’t swoon over a homemade sour cherry pie. Kids, adults, even picky eaters—everyone comes back for seconds.
What makes my version a little different? For one, I always use a touch of almond extract to really round out the cherry flavor. I also toss the cherries with just enough sugar and cornstarch to keep the filling bright and lively, not overly sweet or gloopy. Plus, if you’re nervous about pie dough, you can even use a store-bought crust in a pinch—no judgment here. After testing this recipe half a dozen times (and eating more slices than I care to admit), I can promise you’ll get a flaky, golden crust and that perfect balance of tart and sweet inside every bite. This isn’t just another sour cherry pie recipe—it’s my go-to, comfort-food favorite, and I bet it’ll become yours too.
Baking a pie from scratch is more than just dessert—it’s a little act of love. You get to fill your kitchen with the smell of bubbling cherries and warm pastry, create a memory for your family, and maybe even sneak a sliver for breakfast the next day (shh, I won’t tell!). That’s why this recipe is close to my heart, and I can’t wait for you to try it.
What Ingredients You Will Need
This sour cherry pie uses classic, easy-to-find ingredients that come together for a show-stopping dessert. Here’s everything you’ll need (plus a few handy tips and swaps):
- For the Pie Crust:
- 2 1/2 cups (315g) all-purpose flour
- 1 tsp salt
- 1 tbsp sugar (for a touch of sweetness)
- 1 cup (226g) unsalted butter, cold and cubed (I always use real butter for maximum flakiness!)
- 6-8 tbsp (90-120ml) ice water
- Shortcut: Use two store-bought pie crusts if you’re pressed for time or nervous about homemade dough. No shame—it still tastes amazing.
- For the Sour Cherry Filling:
- 5 cups (700g) pitted sour cherries (fresh or frozen—just thaw and drain if using frozen)
- 1 1/4 cups (250g) granulated sugar (adjust to taste, especially if your cherries are extra tart)
- 1/4 cup (32g) cornstarch (for that luscious, not-too-runny filling)
- 1/4 tsp salt
- 1/2 tsp almond extract (trust me, this little splash makes all the difference!)
- 1 tsp vanilla extract
- 1 tbsp lemon juice (brightens the flavor and balances the sweetness)
- For the Finishing Touch:
- 1 egg (for egg wash)
- 1 tbsp milk (for egg wash)
- Coarse sugar for sprinkling (optional, but adds a pretty sparkle and crunch!)
Ingredient Tips: If you’re lucky enough to find fresh sour cherries at your local market or orchard, grab them! Their flavor is unbeatable. Frozen works perfectly, too, just make sure to thaw and drain any extra liquid. I’ve even made this pie with a mix of tart and sweet cherries in a pinch—just cut back on the sugar. For a gluten-free version, use a 1:1 gluten-free flour blend for the crust. And if you’re dairy-free, swap the butter for a good plant-based alternative (I like Miyoko’s for pies).
Equipment Needed
- 9-inch (23cm) pie plate: Standard size works best. I’ve used both glass and ceramic—glass lets you peek at the bottom crust for doneness.
- Mixing bowls: At least two—one for the crust, one for the filling.
- Pastry cutter or food processor: For cutting butter into the flour. You can also use two knives or your fingers in a pinch.
- Rolling pin: A wine bottle works if you don’t have one (been there, done that!).
- Measuring cups and spoons: Accuracy counts, especially for the crust and thickener.
- Small whisk or fork: To mix your egg wash.
- Baking sheet: Place under the pie to catch any drips—trust me, it’s worth it for easy cleanup.
- Cooling rack: Helps the pie set up and cool evenly.
If you bake pies often, a silicone baking mat makes rolling dough less sticky. And for easy cleanup, parchment paper under your pie plate on the baking sheet is a lifesaver. You don’t need top-of-the-line tools—my favorite pie plate was thrifted for $2 and has seen a lot of crusts!
How to Make Irresistible Sour Cherry Pie
-
Make the Pie Crust (15 minutes, plus chilling):
In a large mixing bowl, whisk together 2 1/2 cups (315g) flour, 1 tsp salt, and 1 tbsp sugar. Add 1 cup (226g) cold, cubed butter. Using a pastry cutter or your fingers, cut the butter into the flour until the mixture looks like coarse crumbs with pea-sized bits. Drizzle in 6 tbsp (90ml) ice water, mixing with a fork after each addition. Add more water, 1 tbsp at a time, just until the dough starts to come together. It should hold when pinched but not feel wet. Divide the dough in half, shape each into a disk, wrap in plastic, and chill at least 1 hour. (If you’re short on time, 30 minutes in the freezer works too.) -
Prepare the Filling (5 minutes):
In a large bowl, combine 5 cups (700g) pitted sour cherries, 1 1/4 cups (250g) sugar, 1/4 cup (32g) cornstarch, 1/4 tsp salt, 1/2 tsp almond extract, 1 tsp vanilla extract, and 1 tbsp lemon juice. Toss gently to coat. Let sit while you roll the crust—this helps the cherries release a bit of juice. -
Roll Out the Dough (10 minutes):
On a lightly floured surface, roll out one dough disk to about 12 inches (30cm) in diameter. Fit it into your 9-inch pie plate, letting the excess hang over the edges. Roll out the second disk for the top crust (you can do a lattice, full top, or cut cute shapes for a vented crust!). -
Assemble the Pie (5 minutes):
Spoon the cherry filling (and any juices) into the prepared crust. Dot with a few extra bits of butter if you’re feeling fancy (totally optional). Place the top crust over the filling, trim the excess dough, and crimp the edges to seal (I like a simple fork crimp). Cut a few slits in the top if you’re not doing a lattice. -
Egg Wash & Sugar (2 minutes):
Beat 1 egg with 1 tbsp milk. Brush over the top crust, then sprinkle with coarse sugar for sparkle. -
Bake (50-60 minutes):
Place the pie on a baking sheet (lined with parchment for easy cleanup). Bake at 400°F (200°C) for 20 minutes, then reduce the oven to 350°F (175°C) and bake another 30-40 minutes, until the crust is golden and the filling is bubbling through the vents. If the crust browns too quickly, cover the edges with foil. -
Cool Completely (at least 3 hours):
This is the hardest part, but it’s worth it! Let the pie cool on a rack at least 3 hours for the filling to set—otherwise, it’ll be soupy. The pie slices perfectly once fully cool.
Troubleshooting: If your crust cracks, patch it with a scrap of dough and a dab of water. If the filling looks too runny when assembling, just add an extra teaspoon of cornstarch. And if you’re worried about a soggy bottom, you can blind-bake the bottom crust for 10 minutes (just line with parchment and pie weights).
Trust your senses—a bubbling filling, golden edges, and a toasty smell mean it’s ready. And hey, even if it’s a little messy, it’ll still taste amazing (I’ve never had a “bad” sour cherry pie!).
Cooking Tips & Techniques
- Keep Ingredients Cold: Cold butter and ice water make a flakier pie crust. I even chill my rolling pin in the summer!
- Don’t Overwork the Dough: Mix and roll gently—too much handling can make the crust tough. If you see little specks of butter in the dough, you’re doing it right.
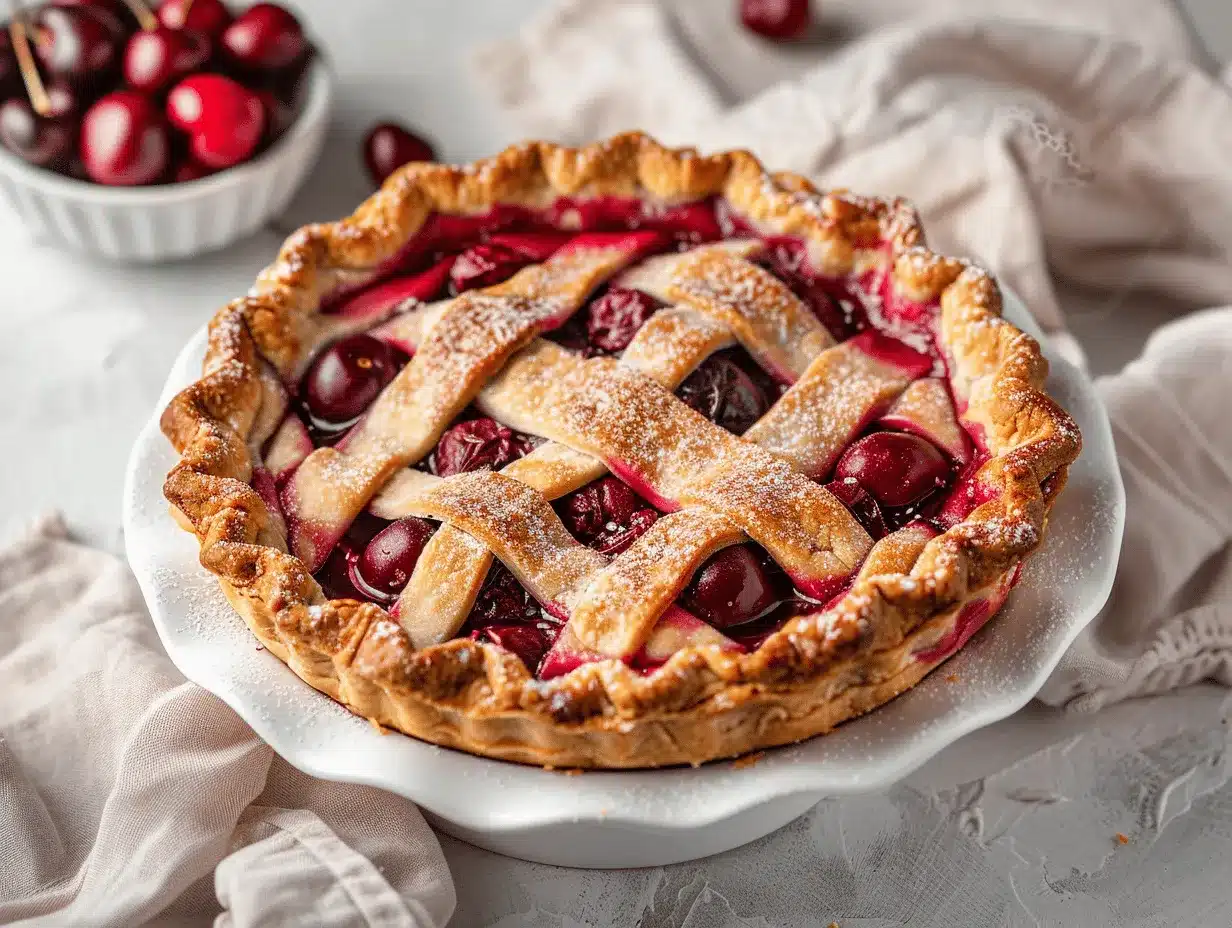
- Lattice or Full Crust: Lattice lets more steam escape and looks beautiful, but a full top crust is quicker and still tasty. If you go full crust, cut a few slits for vents.
- Prevent Soggy Bottoms: Baking on a hot baking sheet or a preheated pizza stone can help the bottom crust bake up crisp.
- Juicy Cherries: Sour cherries release a lot of juice. Letting them sit tossed with sugar and cornstarch for a few minutes before filling the pie helps thicken things up.
- Don’t Skip Cooling: I get it, the smell is wild, but a fully cooled pie sets up properly. Slice too soon, and the filling will ooze everywhere (delicious, but messy!).
- Personal Oops: Once, I forgot to cut vents in my top crust—the filling found its own way out. The pie still tasted great, but it looked a little… rustic. Lesson learned: always vent!
I usually set a timer halfway through to check the pie’s browning—sometimes I pop on a pie shield or foil to protect the edges. And if you’re multitasking, just remember: pie filling can bubble over fast, so don’t stray too far from the kitchen during the last 10 minutes.
Variations & Adaptations
- Gluten-Free: Use a 1:1 gluten-free flour blend for the crust. I’ve had great results with King Arthur’s mix—no one even noticed the swap!
- Vegan: Substitute plant-based butter in the crust and brush the top with almond milk instead of egg wash. The filling is already vegan-friendly.
- Sweet Cherry Mix: If you can’t find all sour cherries, use half sweet cherries and reduce the sugar by 1/4 cup (50g). The flavor is still punchy with a touch more sweetness.
- Crumb Topping: Swap the top crust for a simple crumb topping made with flour, brown sugar, and butter for a “crumble pie” vibe. My kids love this version, especially with a scoop of vanilla ice cream.
- Mini Pies or Hand Pies: Use the same filling and crust to make hand-held pies—just cut circles, fill, fold, and bake. Great for picnics or lunchboxes!
- Allergen Swaps: Use a nut-free extract if you have almond allergies, or skip it altogether—vanilla alone is lovely.
One of my favorite twists was making this pie with a splash of bourbon in the filling—just 1 tablespoon for a grown-up kick. Highly recommend for special occasions!
Serving & Storage Suggestions
Serving: This sour cherry pie is best served at room temperature or slightly warm. If you want the classic “Pinterest-perfect” slice, let it cool completely before cutting. For a real treat, add a scoop of vanilla ice cream or a dollop of whipped cream—my family’s favorite.
Presentation: I love to sprinkle the top with coarse sugar before baking for that bakery-style sparkle. Serve slices on pretty plates with a few extra cherries or mint leaves on the side for a pop of color.
Storage: Leftover pie keeps well, loosely covered, at room temperature for 1-2 days. For longer storage, refrigerate up to 4 days—the filling will firm up a bit more, but the flavors get even deeper. To freeze, wrap tightly in foil and freeze up to 2 months. Thaw overnight in the fridge and reheat at 300°F (150°C) for 10-15 minutes to crisp the crust.
Reheating: For that fresh-baked vibe, warm slices in the oven or a toaster oven. Microwaving works in a pinch, but the crust won’t stay as crisp.
Honestly, leftover sour cherry pie makes a pretty great breakfast, too. The flavors mellow overnight, and it’s just as good with coffee as it is with dessert wine!
Nutritional Information & Benefits
This sour cherry pie recipe makes about 8 generous slices. Each slice (with homemade crust) roughly contains:
- Calories: 400
- Fat: 17g
- Carbohydrates: 61g
- Protein: 4g
- Fiber: 2g
Key Ingredient Benefits: Sour cherries are packed with antioxidants, vitamin C, and fiber. The moderate sugar lets the fruit shine without being cloying. Using real butter gives the crust that classic flavor, but you can swap for plant-based if needed. This recipe is naturally nut-free (if you skip almond extract) and vegetarian. Just watch for gluten if you have sensitivities—simple swaps make it friendly for most diets.
From my personal wellness perspective, a homemade pie is a wonderful way to celebrate fruit and share a treat without crazy processed ingredients. It’s all about balance and enjoying every bite!
Conclusion
So, why should you try this irresistible sour cherry pie recipe? Because it’s the kind of classic comfort food that brings people together—easy enough for beginners, rewarding for seasoned bakers, and always a hit at any table. The tart cherries, flaky crust, and that hint of almond make every bite a little celebration of home baking.
Don’t be afraid to make it your own—try a crumb topping, play with different extracts, or use whatever cherries you can find. I love this recipe for how it connects me to summer memories and simple joys, and I hope it becomes a staple in your kitchen, too.
If you bake it, let me know in the comments! Share your tweaks, your photos, or even your “oops” moments (hey, we’ve all been there). Happy baking, and may your kitchen always smell like sour cherry pie!
Frequently Asked Questions About Sour Cherry Pie
Can I use frozen sour cherries instead of fresh?
Absolutely! Just thaw and drain them well before using. Frozen sour cherries work great and make this pie possible year-round.
What if I can’t find sour cherries?
You can use a mix of sweet and tart cherries. Just reduce the sugar a bit to balance the flavors. The pie will still have that delicious cherry punch.
How do I prevent the bottom crust from getting soggy?
Bake the pie on a hot baking sheet or pizza stone. You can also blind-bake the bottom crust for 10 minutes before filling if you want extra insurance.
Can I make the pie ahead of time?
Yes! Sour cherry pie is actually better after it cools and sets. Bake it a day ahead, cover loosely, and enjoy the next day for the neatest slices.
Is this pie recipe suitable for a gluten-free diet?
Absolutely—just use a good 1:1 gluten-free flour blend for the crust. The filling is naturally gluten-free. No one will notice the difference!
Pin This Recipe!

Sour Cherry Pie

This easy homemade sour cherry pie features a flaky, buttery crust and a juicy, tangy cherry filling with a hint of almond. Perfect for beginners, it’s a comforting classic that brings people together for any occasion.
- Prep Time: 30 minutes
- Cook Time: 50-60 minutes
- Total Time: 4 hours (including chilling and cooling)
- Yield: 8 servings 1x
- Category: Dessert
- Cuisine: American
Ingredients
- 2 1/2 cups all-purpose flour
- 1 teaspoon salt
- 1 tablespoon sugar
- 1 cup unsalted butter, cold and cubed
- 6–8 tablespoons ice water
- 5 cups pitted sour cherries (fresh or frozen, thawed and drained if frozen)
- 1 1/4 cups granulated sugar
- 1/4 cup cornstarch
- 1/4 teaspoon salt
- 1/2 teaspoon almond extract
- 1 teaspoon vanilla extract
- 1 tablespoon lemon juice
- 1 egg
- 1 tablespoon milk
- Coarse sugar for sprinkling (optional)
Instructions
- Make the Pie Crust: In a large mixing bowl, whisk together flour, salt, and sugar. Add cold, cubed butter and cut into the flour using a pastry cutter or your fingers until the mixture resembles coarse crumbs with pea-sized bits. Drizzle in ice water, mixing with a fork after each addition, until the dough just comes together. Divide dough in half, shape into disks, wrap in plastic, and chill at least 1 hour (or 30 minutes in the freezer if short on time).
- Prepare the Filling: In a large bowl, combine pitted sour cherries, granulated sugar, cornstarch, salt, almond extract, vanilla extract, and lemon juice. Toss gently to coat and let sit while rolling out the crust.
- Roll Out the Dough: On a lightly floured surface, roll out one dough disk to about 12 inches in diameter. Fit into a 9-inch pie plate, letting excess hang over the edges. Roll out the second disk for the top crust (lattice, full top, or vented shapes).
- Assemble the Pie: Spoon the cherry filling (and juices) into the prepared crust. Optionally, dot with a few bits of butter. Place the top crust over the filling, trim excess dough, and crimp edges to seal. Cut slits in the top if not using a lattice.
- Egg Wash & Sugar: Beat egg with milk. Brush over the top crust and sprinkle with coarse sugar if desired.
- Bake: Place pie on a baking sheet lined with parchment. Bake at 400°F for 20 minutes, then reduce oven to 350°F and bake another 30-40 minutes, until crust is golden and filling is bubbling. Cover edges with foil if browning too quickly.
- Cool Completely: Let pie cool on a rack at least 3 hours for the filling to set before slicing.
Notes
For gluten-free, use a 1:1 gluten-free flour blend for the crust. For vegan, substitute plant-based butter and use almond milk for the wash. If using frozen cherries, thaw and drain well. Blind-bake the bottom crust for 10 minutes to prevent sogginess. Let pie cool fully for neat slices. Store leftovers covered at room temperature for 1-2 days or refrigerate up to 4 days. Freeze for up to 2 months.
Nutrition
- Serving Size: 1 slice (1/8 of pie)
- Calories: 400
- Sugar: 32
- Sodium: 250
- Fat: 17
- Saturated Fat: 10
- Carbohydrates: 61
- Fiber: 2
- Protein: 4
Keywords: sour cherry pie, cherry pie, homemade pie, easy pie recipe, summer dessert, comfort food, beginner baking, fruit pie, classic pie, almond extract