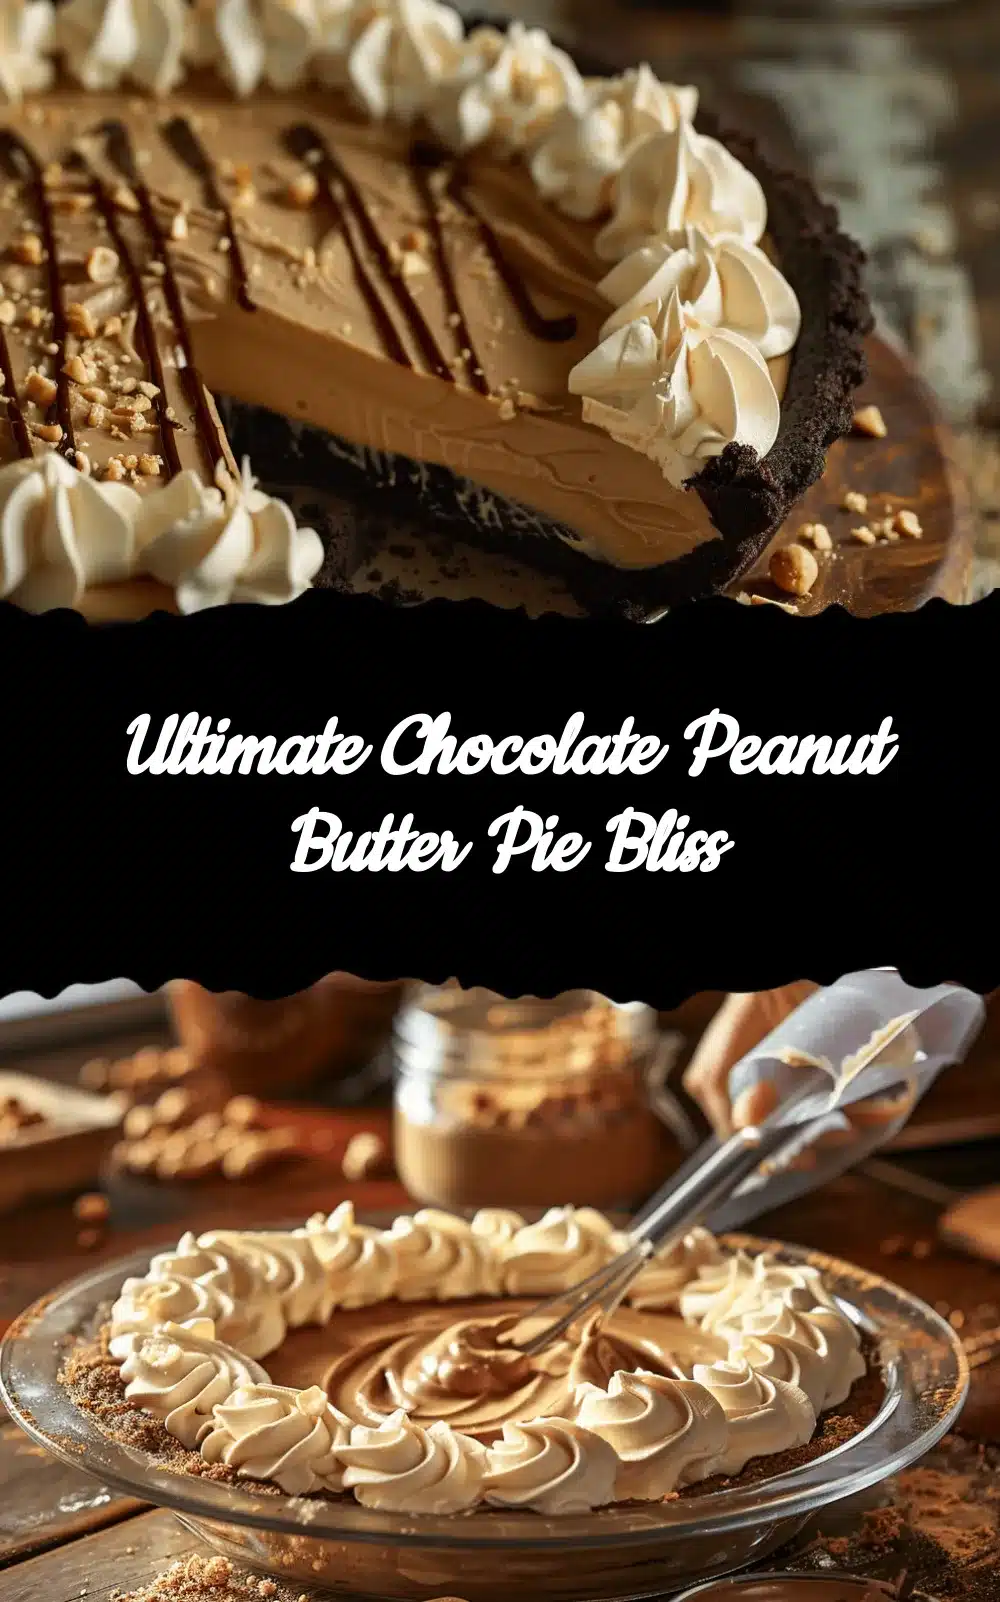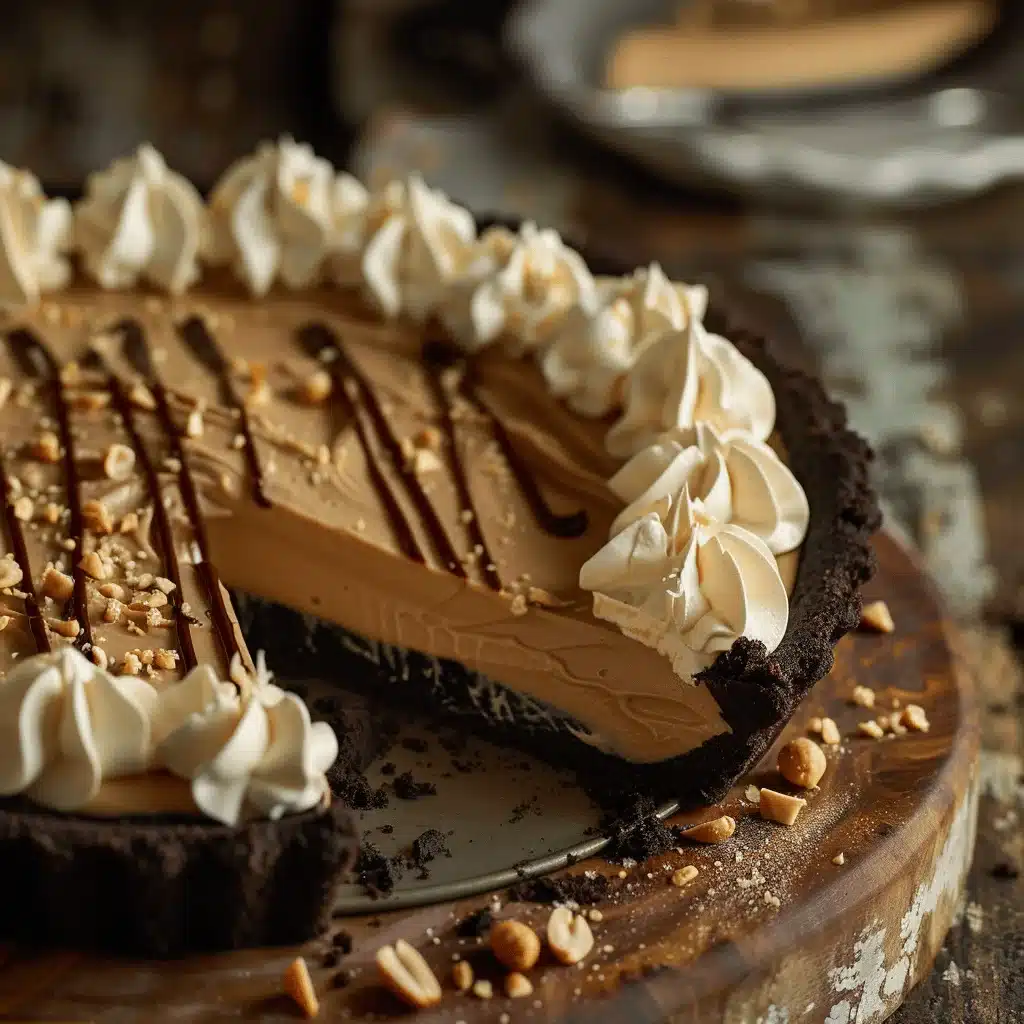
The first time I made this chocolate peanut butter pie, I knew I was onto something magical. Imagine a creamy, rich peanut butter filling nestled in a chocolate cookie crust, topped with fluffy swirls of whipped cream. It’s decadent, indulgent, and yet surprisingly easy to make. Whether you’re hosting a party or just satisfying your sweet tooth, this pie is the ultimate dessert experience. And the best part? You don’t need fancy skills to pull it off—it’s all about simple ingredients and a little love.
This recipe is perfect for chocolate and peanut butter lovers. It’s the dessert that makes people stop mid-bite to say, “Wow!” Plus, it’s a no-bake wonder, which means less oven time and more time enjoying the sweet rewards. Ready to whip up the ultimate chocolate peanut butter pie? Let’s get baking—or rather, assembling!
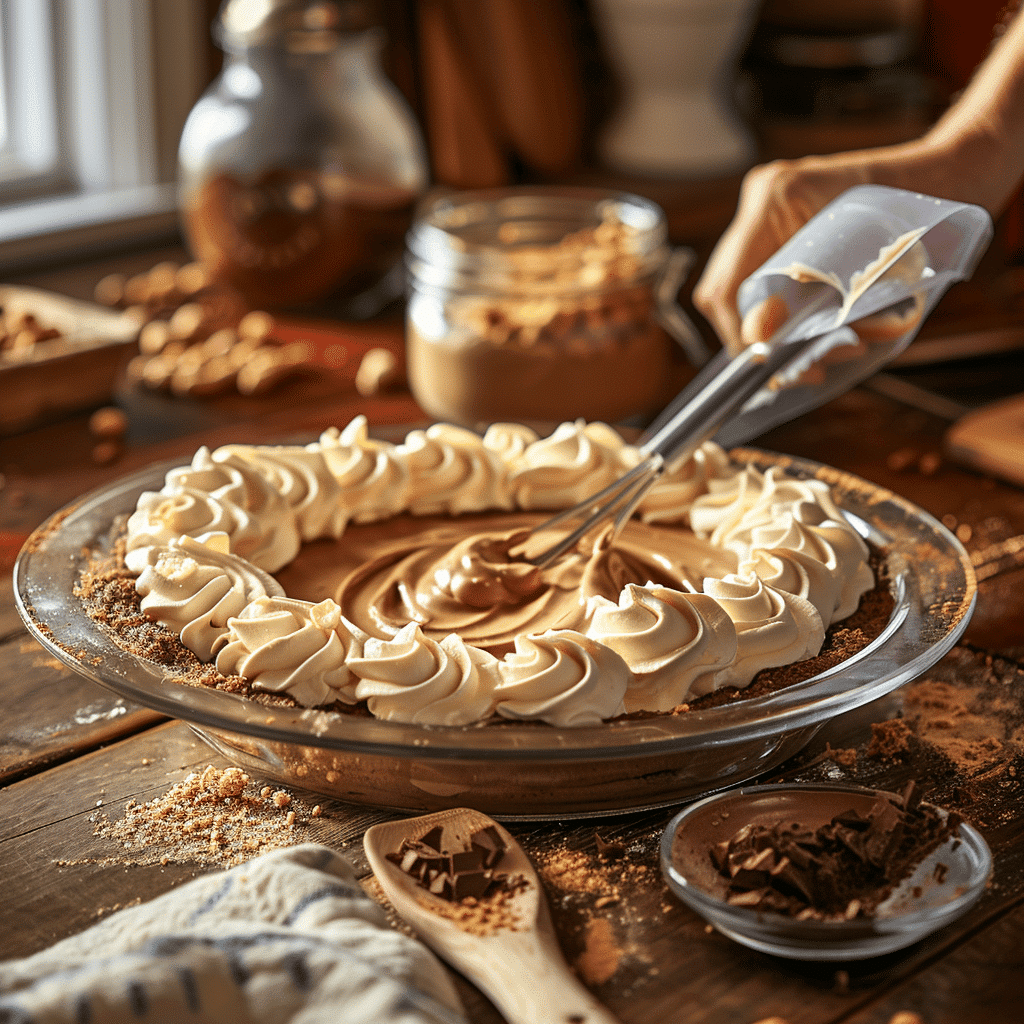
Why You’ll Love This Recipe
- Rich and Creamy: The peanut butter filling is smooth, luscious, and perfectly balanced with the chocolate crust.
- No-Bake Convenience: No need to heat up your kitchen—this pie sets beautifully in the fridge.
- Simple Ingredients: You probably have most of the ingredients in your pantry already!
- Perfect for Any Occasion: Whether it’s a birthday, holiday dessert table, or just a cozy weekend treat, this pie fits the bill.
- Visually Stunning: The whipped cream swirls make it look bakery-level fancy without the effort.
- Proven Crowd-Pleaser: Kids, adults, and everyone in between can’t resist the classic chocolate-peanut butter combo.
Honestly, this isn’t just a dessert—it’s a love letter to anyone who appreciates the magic of chocolate and peanut butter together. Plus, the silky whipped topping adds an elegant touch that makes this pie stand out from the rest.
What Ingredients You Will Need
This recipe uses simple, wholesome ingredients that come together to create a show-stopping dessert. Here’s what you’ll need:
- Chocolate Cookie Crust: 1 ½ cups crushed chocolate sandwich cookies (like Oreos), 4 tbsp melted butter.
- Peanut Butter Filling: 1 cup creamy peanut butter, 8 oz cream cheese (softened), 1 cup powdered sugar, ½ cup heavy cream.
- Chocolate Ganache Layer: ½ cup semi-sweet chocolate chips, ¼ cup heavy cream.
- Whipped Cream Topping: 1 cup heavy cream, 2 tbsp powdered sugar, 1 tsp vanilla extract.
- Optional Garnishes: Chocolate shavings, crushed peanuts, or mini chocolate chips.
If you’re missing an ingredient or need to make substitutions, don’t worry! You can swap out the cookie crust for graham crackers and use almond butter instead of peanut butter. This pie is incredibly forgiving.
Equipment Needed
Here’s the gear you’ll need to make this pie:
- Pie Pan: A 9-inch pie pan works best for this recipe.
- Food Processor: For crushing cookies into fine crumbs. Alternatively, use a rolling pin and a zip-top bag.
- Mixing Bowls: You’ll need a few bowls for the filling, ganache, and whipped cream.
- Hand Mixer or Stand Mixer: Whipping the cream and blending the filling is much easier with a mixer.
- Rubber Spatula: For scraping down the sides and spreading layers evenly.
If you don’t have a pie pan, you can use a springform pan for easier slicing. And for mixing, a sturdy whisk can substitute for an electric mixer—just be ready for a little arm workout!
Preparation Method
- Make the Crust: Crush the chocolate cookies into fine crumbs using a food processor or rolling pin. Mix the crumbs with melted butter until evenly combined. Press the mixture into the pie pan, ensuring the crust covers the bottom and sides. Chill in the fridge for 20 minutes.
- Prepare the Peanut Butter Filling: In a large mixing bowl, beat the cream cheese and peanut butter until smooth. Add the powdered sugar and continue mixing until fully incorporated. Slowly add the heavy cream, beating until the mixture is light and fluffy. Spoon the filling into the chilled crust and spread evenly.
- Make the Ganache: Heat the heavy cream in a small saucepan until just simmering. Pour over the chocolate chips in a bowl and let sit for 1-2 minutes. Stir until smooth and glossy. Pour the ganache over the peanut butter layer and spread evenly. Chill for 30 minutes.
- Whip the Cream: In a cold mixing bowl, beat heavy cream, powdered sugar, and vanilla extract until stiff peaks form. Pipe or spoon swirls of whipped cream on top of the pie.
- Finish and Chill: Add optional garnishes like chocolate shavings or crushed peanuts. Chill the pie in the refrigerator for at least 2 hours before serving.
When slicing, run your knife under warm water for clean, even cuts. Trust me, this step makes a difference!
Cooking Tips & Techniques
- Room Temperature Ingredients: Make sure your cream cheese is softened for a smooth filling. Cold cream cheese can lead to lumps.
- Chill Between Layers: Giving each layer time to set in the fridge ensures clean, distinct layers when slicing.
- Whipped Cream Perfection: Use a cold bowl and whisk for the fluffiest whipped cream. Don’t overbeat, or it can turn grainy.
- Ganache Consistency: If your ganache is too thick, add a teaspoon of warm cream at a time until it’s pourable.
- Crust Tips: Press the crust firmly into the pan to prevent crumbling when slicing.
These little tricks make the difference between a good pie and a great one. Trust me, I’ve learned these lessons the hard way!
Variations & Adaptations
- Gluten-Free Version: Swap the cookie crust for gluten-free cookies or ground nuts mixed with butter.
- Nut-Free Option: Use sunflower seed butter in place of peanut butter for a similar creamy texture.
- Seasonal Twist: Add a layer of raspberry jam under the ganache for a fruity pairing.
- No-Crust Option: Serve the filling and toppings in individual cups for a crustless treat.
I once tried adding a layer of crushed pretzels between the ganache and filling—it added a salty crunch that was unforgettable. Feel free to make this recipe your own!
Serving & Storage Suggestions
This pie is best served cold, straight from the fridge. Slice it into wedges and serve on dessert plates with a drizzle of chocolate sauce or a sprinkle of crushed peanuts for presentation.
Store leftovers in an airtight container in the refrigerator for up to 4 days. You can also freeze the pie for up to a month—just thaw in the fridge overnight before serving. The flavors actually deepen over time, making the pie even more irresistible!
Nutritional Information & Benefits
While this pie is indulgent, it has its perks:
- Calories: Approximately 380 per slice (based on 10 slices).
- Protein: The peanut butter adds a nice protein boost.
- Dietary Considerations: Can be adapted for gluten-free or nut-free diets.
Remember, it’s a dessert meant to be savored. Balance it with lighter meals throughout the day if you’re watching your intake.
Conclusion
If you’re searching for a dessert that’s easy, stunning, and downright delicious, this ultimate chocolate peanut butter pie is it. From the creamy filling to the rich ganache and dreamy whipped cream swirls, every bite feels like a special occasion.
Give it a try and don’t be afraid to experiment—add extra toppings, tweak the crust, or make it your own. I’d love to hear how yours turns out! Leave a comment below and share your pie pictures. And hey, don’t forget to pin this recipe for later—it’s one you’ll want to come back to again and again.
Happy baking—or should I say, assembling!
FAQs
Can I use natural peanut butter?
Yes, but make sure it’s well-stirred to avoid a gritty texture. Creamy, processed peanut butter works best for smooth results.
Can I freeze this pie?
Absolutely! Wrap it tightly and freeze for up to a month. Thaw in the fridge overnight before serving.
Can I make this pie ahead of time?
Yes, it’s a great make-ahead dessert. Prepare it the night before and refrigerate until ready to serve.
Do I have to use a food processor for the crust?
No, you can crush the cookies in a zip-top bag using a rolling pin. It works just as well!
What’s the best way to store leftovers?
Keep leftover pie in an airtight container in the fridge for up to 4 days, or freeze for longer storage.
Pin This Recipe!