I did not trust refrigerator pickles to deliver that satisfying crunch you get from traditional fermented jars. Honestly, the idea of soaking cucumbers in a cold brine and expecting them to transform into crunchy dill delights overnight sounded like a mistake—soft, soggy pickles that would disappoint at best. But then, one restless evening, I tossed a batch together just to see what would happen, mostly to prove myself right.
The next day, I opened that jar and was hit with the sharp, fresh scent of dill mingling with garlic and vinegar. The first bite? A perfect snap. It wasn’t just edible; it was a revelation. The pickles had that bright, tangy punch I thought only fermenting for weeks could achieve—yet they were ready in less than 24 hours. I’ve since made these quick crunchy refrigerator dill pickles countless times, each batch a little reminder that sometimes the shortcuts are worth trusting.
What stuck with me was how effortlessly this recipe fits into busy days without sacrificing that classic pickle goodness. Plus, no weird equipment or months of waiting. Just simple ingredients, a little patience, and a fridge. It’s become my go-to side for everything from pulled pork sliders to quick snacks in between errands. Not to mention the way the flavors deepen if you let them chill a bit longer, making each bite even more addictive.
So yeah, I was skeptical, but these quick crunchy refrigerator dill pickles proved me wrong—in the best way possible.
Why You’ll Love This Recipe
After testing this quick crunchy refrigerator dill pickles recipe through many late-night snack cravings and last-minute dinner add-ons, I can confidently say it’s a keeper. Here’s why it’s earned a permanent spot in my kitchen:
- Quick & Easy: Ready in just 24 hours, this recipe is perfect when you want homemade pickles but don’t have weeks to wait.
- Simple Ingredients: Uses everyday pantry staples like fresh cucumbers, garlic, dill, and vinegar—no specialty stores required.
- Perfect for Entertaining: Pairs wonderfully with casual gatherings or game day snacks, especially alongside dips like the buffalo chicken dip that always gets people talking.
- Crowd-Pleaser: The crisp texture and bold dill flavor win over even the pickiest eaters in the family.
- Unbelievably Delicious: The balance of tangy, savory, and fresh notes hits just right, making you close your eyes after the first bite—trust me on this one.
Unlike many quick pickle recipes that end up mushy or bland, these pickles get a secret boost from a pinch of pickling lime and a careful brine ratio that locks in crunch and flavor. Plus, by layering fresh dill and garlic cloves, the aroma truly shines through, making this more than just your average refrigerator pickle.
In short, it’s the kind of recipe that feels like a small kitchen miracle—fast, fuss-free, and genuinely satisfying.
What Ingredients You Will Need
This recipe uses simple, wholesome ingredients to deliver bold flavor and satisfying texture without the fuss. Most are pantry staples, and if you keep pickling essentials on hand, whipping up these pickles is always within reach.
- Fresh Cucumbers: About 4-5 medium Kirby or pickling cucumbers (around 1.5 pounds / 700 grams), washed and sliced into spears or rounds—Kirby cucumbers are preferred for their firmness.
- Fresh Dill: 3-4 sprigs of fresh dill (or 2 tablespoons of dill seeds if fresh isn’t available) for that unmistakable dill aroma and flavor.
- Garlic Cloves: 3-4 peeled cloves, lightly crushed to release flavor.
- White Vinegar: 1 cup (240 ml), preferably 5% acidity for proper pickling tang.
- Water: 1 cup (240 ml), filtered or distilled for a clean taste.
- Pickling Salt: 1 tablespoon (use kosher or canning salt, avoid iodized as it can cloud the brine).
- Granulated Sugar: 1 teaspoon, to balance the acidity slightly.
- Pickling Lime (Calcium Hydroxide): 1 teaspoon (optional but highly recommended to keep the crunch intact).
- Black Peppercorns: 1 teaspoon, adds subtle spice.
- Mustard Seeds: 1 teaspoon, for that classic tangy note.
- Red Pepper Flakes: A pinch, if you like a little kick in your pickles.
For best results, I always recommend using fresh, firm cucumbers and high-quality distilled vinegar. Brands like Heinz or Bragg work well for a clean, sharp flavor. If you’re out of fresh dill, dill seeds can substitute but won’t deliver quite the same brightness. And if you want to keep this recipe keto or low-carb, the sugar can be omitted without much impact on texture.
Equipment Needed
- Quart-sized Mason Jar or Pickling Jar: Big enough to hold your cucumber spears comfortably with brine. Wide-mouth jars make packing easier.
- Mixing Bowl: For preparing the brine and tossing cucumbers if preferred.
- Measuring Cups and Spoons: Precise brine ratios make all the difference in quick pickles.
- Small Saucepan: To warm the vinegar, water, salt, and sugar to help dissolve and blend flavors.
- Kitchen Tongs or Fork: Handy for packing cucumbers tightly and removing them if needed.
- Optional: Pickling Lime Strainer: If using pickling lime, it’s helpful to rinse cucumbers afterward to remove residues.
If you don’t have a Mason jar, any clean, non-reactive container with a lid will work—glass is best to avoid flavor changes. I’ve tried plastic containers before, but they can sometimes dull the crispness. For warming the brine, a microwave-safe bowl can substitute for a saucepan in a pinch.
Preparation Method
- Prepare the Cucumbers: Wash your cucumbers thoroughly to remove any dirt or wax. Cut off the blossom ends (this helps prevent softening). Slice into spears or rounds, depending on your preference. Expect about 12-15 spears or 24-30 rounds from 4-5 cucumbers. (10 minutes)
- Optional: Soak in Pickling Lime: If using pickling lime, dissolve 1 teaspoon in 4 cups cold water in a large bowl. Soak cucumber slices for 1 hour. This step firms up the cucumbers beautifully but requires a good rinse afterward to avoid residual lime taste. Rinse cucumbers 2-3 times under cold water after soaking. (70 minutes total)
- Make the Brine: In a small saucepan, combine 1 cup white vinegar, 1 cup water, 1 tablespoon pickling salt, and 1 teaspoon sugar. Warm over medium heat until salt and sugar dissolve completely. Remove from heat and let cool slightly. (5-7 minutes)
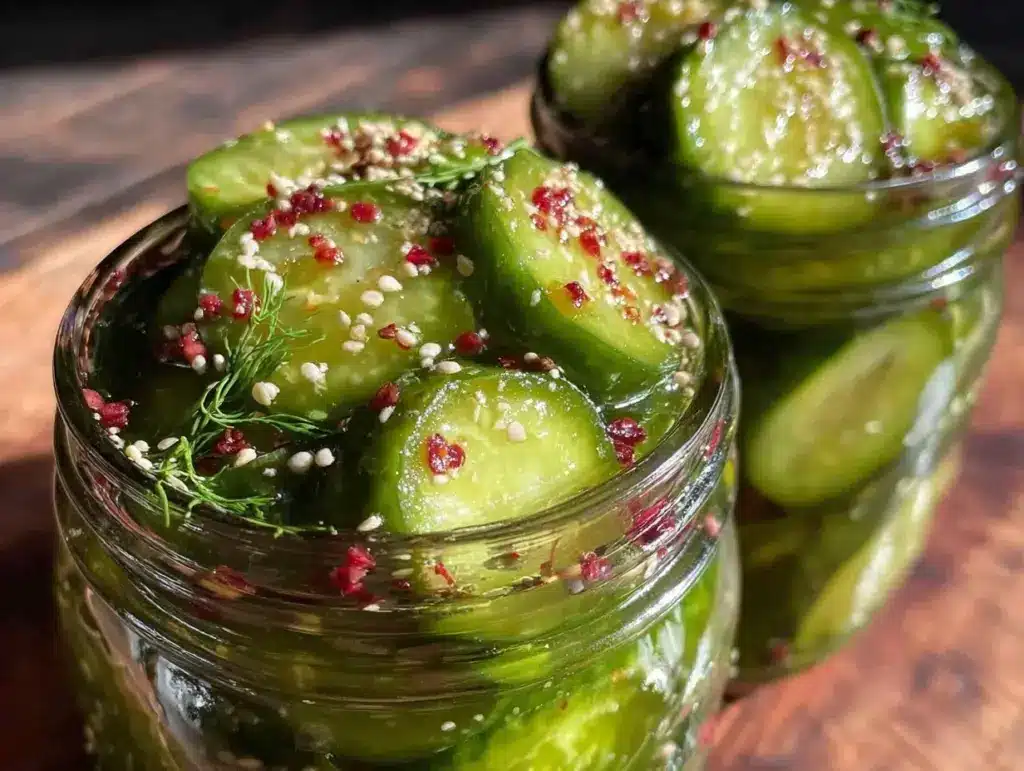
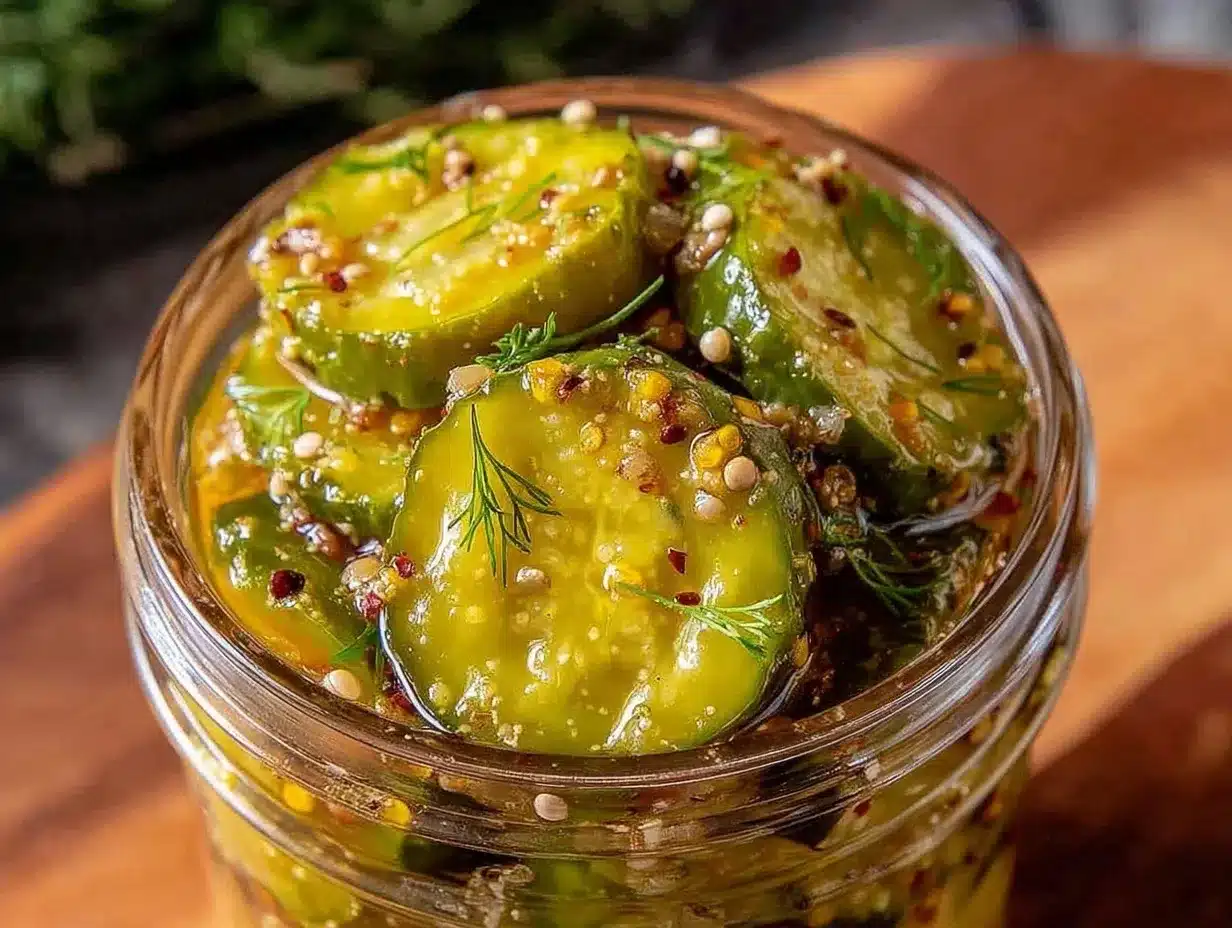
- Pack the Jars: Place fresh dill sprigs, garlic cloves, black peppercorns, mustard seeds, and red pepper flakes into the clean Mason jar. Pack cucumber slices tightly but without crushing. The goal is to fill the jar fully for even brining. (5 minutes)
- Pour the Brine: Carefully pour the warm brine over the cucumbers, ensuring they’re fully submerged. Leave about ½ inch (1.25 cm) space at the top. Use a clean utensil to press down if needed. Seal the jar with the lid. (3 minutes)
- Refrigerate: Place the jar in the refrigerator. Let the pickles chill and soak for at least 24 hours before tasting. They’ll develop more flavor after 48 hours but are perfectly crunchy and tangy at the one-day mark. (24-48 hours)
- Enjoy: Grab your crunchy refrigerator dill pickles straight from the jar. They’re perfect on sandwiches, burgers, or as a snack alongside your favorite dishes.
Pro tip: If your pickles taste a little too sharp on day one, give them another day or two to mellow out. Also, if the pickles float above the brine, gently press them down daily to keep them submerged for even pickling.
Cooking Tips & Techniques
One lesson I learned the hard way is not to skip rinsing the pickling lime soak. That residual lime can leave a soapy aftertaste, which is a shame after waiting all day. So, multiple rinses are key if you want that unbeatable crunch without weird flavors.
Another tip is to use fresh, firm cucumbers picked within a day or two of making the pickles. Older cucumbers tend to go limp too quickly. I’ve found that Kirby cucumbers hold their shape best, but Persian cucumbers can work if you slice them thick.
Don’t be tempted to use table salt here. Pickling or kosher salt keeps the brine clear and the flavor clean. Also, warming the brine helps the salt dissolve and melds the flavors, but be sure to cool it before pouring it over the cucumbers to avoid softening them prematurely.
Timing-wise, 24 hours is the magic minimum, but I like to wait 36 hours for the dill and garlic to really seep into the cucumbers. If you’re prepping for a party, start these the day before, and you’ll have crunchy pickles ready just in time to impress.
When it comes to multitasking, these pickles are perfect. I often start the brine while prepping a quick dinner like the honey balsamic chicken pasta salad, then let the pickles chill while I finish cooking. It’s a win-win for busy nights.
Variations & Adaptations
This quick crunchy refrigerator dill pickles recipe is flexible enough to suit all kinds of tastes and dietary needs.
- Spicy Pickles: Add more red pepper flakes or a few sliced jalapeños for a fiery kick that pairs well with smoky dishes.
- Garlic-Less Version: Skip the garlic cloves if you prefer a milder, cleaner flavor—great for those sensitive to garlic’s intensity.
- Vegan & Low-Sodium: Use a lower amount of salt or a salt substitute, and swap sugar with a natural sweetener like stevia or monk fruit. The texture remains great.
- Herb Variations: Try swapping dill for fresh tarragon or adding a touch of fresh thyme for a different herbaceous note.
- Quick Bread & Butter Pickles: For a sweeter twist, add sliced onion and increase sugar to ¼ cup when making the brine.
Once, I made a batch with a splash of apple cider vinegar instead of white vinegar—turns out, it adds a lovely fruity depth while keeping the crunch intact. It paired beautifully with the creamy classic southern potato salad I was serving alongside.
Serving & Storage Suggestions
Serve your quick crunchy refrigerator dill pickles chilled, straight from the jar or on a small platter with toothpicks for easy snacking. They’re fantastic alongside hearty sandwiches or as a zesty contrast to creamy dips like the patriotic layered hummus dip.
Store pickles in the refrigerator for up to 2 weeks. The flavor and crunch actually improve after a few days as the brine continues to infuse. Just keep the jar sealed and the cucumbers submerged in brine to avoid any spoilage.
If you want to save some for later, these pickles freeze well for up to 3 months, although the texture softens slightly after thawing. For best texture, stick to refrigerated storage.
Reheating isn’t really necessary—these pickles shine cold, adding that bright, crisp snap to meals and snacks.
Nutritional Information & Benefits
Each serving (about 3 spears) of these quick crunchy refrigerator dill pickles contains roughly 10-15 calories, very low carbs, and negligible fat, making them a guilt-free snack. They’re naturally gluten-free and keto-friendly.
The vinegar and dill have digestive benefits, and cucumbers provide hydration plus small amounts of vitamin K. Since this recipe uses fresh ingredients and no preservatives, you get a clean flavor without additives.
Just a heads-up: the sodium content is moderate due to the pickling salt, so if you’re watching your salt intake, adjust accordingly.
Conclusion
Quick crunchy refrigerator dill pickles have become my favorite way to enjoy homemade pickles without the wait or complicated equipment. This recipe is straightforward, dependable, and delivers that classic dill pickle crunch and tang in just 24 hours. I love how it fits effortlessly into my busy kitchen routine and how the flavors brighten up everything from sandwiches to snack platters.
Feel free to tweak the spice level, herbs, or even the vinegar to make these pickles your own. They’re forgiving and flexible, which makes them perfect for experimenting.
If you’ve ever been wary of quick pickles like I was, this recipe might just change your mind—like it did mine. And if you want to keep the party going, these pickles make a fantastic side for dishes like the BBQ pulled pork sliders with creamy coleslaw or fresh salads.
Give them a try, and I’d love to hear how you make them your own.
Frequently Asked Questions
How long do quick refrigerator dill pickles last?
They keep well in the fridge for up to 2 weeks. The flavor and crunch often improve after a couple of days but best enjoyed within that timeframe.
Can I use regular vinegar instead of white vinegar?
White vinegar is best for its clean, sharp acidity, but apple cider vinegar can be used for a slightly sweeter, fruitier flavor.
Do I have to use pickling lime?
No, but it helps keep the cucumbers extra crunchy. If you skip it, your pickles might be a bit softer but still tasty.
Can I reuse the brine for another batch?
It’s not recommended because the brine loses potency and can harbor bacteria. Fresh brine ensures safety and best flavor.
What’s the difference between refrigerator pickles and canned pickles?
Refrigerator pickles are quick, kept cold, and not heat-processed, while canned pickles are preserved through boiling water baths and can be stored at room temperature for longer periods.
Pin This Recipe!
Quick Crunchy Refrigerator Dill Pickles Recipe Ready in 24 Hours
A quick and easy refrigerator pickle recipe that delivers crunchy, tangy dill pickles in just 24 hours without fermentation or special equipment.
- Prep Time: 15 minutes
- Cook Time: 10 minutes
- Total Time: 24 hours
- Yield: 4 servings 1x
- Category: Side Dish
- Cuisine: American
Ingredients
- 4–5 medium Kirby or pickling cucumbers (about 1.5 pounds / 700 grams), washed and sliced into spears or rounds
- 3–4 sprigs fresh dill or 2 tablespoons dill seeds
- 3–4 garlic cloves, peeled and lightly crushed
- 1 cup (240 ml) white vinegar (5% acidity)
- 1 cup (240 ml) water, filtered or distilled
- 1 tablespoon pickling salt (kosher or canning salt, avoid iodized)
- 1 teaspoon granulated sugar
- 1 teaspoon pickling lime (calcium hydroxide) – optional but recommended
- 1 teaspoon black peppercorns
- 1 teaspoon mustard seeds
- A pinch of red pepper flakes (optional)
Instructions
- Wash cucumbers thoroughly, cut off blossom ends, and slice into spears or rounds (about 12-15 spears or 24-30 rounds).
- Optional: Dissolve 1 teaspoon pickling lime in 4 cups cold water and soak cucumber slices for 1 hour. Rinse cucumbers 2-3 times under cold water afterward.
- In a small saucepan, combine white vinegar, water, pickling salt, and sugar. Warm over medium heat until salt and sugar dissolve. Remove from heat and let cool slightly.
- Place fresh dill sprigs, garlic cloves, black peppercorns, mustard seeds, and red pepper flakes into a clean quart-sized Mason jar.
- Pack cucumber slices tightly into the jar without crushing.
- Pour the warm brine over the cucumbers, ensuring they are fully submerged, leaving about ½ inch space at the top. Press down if needed and seal the jar.
- Refrigerate the jar for at least 24 hours before tasting. For best flavor, wait 36-48 hours.
- Enjoy the pickles chilled, straight from the jar or as a side with sandwiches and snacks.
Notes
Rinse cucumbers thoroughly after soaking in pickling lime to avoid soapy aftertaste. Use fresh, firm cucumbers for best crunch. Warm the brine to dissolve salt and sugar but cool before pouring to prevent softening cucumbers. Press pickles down daily if they float above the brine. Flavor improves after 48 hours but ready at 24 hours.
Nutrition
- Serving Size: About 3 cucumber spe
- Calories: 12
- Sugar: 1
- Sodium: 600
- Carbohydrates: 3
- Fiber: 1
Keywords: quick pickles, refrigerator pickles, dill pickles, crunchy pickles, easy pickles, homemade pickles, no fermentation pickles


