The smell of sizzling beef mixed with melted cheese tucked inside golden pockets of dough? Oh, it’s pure joy! Cheeseburger pockets are that magical dinner idea that combines comfort food with convenience. I first whipped these up on a busy school night, and ever since, they’ve become our go-to for family dinners. They’re the kind of meal that gets everyone excited—no complaints, no leftovers, just happy bellies.
What makes cheeseburger pockets so irresistible is their versatility. You can stuff them with your favorite cheeseburger fixings, and they’re ready in no time. Plus, they’re handheld, which means kids love them, and cleanup is a breeze. As someone who’s made these dozens of times, I can confidently say this recipe is foolproof, and the flavor is unforgettable.
Why You’ll Love This Recipe
- Quick & Easy: These cheeseburger pockets come together in under 30 minutes, making them perfect for those hectic evenings.
- Simple Ingredients: You probably already have everything you need in your kitchen—no need for complex grocery lists.
- A Family Favorite: Kids and adults alike rave about these pockets. They’re fun to eat, and everyone can customize their own!
- Perfect for Any Occasion: Whether it’s dinner, a party, or packed lunches, cheeseburger pockets are always a hit.
- Unbelievably Tasty: The buttery, flaky crust paired with the juicy beef and melty cheese is a match made in food heaven.
What sets this recipe apart is the use of refrigerated crescent dough as the base—it makes these cheeseburger pockets super easy and quick to prepare. Plus, you can tweak the filling to suit your cravings. Whether you prefer classic cheeseburger flavors or want to spice it up with jalapeños and pepper jack cheese, this recipe has you covered!
Ingredients You Will Need
This recipe uses simple, everyday ingredients to create a dinner that’s full of flavor and fun. Here’s what you’ll need:
- Refrigerated crescent dough: The star of the show! It’s buttery, flaky, and forms the perfect pocket for the filling.
- Ground beef: Choose lean ground beef for less grease, or swap with ground turkey for a lighter option.
- Shredded cheddar cheese: The classic cheeseburger choice, but feel free to experiment with mozzarella, pepper jack, or Swiss.
- Ketchup: Adds a touch of sweetness and tang to the beef mixture.
- Mustard: A small squirt gives that signature cheeseburger kick.
- Onion: Finely diced for a pop of flavor (optional, but highly recommended).
- Pickles: Chopped up for a tangy crunch (optional, but so good!).
- Salt & pepper: To season the beef perfectly.
- Sesame seeds: Optional, but sprinkle them on top for that authentic burger bun feel.
If you’re looking to make this recipe gluten-free, you can use gluten-free crescent dough or even swap the dough for a low-carb tortilla. For dairy-free pockets, opt for vegan cheese and skip the butter glaze.
Equipment Needed
The best part about cheeseburger pockets is that you don’t need fancy equipment to make them. Here’s what you’ll need:
- Skillet: For cooking the ground beef and mixing the filling.
- Mixing bowl: To combine the beef with other ingredients.
- Rolling pin: Optional, but helpful for flattening the crescent dough if needed.
- Baking sheet: To bake the pockets to golden perfection.
- Pastry brush: For applying the egg wash or butter glaze.
If you don’t have a pastry brush, you can use a spoon or your fingers to spread the glaze—it’s not fancy, but it works!
Preparation Method

- Preheat the oven: Start by preheating your oven to 375°F (190°C). Line a baking sheet with parchment paper to prevent sticking.
- Cook the ground beef: Heat a skillet over medium heat and add the ground beef. Break it up with a wooden spoon and cook for about 6-8 minutes, or until it’s browned and fully cooked. Drain any excess grease.
- Season the beef: Add the diced onion, ketchup, mustard, salt, and pepper to the skillet. Stir well, and cook for another 2 minutes to let the flavors meld. Set aside to cool slightly.
- Prep the dough: Roll out the crescent dough on a floured surface. If the triangles are too thin, you can gently roll them out a bit more to create larger pockets.
- Assemble the pockets: Place a small scoop of the beef mixture onto each crescent triangle. Add a sprinkle of shredded cheese and chopped pickles (if using). Fold the dough over the filling and pinch the edges to seal.
- Add the finishing touches: Brush the tops of the pockets with a beaten egg or melted butter for a golden finish. Sprinkle sesame seeds on top if you’re feeling fancy!
- Bake: Arrange the pockets on the prepared baking sheet. Bake for 12-15 minutes, or until the dough is golden brown and puffed.
- Cool & enjoy: Let the pockets cool for a couple of minutes before serving. Trust me, they’ll be piping hot inside!
Cooking Tips & Techniques
- Don’t overfill: It’s tempting to pack these pockets with as much filling as possible, but too much can lead to messy leaks during baking.
- Seal the edges well: Use your fingers or the prongs of a fork to tightly seal the dough edges to keep the filling intact.
- Drain excess grease: If your ground beef is too greasy, it can make the dough soggy. Always drain well before mixing the filling.
- Customize the fillings: Add sautéed mushrooms, crispy bacon, or even a dollop of barbecue sauce for extra flavor.
- Watch the oven closely: Crescent dough cooks quickly, so keep an eye on your pockets to avoid burning them.
Variations & Adaptations
- Gluten-Free: Swap the crescent dough for gluten-free dough or use corn tortillas for a taco-inspired twist.
- Low-Carb: Go for low-carb wraps instead of dough. You can even use lettuce leaves for a lighter option.
- Vegetarian Version: Substitute the ground beef with a plant-based meat alternative or use black beans and sautéed veggies for a healthy spin.
- Spicy Kick: Add diced jalapeños, cayenne pepper, or hot sauce to the beef mixture for some heat.
- Cheese Lover’s Delight: Mix cheeses like cheddar, mozzarella, and Parmesan for an extra gooey filling.
Personally, I once added caramelized onions and barbecue sauce to the filling, and my family went crazy for it. Experiment and make it your own!
Serving & Storage Suggestions
Cheeseburger pockets are best enjoyed hot and fresh out of the oven when the dough is flaky and the cheese is perfectly melted. Serve them with a side of ketchup, mustard, or even ranch for dipping.
Pair these pockets with a crisp side salad, roasted veggies, or some fries for a complete meal. If you’re hosting a party, they also work great alongside chips and a creamy dip.
To store any leftovers, place them in an airtight container in the refrigerator for up to 3 days. When you’re ready to reheat, pop them in the oven at 350°F (175°C) for 10 minutes or until heated through. You can also freeze them for up to 2 months—just thaw overnight in the fridge and reheat before serving.
Nutritional Information & Benefits
Each cheeseburger pocket contains approximately:
- Calories: 250
- Protein: 15g
- Fat: 12g
- Carbohydrates: 20g
Thanks to the lean ground beef and moderate cheese, these pockets offer a good balance of protein and fat, making them satisfying without being overly heavy. For a healthier twist, you can use whole-grain dough or incorporate more veggies into the filling. Just be mindful of allergens like gluten or dairy if you’re serving these to a crowd.
Conclusion
There’s something so comforting and satisfying about these irresistible cheeseburger pockets. Not only are they fun to make, but they’re also a guaranteed crowd-pleaser that you can personalize to suit your family’s tastes. Whether you’re whipping up a quick dinner or prepping for a casual get-together, this recipe is always a winner.
Give it a try and let me know how you customized your pockets! I’d love to hear your ideas in the comments below. If you enjoyed this recipe, don’t forget to share it with your friends and family—it’s too good not to pass along. Happy cooking!
FAQs
Can I use puff pastry instead of crescent dough?
Yes! Puff pastry will give you a flakier, buttery crust. Just make sure to adjust the baking time as it may take slightly longer to cook.
Can I make these ahead of time?
Absolutely! Prepare the pockets and refrigerate them unbaked for up to 24 hours. Bake them fresh when you’re ready to eat.
What’s the best way to reheat cheeseburger pockets?
Reheat them in the oven at 350°F (175°C) for about 10 minutes to maintain the crispy texture. Avoid using the microwave as it can make the dough soggy.
Can I freeze cheeseburger pockets?
Yes, you can freeze them either baked or unbaked for up to 2 months. Thaw overnight in the fridge and bake or reheat as needed.
Can I add extra toppings to the filling?
Of course! Feel free to add cooked bacon, mushrooms, or even jalapeños for a spicy kick. Just don’t overfill the pockets to avoid leaks.
Pin This Recipe!

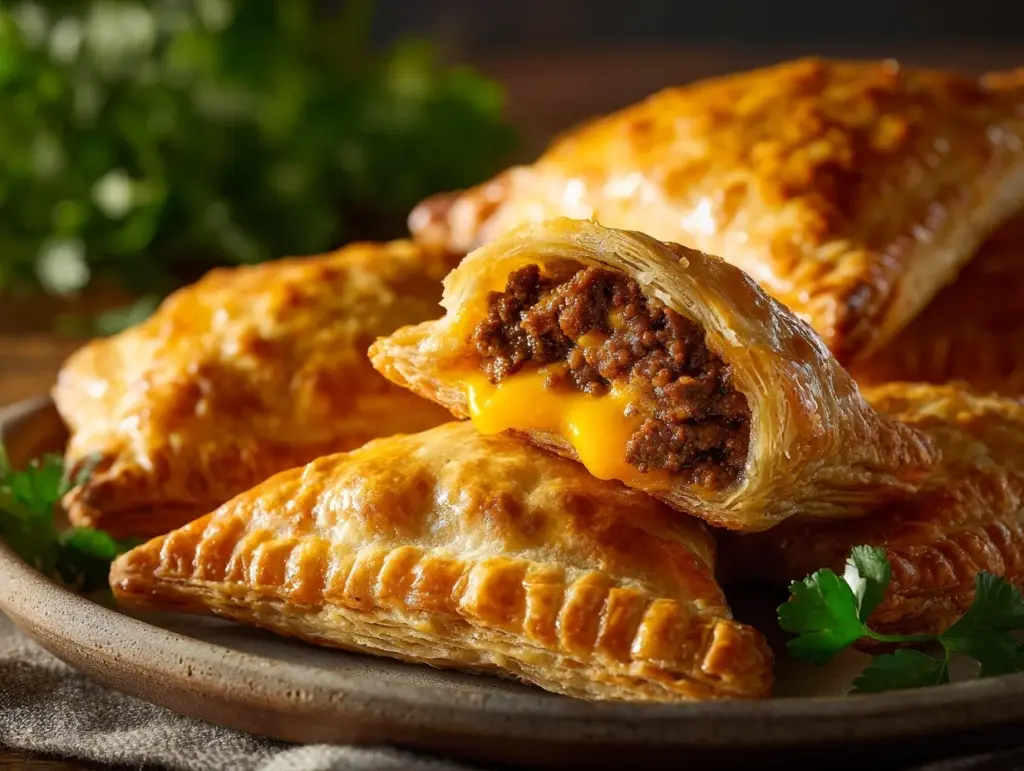
Cheeseburger Pockets

Cheeseburger pockets combine comfort food with convenience, featuring juicy beef and melted cheese tucked inside golden crescent dough pockets.
- Prep Time: 10 minutes
- Cook Time: 15 minutes
- Total Time: 25 minutes
- Yield: 8 pockets 1x
- Category: Main Course
- Cuisine: American
Ingredients
- 1 package refrigerated crescent dough
- 1 pound lean ground beef
- 1 cup shredded cheddar cheese
- 2 tablespoons ketchup
- 1 teaspoon mustard
- 1/4 cup finely diced onion (optional)
- 1/4 cup chopped pickles (optional)
- Salt and pepper to taste
- 1 egg or melted butter (for brushing)
- Sesame seeds (optional)
Instructions
- Preheat the oven to 375°F (190°C). Line a baking sheet with parchment paper.
- Heat a skillet over medium heat and add the ground beef. Break it up with a wooden spoon and cook for 6-8 minutes, or until browned and fully cooked. Drain any excess grease.
- Add the diced onion, ketchup, mustard, salt, and pepper to the skillet. Stir well and cook for another 2 minutes. Set aside to cool slightly.
- Roll out the crescent dough on a floured surface. If the triangles are too thin, gently roll them out to create larger pockets.
- Place a small scoop of the beef mixture onto each crescent triangle. Add a sprinkle of shredded cheese and chopped pickles (if using). Fold the dough over the filling and pinch the edges to seal.
- Brush the tops of the pockets with a beaten egg or melted butter. Sprinkle sesame seeds on top if desired.
- Arrange the pockets on the prepared baking sheet. Bake for 12-15 minutes, or until the dough is golden brown and puffed.
- Let the pockets cool for a couple of minutes before serving.
Notes
[‘Don’t overfill the pockets to avoid leaks during baking.’, ‘Seal the edges tightly using your fingers or a fork.’, ‘Drain excess grease from the ground beef to prevent soggy dough.’, ‘Customize the filling with sautéed mushrooms, crispy bacon, or barbecue sauce.’, ‘Watch the oven closely as crescent dough cooks quickly.’]
Nutrition
- Serving Size: 1 pocket
- Calories: 250
- Fat: 12
- Carbohydrates: 20
- Protein: 15
Keywords: cheeseburger pockets, easy dinner, family meal, crescent dough recipe, handheld dinner