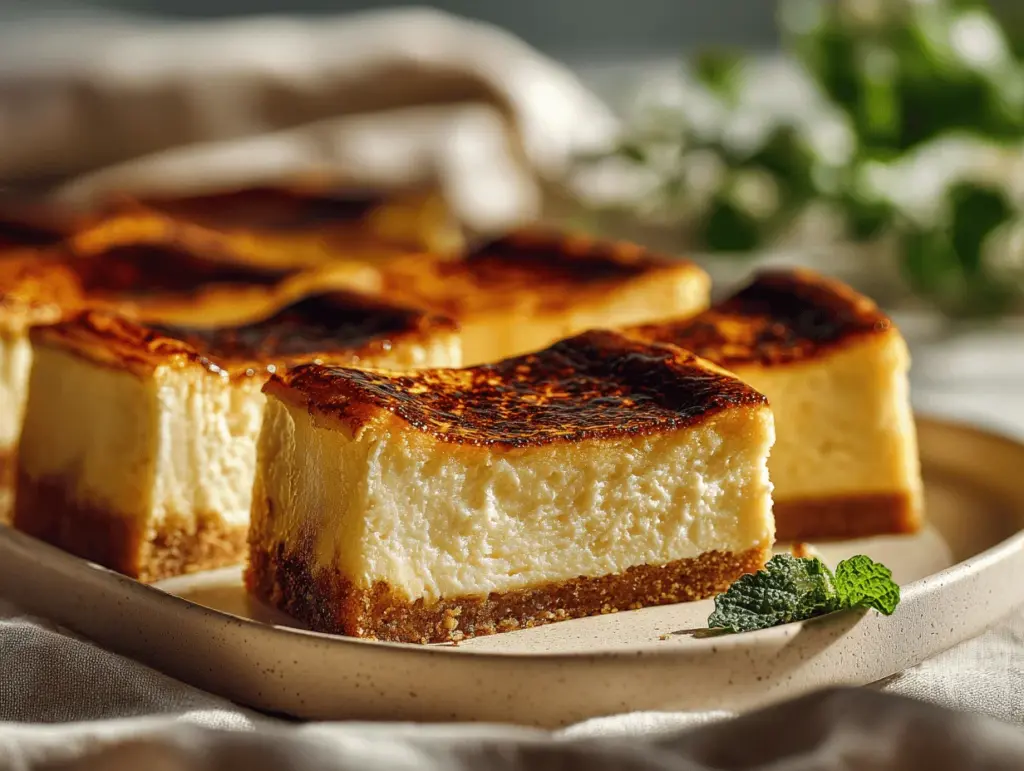
You know that moment when you crack through the caramelized sugar on a creme brûlée and scoop up the silkiest custard underneath? Well, imagine that magic, but in a hand-held cheesecake bar you can make at home—without a culinary torch or a pastry degree! My first bite of these creme brûlée cheesecake bars was pure bliss: buttery crust, creamy filling, and that signature glassy sugar top. It’s the kind of dessert that’ll have your friends gawking (“You made this at home?!”) and your family sneaking seconds when they think no one’s watching.
Honestly, creme brûlée was always my “restaurant-only” treat until I started tinkering with cheesecake bars during a weekend baking spree. I thought, “What if I could mash up my favorite fancy dessert with my go-to cheesecake bars?” The result? Layers of flavor, a little drama from the crackly top, and a dessert that feels decadent but is shockingly easy to pull off. Whether you’re a seasoned baker or just starting out, these creme brûlée cheesecake bars are the ultimate way to impress without stress. Plus, they’re perfect for parties, birthdays, or just because—you deserve a little luxury!
I’ve tested this recipe more times than I can count (my neighbors have strong opinions, trust me). Each time I tweak it, I fall a little more in love. I use simple ingredients, a few pro tricks to get that custardy texture, and a clever broiler method for the brûlée topping. These bars are dreamy, creamy, and totally doable in your own kitchen. If you’re ready to bring a bit of Parisian cafe magic to your dessert table, you’re in the right place. Let’s dive into the most irresistible creme brûlée cheesecake bars you’ll ever taste!
Why You’ll Love These Creme Brûlée Cheesecake Bars
- Quick & Easy: These bars come together in under an hour of active time—no water baths, no fuss, just simple steps for a show-stopping result.
- Simple Ingredients: There’s nothing fancy here. If you bake, you probably have everything you need: cream cheese, eggs, sugar, a splash of vanilla, and graham crackers for the crust.
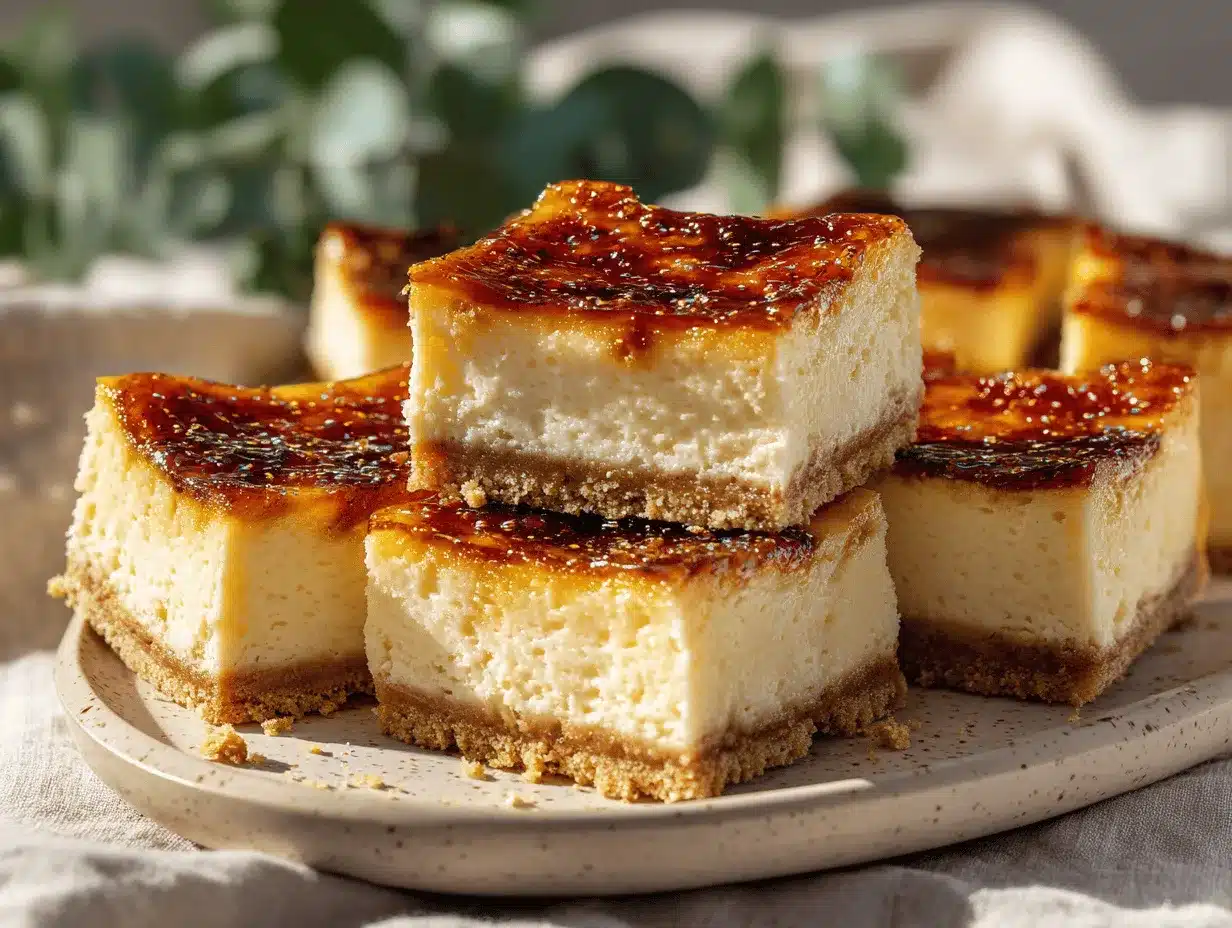
- Perfect for Any Occasion: Whether you’re hosting a dinner party, planning a brunch, or just looking for a luxurious weeknight treat, these bars fit the bill. They slice beautifully and look stunning on a platter!
- Crowd-Pleaser: Both kids and adults rave about that crackly sugar top and the velvety cheesecake beneath. I’ve yet to meet anyone who can resist them (even my “I don’t like cheesecake” friends go back for more).
- Unbelievably Delicious: You get the best of both worlds—the deep vanilla custard flavor of creme brûlée and the tangy richness of cheesecake, all finished with a caramelized sugar shell. It’s comfort food that feels like a celebration!
What really sets these creme brûlée cheesecake bars apart is the technique. I blend the cream cheese until it’s ultra-smooth, fold in just enough cream for silkiness, and bake the whole thing gently so you never get a dry or cracked bar. The sugar topping is broiled (no torch needed!) for that iconic snap. And honestly, there’s something magical about serving a dessert that looks (and tastes) this fancy, knowing it didn’t take all day.
These bars are the kind of treat that makes you pause for a second after the first bite. They’ve got that “close your eyes and smile” factor. For me, they’re a reminder that you don’t need to spend hours in the kitchen for a result that feels special. If you’re looking for a dessert that’ll steal the show without stealing your time, give these creme brûlée cheesecake bars a try. You’ll be hooked!
What Ingredients You Will Need
This recipe uses simple, easy-to-find ingredients, but each one plays a starring role in creating those lush, layered flavors and textures. You’ll probably have most of these on hand, and a few clever swaps can make it work for just about anyone.
- For the Graham Cracker Crust:
- Graham cracker crumbs (about 1 1/2 cups / 150g) – You can crush whole crackers or buy pre-crushed. Digestive biscuits or vanilla wafers work in a pinch.
- Unsalted butter, melted (1/3 cup / 75g) – Adds richness and helps the crust set. If you’re dairy-free, use plant-based butter.
- Granulated sugar (2 tablespoons / 25g) – Sweetens and binds the crust.
- Pinch of salt – Balances out the sweetness and deepens flavor.
- For the Cheesecake Layer:
- Cream cheese, softened (16 oz / 450g) – Full-fat for best texture. I like Philadelphia or store-brand blocks; avoid whipped tubs.
- Granulated sugar (3/4 cup / 150g) – Sweetens and helps create that creamy, classic cheesecake flavor.
- Large eggs (2) – Room temperature, so they blend in smoothly. If you forget, let them sit in warm water for 5 minutes.
- Heavy cream (1/4 cup / 60ml) – For extra silkiness. Half-and-half or coconut cream also work.
- Pure vanilla extract (2 teaspoons) – The star flavor. Use real extract, not imitation!
- Pinch of salt – Don’t skip it; a little salt brings out all the flavors.
- For the Brûlée Topping:
- Granulated sugar (1/4 cup / 50g) – Sprinkled on top and broiled for that classic caramelized finish. Superfine sugar melts fastest, but regular sugar works fine.
Ingredient Notes & Tips:
- If you’re gluten-free, swap graham crackers for gluten-free biscuit crumbs.
- Lactose intolerant? Go for dairy-free cream cheese and coconut cream.
- No heavy cream? You can use sour cream, but the filling will be slightly tangier.
- Don’t have a broiler? See the “Variations & Adaptations” section for other caramelizing options.
- For a twist, infuse the cream with a vanilla bean pod for even more flavor.
Equipment Needed
- 8×8-inch (20×20 cm) Baking Pan: The sweet spot for perfect bars. A 9-inch pan works, but bars will be thinner.
- Parchment Paper: For easy lifting and clean-up. If you’re out, just grease the pan well.
- Mixing Bowls: At least two—one for the crust, one for the filling. Glass or stainless steel is best.
- Electric Hand Mixer or Stand Mixer: For smooth, lump-free cheesecake. If you only have a whisk, it works (get ready for an arm workout!).
- Measuring Cups & Spoons: Precision matters for baking, so don’t eyeball it.
- Rubber Spatula: For scraping down the bowl and smoothing the batter.
- Oven & Broiler: You’ll bake the bars and finish the top under the broiler for that brûlée crunch.
- Knife or Offset Spatula: For slicing bars cleanly. Warm the knife under hot water for the neatest cuts.
Pro tip: If you bake a lot, invest in a good parchment roll—it saves so much cleanup! Don’t worry if your mixer is older or noisy; I’ve made these bars with a $12 hand mixer from the thrift shop, and they turned out perfect. Just make sure your pan is lined well so nothing sticks, and let the bars cool completely for the cleanest slices.
How to Make Creme Brûlée Cheesecake Bars
- Prep your pan: Line an 8×8-inch (20×20 cm) baking pan with parchment paper, leaving an overhang for easy lifting. Preheat your oven to 325°F (163°C). This prevents sticking and makes serving a breeze.
-
Make the crust: In a medium bowl, combine 1 1/2 cups (150g) graham cracker crumbs, 1/3 cup (75g) melted unsalted butter, 2 tablespoons (25g) sugar, and a pinch of salt. Stir until the mixture looks like wet sand. Pour into the pan and press down firmly with your fingers or the bottom of a measuring cup.
Bake for 8-10 minutes until lightly golden. Cool slightly while you prep the filling. -
Mix the cheesecake filling: In a large bowl, beat 16 oz (450g) softened cream cheese with 3/4 cup (150g) sugar and a pinch of salt until completely smooth. This takes about 2-3 minutes with a hand mixer. Scrape down the sides often—lumps are the enemy!
Add 2 large eggs, one at a time, mixing just until blended. Don’t overmix or you’ll add too much air (hello, cracks!). Beat in 1/4 cup (60ml) heavy cream and 2 teaspoons vanilla extract until creamy. -
Assemble and bake: Pour cheesecake batter over the cooled crust. Smooth the top with a spatula. Tap the pan gently on the counter to pop any bubbles.
Bake at 325°F (163°C) for 28-32 minutes. The edges should look set, but the center will jiggle slightly when shaken—don’t overbake! If it puffs or cracks, it’s likely overbaked. Cool at room temperature for 1 hour, then refrigerate at least 3 hours (overnight is even better). -
Brûlée the top: Once fully chilled, remove bars from the pan using parchment overhang. Pat the surface dry with a paper towel if there’s moisture. Sprinkle 1/4 cup (50g) sugar evenly over the surface.
Set your oven broiler to high. Place the pan on the top rack and broil for 2-4 minutes, rotating as needed, until the sugar melts and bubbles into a caramelized shell. Watch closely—sugar burns fast!
If you have a kitchen torch, use it for extra control, but the broiler works great. - Cool and slice: Let the bars cool for 10 minutes so the topping hardens. Slice into 16 squares with a warm, sharp knife. Clean the knife between cuts for neat edges.
- Serve and enjoy! Listen for that satisfying crack as you bite in. Bask in the compliments!
Troubleshooting:
- If the cheesecake cracks, don’t worry! The sugar top hides imperfections.
- If your crust crumbles, try pressing it firmer next time and check that you used enough butter.
- For even caramelization, rotate the pan under the broiler and keep a close eye—burnt sugar happens fast!
I swear by chilling overnight for the creamiest texture, but if you’re impatient, three hours will do. For extra flair, garnish with berries or a sprinkle of flaky salt right before serving.
Cooking Tips & Techniques
- Room Temperature Ingredients: Always bring your cream cheese and eggs to room temp; this prevents lumps and guarantees a velvety filling. I’ve rushed it before and ended up with a chunky batter—never again!
- Bake Gently: Low and slow is the secret. High heat will split or dry out your cheesecake. Stick to 325°F (163°C), and don’t open the oven door too early.
- Don’t Overmix: Mix just until smooth—extra air in the batter means cracks. If you’re using a stand mixer, keep it on low and scrape the bowl often.
- Trouble with the Brûlée? If your sugar beads up instead of melting, give it a quick, even layer and broil closer to the heat. Superfine sugar works fastest!
- Timing Your Steps: While the crust is cooling, make the filling. While the cheesecake chills, clean up and prep your brûlée setup—it’s all about multitasking.
- Consistency Tricks: For extra-smooth bars, sift your sugar before sprinkling on top. And if you want super-neat slices, dip your knife in hot water and wipe clean between each cut.
Just a heads-up: cheesecake bars love to stick, so line your pan well and don’t rush the cooling. If the sugar topping softens in the fridge, you can flash it under the broiler again for a fresh crunch. The beauty of this recipe is that a little imperfection just makes it look more homemade (and, honestly, more irresistible!).
Variations & Adaptations
- Gluten-Free: Swap traditional graham crackers for gluten-free varieties (I like Schär or homemade GF crumbs). The rest of the recipe is naturally gluten-free!
- Flavor Twists: Add a hint of orange zest to the cheesecake batter for a citrusy note, or swirl in a spoonful of raspberry jam before baking for a fruity finish. I’ve also tried espresso powder for a mocha spin—so good!
- Dairy-Free: Use plant-based cream cheese (like Kite Hill) and coconut cream instead of heavy cream. The texture stays rich, and you still get that classic flavor.
- No Broiler? No Problem: If you can’t use your broiler, caramelize the sugar topping with a kitchen torch, or skip it and serve the bars as is—they’ll still be delicious (just missing the crackly lid).
- Allergen Adjustments: For egg allergies, try a commercial egg replacer—though the texture will be a bit different, it still sets up nicely.
- Personal Favorite: Sometimes I sprinkle a tiny pinch of flaky sea salt on top after brûléeing for a sweet-salty hit. It’s not classic, but it’s wildly addictive!
Feel free to mix and match these adaptations. There’s no “right” way—just what tastes right to you. Let your pantry and cravings be your guide!
Serving & Storage Suggestions
Serving: These creme brûlée cheesecake bars are best served chilled, straight from the fridge. That’s when the layers are at their creamiest and the sugar top stays crisp. For a party platter, arrange the bars on a pretty tray and garnish with fresh berries or edible flowers. Add a dusting of powdered sugar for extra flair (just before serving, or the sugar will melt).
Pairings: I love serving these with coffee, espresso, or even a glass of dessert wine. They also play well with fresh fruit—raspberries, blueberries, or sliced strawberries are my go-to.
Storing: Store any leftovers in an airtight container in the fridge for up to 5 days. The brûlée topping may soften a bit after a day or two, but you can always sprinkle on a bit more sugar and flash under the broiler for a fresh crunch.
Freezing: You can freeze these bars (without the brûlée topping) for up to 2 months. Thaw overnight in the fridge, then add the sugar and brûlée just before serving for best results.
If you’re prepping ahead for a party, make and chill the bars a day in advance, then brûlée the sugar right before serving so you get that dreamy, crackly top. Honestly, they taste even better the next day as the flavors meld and the texture gets even creamier!
Nutritional Information & Benefits
Each creme brûlée cheesecake bar (1 of 16) contains approximately:
- Calories: 220
- Fat: 14g
- Carbohydrates: 20g
- Protein: 3g
- Sugar: 16g
Cream cheese brings calcium and protein, and eggs add extra nutrition. If you’re watching carbs or sugar, try using a low-carb sweetener blend in the crust and filling. For gluten-free diets, just swap out the crust, and for lactose-free, use dairy-free subs as mentioned earlier.
Allergens to note: This recipe contains dairy, eggs, and gluten (unless you use substitutions). I always say: dessert is about balance—so savor every bite and enjoy the treat. For me, these bars are a little moment of joy, perfect for sharing (or not!).
Conclusion
If you’re looking for a dessert that combines elegance with pure comfort, these creme brûlée cheesecake bars are your answer. They deliver all the creamy, crackly, caramelized joy of classic creme brûlée—without the intimidation factor. Plus, you can pick them up with your hands (no tiny spoons required!).
What I love most is how flexible and forgiving this recipe is. Whether you stick to the classic or riff with your own twists, you’ll end up with something worthy of any celebration—or just a Tuesday night “treat yourself” moment. I’ll never get tired of that first sugary crack and the creamy bite underneath. Seriously, give these a try and see what all the fuss is about!
If you make these creme brûlée cheesecake bars, I’d love to hear how they turned out. Drop a comment, share your photos, or let me know your favorite variation. Don’t forget to save and share this recipe—it’s too good to keep to yourself. Happy baking, and here’s to more moments of delicious, doable luxury in your kitchen!
FAQs
Can I make creme brûlée cheesecake bars ahead of time?
Yes! Bake and chill the bars up to 2 days in advance. Add the sugar and brûlée topping right before serving for best crunch.
Do I need a kitchen torch for the brûlée topping?
Nope! The broiler works perfectly. Just watch closely so the sugar caramelizes without burning.
Can I freeze creme brûlée cheesecake bars?
Yes, but freeze them before adding the sugar topping. Thaw in the fridge, then add sugar and brûlée before serving for the best texture.
Why did my cheesecake crack?
Usually it’s from overmixing or overbaking. Don’t worry—the sugar topping hides cracks, and the bars still taste amazing.
Can I make these gluten-free?
Absolutely! Just swap the graham cracker crumbs for your favorite gluten-free variety. The rest of the recipe is already gluten-free if you use the right crust.
Pin This Recipe!
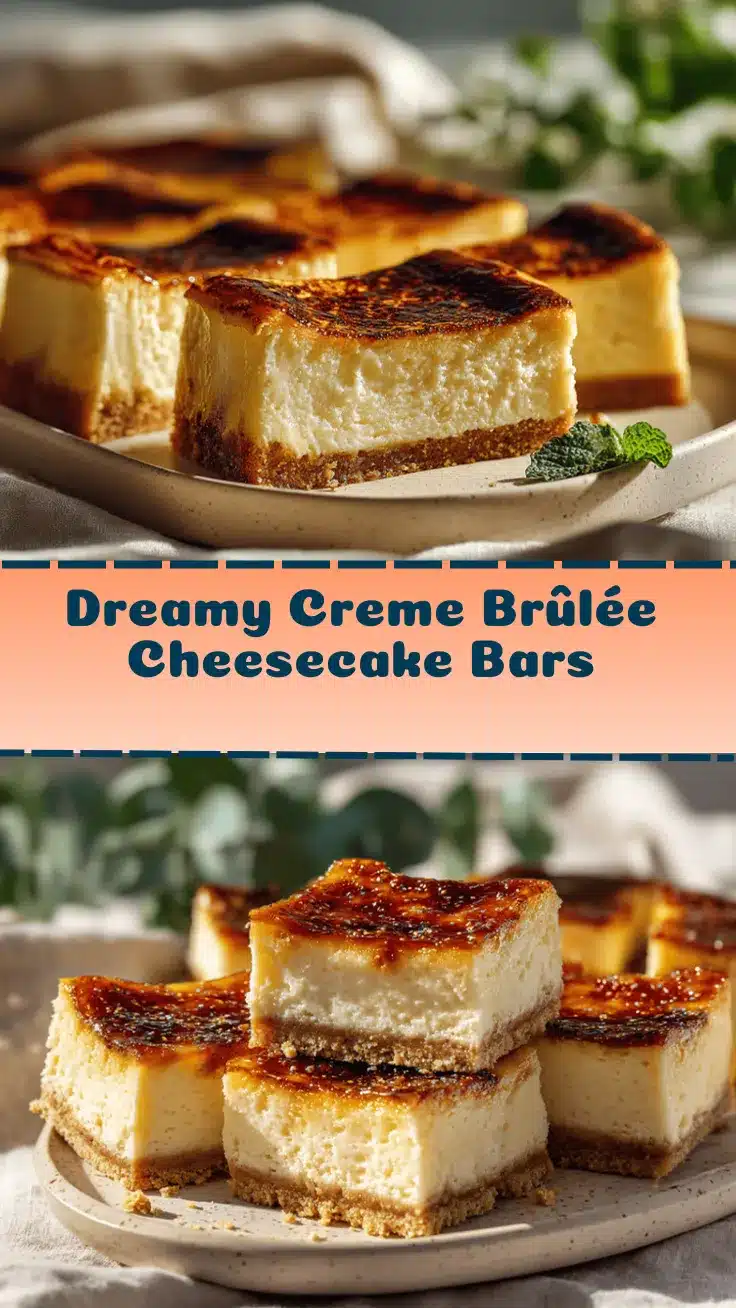
Creme Brûlée Cheesecake Bars
These creme brûlée cheesecake bars combine the creamy, tangy richness of cheesecake with the crackly caramelized sugar top of classic creme brûlée. Easy to make and perfect for parties or special occasions, they deliver luxurious flavor in a hand-held treat.
- Prep Time: 20 minutes
- Cook Time: 40 minutes
- Total Time: 4 hours
- Yield: 16 bars 1x
- Category: Dessert
- Cuisine: French-American
Ingredients
- 1 1/2 cups graham cracker crumbs (about 150g)
- 1/3 cup unsalted butter, melted (75g)
- 2 tablespoons granulated sugar (25g)
- Pinch of salt
- 16 oz cream cheese, softened (450g)
- 3/4 cup granulated sugar (150g)
- 2 large eggs, room temperature
- 1/4 cup heavy cream (60ml)
- 2 teaspoons pure vanilla extract
- Pinch of salt
- 1/4 cup granulated sugar (50g) for topping
Instructions
- Line an 8×8-inch (20×20 cm) baking pan with parchment paper, leaving an overhang for easy lifting. Preheat oven to 325°F (163°C).
- In a medium bowl, combine graham cracker crumbs, melted butter, 2 tablespoons sugar, and a pinch of salt. Stir until the mixture resembles wet sand. Press firmly into the prepared pan.
- Bake the crust for 8-10 minutes until lightly golden. Cool slightly.
- In a large bowl, beat softened cream cheese with 3/4 cup sugar and a pinch of salt until completely smooth (about 2-3 minutes).
- Add eggs one at a time, mixing just until blended. Beat in heavy cream and vanilla extract until creamy.
- Pour cheesecake batter over the cooled crust. Smooth the top and tap the pan gently to remove bubbles.
- Bake at 325°F (163°C) for 28-32 minutes, until edges are set but center jiggles slightly. Cool at room temperature for 1 hour, then refrigerate at least 3 hours (overnight preferred).
- Once chilled, remove bars from the pan. Pat the surface dry if needed. Sprinkle 1/4 cup sugar evenly over the top.
- Broil on high for 2-4 minutes, rotating as needed, until the sugar melts and caramelizes. Watch closely to avoid burning.
- Let cool for 10 minutes to harden the topping. Slice into 16 squares with a warm, sharp knife, cleaning between cuts.
- Serve chilled and enjoy the crackly sugar top!
Notes
For best results, use room temperature cream cheese and eggs. Chill bars overnight for the creamiest texture. If you don’t have a broiler, a kitchen torch works for caramelizing the sugar. Gluten-free and dairy-free adaptations are possible. For neat slices, use a hot, clean knife. The sugar topping may soften in the fridge; re-brûlée if needed.
Nutrition
- Serving Size: 1 bar (1/16 of recipe)
- Calories: 220
- Sugar: 16
- Sodium: 140
- Fat: 14
- Saturated Fat: 8
- Carbohydrates: 20
- Protein: 3
Keywords: creme brulee cheesecake bars, cheesecake bars, creme brulee dessert, easy cheesecake, party dessert, caramelized sugar, broiler cheesecake, make ahead dessert