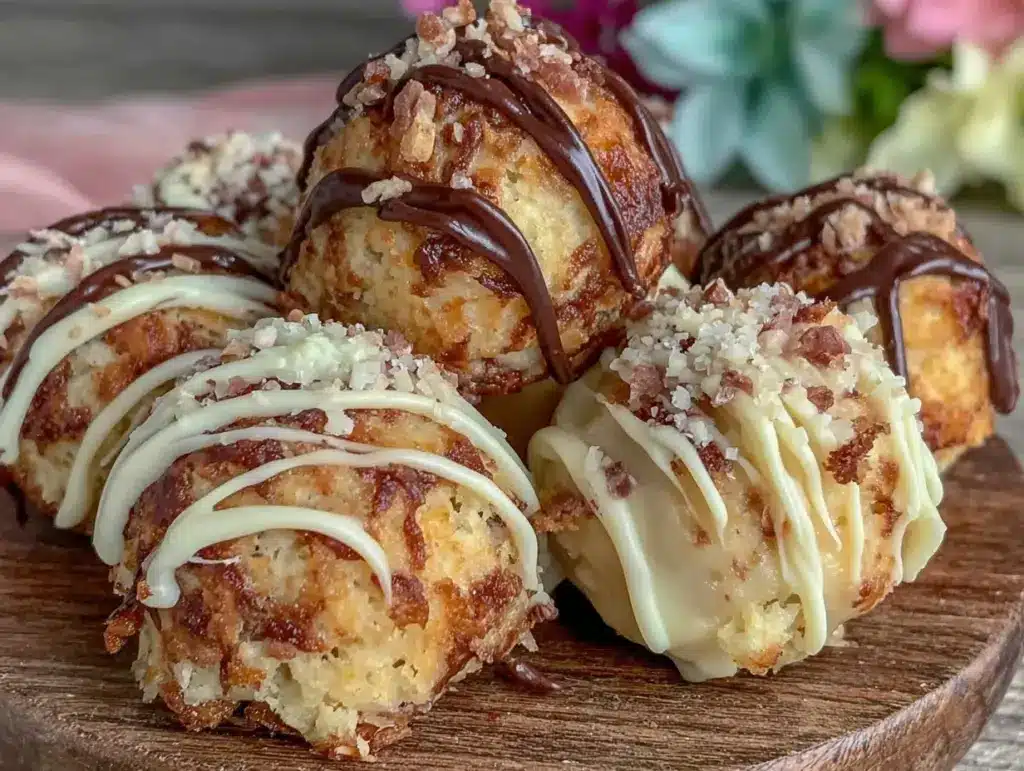
Let me tell you, the scent of warm vanilla and rich cocoa wafting from my kitchen when I first made these cake pops was enough to make anyone’s mouth water. Honestly, there’s something oddly satisfying about turning a baking flop into a sweet little treat that’s just begging to be devoured. The first time I baked these delicious cake pops made from failed cake, I was instantly hooked—it was the kind of moment where you pause, take a deep breath, and just smile because you know you’re onto something truly special.
Years ago, when I was knee-high to a grasshopper, my grandma used to say, “Waste not, want not,” and boy, did that stick with me—especially in the kitchen. I stumbled upon this recipe on a rainy weekend, trying to rescue a batch of cakes gone wrong (you know how it is, sometimes the oven just doesn’t cooperate). Instead of tossing the crumbled mess, I rolled it into pops, dipped them in chocolate, and well… let’s just say my family couldn’t stop sneaking them off the cooling rack (and I can’t really blame them).
These cake pops are dangerously easy and provide pure, nostalgic comfort, perfect for potlucks, a sweet treat for your kids, or just to brighten up your Pinterest cookie board. Plus, you’re saving food and turning a kitchen oops into a crowd-pleaser. After testing this recipe multiple times (in the name of research, of course), it’s become a staple for family gatherings and gifting. Trust me, it feels like a warm hug on a stick, and you’re going to want to bookmark this one.
Why You’ll Love This Recipe
From my many baking adventures and kitchen experiments, this recipe stands out as a simple, tasty solution for those moments when a cake doesn’t quite turn out as planned. Here’s why this delicious cake pops made from failed cake recipe has earned a permanent spot in my recipe box:
- Quick & Easy: Comes together in under 30 minutes, perfect for busy weeknights or last-minute cravings.
- Simple Ingredients: No fancy grocery trips needed; you likely already have everything in your kitchen.
- Perfect for Any Occasion: Great for birthday parties, office treats, or casual get-togethers.
- Crowd-Pleaser: Always gets rave reviews from kids and adults alike—who can resist a bite-sized treat?
- Unbelievably Delicious: The texture and flavor combo is next-level comfort food—moist cake, creamy frosting, and a crisp chocolate shell.
What makes this recipe different? It’s all about rescuing and reinventing. Instead of wasting a cake that didn’t rise or cracked, you’re crafting something fun and festive. The key is blending the cake crumbs with just the right amount of frosting to get that perfect dough-like consistency—this little trick makes the pops melt in your mouth. Plus, the chocolate coating adds a delightful crunch that balances the soft, rich interior. Honestly, this isn’t just another dessert—it’s a feel-good, zero-waste kitchen win that tastes like a celebration.
What Ingredients You Will Need
This recipe uses simple, wholesome ingredients to deliver bold flavor and satisfying texture without the fuss. Most of these are pantry staples or easy to grab from any grocery store, and you can tweak them to suit what you have on hand.
- Failed Cake Crumbs: About 3 cups (roughly 375 grams) of crumbled cake from any flavor (chocolate, vanilla, red velvet, etc.).
- Frosting: ½ cup (120 grams) of your favorite frosting (buttercream, cream cheese, or store-bought). This binds the crumbs into a dough—don’t skimp, but avoid overload.
- Chocolate Coating: 12 ounces (340 grams) of melting chocolate or candy melts (dark, milk, or white chocolate). I prefer Ghirardelli or Wilton’s candy melts for smooth dipping.
- Sprinkles or Decorations: Optional, but fun! Use colored sugar, chopped nuts, or shredded coconut to jazz up the pops.
- Wooden lollipop sticks: About 15-20 sticks, depending on how big you make your pops.
Pro tip: If you want a dairy-free version, swap the frosting for coconut cream and use dairy-free chocolate. Also, in summer, fresh berries on the side pair beautifully with these cake pops for a refreshing twist.
Equipment Needed
- Mixing Bowl: For combining cake crumbs and frosting. A large bowl makes mixing easier and less messy.
- Baking Sheet or Tray: To place the pops on while chilling. Line it with parchment paper or silicone mats to prevent sticking.
- Microwave or Double Boiler: For melting the chocolate coating smoothly. I usually use a microwave in short bursts to avoid burning.
- Lollipop Sticks: Essential for holding your cake pops; you can find these at craft stores or online.
- Cooling Rack: Handy for letting excess chocolate drip off and to keep the pops looking neat.
For a budget-friendly option, reuse wooden skewers you have at home, but watch out for splinters. If you don’t have a cooling rack, resting the sticks upright in a foam block or a mug filled with rice works just fine. Keeping your equipment clean and dry is key—especially when working with melted chocolate, or it can seize up and ruin your coating.
Preparation Method

- Crumb the Cake: Break your failed cake into small crumbs using your hands or a fork. Aim for fine, even crumbs—about 3 cups or 375 grams. This should take about 5 minutes.
- Add the Frosting: Spoon in ½ cup (120 grams) of frosting and gently fold it into the crumbs. You want a dough-like mixture that’s sticky but not wet. Add frosting a little at a time if unsure. This step takes about 5 minutes.
- Form the Balls: Roll the mixture into 1 to 1½-inch (2.5 to 4 cm) balls using your hands. Place them on a lined baking sheet. You should get around 15-20 pops. Chill the balls in the fridge for at least 30 minutes—this helps them firm up and hold shape.
- Prepare the Chocolate Coating: Melt 12 ounces (340 grams) of chocolate in a microwave-safe bowl or a double boiler. If microwaving, heat in 20-second bursts, stirring between each until smooth. This step takes about 5 minutes.
- Assemble the Pops: Dip the tip of each lollipop stick about ½ inch (1.25 cm) into the melted chocolate, then insert it halfway into a chilled cake ball. This anchors the stick so the pop won’t fall off when dipped.
- Dip the Cake Pops: Holding the stick, dip each pop fully into the melted chocolate until covered. Gently tap the stick on the bowl’s edge to remove excess chocolate. Place the dipped pop on a parchment-lined tray or cooling rack.
- Add Decorations: Before the chocolate sets, sprinkle on your decorations or sprinkles for extra flair. Work quickly as the chocolate hardens fast.
- Chill to Set: Refrigerate the cake pops for 15-20 minutes or until the coating is firm and shiny.
Troubleshooting tip: If your chocolate is too thick for dipping, stir in a teaspoon of vegetable oil to thin it out. Also, be patient when chilling—rushing this can cause the pops to fall apart or melt.
Cooking Tips & Techniques
Getting these cake pops just right is a bit of an art, and after my fair share of kitchen slip-ups, here are some tips to keep your treats looking and tasting perfect:
- Texture Balance: The key to luscious cake pops is achieving the right crumb-to-frosting ratio. Too much frosting makes them greasy; too little and they crumble. I usually start with less and add more as needed.
- Chilling is Crucial: Don’t skip the chill time—cold cake balls hold together better and dip more smoothly.
- Melting Chocolate Properly: Overheating chocolate makes it grainy or burnt. Use short bursts in the microwave or low heat on the stove, stirring often.
- Stick Stability: Dipping the stick in chocolate before inserting it into the cake ball acts like glue. Don’t skip this step unless you want your pops to go tumbling.
- Multitasking: While the cake balls chill, melt your chocolate and prep decorations—this keeps your workflow smooth and prevents the chocolate from hardening prematurely.
- Keep Hands Cool: Warm hands can melt the cake balls, so wash and chill hands if needed during rolling.
Honestly, the first time I skipped chilling, I ended up with a chocolate-covered mess on the floor—lesson learned! But hey, that’s part of the fun in the kitchen, right?
Variations & Adaptations
One of the best parts about this delicious cake pops made from failed cake recipe is how flexible it is. Here are some ways to mix things up:
- Flavor Boost: Mix in a teaspoon of instant coffee powder with the frosting for a mocha twist, or add a splash of lemon zest for a zesty surprise.
- Dietary Tweaks: Use gluten-free cake crumbs and dairy-free frosting to make this recipe allergy-friendly. Coconut or almond flour cakes work great here.
- Seasonal Flair: Swap out the chocolate coating for white chocolate and sprinkle crushed peppermint candies for a festive holiday treat.
- Baking Method Adaptations: If you don’t have a microwave for melting chocolate, use a double boiler or even a heat-safe bowl over simmering water.
- Personal Favorite: I once tried adding a pinch of cayenne pepper to the chocolate coating for a spicy-sweet kick. It was surprisingly addictive!
Serving & Storage Suggestions
Serve these cake pops chilled or at room temperature. They look fantastic arranged on a platter or stuck into a decorative foam block for parties. Pair with a cold glass of milk, coffee, or a fruity punch to balance the sweetness.
To store, place the cake pops in an airtight container in the refrigerator for up to 5 days. They also freeze beautifully—just wrap them individually in plastic wrap and pop them in a freezer-safe bag for up to 2 months. When ready to enjoy, thaw in the refrigerator for a few hours.
Reheating isn’t really needed because they taste best cool, but if you prefer them softer, leave them at room temperature for 15-20 minutes before serving. Over time, the flavors meld nicely, and the frosting inside gets even creamier.
Nutritional Information & Benefits
Each cake pop (about 1½-inch diameter) roughly contains 150-180 calories, depending on the cake and frosting used. These treats provide a moderate amount of energy, perfect for a quick snack or dessert.
Using leftover cake reduces food waste, which is a win for your kitchen and the planet. Plus, by choosing your preferred frosting and chocolate type, you can control sugar and fat levels—opt for dark chocolate for antioxidants and a richer flavor with less sweetness.
Gluten-free and dairy-free options are easy to create here, making this recipe versatile for many dietary needs. Just keep an eye on common allergens like nuts if you add toppings.
Conclusion
Honestly, this delicious cake pops made from failed cake recipe is a game-changer for anyone who’s ever battled with baking mishaps. It’s a simple, fun way to turn kitchen blunders into bite-sized joy. Feel free to customize it to your taste and keep experimenting—you might find your new favorite snack!
Why toss out a cake when you can transform it into something magical? I love how this recipe brings together thriftiness, creativity, and deliciousness all on one stick. If you give it a try, please share how you made it your own—I’m always eager to hear your twists and tips!
Go ahead, give these cake pops a whirl and watch them disappear faster than you can say “waste not, taste lots!”
FAQs
Can I use any type of failed cake for these cake pops?
Absolutely! Whether it’s chocolate, vanilla, or even a fruity cake, as long as it’s crumbly, it works well. Just avoid cakes with too much moisture or syrup that might be too wet.
What if I don’t have frosting on hand?
You can make a quick frosting substitute by mixing cream cheese with a bit of powdered sugar and vanilla, or even use peanut butter for a different flavor profile.
How do I prevent the cake pops from falling off the sticks?
Dip the stick tip in melted chocolate before inserting it into the cake ball—this acts like glue and keeps everything secure.
Can I make these cake pops ahead of time?
Yes! They keep well in the fridge for up to 5 days or freeze nicely for up to 2 months. Just thaw in the fridge before serving.
What can I use if I don’t have lollipop sticks?
Wooden skewers or even sturdy straws can work as alternatives. Just be cautious with sharp edges and consider cutting skewers to size.
Pin This Recipe!
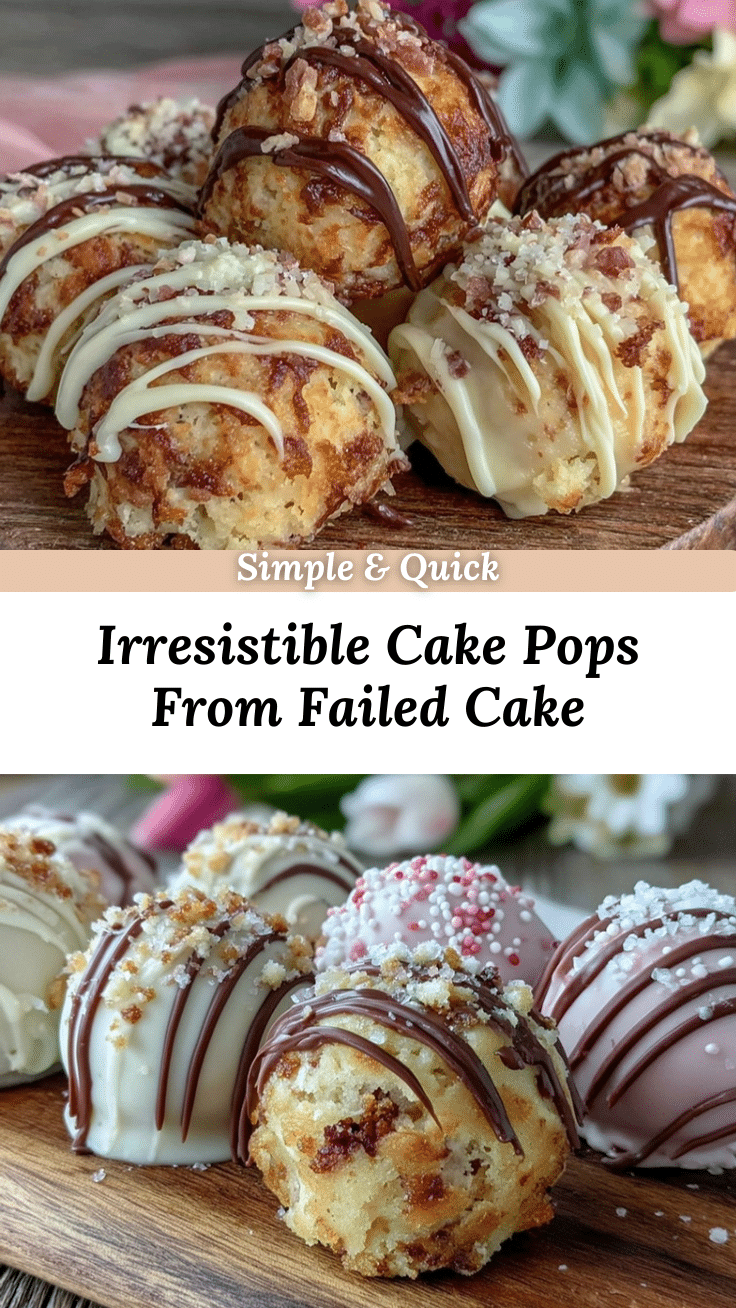
Delicious Cake Pops Recipe From Failed Cake

Transform leftover or failed cake into delicious, easy-to-make cake pops coated in chocolate. A perfect snack or party treat that saves food and delights all ages.
- Prep Time: 15 minutes
- Cook Time: 15 minutes
- Total Time: 45 minutes
- Yield: 15-20 cake pops 1x
- Category: Dessert
- Cuisine: American
Ingredients
- 3 cups (about 375 grams) crumbled failed cake (any flavor: chocolate, vanilla, red velvet, etc.)
- ½ cup (120 grams) frosting (buttercream, cream cheese, or store-bought)
- 12 ounces (340 grams) melting chocolate or candy melts (dark, milk, or white chocolate)
- Sprinkles or decorations (optional: colored sugar, chopped nuts, shredded coconut)
- 15–20 wooden lollipop sticks
Instructions
- Crumb the cake into fine, even crumbs (about 3 cups or 375 grams).
- Add ½ cup (120 grams) frosting to the crumbs and fold gently until a sticky, dough-like mixture forms.
- Roll the mixture into 1 to 1½-inch balls and place on a lined baking sheet. Chill in the fridge for at least 30 minutes.
- Melt 12 ounces (340 grams) of chocolate in a microwave-safe bowl or double boiler, heating in short bursts and stirring until smooth.
- Dip the tip of each lollipop stick about ½ inch into melted chocolate, then insert halfway into a chilled cake ball to secure.
- Dip each cake pop fully into the melted chocolate, tap off excess, and place on parchment-lined tray or cooling rack.
- Before the chocolate sets, add sprinkles or decorations if desired.
- Refrigerate the cake pops for 15-20 minutes until the coating is firm and shiny.
Notes
If chocolate is too thick for dipping, stir in 1 teaspoon vegetable oil to thin. Chill cake balls thoroughly before dipping to prevent melting or falling apart. Use frosting sparingly to avoid greasy pops. Wooden skewers can substitute for lollipop sticks but watch for splinters.
Nutrition
- Serving Size: 1 cake pop (about 1½
- Calories: 150180
- Sugar: 18
- Sodium: 90
- Fat: 8
- Saturated Fat: 4
- Carbohydrates: 22
- Fiber: 1
- Protein: 2
Keywords: cake pops, failed cake recipe, easy dessert, snack, chocolate coating, leftover cake, party treats, no waste dessert


