
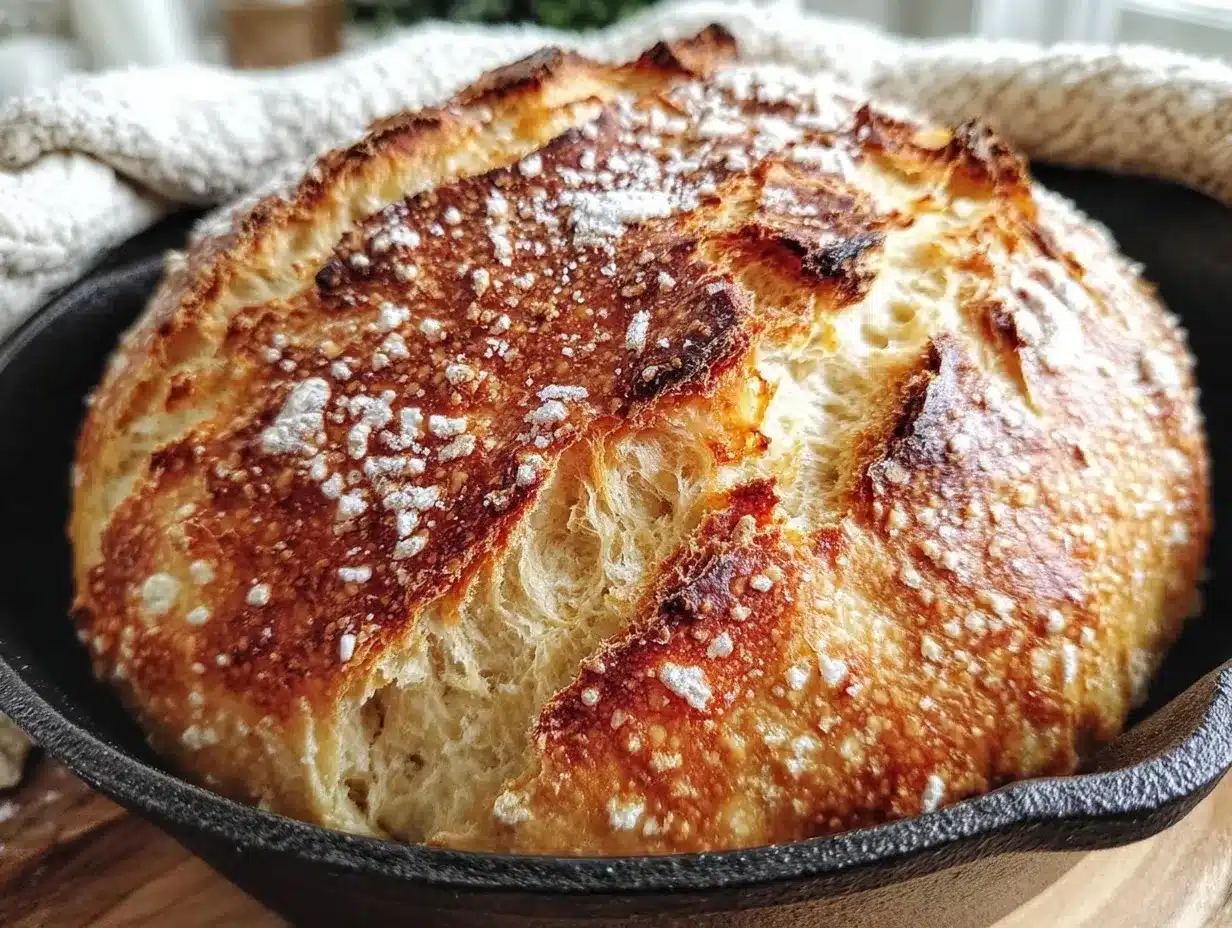
“I wasn’t expecting a lesson in bread baking from my quiet neighbor, Mrs. Jenkins, but there I was, kneading dough in her sunlit kitchen while she shared her secret for the perfect crust,” I recall. It was a chilly Saturday afternoon, and she had just pulled a steaming loaf of artisan bread from the Dutch oven. The crust was golden and crackling, the inside soft and airy—honestly, it felt like magic.
That day, I learned that making crispy artisan bread doesn’t have to be complicated or time-consuming. You don’t need fancy mixers or hours of kneading. This easy crispy no-knead artisan bread recipe, baked right in a Dutch oven, has since become my go-to for weekend baking. The beauty is in its simplicity and the rustic charm that fills the kitchen with every loaf.
Maybe you’ve been there—looking for a homemade bread that tastes like it came from a bakery but without the stress. I get it. I once forgot to set a timer and nearly burnt a batch (not my finest hour), but this recipe is forgiving. It’s perfect for anyone who loves the idea of fresh bread but isn’t a professional baker. Plus, the Dutch oven method traps steam, giving you that crispy crust that makes artisan bread so irresistible.
Why does this recipe stay with me? Because it turns a humble set of ingredients into something that feels special—a slice of comfort for any day of the week. And if Mrs. Jenkins can teach a bread newbie like me, you can do it, too.
Why You’ll Love This Recipe
This easy crispy no-knead artisan bread recipe is a winner for so many reasons. From my experience baking countless loaves, I can say this method truly delivers on flavor and texture without demanding your whole day.
- Quick & Easy: Just mix, wait, and bake—no kneading required. The active work is under 15 minutes.
- Simple Ingredients: Flour, water, salt, and yeast—nothing fancy, nothing expensive. I usually use King Arthur flour for consistent results.
- Perfect for Weekend Baking: Whether you want fresh bread for Sunday brunch or a cozy dinner, this recipe fits right in.
- Crowd-Pleaser: The crackly crust and soft crumb impress friends and family every time. It’s the kind of bread that disappears fast.
- Unbelievably Delicious: The Dutch oven creates steam that bakes the loaf to crispy perfection while keeping the inside tender.
This isn’t just another no-knead bread recipe. The key is the Dutch oven baking technique, which mimics professional steam ovens. That step is what sets this bread apart—the crust crunches just right, and the texture is light but satisfying. Honestly, once you try it, you’ll understand why this recipe became a staple in my kitchen.
What Ingredients You Will Need
This recipe uses simple, wholesome ingredients to deliver bold flavor and a satisfying texture without fuss. Most are pantry staples, so you probably have them on hand already.
- All-purpose flour – 3 cups (360 g) (I prefer King Arthur for its consistency)
- Warm water – 1½ cups (355 ml) (about 100°F/38°C, warm to the touch but not hot)
- Instant yeast – 1 teaspoon (you can also use active dry yeast, just proof it first)
- Salt – 1½ teaspoons (fine sea salt works best)
- Optional: Cornmeal or flour for dusting (helps prevent sticking and adds a rustic touch)
These ingredients come together to create a simple dough that’s forgiving and flexible. You can swap all-purpose flour with bread flour for a slightly chewier crumb, or try whole wheat flour for a heartier loaf (though you might need a touch more water). If you’re gluten-intolerant, almond or oat flour won’t work well here, but there are gluten-free no-knead recipes out there worth trying.
For the yeast, instant yeast is my go-to because it mixes right in without needing to proof. If you only have active dry yeast, dissolve it in warm water with a pinch of sugar and wait until it’s foamy before mixing it in.
Equipment Needed
- Dutch Oven (6-7 quart size recommended) – This is the star of the show, creating the perfect steam environment. Cast iron works best because it holds heat evenly.
- Large Mixing Bowl – For combining your ingredients. Glass or stainless steel works fine.
- Wooden Spoon or Silicone Spatula – To mix the sticky dough without fuss.
- Kitchen Scale (optional but recommended) – For accurate measuring of flour and water.
- Kitchen Towel or Plastic Wrap – To cover the dough during the resting period.
If you don’t have a Dutch oven, a heavy oven-safe pot with a lid can work in a pinch. Just make sure it’s oven-proof at 450°F (232°C). I once used a ceramic casserole dish with a lid and got decent results, though the crust wasn’t quite as crispy. For those on a budget, Lodge makes great affordable cast iron Dutch ovens that last a lifetime.
Keep your Dutch oven well-seasoned and dry to prevent sticking. I like to line it with parchment paper (just a square big enough to lift the bread out) to make handling easier.
Preparation Method
- Mix the dry ingredients: In a large bowl, whisk together 3 cups (360 g) of all-purpose flour, 1 teaspoon of instant yeast, and 1½ teaspoons of salt until evenly combined. (This takes about 2 minutes.)
- Add the water: Pour in 1½ cups (355 ml) of warm water (around 100°F/38°C). Stir gently with a wooden spoon or spatula until a shaggy, sticky dough forms. This should take about 3 minutes. Don’t worry if it looks rough—that’s the charm of no-knead dough!
- Cover and let rise: Cover the bowl tightly with plastic wrap or a damp kitchen towel. Leave the dough at room temperature (about 70°F/21°C) for 12 to 18 hours. It will bubble and double in size. This slow fermentation develops flavor and strength without kneading.
- Preheat your oven and Dutch oven: About 30 minutes before baking, place your empty Dutch oven (with lid) into the oven and preheat to 450°F (232°C). This step is key to get that crispy crust.
- Shape the dough: Lightly flour a clean surface and your hands. Gently turn the dough out onto it. It will be sticky and loose—that’s perfect. Fold the dough over itself a couple of times to form a rough ball. Don’t overwork it.
- Prepare for baking: Place the dough seam-side down on a piece of parchment paper dusted with flour or cornmeal. This will help you lift it into the Dutch oven.
- Bake: Carefully remove the preheated Dutch oven from the oven. Using the parchment paper, lift the dough and lower it into the pot. Cover with the lid and bake for 30 minutes.
- Finish baking: After 30 minutes, remove the lid and bake for another 15-20 minutes, until the crust is deeply golden and crisp. You’ll know it’s done when it sounds hollow when tapped.
- Cool: Use tongs or a spatula to lift the bread out onto a wire rack. Let it cool for at least an hour before slicing. This resting time allows the crumb to set perfectly.
Pro tip: If your dough feels too sticky to handle, wet your hands slightly before shaping. And if the crust browns too fast, tent it loosely with foil for the last 10 minutes.
Cooking Tips & Techniques
One of the biggest challenges with homemade bread is getting that perfect crust without drying out the inside. The trick here is the Dutch oven—it traps steam which keeps the crust moist initially, allowing it to rise fully before crisping up.
Make sure your Dutch oven is thoroughly preheated; I’ve learned that skipping this step leads to a pale, soft crust. Also, don’t rush the long fermentation—12 hours is ideal for flavor and texture, but up to 18 hours works if you need a bit of flexibility.
When mixing the dough, resist the urge to add too much flour. The dough should be sticky and loose—that’s what makes the bread airy inside. I remember my first attempt when I added extra flour and ended up with a dense loaf (lesson learned!).
Timing is key—pull the lid off halfway through baking to let the crust caramelize. If you keep the lid on too long, the crust stays pale and soft.
Lastly, let the bread cool completely before slicing. I know it’s tempting to cut in immediately, but the crumb finishes setting during the cooling, avoiding a gummy texture.
Variations & Adaptations
Feel free to make this recipe your own with these easy twists:
- Herb Infusion: Stir in 1-2 tablespoons of fresh chopped rosemary or thyme into the dough for a fragrant touch.
- Whole Wheat Blend: Swap half of the all-purpose flour with whole wheat flour for a nuttier flavor and denser crumb. Add a bit more water if needed.
- Seeded Loaf: Mix in ¼ cup of sunflower seeds, flaxseeds, or pumpkin seeds for texture and nutrition. Sprinkle some on top before baking for a crunchy crust.
- Gluten-Free Option: While traditional no-knead bread relies on gluten, you can try a gluten-free flour blend designed for bread baking. Expect a different texture and shorter rise time.
- Cooking Method Alternative: If you don’t have a Dutch oven, bake on a preheated baking stone with a tray of hot water below to create steam. It’s not quite the same but still tasty.
One variation I tried recently was adding a handful of sun-dried tomatoes and olives to the dough—surprisingly delicious and perfect for a Mediterranean-style meal.
Serving & Storage Suggestions
This artisan bread is best served warm or at room temperature. Slice it thick with butter, or use it for sandwiches. The crispy crust and soft interior pair beautifully with soups, salads, or even just a drizzle of olive oil and balsamic vinegar.
To store, wrap the loaf loosely in a clean kitchen towel and keep it at room temperature for up to two days. Avoid plastic wrap as it traps moisture and softens the crust.
If you want to keep it longer, slice and freeze the bread in a zip-top bag. Toast slices from frozen for that fresh-baked feel anytime.
Reheating works best in a 350°F (175°C) oven for 10 minutes wrapped in foil to refresh the crust. If you want it extra crispy, unwrap for the last few minutes.
Flavors deepen if you wait a day before eating, so consider making the bread the day before a gathering. Trust me, the texture improves overnight!
Nutritional Information & Benefits
Each slice (about 1/12th of the loaf) roughly contains:
| Calories | 150 |
|---|---|
| Carbohydrates | 30g |
| Protein | 5g |
| Fat | 1g |
| Fiber | 1g |
This bread is a good source of complex carbohydrates for sustained energy. Using unbleached all-purpose flour keeps it simple and clean. The slow fermentation breaks down some gluten and develops flavor without additives.
It’s naturally dairy-free, egg-free, and vegan, making it accessible for many diets. For those watching gluten, this recipe is not suitable unless you adapt with special flours.
From a wellness perspective, homemade bread like this is comforting and nourishing, with no preservatives or artificial ingredients. Plus, the satisfaction of baking it yourself is a little boost for the soul.
Conclusion
This easy crispy no-knead artisan bread recipe shows that you don’t need to be a baker to make something truly delicious at home. It’s forgiving, straightforward, and yields a loaf with a crust that crackles and a soft, airy crumb that you’ll want to savor.
Feel free to customize it to your taste—add herbs, seeds, or whole grains. The Dutch oven method is the secret weapon for that bakery-quality crust without fancy equipment.
Personally, this bread has become my weekend ritual, a simple pleasure that fills the kitchen with warmth and aroma. I hope it becomes a favorite in your home, too.
Give it a try, share your results, and don’t hesitate to swap in your own twists. Baking bread is as much about the journey as the loaf, and I’m cheering you on every step of the way!
Frequently Asked Questions
Can I use active dry yeast instead of instant yeast?
Yes! Just proof active dry yeast in warm water with a pinch of sugar for 5-10 minutes until foamy, then proceed with the recipe.
Do I need a Dutch oven to make this bread?
While a Dutch oven gives the best crust by trapping steam, you can bake on a preheated baking stone with a pan of hot water in the oven to create steam as an alternative.
Why is the dough so sticky? Am I doing it wrong?
Nope! The dough is meant to be wet and sticky—that’s what helps create the airy crumb. Resist adding extra flour beyond what the recipe calls for.
How long can I store the bread?
Store at room temperature wrapped in a towel for up to two days. For longer storage, slice and freeze it; toast slices from frozen when needed.
Can I make smaller loaves or rolls with this recipe?
You can divide the dough into smaller portions for mini loaves or rolls, but baking times will be shorter. Keep an eye on them and check for a golden crust.
Pin This Recipe!
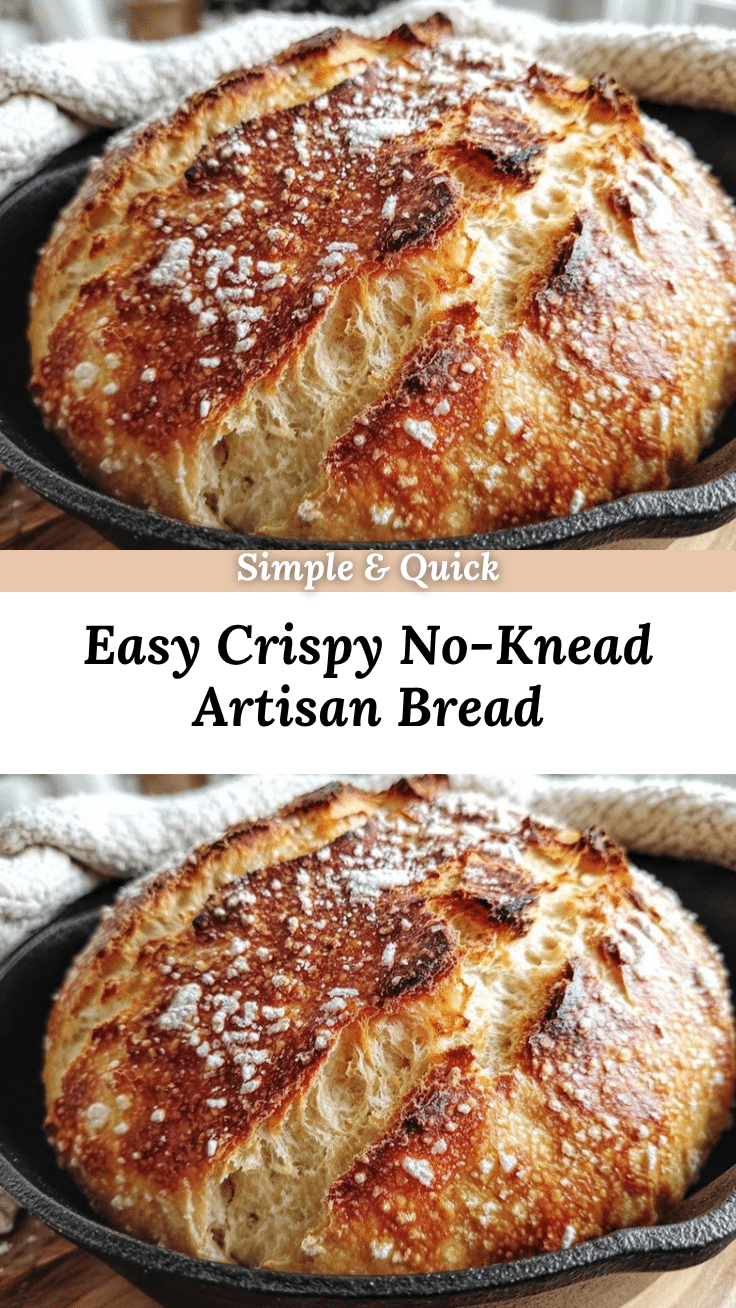
Easy Crispy No-Knead Artisan Bread Recipe Perfect for Dutch Oven Baking
This easy crispy no-knead artisan bread recipe delivers a golden, crackling crust and soft, airy crumb using simple ingredients and a Dutch oven baking method. Perfect for weekend baking with minimal active work.
- Prep Time: 15 minutes
- Cook Time: 45 minutes
- Total Time: 12 to 18 hours 1 hour 15 minutes (including rise and baking time)
- Yield: 1 loaf (about 12 slices) 1x
- Category: Bread
- Cuisine: American
Ingredients
- 3 cups (360 g) all-purpose flour
- 1½ cups (355 ml) warm water (about 100°F/38°C)
- 1 teaspoon instant yeast
- 1½ teaspoons salt
- Optional: cornmeal or flour for dusting
Instructions
- Mix the dry ingredients: In a large bowl, whisk together 3 cups (360 g) of all-purpose flour, 1 teaspoon of instant yeast, and 1½ teaspoons of salt until evenly combined (about 2 minutes).
- Add the water: Pour in 1½ cups (355 ml) of warm water (around 100°F/38°C). Stir gently with a wooden spoon or spatula until a shaggy, sticky dough forms (about 3 minutes).
- Cover and let rise: Cover the bowl tightly with plastic wrap or a damp kitchen towel. Leave the dough at room temperature (about 70°F/21°C) for 12 to 18 hours until it bubbles and doubles in size.
- Preheat your oven and Dutch oven: About 30 minutes before baking, place your empty Dutch oven (with lid) into the oven and preheat to 450°F (232°C).
- Shape the dough: Lightly flour a clean surface and your hands. Gently turn the dough out onto it. Fold the dough over itself a couple of times to form a rough ball without overworking it.
- Prepare for baking: Place the dough seam-side down on a piece of parchment paper dusted with flour or cornmeal.
- Bake: Carefully remove the preheated Dutch oven from the oven. Using the parchment paper, lift the dough and lower it into the pot. Cover with the lid and bake for 30 minutes.
- Finish baking: Remove the lid and bake for another 15-20 minutes until the crust is deeply golden and crisp.
- Cool: Lift the bread out onto a wire rack and let it cool for at least an hour before slicing.
Notes
Use instant yeast for convenience or proof active dry yeast before use. Preheat the Dutch oven thoroughly for best crust. The dough should be sticky and loose; avoid adding extra flour. Let bread cool completely before slicing to set the crumb. If crust browns too fast, tent with foil for last 10 minutes. Store wrapped in a towel at room temperature up to 2 days or freeze sliced bread for longer storage.
Nutrition
- Serving Size: 1 slice (1/12th of l
- Calories: 150
- Fat: 1
- Carbohydrates: 30
- Fiber: 1
- Protein: 5
Keywords: no-knead bread, artisan bread, Dutch oven bread, crispy crust bread, easy bread recipe, homemade bread, weekend baking


