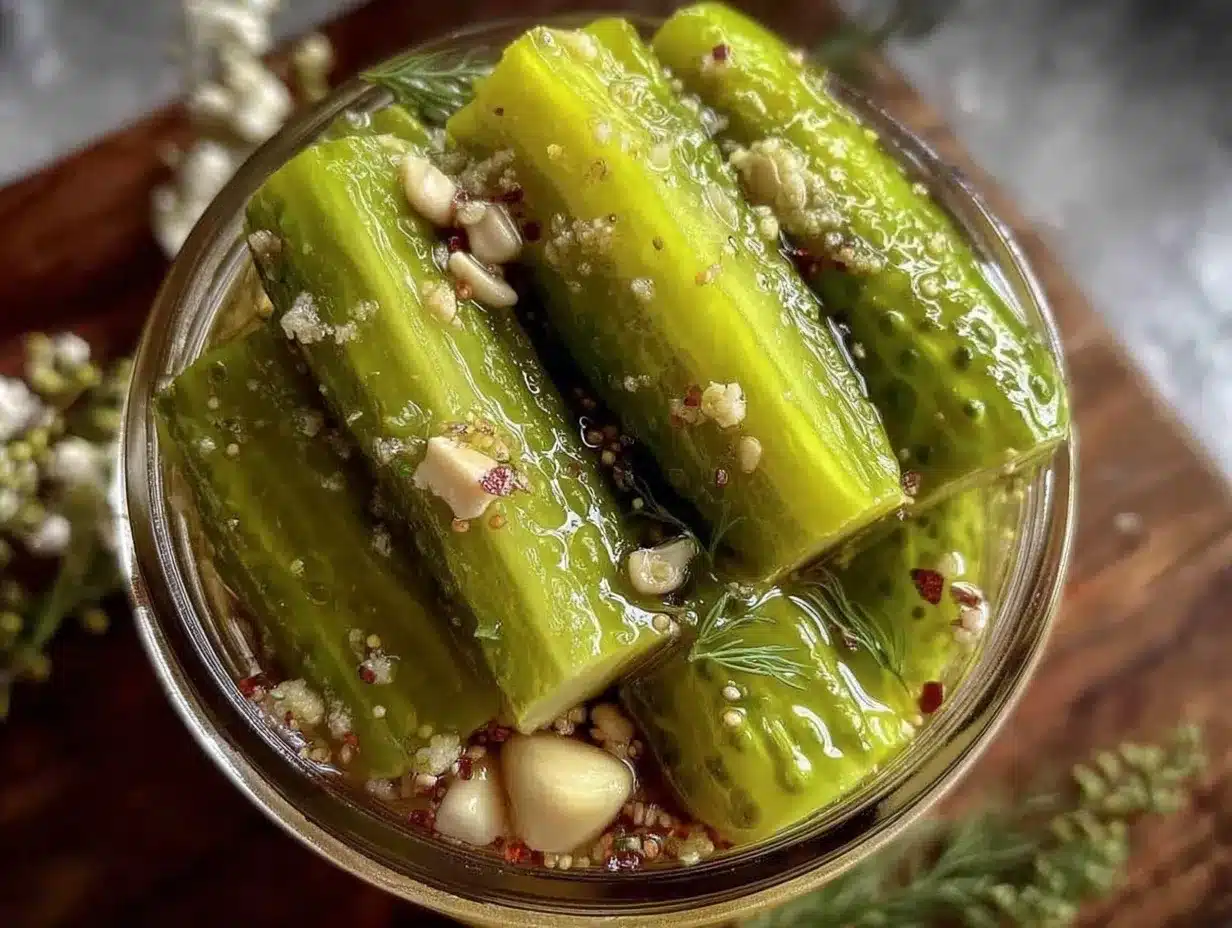
My mouth’s already watering for something sharp and tangy, and all I have to do is open the fridge to get it—easy crunchy refrigerator dill pickles. I swear, there’s a certain thrill in knowing these pickles have been soaking up that perfect briny tang for just the right amount of time. Honestly, I’ve made my share of pickles that ended up soggy or disappointingly bland, but these ones? They stay that satisfying crunch, like a little snack party every time I bite in. It’s funny how a simple jar of pickles can turn into a moment of quiet joy, especially when you realize how effortless they are to whip up at home without any fancy canning. The smell of fresh dill and garlic wafts from the jar, teasing my senses, and I catch myself reaching in again, just one more time. This recipe stuck with me because it’s that rare combo of no-fuss, super satisfying, and totally homemade comfort. No need to chase down artisanal jarred pickles; these have all the soul and snap I crave.
Why You’ll Love This Recipe
Easy crunchy refrigerator dill pickles have become my go-to for quick homemade snacks, and here’s why I’m pretty sure they’ll win you over too:
- Quick & Easy: Ready in just a few days, no boiling or pressure canning—perfect for last-minute pickle cravings.
- Simple Ingredients: You probably already have everything on hand: fresh cucumbers, garlic, dill, and pantry staples like vinegar and salt.
- Perfect for Any Occasion: Whether it’s a summer BBQ or a cozy night in, these pickles add that crunchy tang that pairs well with anything.
- Crowd-Pleaser: Friends and family always ask for the recipe, especially those who claim they “don’t even like pickles.”
- Unbelievably Delicious: The balance of garlic, dill, and just enough vinegar makes every bite zing with flavor and texture.
This recipe isn’t just your run-of-the-mill pickles. The secret is in the brine—using the right amount of salt and a touch of sugar to round out the sharpness—and packing the jar with plenty of fresh dill and garlic to infuse every slice. Plus, I’ve found that using small, firm cucumbers makes all the difference for that satisfying crunch. It’s like the pickles you get at the deli, but way fresher and with your own kitchen’s love mixed in. Honestly, making these feels like a little act of magic—you get the joy of homemade without the fuss of traditional canning.
What Ingredients You Will Need
This recipe uses simple, wholesome ingredients to deliver bold flavor and satisfying texture without the fuss. Most of the stuff is pantry staples, with fresh produce that’s easy to find or swap out depending on the season.
- Fresh cucumbers (about 2 pounds / 900 grams, small to medium-sized, preferably Kirby or pickling cucumbers for maximum crunch)
- Fresh dill (3-4 sprigs, or about 2 tablespoons of dill heads, for that signature aroma)
- Garlic cloves (3-4 cloves, peeled and smashed — the more, the merrier for flavor)
- White vinegar (1 cup / 240 ml, standard 5% acidity for the right tartness)
- Water (1 cup / 240 ml, to balance vinegar intensity)
- Pickling salt (1 tablespoon, or kosher salt if pickling salt isn’t available — avoid iodized salt as it can cloud the brine)
- Sugar (1 teaspoon, just enough to soften the edge of the vinegar without sweetness)
- Black peppercorns (1 teaspoon, whole for subtle spice)
- Red pepper flakes (optional, ¼ teaspoon if you like a little heat)
- Bay leaf (optional, 1 leaf for a subtle herbal note)
If you can find fresh dill heads, that’s ideal—they pack more flavor than just the fronds. I usually recommend McCormick pickling salt for consistent results, but kosher salt works fine if you measure carefully. And if you want to make these pickles keto-friendly or low-carb, just skip the sugar altogether—it’s barely missed. For a fun twist in summer, try swapping some cucumbers with fresh green beans or small carrots for multi-vegetable pickles.
Equipment Needed
- Glass jars with lids: Quart-sized Mason jars or any clean glass container with a tight-sealing lid work best. Avoid metal lids that might react with the vinegar.
- Mixing bowl to prepare the brine.
- Measuring cups and spoons for precise brine ratios (trust me, this matters).
- Sharp knife and cutting board to slice cucumbers evenly—consistency helps with even pickling.
- Tongs or chopsticks to pack cucumbers tightly without bruising.
Nothing fancy here, honestly. I’ve tried those plastic pickle presses before, but they felt unnecessary for refrigerator pickles since they’re eaten quickly. If you don’t have Mason jars, any clean glass jar with a lid will do, just make sure it seals well to keep the flavors locked in. I recommend hand-washing your jars and lids carefully to avoid any residue that could cloud the brine or affect taste. Oh, and a funnel can be handy to pour the brine in without creating a mess, but it’s not a must-have.
Preparation Method
- Wash and slice cucumbers: Rinse the cucumbers under cold water and pat dry. Slice off the ends (they can be bitter) and cut the cucumbers into your preferred shape—spears about 3 inches (7.5 cm) long and ¼-inch (6 mm) thick work great for crunch and easy snacking. This step takes about 10 minutes.
- Prepare the brine: In a mixing bowl, combine 1 cup (240 ml) white vinegar, 1 cup (240 ml) water, 1 tablespoon pickling salt, and 1 teaspoon sugar. Stir until the salt and sugar are fully dissolved. This ensures the right balance of tang and saltiness without overpowering the cucumbers.
- Pack the jars: Into clean glass jars, place 3-4 sprigs of fresh dill, smashed garlic cloves, black peppercorns, red pepper flakes if using, and a bay leaf. Then tightly pack the sliced cucumbers into the jars. The tighter the pack, the better the texture retention. Use tongs or chopsticks to gently press the cucumbers down without bruising.
- Pour the brine: Pour the brine over the cucumbers, making sure they’re completely submerged. Leave about ½ inch (1.3 cm) of headspace at the top. Seal the jars tightly.
- Refrigerate: Place the jars in the fridge and let them pickle for at least 48 hours before tasting. The flavor develops over time; after 3-5 days, the pickles reach peak crunch and tang. You can keep them refrigerated for up to 4 weeks.
If you notice any cloudy brine or off smells, it’s usually just the salt interacting with the cucumbers—totally normal and harmless. I learned the hard way to slice cucumbers evenly; too thick and they take forever to pickle, too thin and they get mushy fast. Trust me, ¼-inch slices hit the sweet spot. Also, avoid overfilling the jars or the brine won’t cover the cucumbers fully, which can cause spoilage. If you want to speed things up, slice the cucumbers thinner or lightly score the skin to help the brine penetrate faster.
Cooking Tips & Techniques
Keeping these pickles crunchy and flavorful is the real trick, and here’s what I’ve learned over many batches:
- Use fresh, firm cucumbers: The pickling magic starts here. Look for cucumbers that feel heavy for their size and have no soft spots or wrinkles. I avoid English cucumbers since their thin skin can get mushy.
- Don’t skip the pickling salt: Regular table salt can cloud the brine and add off-flavors. Pickling salt dissolves cleanly and keeps the brine clear.
- Keep cucumbers submerged: If they peek above the brine, they can discolor or spoil. A small clean weight or a cabbage leaf works well if your jar isn’t full enough.
- Patience pays off: The pickles might be edible after 24 hours, but the crisp, tangy perfection comes at about day 3 or 4.
- Store in the fridge: These are refrigerator pickles, so always keep them chilled to maintain crunch and prevent fermentation.
One time, I rushed and tried to eat them too early—resulted in soggy disappointment. I learned to mark the jars with a date and trust the brine timeline. Also, smashing the garlic cloves just before packing releases more flavor without overpowering the brine. And if you want your pickles spicier, tossing in a fresh chili pepper or extra red pepper flakes works wonders—just go easy at first!
Variations & Adaptations
This recipe is flexible and easy to tweak depending on what you like or what you have around:
- Spicy Dill Pickles: Add sliced jalapeños or extra red pepper flakes for a fiery kick. I once made a batch with serrano peppers that had everyone reaching for seconds.
- Garlic Lover’s Pickles: Double the garlic cloves for a bold, savory punch. Great for pairing with sandwiches or creamy buffalo chicken dip.
- Herb-Infused Pickles: Swap dill for fresh tarragon, thyme, or rosemary for an unexpected but delicious twist. Rosemary pairs especially well with roasted meats.
- Low-Sodium Option: Cut the salt in half and add a splash of lemon juice for brightness to keep the flavor balanced but lighter.
- Vinegar Variations: Use apple cider vinegar for a slightly sweeter, fruitier pickle; just keep the same 1:1 ratio with water.
I once tried mixing in some fresh cucumbers with pickled green beans from a grilled corn salad party, and the combo was surprisingly refreshing. Feel free to tailor the spice and herb levels until you find your perfect homemade pickle personality.
Serving & Storage Suggestions
These easy crunchy refrigerator dill pickles shine best chilled straight from the jar. Serve them as a tangy snack, alongside sandwiches, burgers, or with a hearty BBQ plate. I love pairing them with creamy potato salad or even a fresh Caprese salad like this nectarine basil caprese for a refreshing summer meal.
Store the pickles in the refrigerator for up to 4 weeks. Over time, the flavor deepens and the cucumbers soften just a little, but they usually stay crunchy enough to enjoy. When reheating isn’t necessary, but if you want warm pickles (weird, I know), briefly warming them in their brine on the stove can mellow the sharpness.
For the best experience, always use a clean fork or tongs to remove pickles to avoid contamination and extend shelf life. I’ve found that the flavors actually get better after a day or two in the fridge, making these pickles a great make-ahead snack for busy weeks.
Nutritional Information & Benefits
Easy crunchy refrigerator dill pickles are low in calories (about 5-10 calories per spear) and naturally fat-free. They provide a good source of vitamin K from fresh dill and antioxidants from garlic. The vinegar acts as a natural preservative and may aid digestion, while the salt content is moderate but worth watching if you’re on a sodium-restricted diet.
Since this recipe is naturally gluten-free, keto, and paleo-friendly, it fits nicely into many eating plans. Just be mindful of added sugar if you’re strictly low-carb. These pickles also make a great crunchy, flavorful alternative to chips or other processed snacks, supporting mindful snacking with real food ingredients.
Conclusion
Easy crunchy refrigerator dill pickles have earned a permanent spot in my fridge because they bring such simple, honest joy. They’re proof that homemade doesn’t have to be complicated or time-consuming to taste fantastic. The crisp snap, the garlicky dill punch, and the tang of vinegar—all melded perfectly in a quick fridge pickle. I love how they make every sandwich, snack plate, or late-night craving feel a little more special.
Make this recipe your own—add heat, more herbs, or double the garlic if you want. It’s all about what makes your taste buds happy. And if you’re looking for more easy homemade snack ideas that bring fresh, seasonal flavor, you might enjoy my creamy buffalo chicken dip or the vibrant fresh nectarine basil caprese. Drop a comment and let me know your favorite pickle twist—I’m always curious!
FAQs About Easy Crunchy Refrigerator Dill Pickles
How long do refrigerator dill pickles last?
They keep well in the fridge for up to 4 weeks. Over time, they might soften slightly but should stay crunchy and flavorful if kept submerged in brine.
Can I use regular cucumbers instead of pickling cucumbers?
You can, but pickling cucumbers like Kirby are firmer and less watery, which helps maintain a better crunch. Regular slicing cucumbers might become soggy faster.
Do I need to sterilize the jars before making refrigerator pickles?
While sterilization isn’t necessary since these are stored in the fridge and consumed relatively quickly, washing jars and lids thoroughly with hot soapy water is important to avoid contamination.
Can I make these pickles without vinegar?
Vinegar is key for the tang and preserving the pickles safely in the fridge. You could experiment with fermenting cucumbers without vinegar, but that’s a different process and takes longer.
How can I make my pickles spicier?
Add fresh sliced jalapeños, serrano peppers, or increase red pepper flakes in the brine. Just be cautious and add gradually to avoid overpowering the other flavors.
Pin This Recipe!

Easy Crunchy Refrigerator Dill Pickles Recipe Perfect for Homemade Snacks
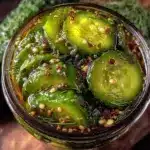
These easy crunchy refrigerator dill pickles are quick to make, requiring no boiling or pressure canning, and deliver a satisfying tangy crunch perfect for snacks or any occasion.
- Prep Time: 10 minutes
- Cook Time: 0 minutes
- Total Time: 2 days (minimum pickling time)
- Yield: 4 servings 1x
- Category: Snack
- Cuisine: American
Ingredients
- 2 pounds (900 grams) fresh cucumbers, small to medium-sized, preferably Kirby or pickling cucumbers
- 3–4 sprigs fresh dill (about 2 tablespoons of dill heads)
- 3–4 garlic cloves, peeled and smashed
- 1 cup (240 ml) white vinegar (5% acidity)
- 1 cup (240 ml) water
- 1 tablespoon pickling salt or kosher salt (avoid iodized salt)
- 1 teaspoon sugar
- 1 teaspoon whole black peppercorns
- ¼ teaspoon red pepper flakes (optional)
- 1 bay leaf (optional)
Instructions
- Wash and slice cucumbers: Rinse cucumbers under cold water and pat dry. Slice off the ends and cut into spears about 3 inches long and ¼ inch thick.
- Prepare the brine: In a mixing bowl, combine white vinegar, water, pickling salt, and sugar. Stir until salt and sugar are fully dissolved.
- Pack the jars: Place fresh dill sprigs, smashed garlic cloves, black peppercorns, red pepper flakes (if using), and bay leaf into clean glass jars. Tightly pack sliced cucumbers into the jars using tongs or chopsticks to avoid bruising.
- Pour the brine: Pour the brine over the cucumbers ensuring they are completely submerged, leaving about ½ inch of headspace. Seal the jars tightly.
- Refrigerate: Place jars in the refrigerator and let pickle for at least 48 hours before tasting. For best flavor and crunch, wait 3-5 days. Store refrigerated for up to 4 weeks.
Notes
Use fresh, firm cucumbers for best crunch. Avoid iodized salt to keep brine clear. Keep cucumbers fully submerged in brine to prevent spoilage. Patience is key; flavor and crunch improve after 3-5 days. Optionally add jalapeños or extra red pepper flakes for spicier pickles. Store refrigerated and consume within 4 weeks.
Nutrition
- Serving Size: About 1 spear (3 inc
- Calories: 510
- Sugar: 0.5
- Sodium: 400
- Carbohydrates: 1
- Fiber: 0.3
- Protein: 0.2
Keywords: refrigerator pickles, dill pickles, crunchy pickles, homemade pickles, quick pickles, easy pickles, no canning pickles, snack recipe