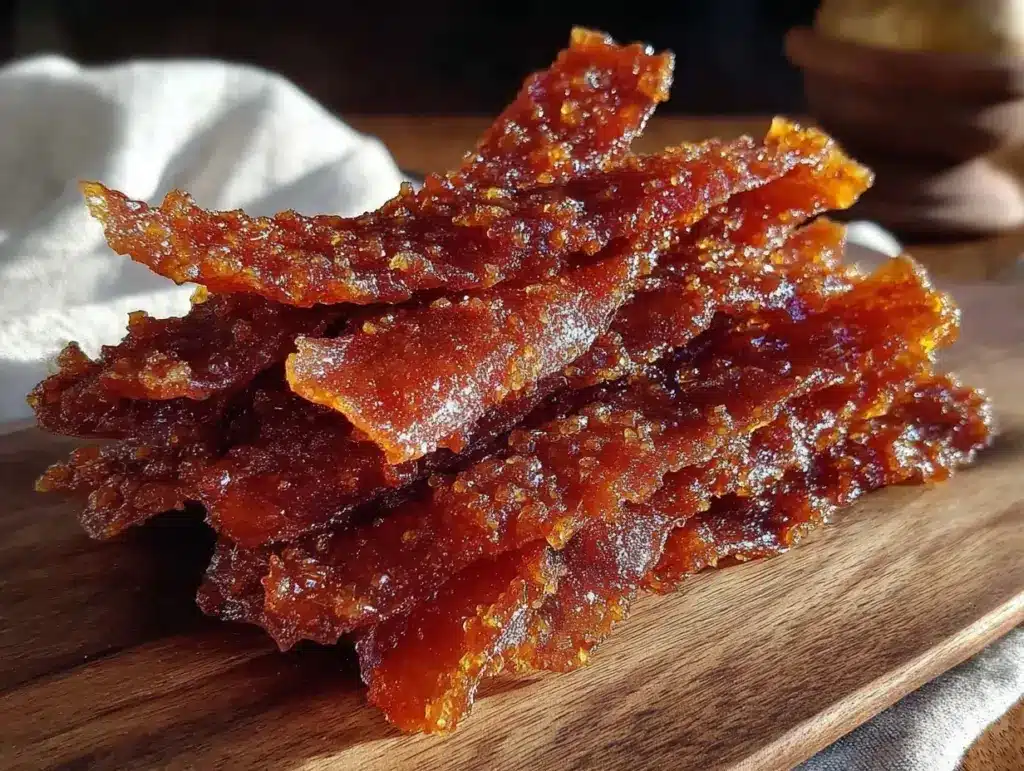
Let me tell you, the smell of fresh, tangy fruit simmering gently on the stove, turning into a glossy, vibrant puree, is enough to make anyone’s mouth water. The first time I made these easy homemade fruit roll-ups, I was instantly hooked—the kind of moment where you pause, take a deep breath, and just smile because you know you’re onto something truly special. It was a rainy Saturday afternoon years ago, and I was knee-high to a grasshopper when my grandma pulled out a secret family recipe that made snack time feel like a little celebration. I wish I’d discovered this recipe ages ago because it’s dangerously easy and provides pure, nostalgic comfort with every chewy bite.
Honestly, my family couldn’t stop sneaking them off the cooling rack (and I can’t really blame them). These fruit roll-ups are perfect for brightening up a lunchbox, sweetening up a picnic, or adding a splash of homemade goodness to your Pinterest cookie board. You know what? They feel like a warm hug wrapped in fruity sweetness, and you’re going to want to bookmark this one. Tested multiple times in the name of research, of course, they’ve become a staple for family gatherings and gifting. Let’s face it—fresh, homemade snacks like these are just unbeatable.
Why You’ll Love This Recipe
From my countless kitchen trials and the joy of sharing these with loved ones, here’s why this easy homemade fruit roll-ups recipe stands apart:
- Quick & Easy: Comes together in under an hour, perfect for busy weeknights or last-minute snack cravings.
- Simple Ingredients: No fancy grocery trips needed—you likely have everything in your kitchen already.
- Perfect for All Ages: Great for kids’ lunchboxes, after-school snacks, or a wholesome treat anytime.
- Crowd-Pleaser: Always gets rave reviews from kids and adults alike—no artificial flavors or preservatives.
- Unbelievably Delicious: The perfect balance of chewy, sweet, and slightly tangy that feels like comfort food reimagined.
This isn’t just another fruit roll-up recipe. By simmering fresh fruit until it’s intensely flavorful and drying it just right, you get a perfectly chewy texture that’s nothing like store-bought versions. Plus, swapping in wholesome natural sweeteners (or none at all) means it’s as good for your family as it tastes. Honestly, after the first bite, you’ll find yourself closing your eyes and savoring every bit. It’s the kind of recipe that turns simple fruit into a memorable treat that feels homemade with soul.
What Ingredients You Will Need
This recipe uses simple, wholesome ingredients to deliver bold flavor and satisfying texture without the fuss. Most are pantry staples, and you can swap or tweak to suit what you have on hand.
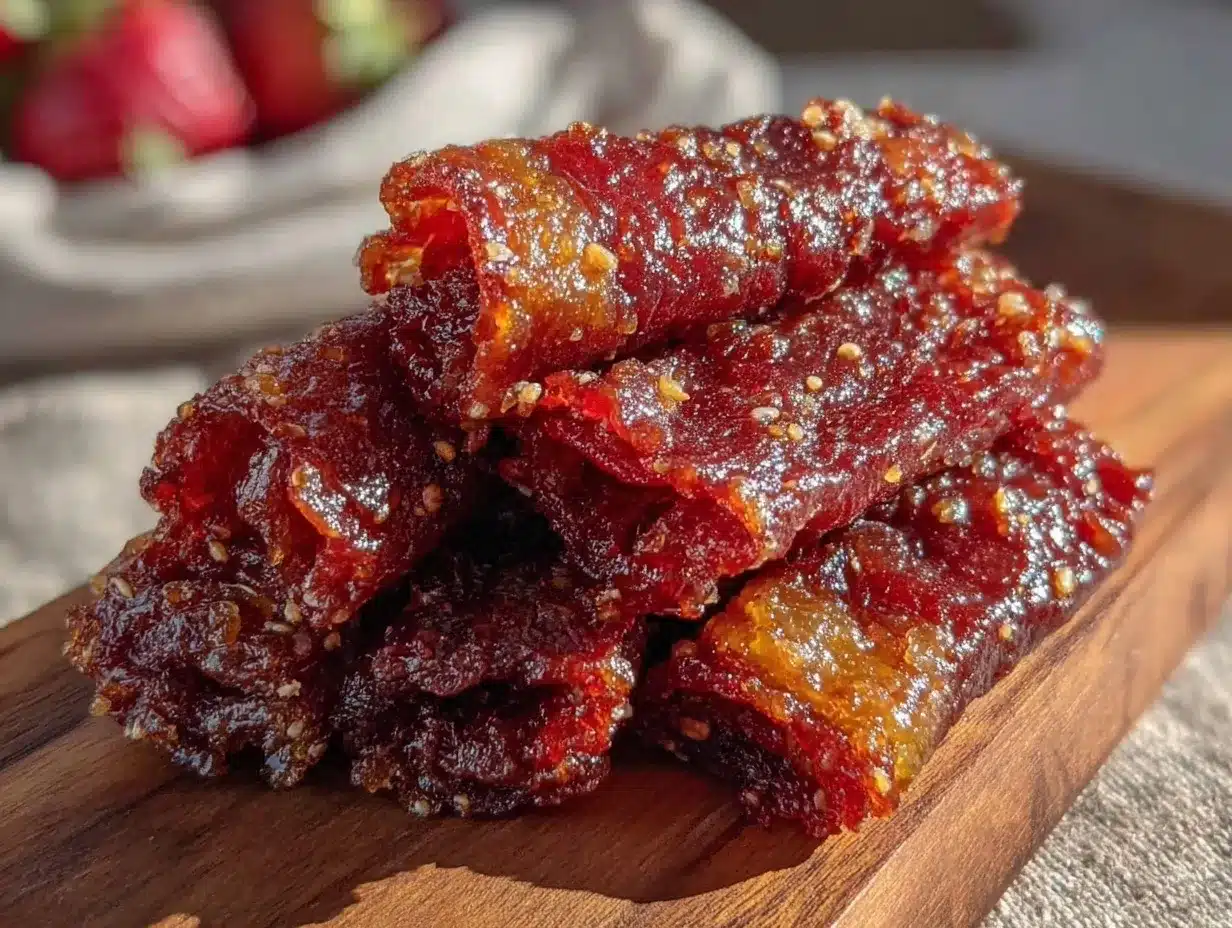
- Fresh fruit (3 cups, chopped): Strawberries, mangoes, peaches, or a mix (choose ripe, juicy fruit for best flavor)
- Granulated sugar (1/4 cup): Adjust depending on the sweetness of your fruit (optional; honey or maple syrup can substitute)
- Lemon juice (1 tablespoon): Adds brightness and helps preserve color and flavor
- Water (2 tablespoons): To help the fruit cook down smoothly
- Optional vanilla extract (1/2 teaspoon): Adds a warm, subtle depth (I love using Nielsen-Massey for quality)
- Non-stick cooking spray or parchment paper: For lining your baking sheet
Pro tip: If you want a gluten-free version, no worries—the recipe is naturally gluten-free! You can also experiment with frozen fruit if fresh isn’t available; just thaw and drain excess liquid before blending. For a no-sugar-added snack, skip the sweetener altogether if your fruit is naturally sweet. When choosing fruit, I recommend firm, ripe pieces for the best texture. You know, that moment when you bite into a juicy peach and it just melts? That’s what you want in your roll-ups.
Equipment Needed
- Blender or food processor: Essential for pureeing the fruit to a smooth consistency. Honestly, a good blender makes all the difference—I use a Vitamix for silky smooth results, but even a basic blender works fine.
- Baking sheet: A rimmed baking sheet works best to hold the fruit mixture in place while drying.
- Parchment paper or silicone baking mat: Prevents sticking and makes peeling the fruit roll-ups a breeze.
- Fine mesh strainer (optional): If you prefer an ultra-smooth texture, straining out seeds or pulp can be helpful.
- Oven or dehydrator: You can dry the fruit in a low-temperature oven or use a food dehydrator if you have one. I’ve tried both, and the oven method is just as reliable for this recipe.
For budget-friendly options, parchment paper and a basic blender will do the trick. Maintenance tip: Keep your blender blades sharp by blending ice cubes occasionally, and always clean your baking mats carefully to avoid sticky buildup. Your equipment will thank you!
Preparation Method
- Prep the Fruit (10 minutes): Wash, peel (if needed), and chop 3 cups of fresh fruit into small chunks. This helps the fruit cook evenly.
- Cook the Fruit (10-15 minutes): In a medium saucepan, combine the chopped fruit, 1/4 cup sugar (or preferred sweetener), 1 tablespoon lemon juice, and 2 tablespoons water. Cook over medium heat, stirring frequently, until the fruit breaks down and the mixture thickens—about 10-15 minutes. You’ll notice the fruit turning glossy and fragrant. Avoid burning by stirring often!
- Puree the Mixture (5 minutes): Transfer the cooked fruit to a blender or use an immersion blender and puree until smooth. If you want a seedless texture, strain through a fine mesh sieve. Add 1/2 teaspoon vanilla extract here if using and blend briefly to combine.
- Prepare the Baking Sheet (5 minutes): Line a rimmed baking sheet (about 9×13 inches) with parchment paper or a silicone baking mat. Lightly spray with non-stick cooking spray for easier peeling later.
- Spread the Fruit Puree (5 minutes): Pour the fruit puree onto the prepared baking sheet and spread evenly with a spatula to about 1/8 inch (3 mm) thickness. Make sure it’s smooth and level for even drying.
- Dry the Fruit Roll-Ups (4-6 hours): Place the baking sheet in an oven preheated to 140°F (60°C) or the lowest temperature your oven can maintain. Leave the oven door slightly ajar to let moisture escape (a wooden spoon works well to prop it open). Dry for 4-6 hours, checking after 4 hours. The fruit leather should be dry to the touch but still a bit pliable and not sticky. If using a dehydrator, follow manufacturer instructions for fruit drying.
- Cool and Cut (10 minutes): Once dried, remove the fruit leather from the oven and let it cool completely. Peel carefully from the parchment or mat, then cut into strips or shapes with scissors or a pizza cutter.
- Store Properly: Roll up the strips in parchment paper and store in an airtight container at room temperature for up to 2 weeks, or refrigerate for longer freshness.
Troubleshooting tip: If the fruit roll-ups stick when peeling, they need more drying time. If too brittle, try drying a little less next time. The thickness of your puree layer affects drying time too—thinner dries faster. Sensory cue: The finished roll-up should feel like a soft leather—firm but bendable, with a sweet aroma that makes you want to snack immediately.
Cooking Tips & Techniques
Perfecting fruit roll-ups is easier than you think, but there are a few tricks I’ve picked up along the way. First, patience is key when drying. Letting the fruit dry slowly at low temperature preserves flavor and prevents burning. You know, I once cranked the oven too high in a hurry and ended up with a scorched mess—lesson learned!
Another tip: don’t skip the lemon juice. It’s a small addition that brightens fruit flavor and keeps the roll-ups from darkening too much during cooking and drying. Also, blending the fruit thoroughly results in a smoother, more uniform texture. I always pulse a few extra times for that silky finish.
For consistency, spread the puree evenly and keep the thickness steady. Uneven layers can cause some parts to dry faster and become brittle while others remain sticky. Multitasking tip: While the fruit simmers, prep your baking sheet and gather equipment, so you’re ready to spread immediately once it’s pureed.
Variations & Adaptations
Want to switch things up? Here are a few tasty variations I’ve tried and loved:
- Mixed Berry Blast: Use a combo of blueberries, raspberries, and blackberries for a tangy, antioxidant-packed twist. Just remember to strain seeds for smoothness.
- Tropical Mango-Pineapple: Swap in mango and pineapple chunks for a bright, sunny flavor. This combo dries a bit faster due to natural sugars.
- Allergy-Friendly: For a nut-free, gluten-free, and dairy-free snack, stick to fresh fruit and natural sweeteners. You can add a pinch of cinnamon or ginger for a spice kick without allergens.
For different cooking methods, you can use a food dehydrator to dry fruit roll-ups evenly without heating your kitchen. Or, for a no-bake option, try freezing the puree into bite-size pops. As a personal variation, I once added finely chopped mint leaves for a refreshing twist—surprisingly delicious!
Serving & Storage Suggestions
These fruit roll-ups are best served at room temperature, fresh from the roll or after a quick rest to soften slightly if refrigerated. They make a vibrant addition to a snack plate alongside nuts, cheese, or yogurt. For kids, they’re perfect as a standalone treat or wrapped in lunchboxes for a healthy surprise.
Store your fruit roll-ups rolled in parchment paper inside an airtight container at room temperature for up to two weeks. If you want to keep them longer, refrigeration extends their life up to a month, though they may firm up a bit. To soften chilled roll-ups, leave them out for 10 minutes or warm gently in your hands.
Flavors actually deepen over a day or two, making these a great make-ahead snack for busy mornings or packed lunches. Just keep an eye out for any moisture buildup, which means it’s time to enjoy them before they get sticky.
Nutritional Information & Benefits
On average, one fruit roll-up strip contains approximately 70-90 calories, depending on the fruit and sweetener used. They’re naturally low in fat and packed with vitamins like vitamin C and antioxidants from fresh fruit. The fiber content helps satisfy hunger and support digestion.
This recipe is naturally gluten-free, dairy-free, and can be made vegan by choosing plant-based sweeteners. Just watch for allergies if you add spices or extras. I appreciate how these roll-ups offer a wholesome alternative to processed snacks—no artificial colors or preservatives here, just pure fruit goodness. It’s a simple way to sneak a little extra fruit into your day while feeling good about what you’re eating.
Conclusion
So, why should you try this easy homemade fruit roll-ups recipe? Because it’s a simple, delicious way to enjoy fresh fruit on the go, with a texture and flavor that beats store-bought by miles. You can customize it with your favorite fruits, adjust sweetness to your liking, and feel good about serving a snack that’s both tasty and wholesome.
I love this recipe because it brings back memories of cozy afternoons and happy snack times, and it’s become a go-to in my kitchen for quick treats and thoughtful gifts. You really can’t go wrong here. Give it a try, and let me know how you customize your fruit roll-ups! Share your thoughts, questions, or favorite fruit combos in the comments—I’d love to hear from you.
Happy snacking, and here’s to fresh, homemade goodness that’s as fun to make as it is to eat!
FAQs About Easy Homemade Fruit Roll-Ups
Can I use frozen fruit for fruit roll-ups?
Yes! Just thaw the fruit completely and drain any excess liquid before cooking to avoid soggy puree.
How long do homemade fruit roll-ups last?
Stored in an airtight container at room temperature, they last about 2 weeks. Refrigeration can extend this to a month.
Is it necessary to add sugar?
Nope! If your fruit is naturally sweet, you can skip the sugar or sweetener altogether for a healthier snack.
Can I use a dehydrator instead of an oven?
Absolutely. A food dehydrator works great and dries the fruit evenly without heating up your kitchen.
How do I prevent fruit roll-ups from sticking to the parchment?
Make sure to lightly spray the parchment paper with non-stick spray before spreading the puree, and let the roll-ups dry completely before peeling.
Pin This Recipe!
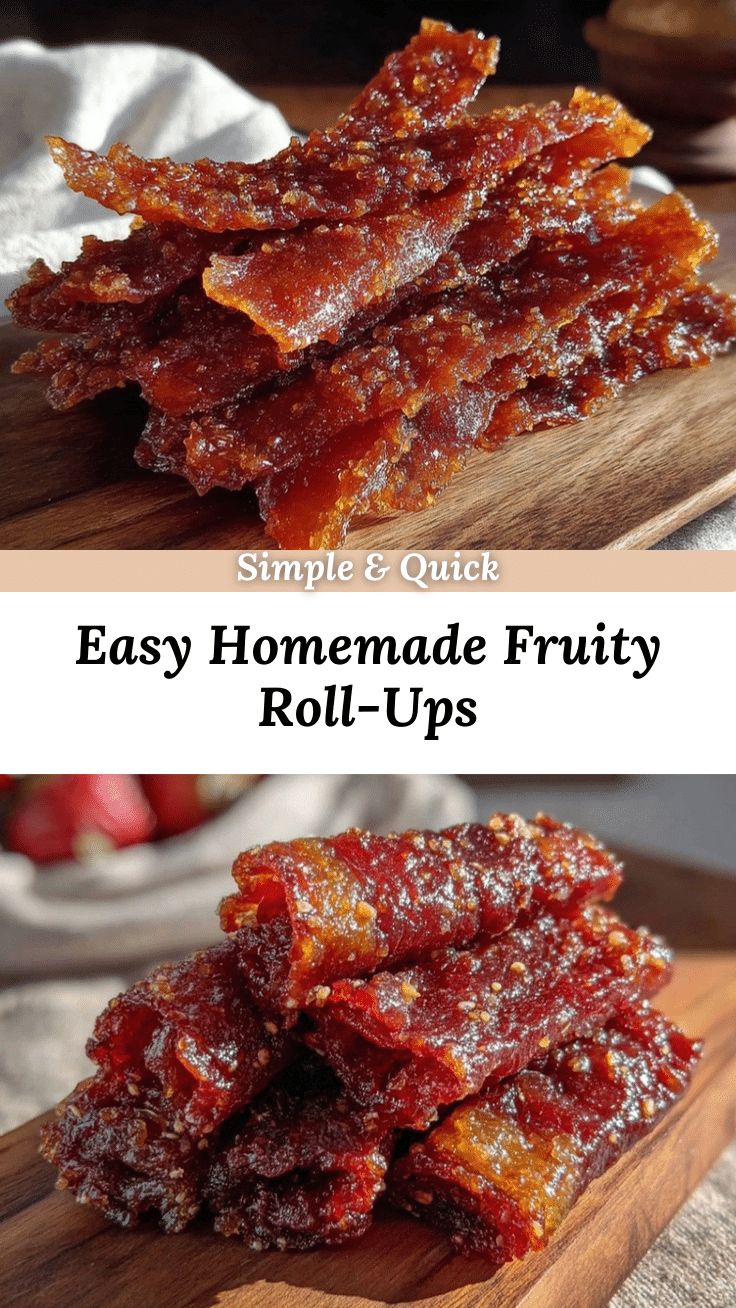
Easy Homemade Fruit Roll-Ups Recipe for a Perfect Fresh Snack

This easy homemade fruit roll-ups recipe transforms fresh fruit into a chewy, sweet, and tangy snack perfect for all ages. Made with simple ingredients and dried to perfection, these roll-ups are a wholesome alternative to store-bought snacks.
- Prep Time: 10 minutes
- Cook Time: 10-15 minutes
- Total Time: 5 hours 35 minutes to 6 hours 35 minutes
- Yield: About 8-10 fruit roll-up strips 1x
- Category: Snack
- Cuisine: American
Ingredients
- 3 cups fresh fruit, chopped (strawberries, mangoes, peaches, or a mix)
- 1/4 cup granulated sugar (optional; can substitute honey or maple syrup)
- 1 tablespoon lemon juice
- 2 tablespoons water
- 1/2 teaspoon vanilla extract (optional)
- Non-stick cooking spray or parchment paper for lining baking sheet
Instructions
- Wash, peel (if needed), and chop 3 cups of fresh fruit into small chunks.
- In a medium saucepan, combine chopped fruit, sugar (or preferred sweetener), lemon juice, and water. Cook over medium heat, stirring frequently, until fruit breaks down and mixture thickens, about 10-15 minutes.
- Transfer cooked fruit to a blender or use an immersion blender and puree until smooth. Strain through a fine mesh sieve if a seedless texture is desired. Add vanilla extract if using and blend briefly.
- Line a rimmed baking sheet (about 9×13 inches) with parchment paper or a silicone baking mat. Lightly spray with non-stick cooking spray.
- Pour fruit puree onto prepared baking sheet and spread evenly to about 1/8 inch thickness.
- Dry in an oven preheated to 140°F (60°C) with the door slightly ajar for 4-6 hours, or use a food dehydrator following manufacturer instructions. The fruit leather should be dry to the touch but pliable.
- Remove from oven and let cool completely. Peel from parchment and cut into strips or shapes.
- Roll strips in parchment paper and store in an airtight container at room temperature for up to 2 weeks or refrigerate for longer freshness.
Notes
If using frozen fruit, thaw and drain excess liquid before cooking. Adjust sugar based on fruit sweetness or omit for no added sugar. Keep oven door slightly ajar during drying to allow moisture to escape. Drying time varies with thickness and fruit type. Roll-ups should be pliable, not sticky or brittle. Store rolled in parchment in airtight container. Refrigerate for longer freshness and soften chilled roll-ups by warming in hands or resting at room temperature.
Nutrition
- Serving Size: One fruit roll-up st
- Calories: 7090
- Sugar: 14
- Sodium: 5
- Carbohydrates: 18
- Fiber: 2
Keywords: fruit roll-ups, homemade snacks, healthy snacks, fruit leather, easy fruit roll-ups, gluten-free snacks, vegan snacks


