Picture this: the sweet, chocolatey aroma of freshly baked brownies swirling through your kitchen, mingling with the crisp winter air and the distant jingle of holiday tunes. If you’ve ever been knee-high to a grasshopper, peeking over the counter as your family preps for Christmas, you know there’s something downright magical about baking during the holidays. The first time I whipped up these Easy Santa Hat Brownie Bites, I felt that same rush of nostalgia—like I’d stumbled onto the ultimate festive treat that’s equal parts adorable and mouthwatering. I remember pausing mid-decorating, just grinning at those tiny red hats perched atop fudgy brownie rounds, thinking, “How did I not make these years ago?”
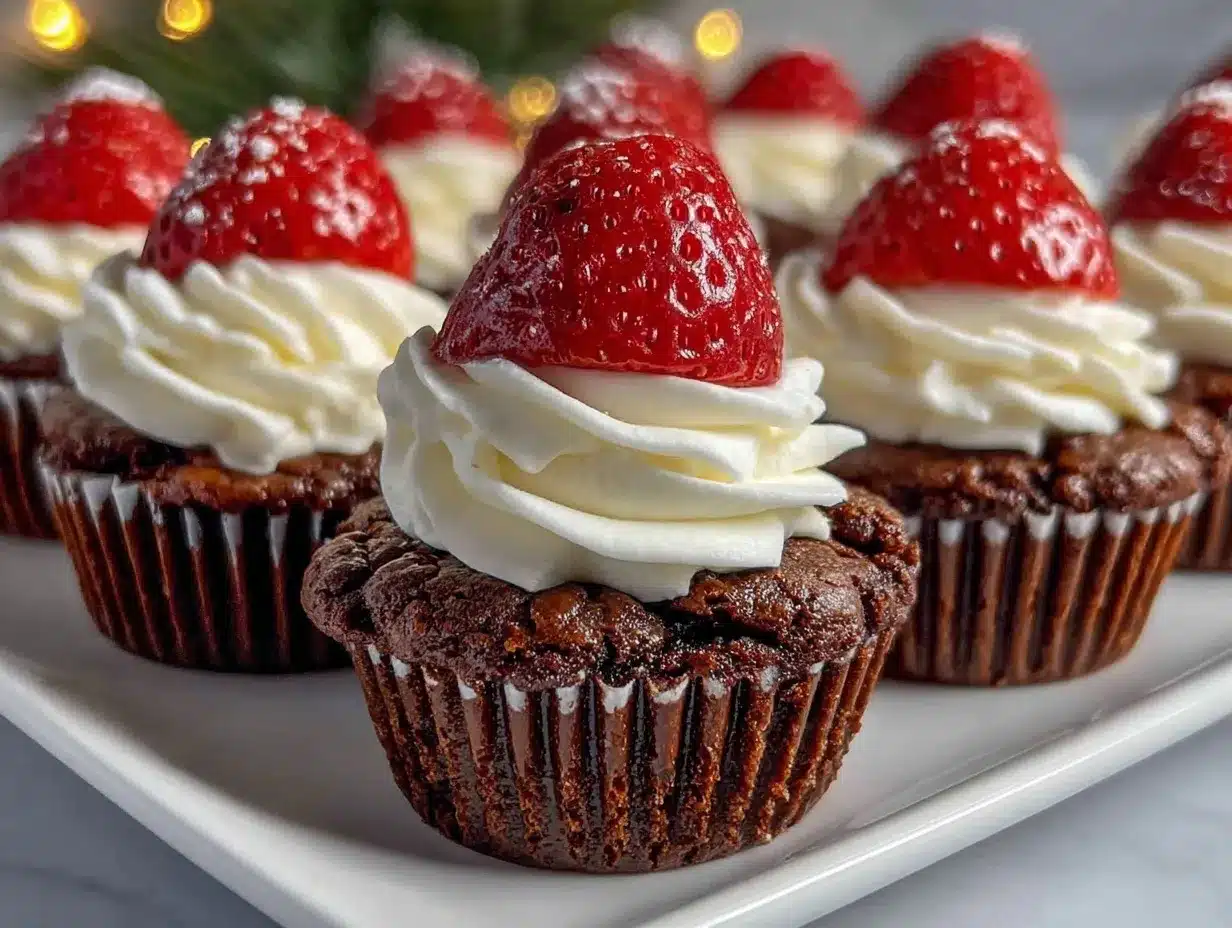
Honestly, these Santa Hat Brownie Bites are dangerously easy to assemble, which is lucky because my family couldn’t stop sneaking them off the cooling rack (and I can’t really blame them). There’s just something about the way the rich brownie base meets the fluffy whipped cream and juicy strawberry “hat” that keeps everyone coming back for more—whether it’s the kids at a school holiday party, your best friend at a cookie exchange, or the grandparents reminiscing about old-fashioned bake sales. These bites have quickly become a staple at our Christmas gatherings (in the name of research, of course) and they never fail to steal the show.
If you’re looking for a Christmas cupcake idea that’ll brighten up your Pinterest board, these little gems are perfect for potlucks, sweet treats for your kids, or even a quick festive dessert for coworkers. They deliver pure, nostalgic comfort with every bite, and—let’s face it—the “oohs” and “aahs” are pretty much guaranteed. Santa Hat Brownie Bites feel like a warm hug on a cold winter day, and you’re going to want to bookmark this one for every December to come.
Why You’ll Love This Recipe
- Quick & Easy: Comes together in under an hour, including baking and decorating. Perfect for last-minute Christmas parties or when you need a sweet fix fast.
- Simple Ingredients: You probably have everything you need—brownie basics, strawberries, and whipped cream. No fancy shopping trips!
- Perfect for Holiday Gatherings: Great for Christmas brunches, school bake sales, cookie exchanges, or festive potlucks. They travel well and look adorable in any setting.
- Crowd-Pleaser: Kids and grown-ups both go nuts for the cute Santa hats and the decadent brownie base. Expect requests for seconds (and maybe thirds).
- Unbelievably Delicious: The combination of rich chocolate, creamy topping, and fresh berries is pure comfort food—soft, fudgy, and just the right amount of festive.
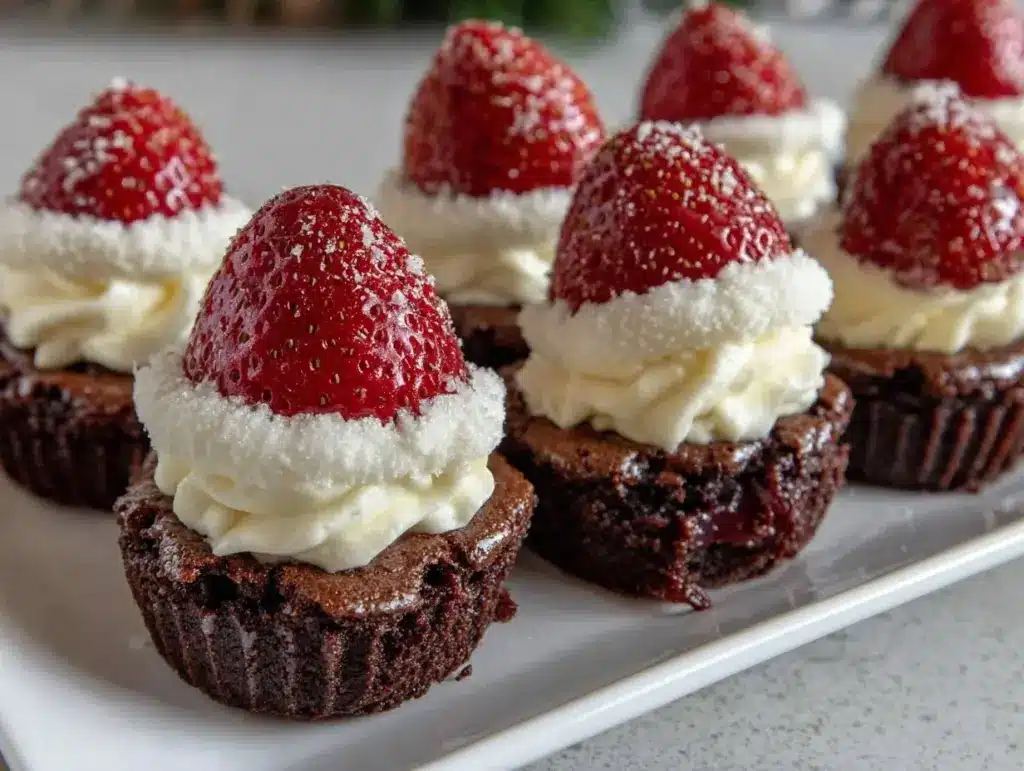
What sets these Easy Santa Hat Brownie Bites apart from all the other Christmas treats? For starters, they’re not your average cupcake. The base is a dense, chewy brownie—none of that dry, cakey stuff—topped with a cloud of whipped cream and a sweet strawberry “hat.” You get the classic holiday colors and flavors, but with a playful twist that’s sure to stand out on any dessert table. I’ve tested this recipe more times than I can count (in the spirit of perfection), and the results are always consistent—no crumbly mess, no bland bites, just pure holiday joy.
For me, these Santa Hat Brownie Bites aren’t just good—they’re the kind of treat that makes you close your eyes after that first bite, savoring every little detail. They’re comfort food with a festive flair, perfect for impressing guests without all the usual holiday stress. Whether you’re baking with kids, prepping for a big party, or just want something fun and easy, these bites turn a simple moment into a lasting Christmas memory.
What Ingredients You Will Need
This recipe uses simple, wholesome ingredients to deliver bold chocolate flavor and a playful festive look—no complicated steps, just pantry staples and a quick trip to the produce section for strawberries. Here’s what you’ll need:
- For the Brownie Base:
- 1/2 cup (115g) unsalted butter, melted (adds richness)
- 3/4 cup (150g) granulated sugar
- 2 large eggs (room temperature for easier mixing)
- 1 teaspoon vanilla extract (I prefer Nielsen-Massey for its pure flavor)
- 1/3 cup (40g) unsweetened cocoa powder (Dutch-processed is my go-to for deeper flavor)
- 1/2 cup (65g) all-purpose flour (swap with gluten-free blend if needed)
- 1/4 teaspoon salt (balances sweetness)
- Optional: 1/4 cup (45g) mini chocolate chips for extra fudginess
- For the Topping:
- 20-24 medium strawberries, hulled (choose bright red, firm berries for the best “hat” shape)
- 1 cup (240ml) heavy whipping cream (or use store-bought whipped cream for convenience)
- 2 tablespoons powdered sugar (for a touch of sweetness)
- 1/2 teaspoon vanilla extract
- For Decoration:
- Optional: white chocolate chips or mini marshmallows for the “pom pom” at the tip of each hat
- Optional: festive sprinkles for extra holiday cheer
If you’re feeling adventurous, swap the strawberries for raspberries (smaller hats, but still cute) or use dairy-free coconut whipped topping for a vegan-friendly version. I’ve tried these with both homemade and boxed brownie mixes—honestly, the homemade version wins for flavor and texture, but you can totally use a boxed mix if you’re in a rush.
For best results, pick strawberries that are medium-sized and as close to conical as possible—they make the most convincing Santa hats! If you’re out of cocoa powder, a blend of melted dark chocolate (2 oz/55g) can work in a pinch, though it’ll be a bit richer. All in all, this recipe is flexible enough to suit whatever you’ve got in your pantry.
Equipment Needed
- Mini muffin pan: Essential for perfectly bite-sized brownies (I use a 24-cup pan—Wilton makes a sturdy, nonstick one).
- Mixing bowls: One for wet ingredients, one for dry. If you only have one, give it a quick rinse between steps.
- Electric mixer or whisk: For whipping cream. A stand mixer saves time, but a hand mixer works just as well.
- Small offset spatula or butter knife: For loosening brownie bites from the pan (trust me, saves a lot of frustration).
- Piping bag and round tip: For neat whipped cream “trim.” If you don’t have a piping bag, just snip the corner off a zip-top bag.
- Cooling rack: Let those brownies cool completely before decorating.
- Kitchen scale (optional): For precise measuring—especially handy if you’re baking in metric.
For budget-friendly options, you can use a regular muffin pan and cut each brownie in half for smaller bites (been there, done that when my mini pan went missing). Just grease your pans well and let brownies cool before removing. I always wipe down my nonstick pans with a little oil before storing—keeps them in top shape season after season. If you don’t have a piping bag, a spoon works too; your Santa hats might look a bit rustic, but they’ll taste just as sweet!
Preparation Method
-
Preheat and Prep:
Preheat your oven to 350°F (175°C). Grease a 24-cup mini muffin pan generously with butter or nonstick spray. (If you’re using a regular pan, adjust baking time and consider lining with parchment circles for easy removal.) -
Mix Wet Ingredients:
In a medium bowl, whisk together 1/2 cup (115g) melted butter and 3/4 cup (150g) sugar until smooth. Add 2 eggs and 1 teaspoon vanilla extract, mixing until fully combined—about 1 minute. The batter should be glossy and thick. -
Combine Dry Ingredients:
In another bowl, sift together 1/3 cup (40g) cocoa powder, 1/2 cup (65g) flour, and 1/4 teaspoon salt. Stir in mini chocolate chips if using. -
Make the Batter:
Add dry ingredients to wet ingredients, stirring gently until just combined. Avoid overmixing—brownie batter likes a light touch. Batter will be thick and fudgy. -
Fill Muffin Pan:
Spoon batter into prepared mini muffin cups, filling each about 2/3 full (roughly 1 tablespoon per cup). Smooth tops with a spoon or damp fingertip for even baking. -
Bake:
Bake in preheated oven for 12-15 minutes, until edges are set but centers are slightly soft. A toothpick should come out with moist crumbs, not wet batter. (If using a regular pan, bake 18-20 minutes, checking at 15.) -
Cool:
Allow brownies to cool in pan for 5 minutes, then gently loosen edges with a spatula and transfer to a cooling rack. Cool completely—about 20 minutes—before decorating. (Warm brownies will melt your whipped cream, so don’t rush!) -
Prepare Strawberries:
Wash and dry strawberries. Hull each one so the base is flat, making the “hat” sit neatly atop each brownie. Pat dry—any excess moisture will make the whipped cream slide. -
Make Whipped Cream:
In a chilled bowl, whip 1 cup (240ml) heavy cream, 2 tablespoons powdered sugar, and 1/2 teaspoon vanilla using an electric mixer. Beat until stiff peaks form, about 2-3 minutes. (Watch closely—overbeating leads to grainy cream.) -
Assemble Santa Hats:
Pipe or spoon a circle of whipped cream onto each brownie bite, then place a strawberry on top, pointed end up. Pipe a small dot of cream onto the tip of each strawberry “hat.” Optional: add white chocolate chips or mini marshmallows for extra detail. -
Decorate and Serve:
Sprinkle with festive sprinkles if desired. Serve immediately, or refrigerate assembled bites until ready to serve. If making ahead, store undecorated brownies tightly wrapped and top with cream and strawberries just before serving.
Personal Notes: If you notice brownies sticking to the pan, let them cool longer before attempting to remove. I once tried rushing this step, and ended up with a few crumbled hats—lesson learned! For perfect whipped cream, chill your bowl and beaters beforehand; trust me, it makes a real difference. And always dry your strawberries well—otherwise, your hats might “slide” right off!
Cooking Tips & Techniques
- Don’t Overmix: Brownie batter gets tough if you stir too much. Mix until just combined—some streaks are okay.
- Watch the Baking Time: Mini brownies bake fast! Check at 12 minutes. Overbaking leads to dry bites, not the gooey centers you want.
- Chill Tools for Whipped Cream: Cold bowl and beaters make whipped cream fluffier. (Learned the hard way: warm equipment = runny cream.)
- Prep Strawberries Ahead: Hull and dry strawberries while brownies bake for smoother assembly.
- Use a Piping Bag: For neat, bakery-style whipped cream “trim.” If you don’t have one, a zip-top bag with the corner snipped works in a pinch.
- Room Temperature Ingredients: Eggs and butter mix better when not cold, giving brownies a smoother texture.
- Batch Baking: If you need a lot, bake in batches and cool brownies completely between each round.
- Decorate Just Before Serving: Whipped cream holds up best when freshly piped. If you need to make ahead, refrigerate assembled bites—but don’t freeze them (cream gets weird).
Honestly, the first time I made these, I rushed the cooling step and ended up with whipped cream melting everywhere. Now, I always give brownies plenty of time to cool, and I chill my whipped cream ingredients for good measure. Multitasking tip: prep strawberries and whip the cream while the brownies bake—makes assembly a breeze. If you’re making these for a crowd, line up your assembly station so you can decorate a whole tray in minutes. A little practice, and you’ll be churning out Santa hats faster than you can say “Merry Christmas!”
Variations & Adaptations
- Gluten-Free Santa Hat Brownie Bites: Use a 1:1 gluten-free flour blend instead of regular flour. I’ve tried Bob’s Red Mill and King Arthur—both work great.
- Vegan Option: Swap butter for coconut oil, use aquafaba (chickpea brine) instead of eggs, and top with coconut whipped cream. Use vegan chocolate chips for extra flavor.
- Flavor Twist: Add a dash of peppermint extract to your brownie batter for a minty holiday kick. You can also mix orange zest into the whipped cream for a citrusy note.
- Seasonal Swap: In summer, replace strawberries with raspberries or blueberries for birthday parties or patriotic themes—just as cute, and still delicious.
- Nut-Free Option: Skip any chocolate chips that contain nuts and double-check all ingredients for allergens. (Always a must in my house during kid parties!)
Last Christmas, I tried a version with almond flour and coconut whipped cream for my gluten- and dairy-free friends—honestly, they turned out so good I almost preferred them to the classic version! You can also bake the brownie base in a regular pan, then use a round cookie cutter to make circles if you don’t have a mini muffin pan. If you’re looking for something extra festive, add a sprinkle of cinnamon or ginger to the batter for a cozy winter twist. These Santa Hat Brownie Bites are super flexible—just mix and match to suit your taste and dietary needs.
Serving & Storage Suggestions
Serve these Easy Santa Hat Brownie Bites chilled or at room temperature, arranged on a festive platter for maximum holiday impact. They pair perfectly with mugs of hot cocoa, spiced cider, or a fresh pot of coffee—great for cozy gatherings or Christmas morning brunch. If you’re hosting a party, they look adorable lined up alongside sugar cookies, peppermint bark, or gingerbread men.
To store, place undecorated brownie bases in an airtight container at room temperature for up to 3 days, or freeze for up to 1 month. Assemble with whipped cream and strawberries just before serving for best texture. If you need to prep ahead, assemble and refrigerate bites for up to 4 hours—after that, the whipped cream starts to soften and strawberries can weep a bit. For leftovers, refrigerate in a single layer and enjoy within 24 hours. To reheat brownies (if serving plain), microwave for 5-10 seconds just to take the chill off—don’t overdo it or they’ll dry out.
Honestly, the flavors just get richer after a few hours in the fridge, but for picture-perfect hats, decorate right before guests arrive. If you make a big batch, set out half at a time and keep the rest chilled until needed—your Santa hats will stay perky and fresh!
Nutritional Information & Benefits
Each Santa Hat Brownie Bite is approximately 110 calories, with about 6g fat, 14g carbs, and 1g protein (values may vary depending on ingredient brands and portion size). The strawberries add a boost of vitamin C and antioxidants, while using real cocoa powder means you get a little magnesium and iron, too.
This recipe is nut-free (as long as you skip nut-containing chocolate chips), and can be made gluten-free or dairy-free with simple swaps. The bites are a fun way to sneak a little fruit into holiday treats, and portion control is built right in—no massive brownies, just cute, snack-sized bites. Of course, if you have allergies, always double-check your ingredient labels and adapt as needed. For me, these bites are a cheerful, guilt-friendly way to celebrate without overindulging.
Conclusion
If you’re on the hunt for the best Christmas treats idea, these Easy Santa Hat Brownie Bites are totally worth adding to your holiday baking rotation. They’re festive, fun, and ridiculously simple to make, with flavors and textures that feel like a cozy winter day wrapped up in a bite. Whether you’re making them with kids, sharing at a party, or just treating yourself, these brownie bites are guaranteed to put a smile on every face.
Feel free to swap ingredients, add your own twist, or double the batch for a crowd—these bites are as flexible as they are charming. I love them because they bring a little magic to even the simplest holiday get-together, and every year, they remind me of why I cherish these baking traditions. If you do try this recipe, let me know in the comments below, share your photos on Pinterest, or tell me your favorite adaptation. Happy baking, and may your holidays be filled with sweet, chocolatey cheer!
Frequently Asked Questions
Can I use a boxed brownie mix for Santa Hat Brownie Bites?
Absolutely! Just prepare the mix according to package instructions and bake in a mini muffin pan. The flavor is good, but homemade brownies usually come out richer and chewier.
How far in advance can I make these?
You can bake the brownie bases up to 3 days ahead. Assemble with whipped cream and strawberries the day you plan to serve for best results.
What if I don’t have a mini muffin pan?
No problem! Bake brownies in a regular pan and use a round cookie cutter to make bite-sized circles. Or cut them into squares and decorate as usual.
Can I make these gluten-free or dairy-free?
Yes! Use a gluten-free flour blend and coconut oil for the brownies, then coconut whipped cream for topping. They turn out delicious and festive.
How do I keep the whipped cream from melting?
Make sure brownies are completely cool before decorating. Use chilled cream and tools, and refrigerate bites until serving. If you’re making them for a party, assemble just before guests arrive.
Pin This Recipe!
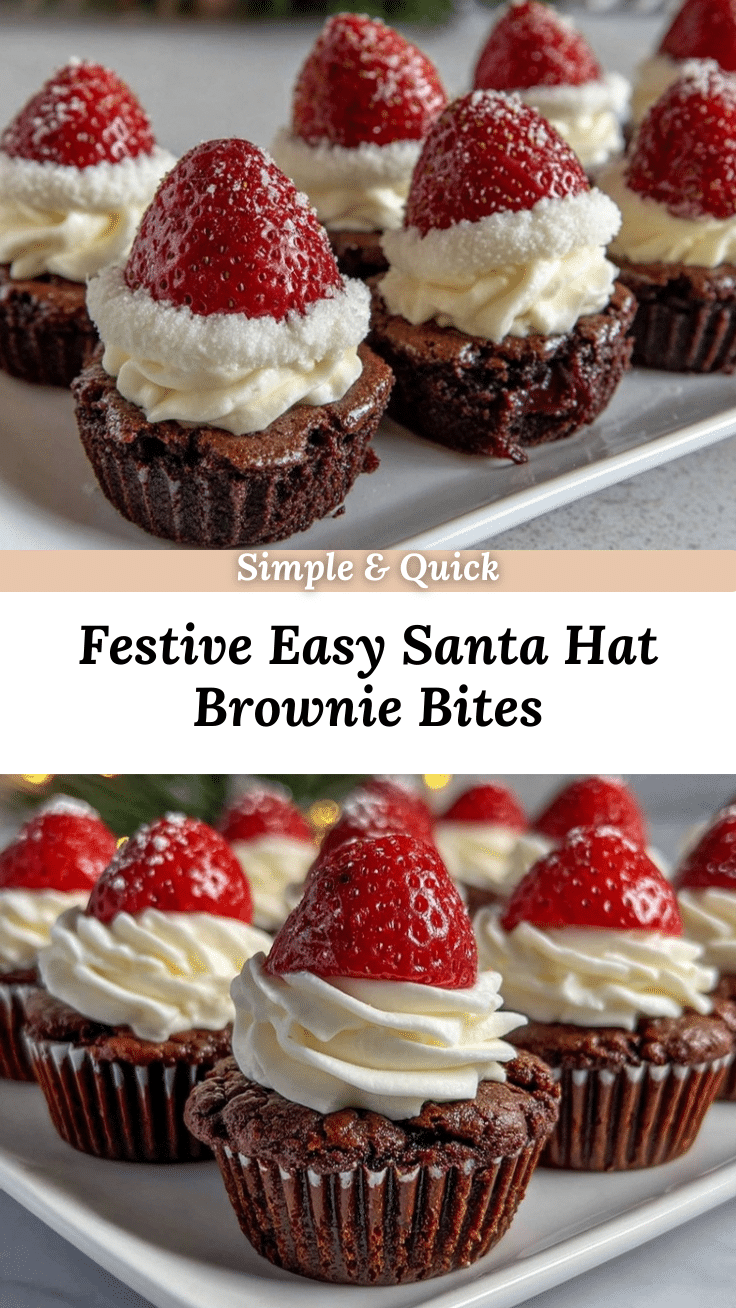
Easy Santa Hat Brownie Bites

These festive Santa Hat Brownie Bites feature a rich, fudgy brownie base topped with fluffy whipped cream and juicy strawberries, making them the perfect adorable and delicious Christmas treat for parties, potlucks, or family gatherings.
- Prep Time: 20 minutes
- Cook Time: 15 minutes
- Total Time: 45 minutes
- Yield: 20-24 brownie bites 1x
- Category: Dessert
- Cuisine: American
Ingredients
- 1/2 cup unsalted butter, melted
- 3/4 cup granulated sugar
- 2 large eggs, room temperature
- 1 teaspoon vanilla extract
- 1/3 cup unsweetened cocoa powder (Dutch-processed preferred)
- 1/2 cup all-purpose flour
- 1/4 teaspoon salt
- 1/4 cup mini chocolate chips (optional)
- 20–24 medium strawberries, hulled
- 1 cup heavy whipping cream
- 2 tablespoons powdered sugar
- 1/2 teaspoon vanilla extract
- white chocolate chips or mini marshmallows (optional, for decoration)
- festive sprinkles (optional)
Instructions
- Preheat oven to 350°F (175°C). Grease a 24-cup mini muffin pan with butter or nonstick spray.
- In a medium bowl, whisk together melted butter and sugar until smooth. Add eggs and vanilla extract, mixing until fully combined.
- In another bowl, sift together cocoa powder, flour, and salt. Stir in mini chocolate chips if using.
- Add dry ingredients to wet ingredients, stirring gently until just combined. Do not overmix.
- Spoon batter into prepared mini muffin cups, filling each about 2/3 full (roughly 1 tablespoon per cup). Smooth tops.
- Bake for 12-15 minutes, until edges are set but centers are slightly soft. A toothpick should come out with moist crumbs.
- Allow brownies to cool in pan for 5 minutes, then loosen edges and transfer to a cooling rack. Cool completely (about 20 minutes).
- Wash and dry strawberries. Hull each one so the base is flat. Pat dry.
- In a chilled bowl, whip heavy cream, powdered sugar, and vanilla extract until stiff peaks form (2-3 minutes).
- Pipe or spoon a circle of whipped cream onto each brownie bite. Place a strawberry on top, pointed end up. Pipe a small dot of cream onto the tip of each strawberry.
- Decorate with white chocolate chips, mini marshmallows, or festive sprinkles if desired. Serve immediately or refrigerate until serving.
Notes
For best results, chill your bowl and beaters before whipping cream. Dry strawberries thoroughly to prevent whipped cream from sliding. Brownie bases can be made ahead and decorated just before serving. Gluten-free and dairy-free adaptations are possible with simple swaps.
Nutrition
- Serving Size: 1 brownie bite
- Calories: 110
- Sugar: 11
- Sodium: 40
- Fat: 6
- Saturated Fat: 4
- Carbohydrates: 14
- Fiber: 1
- Protein: 1
Keywords: Santa Hat Brownie Bites, Christmas treats, holiday dessert, festive brownies, easy brownie bites, kid-friendly, party dessert, chocolate, strawberries, whipped cream


