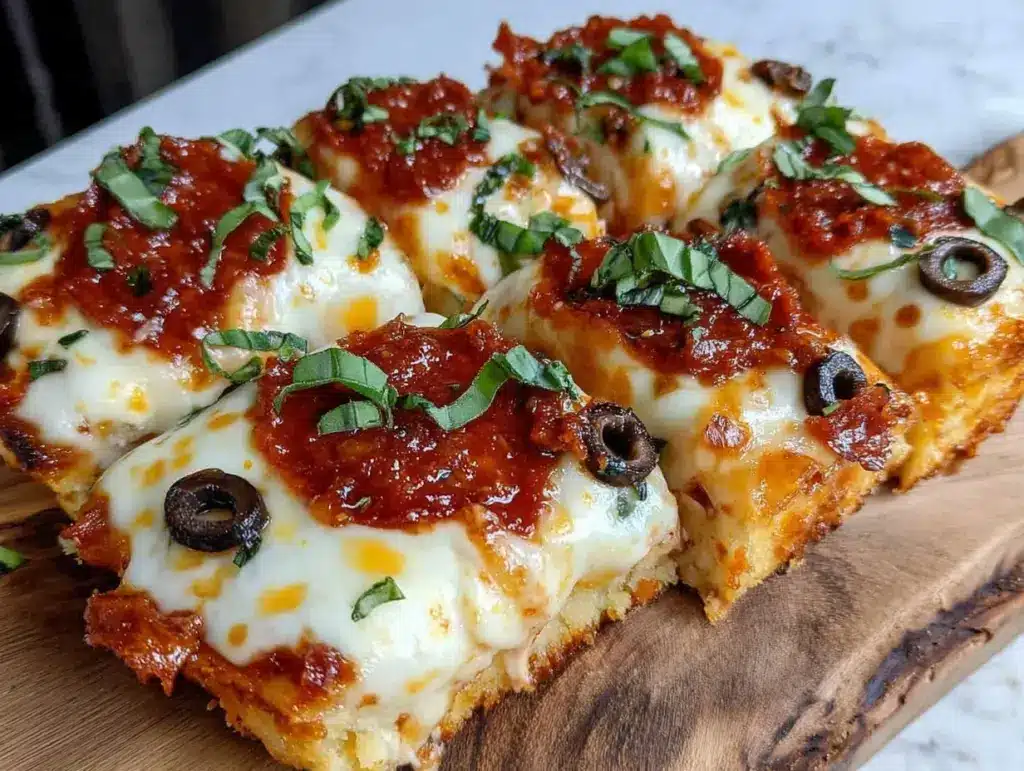
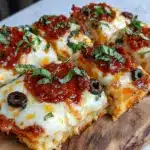
Let me tell you, the moment the scent of melted cheese mingled with spicy pepperoni wafted from my oven, I knew I was onto something dangerously tasty. The first time I whipped up this Flavorful Adult Lunchables Pizza Snack with its crispy thin crust, I was instantly hooked—the kind of moment where you pause, take a deep breath, and just smile because you know you’re onto something truly special. This isn’t your childhood lunchbox throwback; it’s a grown-up twist packed with bold flavors and a satisfyingly crunchy crust that’s just right for a quick bite or a casual snack break.
Years ago, when I was knee-high to a grasshopper, those classic Lunchables were a weekend treat, but honestly, they never quite hit the mark when I craved something more than just “kid food.” So, on a rainy weekend, I decided to recreate the magic with a crispy, thin pizza crust loaded with gourmet toppings and a punch of flavor. My family couldn’t stop sneaking them off the cooling rack (and I can’t really blame them). It quickly became a staple for family gatherings, late-night cravings, and even those “I-need-something-now” moments.
You know what makes this Adult Lunchables Pizza Snack a winner? It’s dangerously easy to make, packs pure, nostalgic comfort, and fits perfectly into busy days or laid-back evenings. Whether you’re looking to brighten up your Pinterest cookie board or need a sweet treat for your kids’ lunchboxes with an adult twist, this recipe is going to want you to bookmark it for good.
Why You’ll Love This Recipe
Honestly, this Flavorful Adult Lunchables Pizza Snack recipe is one of those rare finds that combines convenience, taste, and just the right crunch. After plenty of testing in the name of research, of course, I can confidently say this recipe is a must-try for anyone who loves a quick, satisfying snack that doesn’t skimp on flavor.
- Quick & Easy: Comes together in under 30 minutes, perfect for busy weeknights or last-minute cravings.
- Simple Ingredients: No fancy grocery trips needed; you likely already have everything in your kitchen.
- Perfect for Snacking: Great for solo munching, sharing at casual get-togethers, or packing in lunchboxes.
- Crowd-Pleaser: Always gets rave reviews from both kids and adults alike—everyone loves that crispy crunch.
- Unbelievably Delicious: The thin crust gives you that perfect crisp bite while the toppings bring on bold, flavorful satisfaction.
What sets this recipe apart? It’s the crispy thin crust, baked just right to hold up under rich, savory toppings without getting soggy. I like to blend a little olive oil into the dough for added flavor and crunch, and I always recommend using quality cured meats and freshly shredded cheeses to bring the best taste forward. This isn’t just another pizza snack; it’s a grown-up version that’s simple, delicious, and has that perfect balance of crispy and melty that makes you close your eyes after the first bite. Whether you’re impressing friends without the stress or turning a simple meal into something memorable, you’re going to love this one.
What Ingredients You Will Need
This recipe uses simple, wholesome ingredients to deliver bold flavor and satisfying texture without the fuss. Most are pantry staples, and substitutions are easy if needed.
- For the Crispy Thin Crust:
- 1 cup all-purpose flour (120g) – I recommend King Arthur for best texture
- ½ teaspoon instant yeast
- ½ teaspoon salt
- ⅓ cup warm water (80ml), about 110°F (43°C)
- 1 tablespoon olive oil (adds richness and crispiness)
- For the Toppings:
- 2 tablespoons pizza sauce or marinara
- ¼ cup shredded mozzarella cheese (about 28g) – fresh shredded works best
- ¼ cup shredded sharp cheddar cheese (about 28g) – optional, for extra flavor
- 6 slices pepperoni or salami, halved
- 1 tablespoon sliced black olives (optional)
- A pinch of dried oregano or Italian seasoning
- Red pepper flakes (optional, for a little heat)
- For Serving:
- Fresh basil leaves or arugula (optional, for garnish)
- Grated Parmesan cheese (optional)
If you want to go gluten-free, swap all-purpose flour for a gluten-free baking mix like Bob’s Red Mill. For dairy-free, try vegan cheese and skip the Parmesan garnish. Using small-curd mozzarella will give you a better melt, and I always find that a good-quality olive oil makes a noticeable difference in the crust’s flavor.
Equipment Needed
- Baking sheet or pizza stone – A pizza stone helps get that extra crisp, but a baking sheet works perfectly well too.
- Mixing bowl – For combining the dough ingredients.
- Measuring cups and spoons – Accurate measurements make all the difference here.
- Rolling pin – To roll out the dough thinly; a wine bottle can be a budget-friendly substitute in a pinch.
- Pastry brush – Useful if you want to lightly brush olive oil on the crust edges for extra crispness.
- Oven mitts – Safety first when handling hot trays!
I’ve tried this recipe with and without a pizza stone, and while the stone gives a slightly better crunch, the baking sheet offers convenience and is easier to clean. If you’re on a budget, no worries—your trusty baking sheet will do just fine. Just make sure to preheat it in the oven for a few minutes before sliding the pizza on for that crisp bottom.
Preparation Method

- Mix the Dough (5 minutes): In a mixing bowl, combine 1 cup (120g) of all-purpose flour, ½ teaspoon instant yeast, and ½ teaspoon salt. Stir together with a whisk or fork until evenly mixed.
- Add Liquids (2 minutes): Pour in ⅓ cup (80ml) of warm water (about 110°F/43°C) and 1 tablespoon olive oil. Stir with a spoon until the dough starts to come together. It’ll be slightly sticky but manageable.
- Knead the Dough (5-7 minutes): Turn the dough onto a lightly floured surface and knead gently for about 5-7 minutes until smooth and elastic. If it sticks too much, sprinkle a little flour, but be careful not to add too much or the crust will be tough.
- Rest the Dough (20 minutes): Place the dough back in the bowl, cover it loosely with a clean kitchen towel or plastic wrap, and let it rest at room temperature for 20 minutes. This resting time helps the gluten relax for easier rolling and a better crust texture.
- Preheat Oven (10 minutes): While the dough rests, preheat your oven to 450°F (232°C). If using a pizza stone, place it in the oven now to heat up.
- Roll Out the Dough (5 minutes): After resting, roll out the dough on a lightly floured surface into a thin circle or rectangle about 8-9 inches (20-23 cm) in diameter. The thinner, the crispier!
- Prepare the Base (2 minutes): Transfer the rolled dough to a parchment-lined baking sheet or a pizza peel if using a stone. Spread 2 tablespoons of pizza sauce evenly over the dough, leaving a small border around the edges.
- Add Toppings (3 minutes): Sprinkle ¼ cup shredded mozzarella and ¼ cup shredded cheddar cheese evenly over the sauce. Arrange the halved pepperoni slices on top, add olives if using, and sprinkle a pinch of dried oregano or Italian seasoning.
- Bake (10-12 minutes): Slide the pizza into the oven and bake for 10-12 minutes, until the crust is golden brown and crispy, and the cheese is melted and bubbly. Keep an eye near the end to avoid burning.
- Finish and Serve (2 minutes): Remove the pizza from the oven, sprinkle with fresh basil or arugula if desired, and grate a little Parmesan cheese on top. Let it cool for a couple of minutes before slicing and enjoying.
Pro tip: If the crust feels too soft after baking, pop it back in the oven for another minute or two, but watch it closely. Also, rolling the dough very thin is key to that signature crispy texture—it’s worth the extra minute of effort!
Cooking Tips & Techniques
Getting that perfect crispy thin crust isn’t rocket science, but a few tricks can really make a difference. First, don’t overload your pizza with sauce or toppings; too much moisture is the enemy of crispiness. I learned this the hard way after my first soggy attempt (lesson learned!).
Using instant yeast means you can skip the long rise, but resting the dough for about 20 minutes lets the gluten relax and makes rolling much easier. If you try to roll right away, the dough will snap back on you.
Preheating your baking surface is another game-changer—it helps the crust get that golden, crunchy bottom quickly. I always preheat my baking sheet for at least 10 minutes before placing the pizza on it.
When adding cheese, I find that mixing mozzarella with a bit of sharp cheddar adds a nice flavor punch without overpowering the toppings. And don’t forget a sprinkle of herbs—oregano and red pepper flakes bring that classic pizzeria vibe right to your kitchen.
One last thing: If you want an ultra-thin crust, roll the dough between two sheets of parchment paper to prevent sticking and tearing. Also, keep an eye on your oven temperature; every oven is a little different, so adjust the time as needed for your perfect crunch.
Variations & Adaptations
Feeling adventurous? This Flavorful Adult Lunchables Pizza Snack can be tailored in loads of ways to suit your taste or dietary needs.
- Vegetarian Version: Swap the pepperoni for roasted veggies like bell peppers, mushrooms, or caramelized onions. Adding a sprinkle of feta cheese adds a punch of flavor.
- Gluten-Free Option: Use a gluten-free baking mix instead of all-purpose flour—Bob’s Red Mill gluten-free blend works great. Just note the dough may be a bit more delicate, so handle gently.
- Spicy Twist: Add sliced jalapeños or a drizzle of hot honey on top before baking for a sweet-heat combo that wakes up your taste buds.
- Low-Carb Alternative: Try making the crust with almond flour and a touch of psyllium husk powder. It won’t be quite as crispy but still hits the spot.
- Personal Favorite: I once swapped out the pepperoni for thinly sliced prosciutto and added fresh arugula after baking—absolutely divine and a little fancy for a snack!
Serving & Storage Suggestions
This pizza snack is best served warm, fresh out of the oven when the crust is at its crispiest and the cheese is perfectly melty. I love slicing it into small squares for easy sharing or to nibble between meetings or movie nights.
Pair it with a crisp side salad or a cold glass of sparkling water with a squeeze of lemon for a light, balanced snack. Or, for an adult-friendly twist, a glass of your favorite red wine or craft beer complements the rich flavors beautifully.
If you have leftovers (rare, but it happens), store them in an airtight container in the fridge for up to 2 days. To reheat, pop the slices in a toaster oven or under the broiler for a few minutes to bring back that crispy crust. Microwave isn’t recommended unless you don’t mind a soft crust.
Over time, the flavors meld nicely, especially if you add fresh herbs or a sprinkle of Parmesan just before serving again. Just be sure to enjoy it within a couple of days for the best texture and taste.
Nutritional Information & Benefits
This Flavorful Adult Lunchables Pizza Snack offers a balanced mix of carbs, protein, and fats, making it a satisfying treat without going overboard. One serving (about half the pizza) contains approximately:
| Calories | 280 kcal |
|---|---|
| Protein | 12g |
| Carbohydrates | 28g |
| Fat | 12g |
| Fiber | 2g |
The olive oil adds heart-healthy fats while the pepperoni and cheeses provide protein and calcium. If you’re watching carbs, the thin crust helps keep it lighter than traditional thick pizzas. Just a heads-up: this recipe contains gluten and dairy, so keep that in mind for allergies or sensitivities.
From a wellness perspective, making this snack at home means you can control the ingredients and avoid preservatives or artificial flavors often found in store-bought snacks. Plus, it’s a great way to enjoy pizza without the heaviness of typical takeout.
Conclusion
So, why should you give this Flavorful Adult Lunchables Pizza Snack with Crispy Thin Crust a shot? Because it’s a perfect mix of nostalgia and grown-up taste, quick to whip up, and totally satisfying. You can easily tweak it to match your cravings or dietary needs, making it a versatile snack or light meal that never disappoints.
Honestly, I love this recipe because it brings that warm, comforting feeling of pizza in a fresh, crispy package that’s just right for any time of day. Whether you’re meal prepping, entertaining, or just need a tasty pick-me-up, this one’s a keeper.
Give it a try, and don’t forget to share your variations and thoughts—I love hearing how you make it your own! Happy snacking, friends.
FAQs
Can I make the dough ahead of time?
Yes! You can prepare the dough up to 24 hours in advance and store it in the fridge. Just bring it to room temperature before rolling out.
What if I don’t have instant yeast?
You can use active dry yeast but activate it first in warm water with a pinch of sugar for about 5-10 minutes before mixing.
Can I use pre-made pizza sauce?
Absolutely! Store-bought pizza sauce works fine, just choose one with your preferred flavor profile.
How do I get the crust extra crispy?
Make sure your oven and baking surface are fully preheated, roll the dough very thin, and avoid too much sauce or toppings.
Is this recipe suitable for kids?
Yes! You can reduce or omit spicy toppings and let kids help add their favorite toppings for a fun snack time.
Pin This Recipe!

Flavorful Adult Lunchables Pizza Snack Recipe with Crispy Thin Crust Easy and Perfect
A grown-up twist on classic Lunchables featuring a crispy thin crust pizza snack loaded with bold flavors and gourmet toppings. Quick and easy to make, perfect for a satisfying snack or light meal.
- Prep Time: 37 minutes
- Cook Time: 10-12 minutes
- Total Time: 47-49 minutes
- Yield: 2 servings 1x
- Category: Snack
- Cuisine: American
Ingredients
- 1 cup all-purpose flour (120g)
- ½ teaspoon instant yeast
- ½ teaspoon salt
- ⅓ cup warm water (80ml), about 110°F (43°C)
- 1 tablespoon olive oil
- 2 tablespoons pizza sauce or marinara
- ¼ cup shredded mozzarella cheese (about 28g)
- ¼ cup shredded sharp cheddar cheese (about 28g) – optional
- 6 slices pepperoni or salami, halved
- 1 tablespoon sliced black olives – optional
- A pinch of dried oregano or Italian seasoning
- Red pepper flakes – optional
- Fresh basil leaves or arugula – optional for garnish
- Grated Parmesan cheese – optional
Instructions
- In a mixing bowl, combine 1 cup (120g) of all-purpose flour, ½ teaspoon instant yeast, and ½ teaspoon salt. Stir together until evenly mixed.
- Pour in ⅓ cup (80ml) of warm water (about 110°F/43°C) and 1 tablespoon olive oil. Stir until the dough starts to come together; it will be slightly sticky but manageable.
- Turn the dough onto a lightly floured surface and knead gently for about 5-7 minutes until smooth and elastic. Add a little flour if too sticky, but not too much.
- Place the dough back in the bowl, cover loosely with a kitchen towel or plastic wrap, and let it rest at room temperature for 20 minutes.
- Preheat your oven to 450°F (232°C). If using a pizza stone, place it in the oven to heat up.
- Roll out the dough on a lightly floured surface into a thin circle or rectangle about 8-9 inches (20-23 cm) in diameter.
- Transfer the rolled dough to a parchment-lined baking sheet or pizza peel if using a stone. Spread 2 tablespoons of pizza sauce evenly over the dough, leaving a small border.
- Sprinkle ¼ cup shredded mozzarella and ¼ cup shredded cheddar cheese evenly over the sauce. Arrange halved pepperoni slices on top, add olives if using, and sprinkle a pinch of dried oregano or Italian seasoning.
- Bake for 10-12 minutes until the crust is golden brown and crispy and the cheese is melted and bubbly. Watch closely near the end to avoid burning.
- Remove from oven, sprinkle with fresh basil or arugula and grated Parmesan if desired. Let cool for a couple of minutes before slicing and serving.
Notes
Roll the dough very thin for a crispy crust. Preheat baking surface for best results. Avoid overloading with sauce or toppings to prevent sogginess. Dough can be made ahead and refrigerated up to 24 hours. Reheat leftovers in toaster oven or broiler for crispiness; avoid microwave.
Nutrition
- Serving Size: About half the pizza
- Calories: 280
- Fat: 12
- Carbohydrates: 28
- Fiber: 2
- Protein: 12
Keywords: Adult Lunchables, pizza snack, thin crust pizza, quick pizza recipe, easy snack, crispy pizza, pepperoni pizza, homemade pizza snack


