The scent of maple syrup drifting through my kitchen while a loaf of banana bread bakes is pure magic. You know that cozy, can’t-wait-any-longer feeling you get when something truly special is in the oven? That’s exactly what happens every single time I whip up this maple glazed banana bread. It’s not just another banana bread—this one’s got a gorgeous maple syrup glaze that turns ordinary into oh-wow. Honestly, I started making this recipe on a whim one weekend after I bought too many bananas (again), and it’s become my go-to comfort bake ever since.
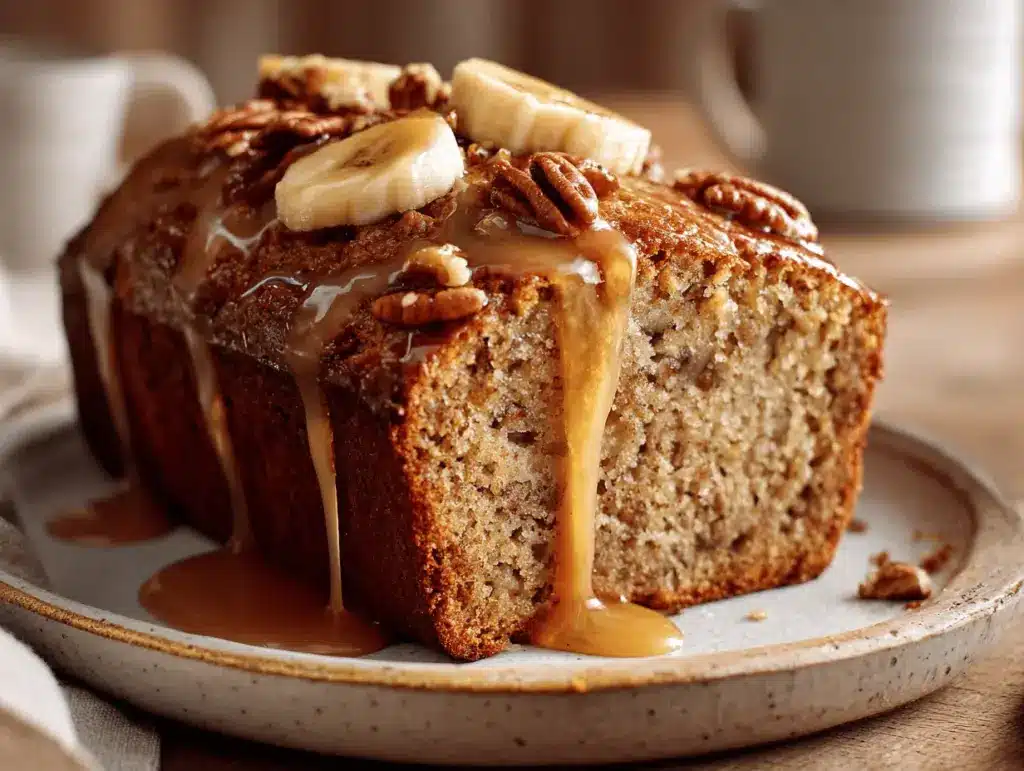
I remember the first time I poured warm maple syrup over freshly baked banana bread. The glaze seeped into the loaf, making it extra moist and giving it a sweet, caramelized finish. It felt like a hug in every slice. This isn’t just a treat for Sunday brunch—it’s the pick-me-up loaf that’s saved me on busy mornings and made me the hero at family gatherings. And let’s face it, banana bread is already a classic, but that maple twist? It’s a total game-changer.
What I love most is how easy it is to make—even when my pantry’s looking a little bare. No fancy tricks, just honest ingredients and a little patience. Whether you’re baking for your kids, sharing with friends, or just sneaking a warm slice for yourself, this maple glazed banana bread is sure to become a staple in your kitchen. Trust me, I’ve tested this recipe every which way, and it never disappoints. If you crave a loaf that’s moist, flavorful, and impossible to resist, you’re in the right place.
Why You’ll Love This Maple Glazed Banana Bread Recipe
- Quick & Easy: You can have this maple glazed banana bread in the oven in under 15 minutes—perfect for those last-minute sweet cravings or when you need a quick breakfast solution.
- Simple Ingredients: No need for special trips to the store. Everything you need is probably already in your pantry, from ripe bananas to that bottle of maple syrup you forgot about.
- Perfect for Any Occasion: This loaf shines at brunch tables, potlucks, cozy evening snacks, and even holiday mornings when you want something a little extra.
- Crowd-Pleaser: Kids go wild for the sweet, sticky glaze, and adults always ask for the recipe. I’ve never taken this anywhere without it disappearing fast.
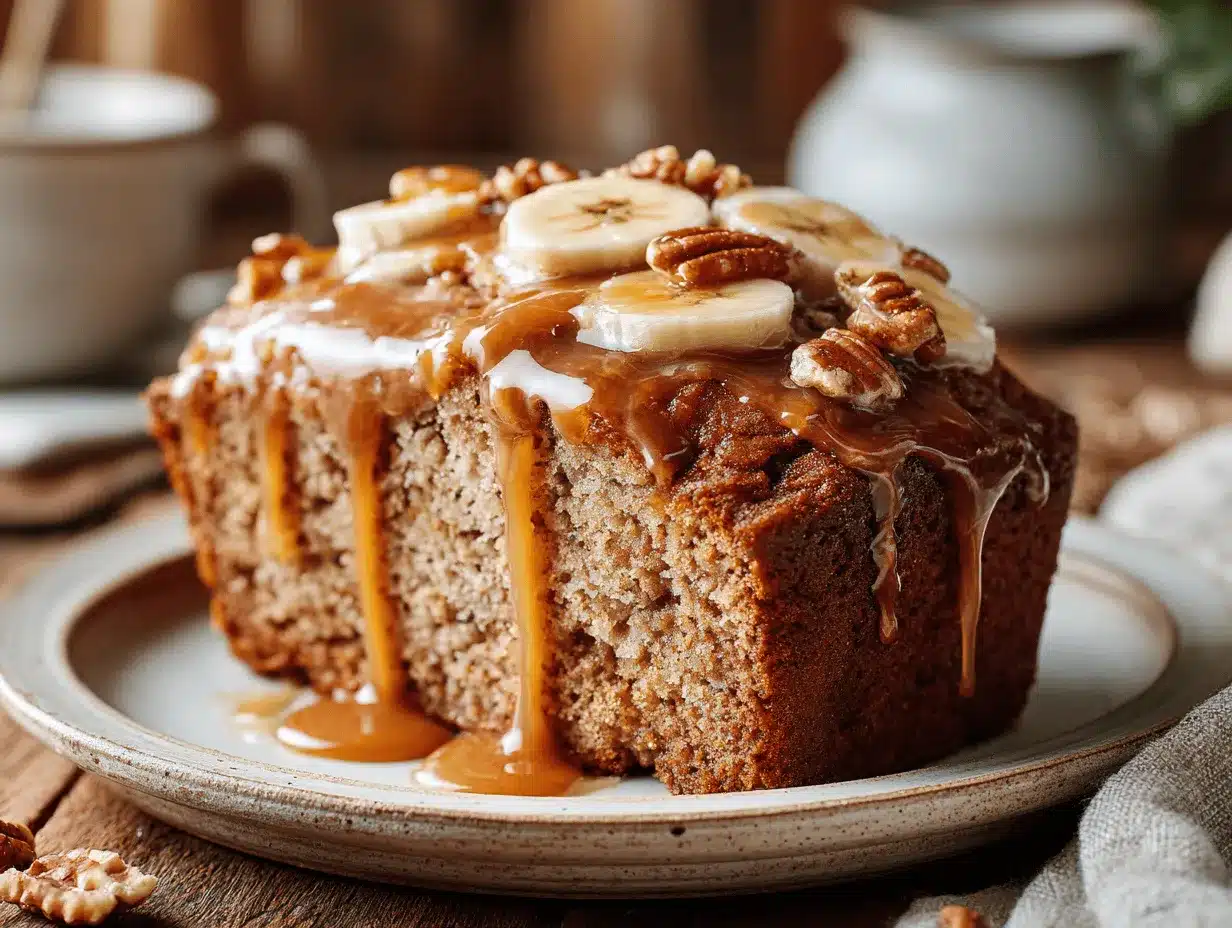
- Unbelievably Delicious: The combination of moist banana bread and that rich maple glaze is next-level comfort food. Each bite is soft, sweet, and totally satisfying.
This isn’t just banana bread with a drizzle on top. The maple glaze soaks into the loaf, locking in moisture and adding a depth of flavor you just don’t find in ordinary recipes. I always blend the bananas until they’re super smooth—no weird chunks, just a silky, tender crumb. And the glaze? It’s sticky, shiny, and just the right amount of sweet (never cloying!).
This recipe comes from years of experimenting—trying different sugars, flour blends, and even baking times. I’ve landed on a version that’s foolproof and flexible, so whether you want to add nuts, chocolate chips, or keep it classic, you’ll get that same irresistible result. It’s the kind of banana bread that makes you pause, savor, and maybe even sneak a second slice before anyone notices.
If you’re looking for something that feels both nostalgic and a little bit special, this maple glazed banana bread is your answer. It’s easy enough for a weekday but impressive enough for guests—truly the best of both worlds!
What Ingredients You Will Need
This maple glazed banana bread recipe keeps things simple but delivers on major flavor. Everything works together for that soft, tender loaf and the sweet maple finish. Here’s what you’ll need:
- For the Banana Bread:
- 3 large very ripe bananas, mashed (about 1 1/4 cups / 300g) – The riper, the better! Overripe bananas add natural sweetness and moisture.
- 1/2 cup (115g) unsalted butter, melted and cooled (or coconut oil for a dairy-free twist)
- 3/4 cup (150g) light brown sugar (packs in extra moisture and a caramel-like flavor)
- 2 large eggs, room temperature (helps with structure and richness)
- 1/4 cup (60ml) pure maple syrup (the secret to that deep maple note in every bite!)
- 1 teaspoon vanilla extract (for warmth and background sweetness)
- 1 3/4 cups (220g) all-purpose flour (or use 1-to-1 gluten-free flour for celiac-friendly baking)
- 1 teaspoon baking soda (for rise—don’t skip it!)
- 1/2 teaspoon salt (balances the sweetness and brings out the flavors)
- 1/2 teaspoon ground cinnamon (optional, but I love the cozy hint it adds)
- 1/2 cup (60g) chopped walnuts or pecans (optional for crunch—toast them for even more flavor)
- 1/2 cup (85g) chocolate chips (optional, for a little indulgence)
- For the Maple Glaze:
- 1/3 cup (80ml) pure maple syrup (real maple syrup gives the best flavor—trust me, I’ve tried the imitations and they don’t compare)
- 1 tablespoon (14g) unsalted butter (or coconut oil for dairy-free)
- 1/2 cup (60g) powdered sugar, sifted (for a smooth, glossy glaze)
- Pinch of salt (just a little to make the glaze pop)
- Optional: 1/4 teaspoon maple extract for extra maple oomph
If you need to swap something, go for it! I often use coconut oil for a dairy-free loaf, or add a handful of blueberries when I’m feeling adventurous. You can use honey instead of maple syrup in a pinch, though the flavor will shift a bit. And if nuts aren’t your thing, just leave them out—it’s still delicious.
I usually go for King Arthur or Bob’s Red Mill flour, and for maple syrup, the darker, the better. Grade A dark amber has the boldest flavor. If you’re experimenting, keep the flour and banana ratio steady for the right texture. Don’t be afraid to make it your own!
Equipment Needed
You don’t need a fancy kitchen to make this maple glazed banana bread—just the basics and a little love.
- 9×5-inch (23x13cm) loaf pan – Standard size for a tall, impressive loaf. If you only have an 8×4-inch pan, reduce the baking time a bit.
- Mixing bowls – One large for wet ingredients, one medium for dry. If you’re short on bowls, you can mix in stages—just wipe between steps.
- Whisk and sturdy spoon – A handheld electric mixer is nice but not necessary. I often just use a big wooden spoon.
- Measuring cups and spoons (US and metric) – For accuracy. I recommend metal or glass for durability.
- Spatula – For scraping down the bowl and smoothing out the batter.
- Wire rack – Helps the bread cool evenly and prevents soggy bottoms.
- Small saucepan – For warming up the maple glaze. If you don’t have one, a microwave-safe bowl works too.
If you’re baking on a budget, you can usually find loaf pans and mixing bowls at thrift stores (that’s where I got my favorite pan). Don’t stress if your tools aren’t top-of-the-line; I’ve made this bread in rental kitchens with just the basics and it turned out great. Just make sure your loaf pan is greased well, and if it’s old or dark metal, check the bread a few minutes early to avoid overbaking.
Preparation Method
- Prep your loaf pan and oven: Grease your 9×5-inch (23x13cm) loaf pan with butter or nonstick spray. Preheat your oven to 350°F (175°C). Line the pan with parchment paper if you want super easy removal.
- Mash the bananas: In a large bowl, mash 3 large, very ripe bananas (about 1 1/4 cups / 300g) until smooth. You can use a fork, potato masher, or even a hand mixer. The smoother the bananas, the more tender your loaf!
- Mix wet ingredients: Add 1/2 cup (115g) melted butter, 3/4 cup (150g) brown sugar, 2 large eggs, 1/4 cup (60ml) maple syrup, and 1 teaspoon vanilla extract to the mashed bananas. Whisk until everything is well blended and glossy—about 1 minute.
- Combine dry ingredients: In a separate medium bowl, whisk together 1 3/4 cups (220g) all-purpose flour, 1 teaspoon baking soda, 1/2 teaspoon salt, and 1/2 teaspoon cinnamon (if using). Make sure there are no lumps—nobody likes a pocket of baking soda!
- Combine wet and dry: Add the dry ingredients to the wet mixture. Gently fold together with a spatula until just combined. Don’t overmix—the batter should be thick but streak-free. If adding nuts or chocolate chips, fold them in now.
- Pour and smooth: Pour the batter into your prepared loaf pan. Smooth the top with a spatula. If you want, sprinkle a few extra nuts or chips on top for a bakery look.
- Bake: Bake for 50-60 minutes, or until a toothpick inserted in the center comes out clean or with just a few moist crumbs. If the top browns too quickly, loosely tent with foil halfway through. My loaf usually takes 55 minutes, but ovens vary!
- Cool: Remove from oven and let the bread cool in the pan for 15 minutes. Then transfer to a wire rack to cool completely before glazing. (It smells incredible, but don’t rush this step or the glaze will melt right off!)
- Make the maple glaze: In a small saucepan, combine 1/3 cup (80ml) maple syrup and 1 tablespoon (14g) butter. Warm over low heat until the butter melts and the mix just starts to bubble. Remove from heat and whisk in 1/2 cup (60g) powdered sugar and a pinch of salt. If you love extra maple flavor, add 1/4 teaspoon maple extract.
- Glaze and serve: Once the bread is cool, drizzle the maple glaze over the top. Let it set for about 10 minutes before slicing—if you can wait! The glaze will firm up a bit as it cools.
Troubleshooting Tips: If your bread sinks in the middle, it’s probably underbaked—give it a few more minutes next time. If it’s too dry, double-check banana and butter measurements. And don’t worry if the glaze drips down the sides—that’s part of the charm!
Personal tip: I always save one slice for the next day—the flavors just get better as they sit and mingle.
Cooking Tips & Techniques
Let’s be real—banana bread is simple, but nailing that moist crumb and perfect glaze takes a little know-how. Here’s what I’ve learned after baking dozens of loaves:
- Use overripe bananas: The darker and spottier, the better. They mash smoother and add a natural sweetness you just can’t fake. If your bananas are underripe, pop them in a 300°F (150°C) oven for 15 minutes to soften and sweeten up.
- Don’t overmix the batter: Stir just until you don’t see any streaks of flour. Overmixing develops gluten and can make your loaf tough instead of tender.
- Check oven temperature: Some ovens run hot or cool. If your bread browns too fast, your oven may be running hot. Use an oven thermometer if you’re unsure.
- Test for doneness: Insert a toothpick in the center—if it comes out mostly clean (a few moist crumbs are fine), it’s ready. If you see wet batter, give it more time.
- Cool completely before glazing: I know, it’s tough! But if you glaze while the bread is warm, the glaze will run off and not set properly.
- Double the glaze for extra sweetness: If you love a thicker layer, make a little extra. I sometimes do this for parties or when I want that “bakery window” look.
Once, I rushed and glazed too soon—the glaze pooled right off the loaf and made a sticky mess on my counter. Lesson learned: patience pays off! And if you’re multitasking (like I always am), set a timer so you don’t forget the bread in the oven. Nothing’s sadder than an overbaked loaf.
For consistent results, always use the same loaf pan and measure your flour by spooning it into the cup and leveling off. These little habits really do make a difference—trust me!
Variations & Adaptations
This maple glazed banana bread is endlessly customizable. Here are some of my favorite twists:
- Gluten-Free: Swap the all-purpose flour for a 1-to-1 gluten-free blend. I’ve used Bob’s Red Mill with great results—no weird texture, just pure banana bread goodness.
- Vegan: Use coconut oil instead of butter, and replace the eggs with flax eggs (2 tablespoons flaxseed meal + 5 tablespoons water). The loaf stays moist and the glaze still shines!
- Lower Sugar: Cut the brown sugar to 1/2 cup (100g) and skip the chocolate chips. The bananas and maple syrup add plenty of sweetness already.
- Nut-Free: Omit the walnuts/pecans and double the chocolate chips, or add dried fruit like cranberries for a chewy surprise.
- Fruit Add-Ins: Fold in a handful of blueberries or diced apples for a fruity twist. I tried this with fresh blueberries in summer and it was a hit with my kids!
- Different Cooking Methods: Bake as muffins—divide batter among 12 muffin cups and bake for 18-22 minutes. Great for grab-and-go breakfasts.
One of my favorite personal variations was adding a swirl of peanut butter before baking—total game-changer! Don’t be afraid to play around and make this loaf your own.
Serving & Storage Suggestions
This maple glazed banana bread is best served at room temperature, with the glaze fully set and a cup of coffee or tea alongside. For a brunch spread, slice thick and arrange on a pretty platter—watch it disappear!
It pairs beautifully with yogurt and berries, or as a sweet side to a savory breakfast casserole. For dessert, a scoop of vanilla ice cream on a warm slice is pure heaven.
Storage: Store leftover bread tightly wrapped at room temperature for up to 3 days. For longer storage, refrigerate for up to a week (let come to room temp before serving for best texture).
Freezing: Slice the cooled loaf, wrap each piece in plastic wrap, and freeze in a zip-top bag. Thaw slices at room temperature or microwave for 20-30 seconds for a quick treat.
The glaze might get a little sticky with storage, but honestly, that just makes it better in my book. If you like a firmer glaze, let the bread sit uncovered for 30 minutes before wrapping up.
Nutritional Information & Benefits
Each slice of maple glazed banana bread (based on 12 slices) has approximately:
- Calories: 230
- Carbohydrates: 36g
- Protein: 3g
- Fat: 8g
- Fiber: 1.5g
- Sugar: 19g
Bananas provide potassium, vitamin B6, and fiber for digestive health. The maple syrup sweetens naturally with minerals like manganese and zinc. Using nuts adds healthy fats and a little protein. This recipe is easy to adapt for gluten-free or dairy-free diets. Allergens to note: contains eggs, wheat, and (if using) nuts and dairy.
I love that this bread satisfies my sweet tooth but still offers some real food goodness—especially when made with wholesome add-ins like nuts or swapped-in whole wheat flour.
Conclusion
There’s something magical about a loaf of maple glazed banana bread—warm, moist, and draped in that shiny, sweet glaze. It’s the kind of recipe you’ll reach for again and again, whether you’re baking for a crowd or just treating yourself to a quiet moment.
Don’t be afraid to customize it—add your favorite nuts, try it with chocolate chips, or play with the glaze. I love this bread for its reliability and comfort, and I know you will too. There’s nothing like the smell of banana bread and maple syrup to make any day a little brighter.
If you try this recipe, I’d love to hear how it turned out! Drop your tweaks and tips in the comments, or share a photo on social media so we can all drool together. Trust me, once you taste that first slice, you’ll be hooked. Happy baking, friends!
Frequently Asked Questions
How ripe should my bananas be for banana bread?
The riper, the better! Bananas with plenty of brown spots (even nearly black) work best. They’re sweeter and mash easily for a moist loaf.
Can I make this maple glazed banana bread gluten-free?
Yes! Use a 1-to-1 gluten-free flour blend in place of regular flour. I’ve had great luck with Bob’s Red Mill.
What if I don’t have maple syrup for the glaze?
You can substitute honey or agave nectar, but the flavor will be different. The maple syrup gives this loaf its signature taste.
Can I add chocolate chips or nuts to the batter?
Absolutely! Fold in up to 1/2 cup (85g) of chocolate chips or chopped nuts before baking for extra flavor and crunch.
How do I keep my banana bread moist?
Don’t overbake, and use very ripe bananas. The maple glaze also helps lock in moisture—just be sure to let the bread cool before adding it.
Pin This Recipe!
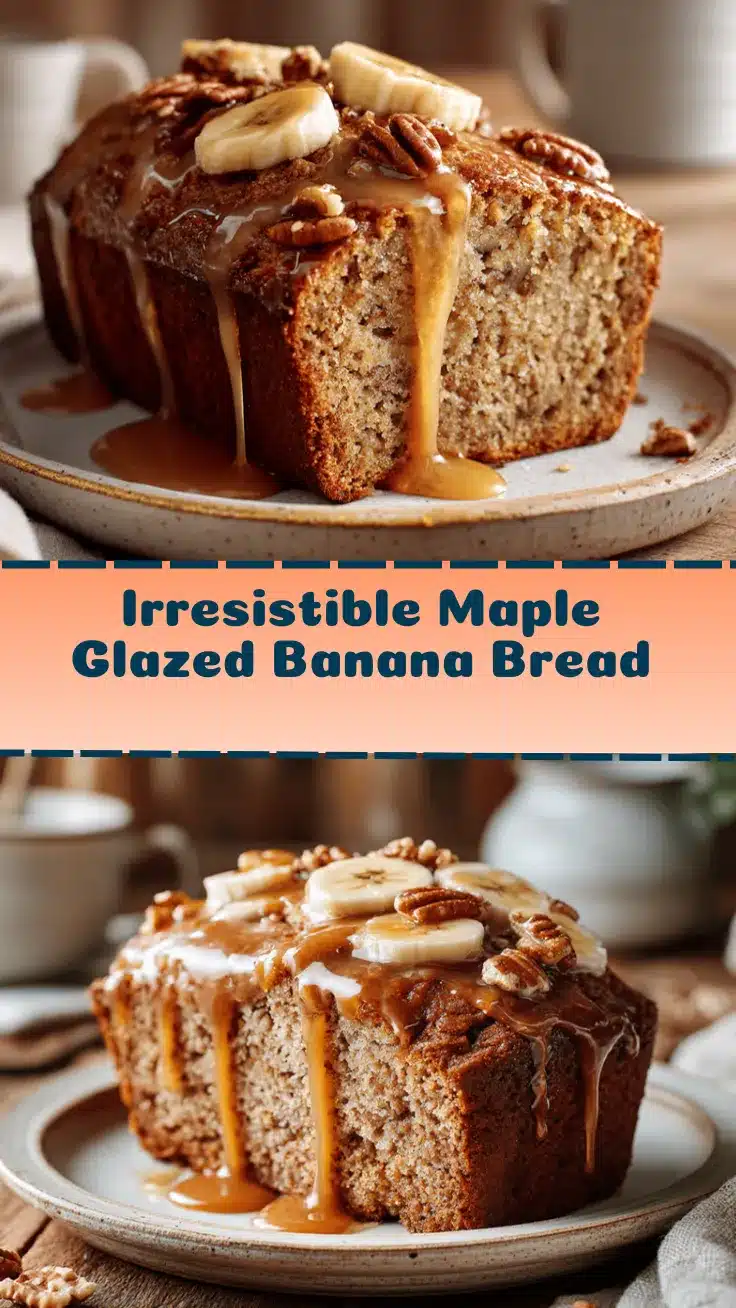
Maple Glazed Banana Bread
This easy, moist banana bread is elevated with a luscious maple syrup glaze that soaks into every slice, making it irresistibly tender and flavorful. Perfect for breakfast, brunch, or a comforting snack, this loaf is a crowd-pleaser with simple pantry ingredients and a cozy maple twist.
- Prep Time: 15 minutes
- Cook Time: 55 minutes
- Total Time: 1 hour 10 minutes
- Yield: 1 loaf (about 12 slices) 1x
- Category: Breakfast, Brunch, Snack, Dessert
- Cuisine: American
Ingredients
- 3 large very ripe bananas, mashed (about 1 1/4 cups / 300g)
- 1/2 cup (115g) unsalted butter, melted and cooled (or coconut oil for dairy-free)
- 3/4 cup (150g) light brown sugar
- 2 large eggs, room temperature
- 1/4 cup (60ml) pure maple syrup
- 1 teaspoon vanilla extract
- 1 3/4 cups (220g) all-purpose flour (or 1-to-1 gluten-free flour)
- 1 teaspoon baking soda
- 1/2 teaspoon salt
- 1/2 teaspoon ground cinnamon (optional)
- 1/2 cup (60g) chopped walnuts or pecans (optional)
- 1/2 cup (85g) chocolate chips (optional)
- For the Maple Glaze:
- 1/3 cup (80ml) pure maple syrup
- 1 tablespoon (14g) unsalted butter (or coconut oil for dairy-free)
- 1/2 cup (60g) powdered sugar, sifted
- Pinch of salt
- Optional: 1/4 teaspoon maple extract
Instructions
- Grease a 9×5-inch loaf pan with butter or nonstick spray. Preheat oven to 350°F (175°C). Line with parchment paper for easy removal if desired.
- In a large bowl, mash the bananas until smooth.
- Add melted butter, brown sugar, eggs, maple syrup, and vanilla extract to the bananas. Whisk until well blended and glossy.
- In a separate bowl, whisk together flour, baking soda, salt, and cinnamon (if using).
- Add dry ingredients to wet mixture. Gently fold together with a spatula until just combined. Fold in nuts or chocolate chips if using.
- Pour batter into prepared loaf pan and smooth the top. Sprinkle extra nuts or chips on top if desired.
- Bake for 50-60 minutes, or until a toothpick inserted in the center comes out clean or with a few moist crumbs. Tent with foil if browning too quickly.
- Let bread cool in the pan for 15 minutes, then transfer to a wire rack to cool completely before glazing.
- For the glaze: In a small saucepan, combine maple syrup and butter. Warm over low heat until butter melts and mixture just starts to bubble. Remove from heat and whisk in powdered sugar, pinch of salt, and maple extract if using.
- Drizzle glaze over cooled bread. Let set for about 10 minutes before slicing.
Notes
Use overripe bananas for best flavor and moisture. Do not overmix the batter to keep the loaf tender. Cool bread completely before glazing for best results. For gluten-free, use a 1-to-1 flour blend. For dairy-free, use coconut oil instead of butter. Add-ins like nuts, chocolate chips, or fruit are optional and customizable. Store tightly wrapped at room temperature for up to 3 days, or freeze slices for longer storage.
Nutrition
- Serving Size: 1 slice (1/12 of loaf)
- Calories: 230
- Sugar: 19
- Sodium: 180
- Fat: 8
- Saturated Fat: 4
- Carbohydrates: 36
- Fiber: 1.5
- Protein: 3
Keywords: banana bread, maple glaze, easy banana bread, moist banana bread, breakfast loaf, brunch, comfort food, quick bread, maple syrup, homemade


