
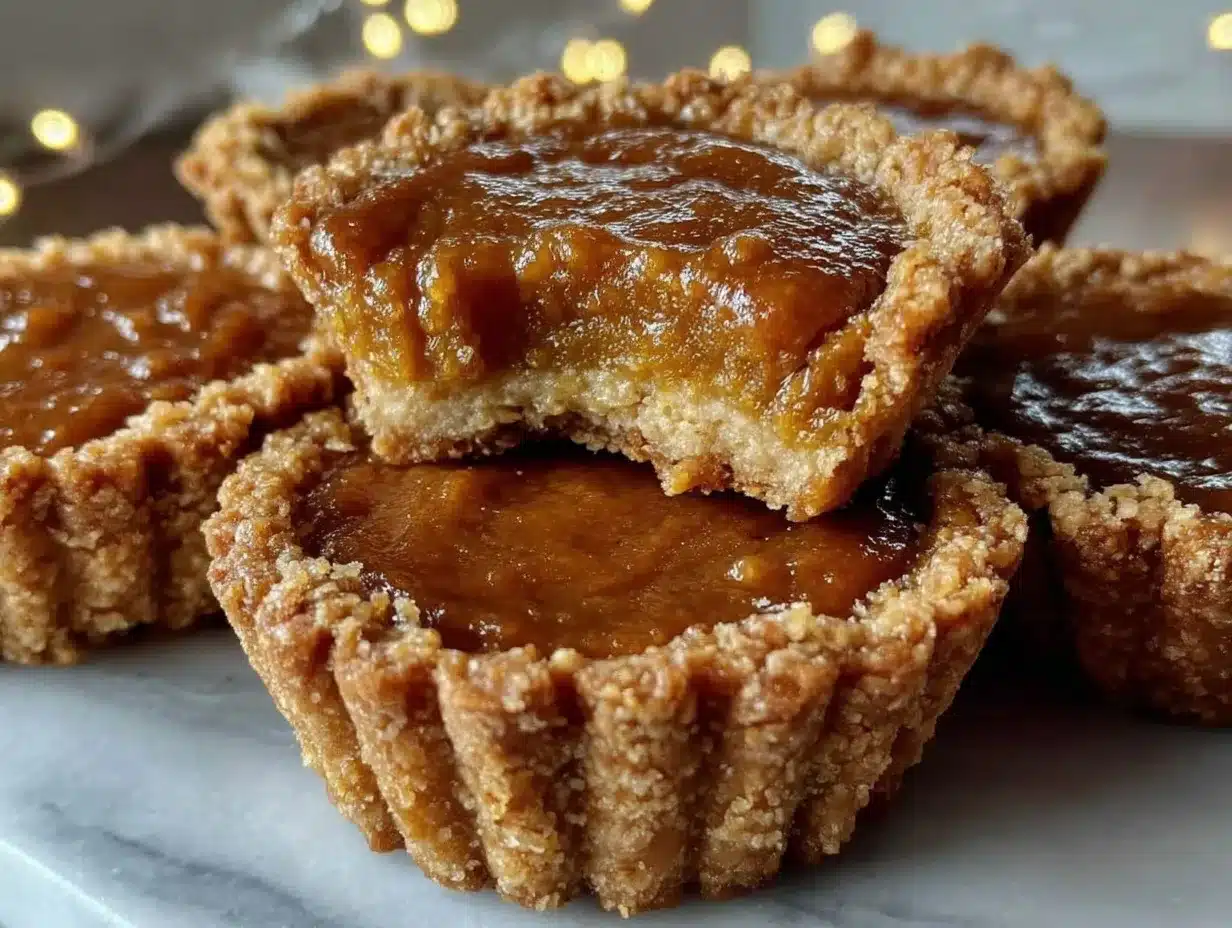
Let me tell you, the scent of warm pumpkin, cinnamon, and nutmeg wafting through my kitchen on a crisp autumn afternoon is nothing short of magical. The first time I pulled a tray of these mini pumpkin pies from the oven, I had to pause—just to take in the golden crusts and the gentle wobble of perfectly set filling. It’s the kind of moment where you pause, take a deep breath, and just smile because you know you’re onto something truly special.
Honestly, when I was knee-high to a grasshopper, pumpkin pies meant big, family gatherings and those giant slices that you could barely finish. But years ago, I stumbled upon the idea of making them mini—purely because I wanted something cute and easy for a fall bake sale. Turns out, these little beauties are dangerously easy, and they offer pure, nostalgic comfort with every bite. I wish I’d found this hack ages ago (the mini size means less mess and more smiles, you know?).
My family couldn’t stop sneaking them off the cooling rack—my youngest tried hiding hers behind a napkin, as if I wouldn’t notice! Whether it’s for a cozy holiday brunch, a school event, or just to brighten up your Pinterest cookie board, these mini pumpkin pies have become a staple for us. They’re the perfect sweet treat for little hands (and let’s face it, adults love them too!). In the name of “research,” I’ve tested these pies more times than I can count. Each batch feels like a warm hug, and you’re going to want to bookmark this one for all your fall gatherings.
Why You’ll Love This Recipe
If you’re anything like me, you want recipes that work every time—no guesswork, no complicated steps, just pure pumpkin pie joy. I’ve tested these mini pumpkin pies so many times, tweaked the ratios, and even had my chef friend weigh in to make sure the crust stays crisp and the filling is creamy. Here’s why you’ll love making (and eating) them:
- Quick & Easy: Comes together in under 45 minutes, so you can whip up a batch for last-minute guests or spontaneous cravings.
- Simple Ingredients: No fancy grocery trips required. I bet you’ve got most things already—like canned pumpkin, eggs, and basic spices.
- Perfect for Fall Gatherings: These mini pumpkin pies are a hit at potlucks, Friendsgiving, and even Thanksgiving dessert tables.
- Crowd-Pleaser: Kids love them for their size; adults love them for the flavor. My aunt still asks for “just two more” every year.
- Unbelievably Delicious: The crust is flaky, the filling isn’t too sweet, and the spice blend is spot on. It’s the pumpkin pie you remember, but cuter and easier to serve.
What makes this recipe stand out is the mini form—no soggy bottoms, no cracking, just perfectly portioned desserts. I use a blend of brown sugar and maple syrup for richer flavor, and a touch of cream for the silkiest filling. You can make them ahead, freeze them, and even jazz them up with whipped cream or candied pecans.
This isn’t just good—it’s the kind of recipe that makes you close your eyes after the first bite. It’s cozy, comforting, and festive, but so much easier than a whole pie. Whether you want to impress your friends on Instagram or just treat yourself, these mini pumpkin pies are the answer. Every year, someone asks for the recipe, and honestly, it’s fun to watch these little pies steal the show!
What Ingredients You Will Need
This recipe uses simple, wholesome ingredients to deliver bold flavor and satisfying texture without the fuss. Most are pantry staples, and you can easily swap or adapt for dietary needs or what you’ve got on hand.
- For the crust:
- 1 1/4 cups (150g) all-purpose flour (or use gluten-free blend for GF option)
- 1/2 cup (115g) unsalted butter, cold and cubed (adds rich flavor)
- 1/4 teaspoon salt
- 2-4 tablespoons ice water (just enough to bind the dough)
- Optional: 1 tablespoon granulated sugar (for slightly sweet crust)
- Store-bought pie dough can be used for speed—Trader Joe’s and Pillsbury work well
- For the filling:
- 1 cup (240g) canned pumpkin puree (not pumpkin pie filling)
- 1/3 cup (70g) packed light brown sugar (for depth of flavor)
- 2 tablespoons pure maple syrup (or honey)
- 1 large egg, room temperature
- 1/4 cup (60ml) heavy cream (or half-and-half)
- 1/2 teaspoon ground cinnamon
- 1/4 teaspoon ground ginger
- 1/4 teaspoon ground nutmeg
- 1/8 teaspoon ground cloves (optional, adds warmth)
- 1/4 teaspoon salt
- 1/2 teaspoon pure vanilla extract
- For topping (optional):
- Whipped cream (homemade or store-bought)
- Candied pecans or walnuts
- Sprinkle of cinnamon or pumpkin pie spice
- Ingredient Notes:
- If you want dairy-free, swap heavy cream for coconut cream (Native Forest is my go-to).
- For egg-free: Use 1 tablespoon ground flaxseed + 2.5 tablespoons water as an egg substitute (works in a pinch).
- Fresh pumpkin puree can be used, but make sure to strain it well for smooth texture.
- Don’t have maple syrup? Just add a little more brown sugar.
I recommend Libby’s for pumpkin puree (always reliable), and use real vanilla extract for the best flavor. In summer, I sometimes swap out pumpkin for sweet potato puree—it’s equally delicious and gives a nice twist!
Equipment Needed
- Muffin tin (12-cup standard) – This is your hero for mini pies. Nonstick makes cleanup easier.
- Rolling pin – If you don’t have one, a clean wine bottle works in a pinch.
- Round cookie cutter (3-3.5 inches/8-9cm) – Or use a drinking glass for cutting dough rounds.
- Mixing bowls – At least two, for separating crust and filling steps.
- Pastry brush – Optional, but nice for brushing crust with milk or egg wash.
- Whisk – For a smooth, lump-free filling.
- Measuring cups and spoons – Accuracy counts for baking!
- Rubber spatula – Makes scraping every bit of filling easy.
- Cooling rack – Prevents soggy bottoms post-bake.
I’ve tried silicone muffin pans—they’re easy to unmold, but I still prefer metal for the crisp crust. Budget-wise, you can find most of these at thrift stores or big-box stores for cheap. Keep your muffin tin clean with a quick soak in hot, soapy water after baking; stuck-on bits come off easier that way.
If you don’t own a pastry brush, use a paper towel or the back of a spoon. For the rolling pin, honestly, anything cylindrical and clean works (been there, done that!).
Preparation Method
- Prepare the crust: In a medium bowl, combine 1 1/4 cups (150g) flour and 1/4 teaspoon salt. Add 1/2 cup (115g) cold, cubed butter. Use a pastry cutter or your fingers to rub the butter into the flour until it looks like coarse crumbs. Drizzle in 2 tablespoons ice water and mix; if dough is dry, add more water, 1 tablespoon at a time, until it just comes together. Shape into a disk, wrap in plastic, and chill for 20 minutes.
- Preheat oven: Set oven to 375°F (190°C). Grease a 12-cup muffin tin lightly.
- Roll out the dough: On a floured surface, roll dough to about 1/8-inch (3mm) thick. Cut out circles using a 3-3.5 inch (8-9cm) cutter or glass. Gently press each round into the muffin wells, smoothing out air bubbles. Patch any tears with extra dough (don’t sweat it if it looks rustic!).
- Make the filling: In a bowl, whisk together 1 cup (240g) pumpkin puree, 1/3 cup (70g) brown sugar, 2 tablespoons maple syrup, 1 large egg, 1/4 cup (60ml) cream, 1/2 teaspoon cinnamon, 1/4 teaspoon each ginger and nutmeg, 1/8 teaspoon cloves, 1/4 teaspoon salt, and 1/2 teaspoon vanilla until smooth and well-blended.
- Fill the crusts: Spoon about 1.5 tablespoons (20g) filling into each crust. Don’t overfill—leave a little room for expansion. If you spill, wipe edges with a damp paper towel.
- Bake: Bake for 18-22 minutes, until filling is set (it should jiggle slightly in the center but not be wet). Crusts should be golden. If edges brown too fast, tent loosely with foil.
- Cool: Let mini pumpkin pies cool in the tin for 10 minutes, then carefully loosen with a butter knife and transfer to a cooling rack. Don’t rush this step—warm pies are fragile!
- Decorate: Top with whipped cream, nuts, or a sprinkle of cinnamon once fully cooled. (Trust me, warm whipped cream is a mess.)
Troubleshooting: If your crust shrinks, try chilling the dough longer. If filling cracks, it’s usually from overbaking—watch closely at the end. For extra efficiency, prep dough and filling a day in advance and just assemble and bake when ready.
Sensory cues: Crust should feel crisp to touch, and filling should smell warmly spiced. If it smells eggy, it’s overcooked. My tip—rotate the pan halfway through baking for even color!
Cooking Tips & Techniques
Here’s where a few pro tricks really make a difference. Mini pumpkin pies are easy, but attention to detail means you get a Pinterest-worthy batch every time.
- Keep everything cold: Cold butter equals flaky crust. Chill your dough, and if your kitchen’s warm, pop the muffin tin in the fridge for a few minutes before filling.
- Don’t overmix the filling: Over-whisking incorporates air, which can cause cracks. Just mix until smooth.
- Portion control: Use a small ice cream scoop or tablespoon for filling—makes it way less messy.
- Watch your bake time: Mini pies cook fast. Start checking at 18 minutes. If a toothpick comes out mostly clean, they’re done.
- Let them cool: Removing while hot can cause breakage. Patience pays off here!
- My biggest fail: Once, I forgot to grease the tin. Every crust stuck like glue! Now, I always give a quick spritz of oil.
- Multitasking: While dough chills, prep filling. You’ll save time and dirty fewer bowls.
- Consistency: Use the same amount of filling for each pie to keep baking even. If you’re making a double batch, rotate pans between oven racks halfway through.
Most common mistake? Overfilling. It causes overflow and soggy bottoms. Less is more! For a glossy finish, brush edges with milk before baking. And if you want even more pumpkin flavor, add a pinch more spice. Your kitchen will smell amazing, promise!
Variations & Adaptations
Mini pumpkin pies are super flexible—here are my favorite ways to change things up:
- Gluten-Free: Swap all-purpose flour for a 1:1 gluten-free blend (Bob’s Red Mill works well). You may need a touch more water to bind the dough.
- Dairy-Free: Use coconut oil in the crust and coconut cream in the filling. The flavor is slightly different, but still delicious (dreamy, honestly).
- Low-Sugar: Reduce brown sugar to 1/4 cup and skip maple syrup. Add 1 tablespoon stevia or monk fruit sweetener if desired.
- Flavor twist: Add 1 tablespoon bourbon to the filling for an adult version—so good for grown-up parties!
- Seasonal swap: Substitute pumpkin with mashed sweet potato or butternut squash for a fun fall twist.
- Nutty crust: Try adding 2 tablespoons finely chopped pecans to the crust for added crunch.
- Different cooking method: Bake in mini tart pans for a fancier look, or use silicone muffin cups for easy release.
Allergen swaps: For egg-free, use flaxseed as mentioned earlier. If nut allergies are a concern, skip nut toppings and use seeds or a dusting of cocoa. Personally, I love making a batch with ginger snap cookie crumbs as crust—spicy, sweet, and totally addicting!
Serving & Storage Suggestions
Serve mini pumpkin pies at room temperature—they taste best this way. If you’re feeling fancy, arrange them on a rustic wooden board or a pretty platter with sprigs of rosemary for that fall vibe. Add a dollop of whipped cream and a dusting of cinnamon right before serving.
Pair with hot apple cider, chai tea, or a scoop of vanilla ice cream for an extra treat. These are lovely as part of a dessert buffet or gift boxes for friends.
Storage is easy: Refrigerate leftover pies in an airtight container for up to 4 days. For longer storage, freeze (wrapped snugly) for up to 2 months. Defrost overnight in the fridge, then let them come to room temp before serving.
Reheating: Warm pies briefly in a 300°F (150°C) oven for 5-7 minutes. Microwave in short bursts, but crust won’t be as crisp. Over time, flavors meld and deepen—day two pies are sometimes even tastier!
Nutritional Information & Benefits
Each mini pumpkin pie (without toppings) has about 140 calories, 7g fat, 18g carbs, and 2g protein. Pumpkin is packed with vitamin A, potassium, and fiber, making these a slightly healthier treat than most desserts.
Using real pumpkin puree offers antioxidants and beta-carotene. For gluten-free or dairy-free swaps, the nutrition profile changes slightly, but you still get those cozy fall flavors. If you’re watching sugar, the low-sugar version is a great option.
Potential allergens: wheat, dairy, and eggs—so adapt as needed. Personally, I love knowing these pies aren’t just delicious but also sneak in a veggie boost!
Conclusion
If you want a dessert that’s festive, fun, and completely irresistible, these mini pumpkin pies are the answer. They’re easy enough for beginner bakers but impressive enough for holiday tables. Every bite delivers that perfect mix of flaky crust and creamy, spiced filling—honestly, it’s hard to stop at just one.
Feel free to tweak the spices, swap in your favorite crust, or dress them up for your own family traditions. That’s the beauty of this recipe—it’s all about making it yours. I keep coming back to this because it never disappoints, whether for a party or a cozy night in.
Give these a try, leave a comment with your tweaks, and share your fall dessert photos! You might just start a new tradition. Here’s to warm kitchens, happy taste buds, and mini pumpkin pies that make every fall day a little brighter.
FAQs
Can I use store-bought pie crust for mini pumpkin pies?
Absolutely! Store-bought pie dough works great. Just roll it out and cut as directed. It’s a big time-saver if you’re in a rush.
How do I keep the crust from getting soggy?
Make sure to bake at the right temperature and cool pies on a rack. If you want, brush a thin layer of egg white on the crust before adding filling—it helps seal and keep the crust crisp.
Can I freeze mini pumpkin pies?
Yes, freeze them after baking and cooling. Wrap tightly and store up to 2 months. Thaw overnight in the fridge before serving.
What’s the best way to remove pies from the muffin tin?
Let pies cool for 10 minutes, then gently loosen edges with a butter knife. Lift carefully from the tin. Silicone pans make this even easier!
Can I make mini pumpkin pies ahead of time?
Definitely. Bake a day ahead and store in the fridge. They taste just as good (sometimes better) the next day—flavors meld beautifully!
Pin This Recipe!
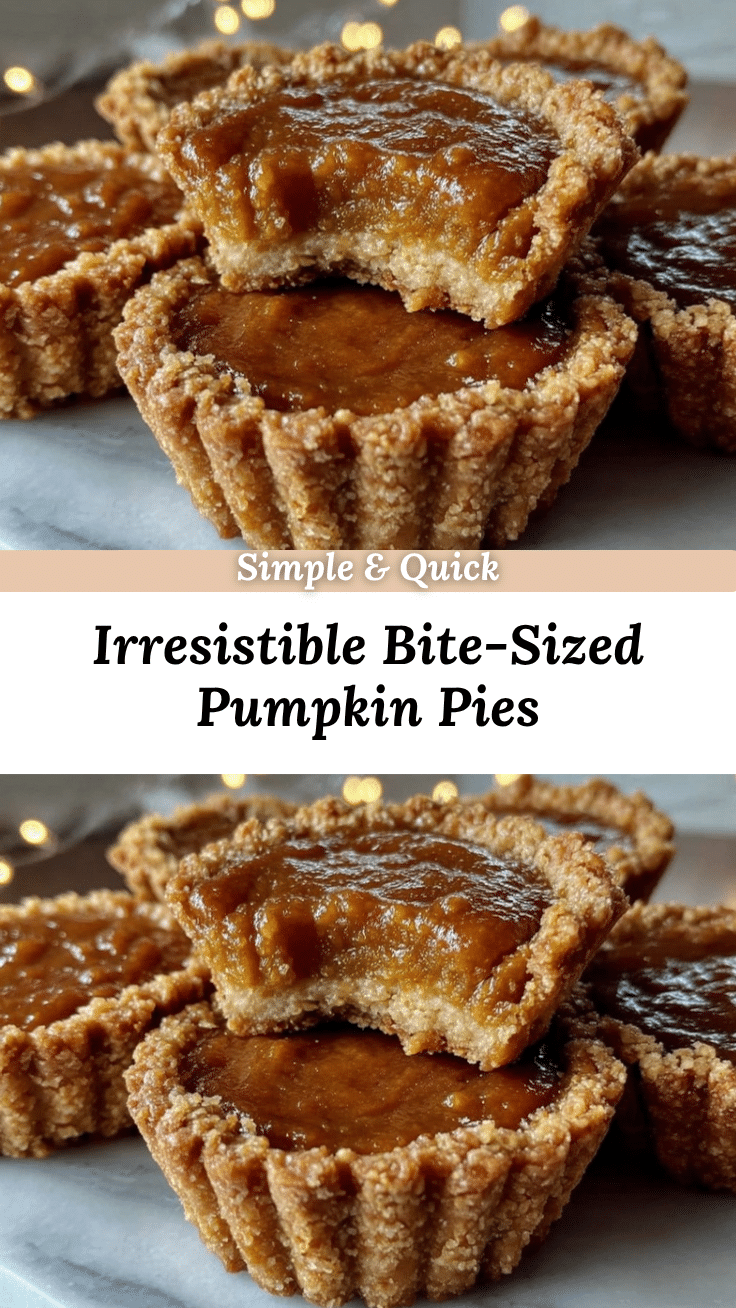
Mini Pumpkin Pies: Easy Homemade Recipe for Perfect Fall Desserts
These mini pumpkin pies feature a flaky homemade crust and creamy, spiced pumpkin filling, making them the perfect bite-sized treat for fall gatherings. Quick to prepare and easy to serve, they’re a festive dessert loved by kids and adults alike.
- Prep Time: 20 minutes
- Cook Time: 22 minutes
- Total Time: 42 minutes
- Yield: 12 mini pies 1x
- Category: Dessert
- Cuisine: American
Ingredients
- 1 1/4 cups all-purpose flour (or gluten-free blend for GF option)
- 1/2 cup unsalted butter, cold and cubed
- 1/4 teaspoon salt
- 2–4 tablespoons ice water
- 1 tablespoon granulated sugar (optional)
- Store-bought pie dough (optional, for speed)
- 1 cup canned pumpkin puree (not pumpkin pie filling)
- 1/3 cup packed light brown sugar
- 2 tablespoons pure maple syrup (or honey)
- 1 large egg, room temperature
- 1/4 cup heavy cream (or half-and-half)
- 1/2 teaspoon ground cinnamon
- 1/4 teaspoon ground ginger
- 1/4 teaspoon ground nutmeg
- 1/8 teaspoon ground cloves (optional)
- 1/4 teaspoon salt
- 1/2 teaspoon pure vanilla extract
- Whipped cream (optional, for topping)
- Candied pecans or walnuts (optional, for topping)
- Sprinkle of cinnamon or pumpkin pie spice (optional, for topping)
Instructions
- Prepare the crust: In a medium bowl, combine flour and salt. Add cold, cubed butter and use a pastry cutter or fingers to rub the butter into the flour until it resembles coarse crumbs. Drizzle in ice water and mix; add more water, 1 tablespoon at a time, until dough just comes together. Shape into a disk, wrap in plastic, and chill for 20 minutes.
- Preheat oven to 375°F (190°C). Lightly grease a 12-cup muffin tin.
- Roll out the dough on a floured surface to about 1/8-inch thick. Cut out circles using a 3-3.5 inch cutter or glass. Gently press each round into the muffin wells, smoothing out air bubbles. Patch any tears with extra dough.
- Make the filling: In a bowl, whisk together pumpkin puree, brown sugar, maple syrup, egg, cream, cinnamon, ginger, nutmeg, cloves, salt, and vanilla until smooth and well-blended.
- Fill the crusts: Spoon about 1.5 tablespoons filling into each crust. Do not overfill; leave a little room for expansion.
- Bake for 18-22 minutes, until filling is set (it should jiggle slightly in the center but not be wet) and crusts are golden. If edges brown too fast, tent loosely with foil.
- Cool pies in the tin for 10 minutes, then carefully loosen with a butter knife and transfer to a cooling rack.
- Decorate with whipped cream, nuts, or a sprinkle of cinnamon once fully cooled.
Notes
For gluten-free, use a 1:1 GF flour blend. For dairy-free, swap butter for coconut oil and cream for coconut cream. Egg-free option: 1 tbsp ground flaxseed + 2.5 tbsp water. Store-bought crust works well for speed. Chill dough for best results. Do not overfill crusts to avoid soggy bottoms. Let pies cool before removing from tin. Freeze baked pies for up to 2 months.
Nutrition
- Serving Size: 1 mini pie
- Calories: 140
- Sugar: 8
- Sodium: 90
- Fat: 7
- Saturated Fat: 4
- Carbohydrates: 18
- Fiber: 2
- Protein: 2
Keywords: mini pumpkin pies, fall dessert, Thanksgiving, bite-sized, easy pumpkin pie, holiday baking, autumn treats, kid-friendly, make ahead, freezer friendly


