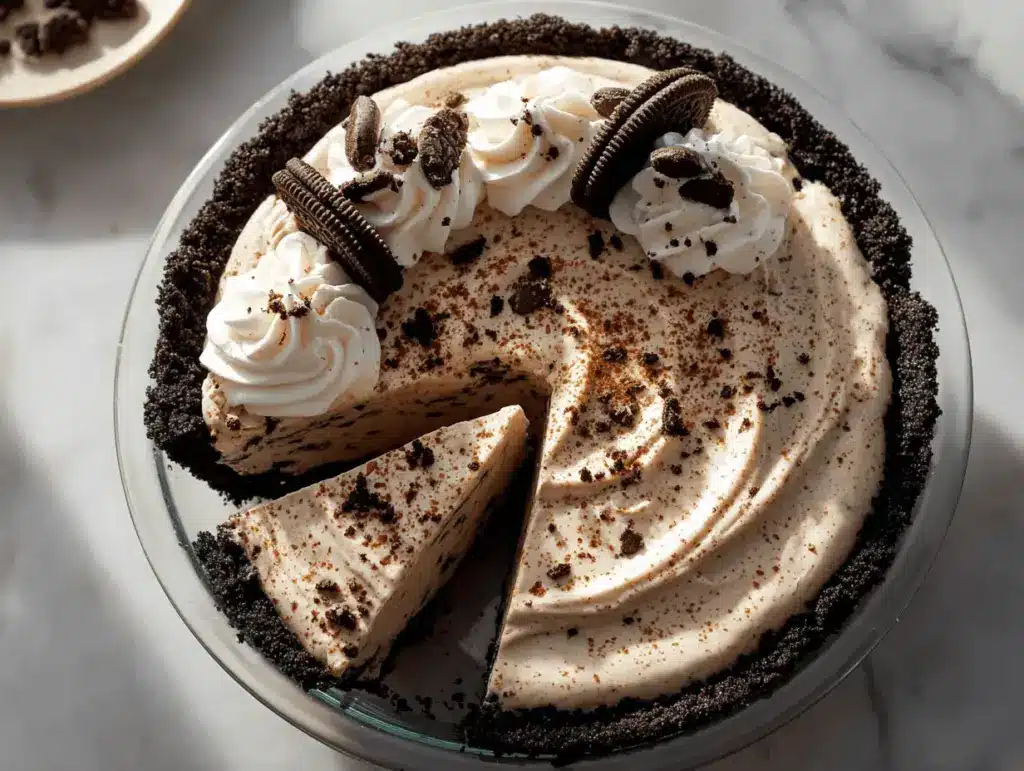
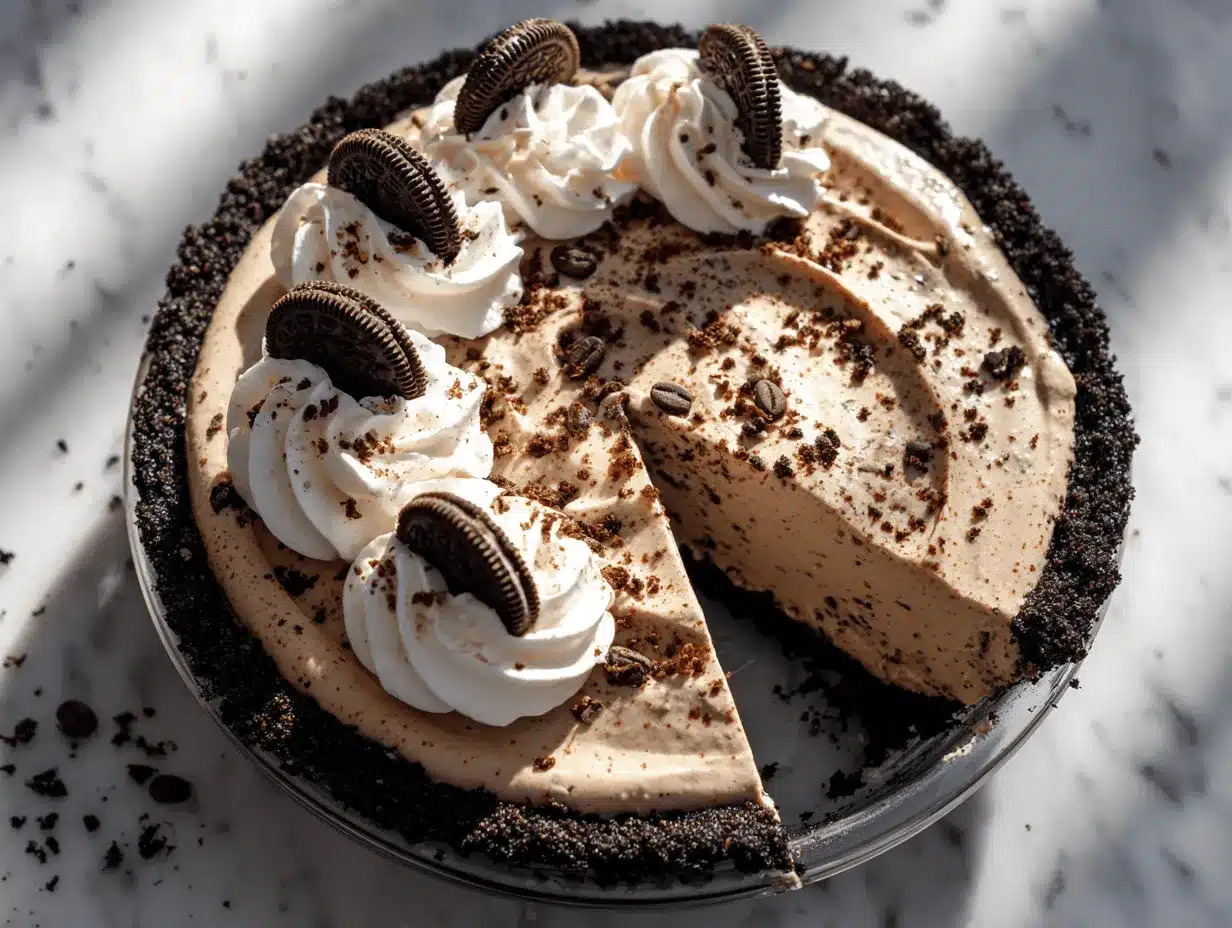
One bite of this No-Bake Mocha Oreo Ice Cream Pie and you’ll probably be hooked for life. Imagine the crunch of a chocolatey Oreo crust, the silky-smooth mocha ice cream filling (with just the right hint of coffee!), and a cloud of whipped cream on top. Honestly, it’s the kind of dessert you sneak out of bed to eat straight from the freezer.
My first encounter with a mocha Oreo ice cream pie was at a summer potluck years ago. I remember thinking, “How can something this decadent be so easy?” Well, after a couple of tweaks (and more than a few taste tests), I landed on this version—and let’s just say it’s become my go-to for every warm-weather party.
This no-bake mocha Oreo ice cream pie is pure magic for anyone who loves coffee and chocolate. It’s ridiculously simple, requires zero oven time, and always disappears in record time when I bring it to gatherings. If you’re craving a frozen dessert that’s as impressive as it is effortless, you’ve found your new favorite. Trust me, after testing this recipe at least a dozen times, I’m sure you’ll love it as much as my family does.
Whether you’re a busy parent, a coffee fanatic, or just someone with a sweet tooth, this frozen pie brings comfort and a little thrill with every spoonful. Plus, it’s totally make-ahead friendly—perfect for summer birthdays, last-minute get-togethers, or those nights when you just need a treat (hey, we’ve all been there). Let’s make it together!
Why You’ll Love This No-Bake Mocha Oreo Ice Cream Pie
I can’t tell you how many times this No-Bake Mocha Oreo Ice Cream Pie has saved me on a hot day or during a dessert emergency—yes, that’s a real thing in my house! Here’s what makes this recipe stand out from all the rest:
- Quick & Easy: You can have this pie chilling in the freezer in under 20 minutes. Perfect for when the oven sounds like a nightmare or you’re short on time.
- Simple Ingredients: No specialty stores or hard-to-find items. You probably have most of what you need on hand right now—Oreos, ice cream, instant coffee, and a few pantry staples.
- Perfect for Any Occasion: Whether it’s a summer BBQ, holiday party, or just a random Tuesday night, this pie never feels out of place. It’s equally at home on a fancy dessert table or beside a pile of paper plates by the pool.
- Crowd-Pleaser: Kids and adults both go wild for the combo of crunchy cookies and creamy mocha filling. I’ve even had self-proclaimed “non-dessert” people ask for seconds.
- Unbelievably Delicious: The coffee flavor is there, but it’s smooth and mellow—think grown-up cookies and cream. It’s rich without being heavy, and every bite feels like a little celebration.
What really sets this recipe apart is how the instant coffee bumps up the chocolate flavor, making the Oreo crust taste even more decadent. Blending the ice cream with a splash of strong coffee (or espresso) adds that sophisticated mocha note without overpowering the sweetness. And let’s face it, being able to make an impressive frozen dessert without turning on the oven is a huge win—especially when it’s hot out or you just want to keep things simple.
Honestly, this pie is the kind of treat that makes you close your eyes and say “wow” after the first forkful. It’s comfort food in frozen form, but with that little twist that makes it feel special. I’ve seen it turn an ordinary weeknight into a mini celebration, and I know it’ll do the same for you.
What Ingredients You Will Need
This recipe uses just a handful of easy-to-find ingredients, but each one plays a key role in building the layers of flavor and texture. Here’s what you’ll need for your irresistible no-bake mocha Oreo ice cream pie:
- Oreo Cookies (about 24, regular or double-stuffed): Crushed for the crust. I like classic Oreos, but chocolate crème or any chocolate sandwich cookie works in a pinch. No need to remove the filling—just crush them whole.
- Unsalted Butter (6 tablespoons / 85g, melted): Binds the cookie crumbs together for that perfect, sliceable crust. If you only have salted butter, it’s fine—just skip any added pinch of salt.
- Chocolate Ice Cream (1 quart / 950ml, softened): The base of your filling. I prefer a rich, premium chocolate ice cream for extra creaminess (think Häagen-Dazs or Ben & Jerry’s), but any favorite brand works. Let it soften at room temp for easy mixing.
- Instant Coffee or Espresso Powder (2 tablespoons / 12g): Dissolved in a splash of hot water. This is the real secret to the mocha flavor. If you love a stronger coffee kick, use espresso powder.
- Heavy Whipping Cream (1 cup / 240ml, cold): For the whipped topping. Freshly whipped cream tastes so much better than store-bought, but if you’re in a rush, Cool Whip is a good shortcut.
- Powdered Sugar (2 tablespoons / 16g): Sweetens the whipped cream just enough.
- Vanilla Extract (1 teaspoon): Adds a subtle warmth to the whipped cream. You could use a splash of coffee liqueur for adults, if you’re feeling fancy.
- Chocolate Shavings or Mini Chocolate Chips (optional, for garnish): Totally optional, but they look gorgeous sprinkled on top and give a little extra crunch.
Ingredient Tips: If you’re gluten-free, use gluten-free chocolate sandwich cookies. For a dairy-free version, swap in your favorite plant-based chocolate ice cream and non-dairy whipped topping. If you can’t find instant coffee, brew a strong shot of regular coffee and reduce the amount of melted ice cream you add so the filling isn’t too runny.
Honestly, feel free to get creative here—sometimes I toss in a handful of chopped chocolate-covered espresso beans for a more intense coffee vibe. The best part about this pie is how forgiving it is.
Equipment Needed
You don’t need a fancy kitchen setup for this no-bake mocha Oreo ice cream pie. Here’s what I reach for every time:
- 9-inch (23cm) Pie Pan: Glass or metal both work. If you’re making this for a party, a disposable aluminum pie tin is perfectly fine.
- Food Processor or Large Zip-Top Bag & Rolling Pin: A food processor makes quick work of crushing Oreos, but if you’re like me and sometimes don’t want to clean extra dishes, just toss the cookies in a bag and smash with a rolling pin.
- Mixing Bowls: You’ll want at least two—one for the crust, one for the whipped cream.
- Electric Mixer or Whisk: For whipping the cream. A hand mixer is my go-to, but a sturdy whisk and strong arms do the trick too (I’ve made it both ways—just takes a little more elbow grease).
- Rubber Spatula: For spreading and smoothing the filling.
- Measuring Cups & Spoons: To keep everything precise. It’s easy to overdo the coffee, so measure that one carefully.
- Offset Spatula (optional): Makes smoothing the top of your pie extra easy, but a regular spatula works fine.
Tip: If using a springform pan, you’ll get nice clean slices and an extra “wow” factor when serving. I’ve tried both ways, and honestly, a regular pie dish is less hassle for freezing and travel. For budget-friendly options, dollar store pie pans work just as well as pricier ones—and clean-up is a breeze!
Preparation Method
-
Make the Oreo Crust: Place 24 Oreo cookies in a food processor and pulse until you have fine crumbs (about 1 minute). If you’re using a zip-top bag, seal it tightly and crush with a rolling pin until the crumbs are uniform.
Tip: Don’t worry if there are a few bigger pieces—those add nice texture! -
Add Butter: Pour 6 tablespoons (85g) melted butter over the cookie crumbs. Pulse or mix until the crumbs are evenly moistened. You should be able to pinch the mixture and have it hold together.
Warning: Too much butter will make the crust greasy, too little and it won’t set. If it seems dry, add an extra tablespoon of butter. -
Press Into Pie Pan: Transfer the crumb mixture to your 9-inch (23cm) pie pan. Use a flat-bottomed measuring cup or your fingers to press the crust firmly across the bottom and up the sides of the pan.
Note: Try to get an even layer, but don’t stress—rustic is beautiful here! - Freeze the Crust: Pop the crust into the freezer for at least 20 minutes while you prep the filling. This helps it set and prevents sogginess.
-
Prepare Mocha Ice Cream Filling: In a small bowl, dissolve 2 tablespoons (12g) instant coffee or espresso powder in 2 tablespoons (30ml) hot water. Stir until completely dissolved.
Sensory Cue: You’ll smell that strong, rich coffee aroma—yum! -
Soften Ice Cream: Let 1 quart (950ml) of chocolate ice cream sit at room temp for 10–15 minutes, until scoopable but not melted.
Tip: You want it soft enough to stir, but not soupy. -
Mix It Up: In a large bowl, combine softened ice cream and dissolved coffee. Stir until the coffee is evenly distributed—don’t overmix or you’ll lose the creamy texture.
Troubleshooting: If the mixture looks too runny, freeze for 10 minutes before spreading. -
Assemble the Pie: Scoop the mocha ice cream mixture into the frozen Oreo crust. Use a spatula to spread it into an even layer.
Personal Tip: Work quickly—if your kitchen’s warm, the ice cream will melt fast! -
Freeze Until Firm: Cover the pie with plastic wrap or foil and freeze for at least 4 hours (overnight is best) until completely firm.
Note: If you’re short on time, 2 hours in the coldest part of the freezer usually does the trick. -
Make Whipped Cream: In a chilled bowl, beat 1 cup (240ml) cold heavy cream with 2 tablespoons (16g) powdered sugar and 1 teaspoon vanilla extract until soft peaks form.
Warning: Don’t overwhip—stop when the cream holds a gentle peak. -
Top & Garnish: Spread or pipe the whipped cream over the frozen pie. Sprinkle with chocolate shavings or mini chips if desired.
Sensory Cue: The pie should look glossy, snowy, and irresistible! -
Slice & Serve: For best results, run a sharp knife under hot water, dry it off, and slice through the pie. Serve immediately.
Efficiency Tip: Wipe the knife between slices for clean edges every time.
Cooking Tips & Techniques
This isn’t your average ice cream pie—there are a few tricks I’ve learned from making it (and sometimes, messing it up!) over the years:
- Let the Ice Cream Soften Naturally: Don’t microwave it—let it sit out until just scoopable. Microwaving can make it icy and change the texture.
- Press the Crust Firmly: Pressing down with a flat-bottomed cup really helps the crust hold together, so you get perfect slices instead of crumbs everywhere.
- Freeze Between Steps: If your ice cream or whipped cream starts to melt, pop the pie back in the freezer for a few minutes before continuing. It makes assembly much less stressful.
- Don’t Overdo the Coffee: Trust me, I’ve tried! More coffee doesn’t always equal better flavor—it can make the ice cream taste bitter. Stick to the recipe for a balanced mocha vibe.
- Consistency Matters: If your filling looks too runny after mixing in the coffee, freeze it for a few minutes before spreading. If too firm, stir gently to loosen.
- Multitask Smartly: While the crust is freezing, prep your coffee mixture and set out the ice cream. This keeps things moving and means less standing around.
- Garnish at the Last Minute: If you’re serving at a party, keep the whipped cream and garnishes in the fridge until just before serving to keep everything looking fresh.
Don’t sweat it if things don’t look “perfect”—I’ve had pies that were a little rustic around the edges, and nobody complained! The flavors always shine through. Remember, the freezer is your friend with this recipe. If in doubt, just chill for a bit longer and you’ll be golden.
Variations & Adaptations
The best part about this no-bake mocha Oreo ice cream pie? You can totally make it your own! Here are a few twists I’ve loved (and a couple I learned from, too):
- Gluten-Free: Use gluten-free chocolate sandwich cookies for the crust and double-check your ice cream ingredients.
- Dairy-Free: Swap in dairy-free ice cream (like coconut or oat-based chocolate) and use non-dairy whipped topping. The coffee flavor still shines through!
- Mint Mocha: Add 1/2 teaspoon peppermint extract to the ice cream mixture for a cool, refreshing spin—perfect for the holidays.
- Nutty Mocha: Sprinkle chopped toasted hazelnuts or almonds between the ice cream and whipped cream layers for a little crunch and a nutty kick.
- Different Flavors: Try using coffee ice cream instead of chocolate for a double-coffee punch, or swirl in some caramel sauce for a mocha caramel vibe.
If you have nut allergies in your house, skip the nuts and stick with chocolate or sprinkle with cocoa powder instead. For a personal favorite, I sometimes stir a handful of mini chocolate chips into the mocha filling before freezing—chocolate in every bite, can’t go wrong!
You can also prep this pie in individual muffin tins for mini pies—just line with cupcake wrappers for easy removal. The possibilities are endless, so don’t be afraid to get creative with what you have on hand.
Serving & Storage Suggestions
This no-bake mocha Oreo ice cream pie is at its best served straight from the freezer, icy cold and creamy. Here’s how to get the most out of every slice:
- Serving Temperature: Let the pie sit at room temperature for 5 minutes before slicing. This makes it easy to cut but still perfectly frozen.
- Presentation: Slice with a sharp, hot knife and serve on chilled plates for that “fancy restaurant” feel. A drizzle of chocolate syrup or a dusting of cocoa powder never hurts.
- Pairings: Goes great with a hot cup of coffee, a scoop of vanilla ice cream, or fresh berries on the side. For a party, pair with iced lattes or cold brew for a total coffee-lover’s dessert bar.
- Storage: Cover the pie tightly with foil or plastic wrap and keep in the freezer. It will stay fresh for up to 2 weeks (though honestly, it never lasts that long at my house!).
- Reheating: No reheating needed—just thaw slightly before slicing. If you do freeze leftovers, wrap individual slices for quick treats anytime.
- Flavor Note: The mocha flavor deepens after a day or two in the freezer, so it’s a fantastic make-ahead dessert.
If you’re prepping for a crowd, you can easily double the recipe and make two pies—just stash one in the back of the freezer for surprise guests (or, you know, yourself).
Nutritional Information & Benefits
I’m not going to pretend this no-bake mocha Oreo ice cream pie is health food, but it’s definitely a treat with some perks! Here’s a rough estimate per slice (1/8 pie):
- Calories: 420
- Fat: 25g
- Carbohydrates: 46g
- Protein: 4g
The instant coffee in the filling gives you a gentle caffeine boost, and the cocoa in both the Oreos and ice cream provides a little antioxidant action. If you swap in dairy-free or gluten-free ingredients, it adapts easily to special diets—though always check labels for allergens like wheat, soy, and dairy.
From a wellness perspective, I believe dessert is about joy and celebration. If you’re mindful of portion size or dietary needs, this pie can still fit in—just slice a little smaller and savor every bite. Life’s too short to skip the good stuff!
Conclusion
If you’re searching for a show-stopping dessert that’s easy, impressive, and downright delicious, this No-Bake Mocha Oreo Ice Cream Pie is the answer. It’s the perfect blend of creamy, crunchy, and chocolatey, with just enough coffee to keep things interesting. Whether you stick to the classic recipe or try one of the fun variations, you’ll end up with a treat that everyone raves about.
I love this pie because it’s a reminder that the best desserts don’t have to be complicated or fussy. Each time I make it, I think of the smiles and “mmm’s” it brings to the table. I hope it brings the same joy to your kitchen!
Give this recipe a try and let me know what you think. Do you have a favorite twist? Did you serve it for a special occasion? Drop a comment below, share with your dessert-loving friends, and don’t forget to pin it for later. Happy scooping, friends!
Frequently Asked Questions (FAQs)
Can I make this no-bake mocha Oreo ice cream pie ahead of time?
Absolutely! In fact, I recommend making it a day in advance so the flavors have time to meld and the pie sets up perfectly. Just keep it tightly covered in the freezer until you’re ready to serve.
What if I don’t have instant coffee or espresso powder?
You can use a very strong shot of brewed coffee (about 2 tablespoons), but reduce any extra liquid in the ice cream filling. The coffee flavor will be a little milder but still delicious.
Can I use store-bought whipped topping instead of homemade whipped cream?
Yes! Cool Whip or any non-dairy whipped topping works great if you’re in a hurry or want to keep things super simple. Homemade does taste richer, though.
How do I make clean slices from a frozen ice cream pie?
Run a sharp knife under hot water, dry it off, and slice through the pie. Wipe the blade between cuts for neat, picture-perfect slices every time.
Can I turn this recipe into mini pies or bars?
You sure can! Use muffin tins lined with cupcake wrappers for mini pies, or press the crust into a square pan and slice into bars. Just adjust freezing times as needed.
Pin This Recipe!
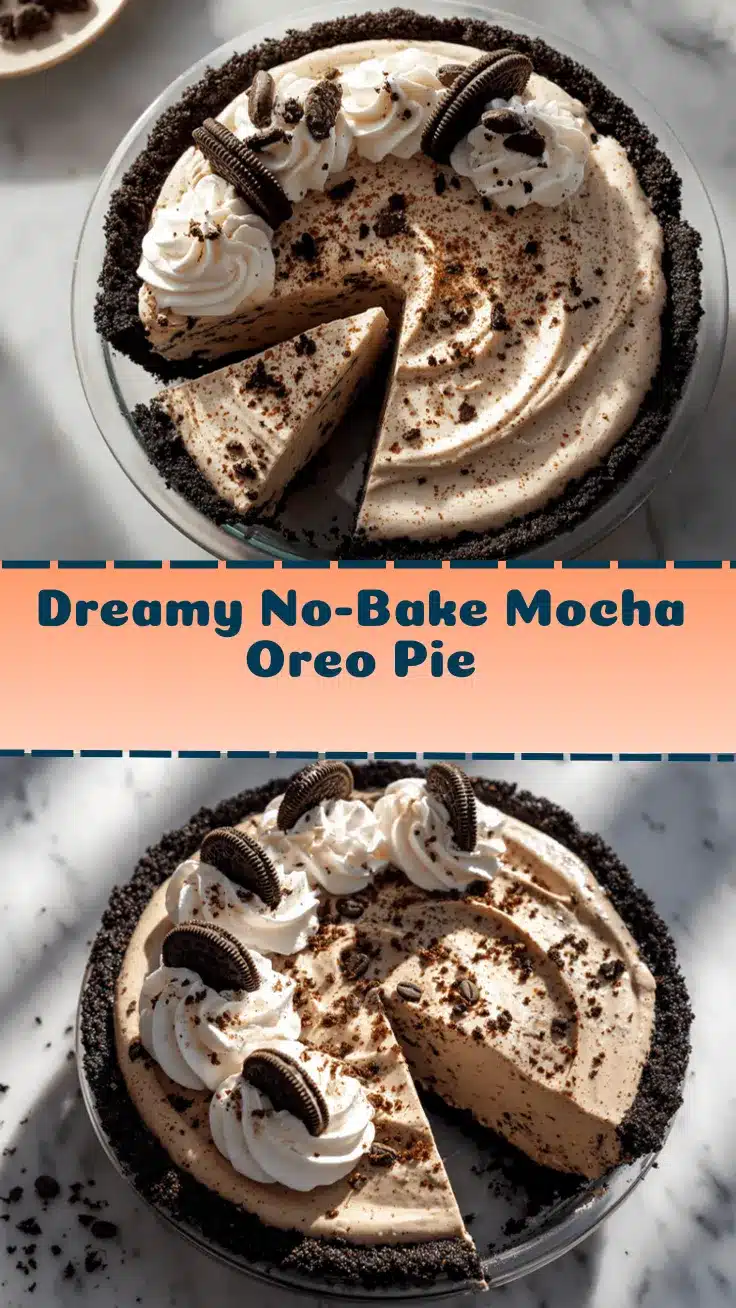
No-Bake Mocha Oreo Ice Cream Pie
This easy no-bake mocha Oreo ice cream pie features a crunchy Oreo crust, creamy mocha ice cream filling, and a cloud of whipped cream on top. It’s a crowd-pleasing frozen dessert perfect for summer parties or any time you need a sweet treat without turning on the oven.
- Prep Time: 20 minutes
- Cook Time: 0 minutes
- Total Time: 4 hours 20 minutes
- Yield: 8 servings 1x
- Category: Dessert
- Cuisine: American
Ingredients
- 24 Oreo cookies (regular or double-stuffed), crushed
- 6 tablespoons unsalted butter, melted
- 1 quart chocolate ice cream, softened
- 2 tablespoons instant coffee or espresso powder
- 2 tablespoons hot water
- 1 cup heavy whipping cream, cold
- 2 tablespoons powdered sugar
- 1 teaspoon vanilla extract
- Chocolate shavings or mini chocolate chips (optional, for garnish)
Instructions
- Place 24 Oreo cookies in a food processor and pulse until fine crumbs form, or crush in a zip-top bag with a rolling pin.
- Pour 6 tablespoons melted butter over the crumbs and mix until evenly moistened.
- Press the crumb mixture firmly into the bottom and up the sides of a 9-inch pie pan.
- Freeze the crust for at least 20 minutes.
- Dissolve 2 tablespoons instant coffee or espresso powder in 2 tablespoons hot water; stir until completely dissolved.
- Let 1 quart chocolate ice cream sit at room temperature for 10–15 minutes until scoopable.
- In a large bowl, combine softened ice cream and dissolved coffee. Stir until evenly mixed.
- Scoop the mocha ice cream mixture into the frozen Oreo crust and spread into an even layer.
- Cover and freeze for at least 4 hours (overnight is best) until firm.
- In a chilled bowl, beat 1 cup cold heavy cream with 2 tablespoons powdered sugar and 1 teaspoon vanilla extract until soft peaks form.
- Spread or pipe the whipped cream over the frozen pie. Garnish with chocolate shavings or mini chocolate chips if desired.
- Slice with a hot, sharp knife and serve immediately.
Notes
Let the ice cream soften naturally at room temperature for best texture. Press the crust firmly for clean slices. If the filling is too runny, freeze for 10 minutes before spreading. Garnish just before serving for the freshest look. For gluten-free or dairy-free adaptations, use appropriate cookies and ice cream substitutes.
Nutrition
- Serving Size: 1 slice (1/8 of pie)
- Calories: 420
- Sugar: 32
- Sodium: 220
- Fat: 25
- Saturated Fat: 14
- Carbohydrates: 46
- Fiber: 2
- Protein: 4
Keywords: no-bake, ice cream pie, mocha, Oreo, frozen dessert, summer dessert, easy dessert, chocolate, coffee, make-ahead, party dessert