
Introduction
The first time I made these No Bake Peanut Butter Oreo Cheesecake Bars, it was one of those summer afternoons when you just cannot bear to turn on the oven. The kitchen was already a little too warm, and honestly, I was craving something creamy and chocolaty—without the fuss. The aroma of crushed Oreos mixed with silky peanut butter and tangy cream cheese? It’s just incredible. Every bite tastes like a childhood memory but with a grown-up twist.
What got me hooked on this recipe was its sheer simplicity. No baking, no water baths, no need for fancy ingredients. You know how some desserts are high maintenance? This one is the opposite. Plus, it’s a total hit with my family—my kids always sneak a few extra bars before dinner (I pretend not to notice). If you love the sweet crunch of Oreo cookies and the salty-smooth depth of peanut butter, these cheesecake bars will make you swoon.
Over the years, I’ve tweaked and tested this recipe more times than I can count. I’ve made it for birthday parties, potlucks, and even the occasional midnight snack attack. I can say with confidence: these No Bake Peanut Butter Oreo Cheesecake Bars deliver every single time. Whether you’re a busy parent or just someone who loves easy desserts, this recipe is your new best friend. And yes, the keyword “No Bake Peanut Butter Oreo Cheesecake Bars” is here to stay—because that’s exactly what you’ll be making!
Why You’ll Love This Recipe
After dozens of batches (and quite a few late-night taste-tests), I can tell you this: No Bake Peanut Butter Oreo Cheesecake Bars have a loyal fan club in my house. Here’s why you’ll probably join, too:
- Quick & Easy: No oven required—these bars come together in about 20 minutes, plus chilling. Perfect for spontaneous dessert cravings or when you forgot to plan ahead.
- Simple Ingredients: You don’t need to hunt down anything fancy. Oreos, peanut butter, cream cheese—chances are, you have most of it already.
- Perfect for Parties & Potlucks: These bars travel well and look impressive. I’ve brought them to backyard BBQs and even holiday gatherings, and they’re always the first to disappear.
- Crowd-Pleaser: Kids go wild for the cookie crust, adults love the creamy filling. It’s basically impossible not to reach for seconds (or thirds).
- Unbelievably Delicious: The contrast of crunchy Oreo base with velvety peanut butter cheesecake is a flavor match made in heaven.
What sets this recipe apart? Two things: blending the peanut butter and cream cheese until ultra-smooth (trust me, no grainy bits), and using double-stuffed Oreos for extra decadence. I’ve played around with crusts and fillings, but this combo nails that crave-worthy balance of sweet, salty, and creamy.
Honestly, these bars are more than just dessert—they’re comfort in a pan, the kind you want to share (but secretly hope there’s leftovers for breakfast). Whether you’re feeding picky eaters, impressing friends, or just treating yourself, you’ll love how this recipe fits your life.
What Ingredients You Will Need
This recipe uses familiar, pantry-friendly ingredients to create an indulgent treat—without needing a special grocery run. You can swap a few things depending on your tastes, but here’s the line-up that makes No Bake Peanut Butter Oreo Cheesecake Bars truly irresistible:
- For the Oreo Crust:
- 24 double-stuffed Oreo cookies (about 264g) – crushed finely (for best texture and flavor)
- 6 tbsp unsalted butter (85g), melted (helps the crust hold together)
- For the Peanut Butter Cheesecake Layer:
- 8 oz cream cheese (227g), softened to room temperature (full-fat for richness)
- 1 cup creamy peanut butter (240g) – smooth, not chunky (I love Skippy or Jif for best creaminess)
- 1 cup powdered sugar (120g) – sifted, for that smooth filling
- 1 tsp pure vanilla extract (5ml) – adds a little warmth
- 1 cup heavy whipping cream (240ml), cold (whipped to stiff peaks for fluffiness)
- For the Topping:
- 6 Oreo cookies (66g), chopped or crushed (for extra crunch and decoration)
- 2 tbsp creamy peanut butter (30g), melted (optional swirl or drizzle)
If you’re short on Oreos, you can use any chocolate sandwich cookie. Want it gluten-free? Substitute gluten-free chocolate cookies. For dairy-free folks, swap cream cheese and whipping cream with plant-based versions (I’ve tried Kite Hill cream cheese with coconut cream—works great!).
For the peanut butter, stick to creamy varieties for best results. If you like a little crunch, fold in 1/4 cup (30g) mini chocolate chips or chopped peanuts into the filling. The powdered sugar gives the filling its signature “cheesecake” sweetness—don’t trade it for granulated, or the texture gets gritty.
Ingredient tip: For the crust, pulse the cookies in a food processor for even crumbs—or just toss them in a zip-top bag and smash with a rolling pin (no judgment). I’ve found that double-stuffed Oreos really do give the crust a softer, more decadent bite. And yes, licking the spoon is totally allowed.
Equipment Needed
You don’t need fancy gadgets—just the basics plus a couple options for convenience:
- 8×8 inch (20x20cm) square baking pan (lined with parchment for easy removal)
- Food processor or blender (for crushing Oreos—alternatively, use a zip-top bag and rolling pin)
- Medium mixing bowl (for crust mixture)
- Large mixing bowl (for cheesecake filling)
- Hand mixer or stand mixer (for whipping cream and blending filling)
- Spatula (for smoothing layers and scraping bowls)
- Measuring cups and spoons (accuracy matters, especially for the filling)
- Offset spatula or butter knife (helpful for swirling peanut butter on top)
If you don’t have a food processor, smashing cookies in a sturdy bag works fine—just takes a little elbow grease. I’ve used glass dishes and metal pans; both work, but metal chills faster. Clean your mixer beaters before whipping cream for best volume. For budget-friendly options, basic mixing bowls and a handheld mixer do the trick (I’ve made these bars in a college dorm with just a whisk and muscle power!).
Maintenance note: If you use a food processor for the Oreos, make sure to pulse in short bursts to avoid turning them into paste. Wipe down your mixer between steps—cream cheese and whipped cream don’t mix well if the bowl’s greasy.
Preparation Method
Here’s the step-by-step for perfect No Bake Peanut Butter Oreo Cheesecake Bars. I’ve included tips from my own kitchen so you get flawless bars every time.
- Line the pan: Place parchment paper in an 8×8 inch (20x20cm) square pan, leaving some overhang for easy lifting later. This makes cleanup so much easier!
-
Make the Oreo crust: Crush 24 Oreos (264g) in a food processor or with a rolling pin until fine crumbs form. Add 6 tbsp melted butter (85g) and blend until you get a wet sand texture.
Prep note: If it looks too dry, add another tablespoon of melted butter. The crust should stick together when pressed. -
Press the crust: Pour crumbs into the prepared pan. Use the back of a spoon or bottom of a measuring cup to firmly press into an even layer. Place in the freezer while you prepare the filling (about 10 minutes).
Sensory cue: Crust should feel firm and slightly cool to the touch. -
Make the peanut butter cheesecake filling: In a large bowl, beat 8 oz (227g) cream cheese until smooth. Add 1 cup (240g) peanut butter, 1 cup (120g) powdered sugar, and 1 tsp (5ml) vanilla extract. Beat until creamy and well combined.
Troubleshooting: If lumps remain, let the cream cheese soften more or beat longer. -
Whip the cream: In another bowl, whip 1 cup (240ml) heavy cream until stiff peaks form (about 3-4 minutes with a mixer on high).
Prep note: Cold cream whips best. If it starts to deflate, chill the bowl and try again. -
Fold whipped cream into filling: Gently fold the whipped cream into the peanut butter mixture in two additions. Use a spatula and light strokes—don’t overmix, or it’ll lose fluffiness.
Sensory cue: Filling should look light, airy, and pale tan. -
Spread filling over crust: Spoon the cheesecake mixture over the chilled Oreo crust. Smooth evenly with a spatula.
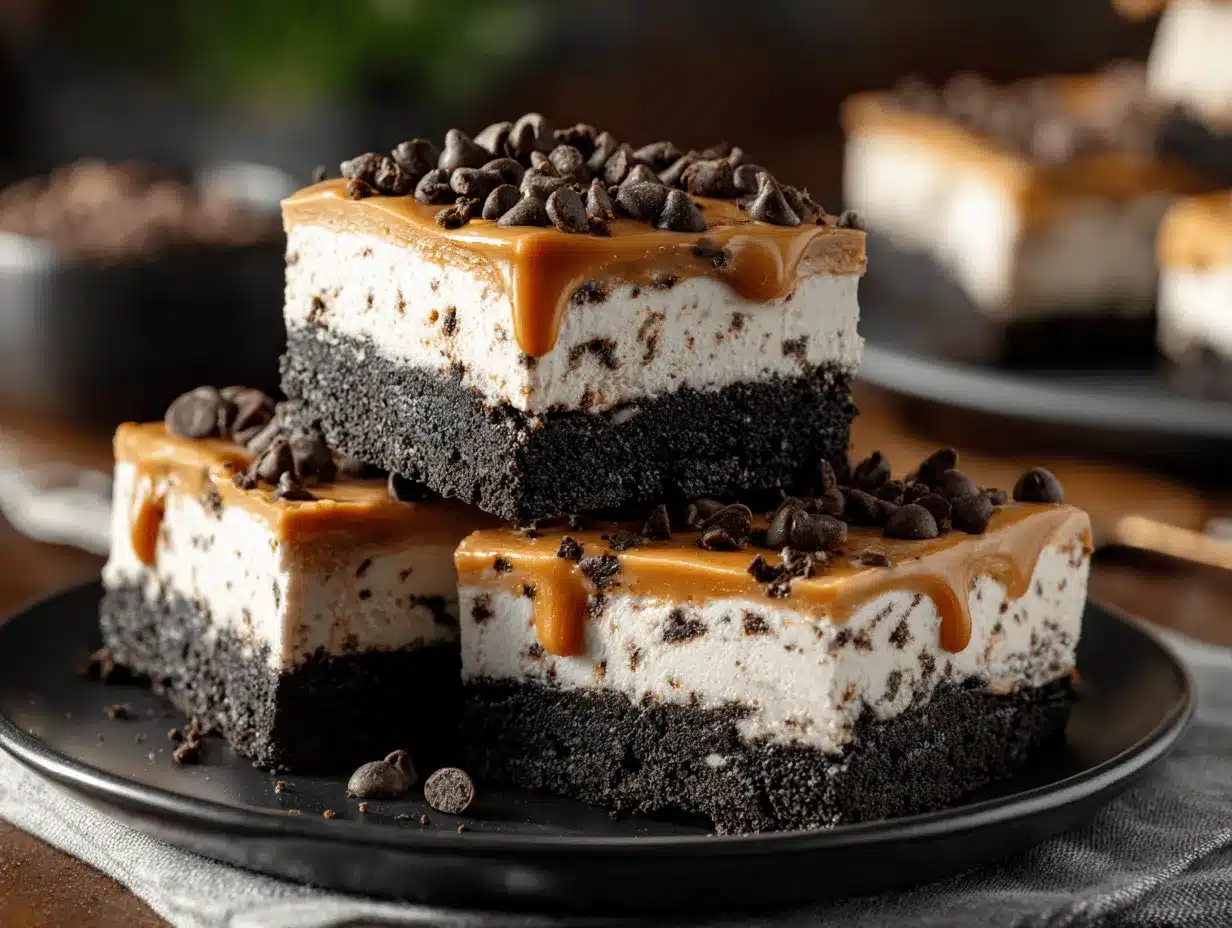
Personal tip: Tap the pan gently on the counter to remove air bubbles. - Add toppings: Sprinkle 6 chopped Oreos (66g) evenly on top. Drizzle with 2 tbsp melted peanut butter (optional). Swirl lightly with a knife for a marbled look.
-
Chill: Cover the pan with foil or plastic wrap. Refrigerate for at least 4 hours, or overnight for best results.
Sensory cue: Bars should feel firm and set when touched lightly. - Cut and serve: Lift bars out using parchment overhang. Slice into 16 squares (or 9 for extra-large bars). Wipe knife between cuts for neat edges.
Efficiency tip: Prep the crust and filling while the crust chills—multi-tasking saves time. If you’re making this ahead, bars can chill up to 24 hours before serving. If bars feel too soft after 4 hours, pop them in the freezer for 30 minutes.
Warning: Don’t skip the chilling! The filling needs time to firm up, or your bars could be messy. (Learned that the hard way during a rush job for my niece’s birthday.)
Cooking Tips & Techniques
Making No Bake Peanut Butter Oreo Cheesecake Bars is pretty straightforward, but a few pro moves help guarantee success. Here’s what I’ve learned—sometimes the hard way!
- Room temperature matters: Always let cream cheese soften fully before mixing. Cold cream cheese leads to lumpy filling, and nobody wants that.
- Whip it real good: Whipped cream should be at stiff peaks—if it’s too soft, your filling won’t set. Chill your bowl and beaters for best results.
- Don’t rush the chill: Patience is key. Bars need at least 4 hours in the fridge; overnight is even better for perfect slices.
- Crushing Oreos: If using a bag and rolling pin, double-bag to avoid cookie bits escaping. Food processor is faster, but watch out for over-processing into mush.
- Layering: Press the crust firmly—loose crust crumbles when sliced. Use a flat-bottomed glass for even pressure.
Common mistakes? Overmixing the whipped cream into the filling (it deflates and gets dense), under-chilling the bars (they turn gooey), and using low-fat cream cheese (filling sets softer and isn’t as rich). I’ve had bars collapse from impatience—trust me, waiting pays off.
Timing tip: Make these bars the night before a big event. You’ll have more time, and they slice cleaner when fully set. If you’re short on time, speed chill in the freezer for 30-45 minutes, but don’t freeze solid.
Consistency hack: For perfect squares, dip your knife in hot water between cuts and wipe dry. No more jagged edges!
Variations & Adaptations
No Bake Peanut Butter Oreo Cheesecake Bars are a blank canvas for creativity. Here are my favorite ways to switch it up:
- Gluten-Free: Use gluten-free chocolate sandwich cookies for the crust and topping. The filling stays the same—just double-check your labels.
- Dairy-Free: Swap regular cream cheese and whipping cream for plant-based versions. I’ve had success with coconut cream and Kite Hill almond cream cheese. The texture stays creamy, and the flavor is still dreamy.
- Chocolate Lovers: Fold in 1/2 cup (90g) mini chocolate chips to the cheesecake filling, or drizzle melted chocolate on top in place of peanut butter.
- Nut-Free: Replace peanut butter with sunflower seed butter or cookie butter. My friend’s daughter has a peanut allergy, so we’ve tested this—no one could tell the difference!
- Seasonal Twists: In fall, sprinkle crushed pretzels and a pinch of cinnamon on top. For summer, add a layer of sliced bananas between crust and filling.
One personal adaptation I love: adding a swirl of caramel sauce on top with the crushed Oreos—gets that sweet-salty flavor bomb. Don’t be afraid to play with mix-ins like chopped nuts, mini marshmallows, or even a dash of espresso powder for grown-up flair.
If you prefer bars less sweet, cut the powdered sugar by 1/4 cup (30g) and add a tiny pinch of salt to the filling. Customizing is half the fun—make these bars your own!
Serving & Storage Suggestions
These No Bake Peanut Butter Oreo Cheesecake Bars are best served chilled. I like to cut them cold for sharp edges, then let them sit at room temperature for 10-15 minutes before serving—this way, the filling gets perfectly creamy.
For presentation, stack bars on a pretty platter and sprinkle extra crushed Oreos or drizzle more peanut butter on top. If you want to get Pinterest-fancy, add a few chocolate curls or mini peanut butter cups.
Pair with a cold glass of milk, hot coffee, or even a scoop of vanilla ice cream for dessert overload. For parties, serve alongside fresh berries or a simple fruit salad.
Storage is easy: keep bars in an airtight container in the refrigerator for up to 5 days. They freeze well, too—just wrap tightly and thaw in the fridge before serving (about 2-3 hours). If you’re reheating for a softer texture, microwave a bar for 10 seconds, but don’t overdo it or the filling melts.
Flavor note: Bars taste even better the next day, as the crust softens and flavors meld. Sometimes I sneak one for breakfast—no regrets!
Nutritional Information & Benefits
Here’s an estimate per bar (if you cut into 16 squares): about 320 calories, 21g fat, 30g carbs, and 6g protein. These numbers may vary depending on brands and substitutions.
Key ingredient benefits: Peanut butter brings plant-based protein and healthy fats, while cream cheese adds calcium and a bit of vitamin A. Oreos are, well, pure joy (and carbs).
Dietary notes: The recipe can be made gluten-free and dairy-free with easy swaps. Contains peanuts, dairy, eggs (in Oreos), and wheat—check labels for allergies.
My wellness perspective? These bars are a treat, not a daily snack, but they’re portioned for moderation. If you want to lighten up, use reduced-fat cream cheese and swap some Oreos for graham crackers.
Conclusion
No Bake Peanut Butter Oreo Cheesecake Bars are the kind of dessert that makes you feel like a kitchen superstar—without breaking a sweat. They’re rich, creamy, and impossible to resist. Whether you’re looking for an easy weeknight treat or a showstopper for your next gathering, this recipe always delivers.
Try swapping in your favorite mix-ins, or switch up the cookies and nut butters for a personal twist. That’s the beauty of it—customize to your cravings!
I love these bars because they remind me that simple ingredients can make the most memorable desserts. If you make them, let me know how they turn out! Drop a comment, share your version, or tag a friend who needs a taste of these. You’ll be glad you did—promise.
Happy chilling and happy snacking!
FAQs
Can I use crunchy peanut butter instead of creamy?
Yes, you can! Crunchy peanut butter will add texture to the filling. Just make sure it’s well-mixed for smoothness.
How do I crush Oreos without a food processor?
Place Oreos in a zip-top bag and crush them with a rolling pin or heavy pan. Double-bag if you’re worried about leaks.
Can I make these bars ahead of time?
Absolutely. You can make them a day in advance. They actually taste better after chilling overnight!
What’s the best way to cut cheesecake bars cleanly?
Use a sharp knife dipped in hot water and wipe it between cuts. This keeps the edges neat and prevents sticking.
Are these bars safe for peanut allergies?
No, unless you swap the peanut butter for a safe alternative like sunflower seed butter or cookie butter. Check all ingredient labels to be sure.
Pin This Recipe!
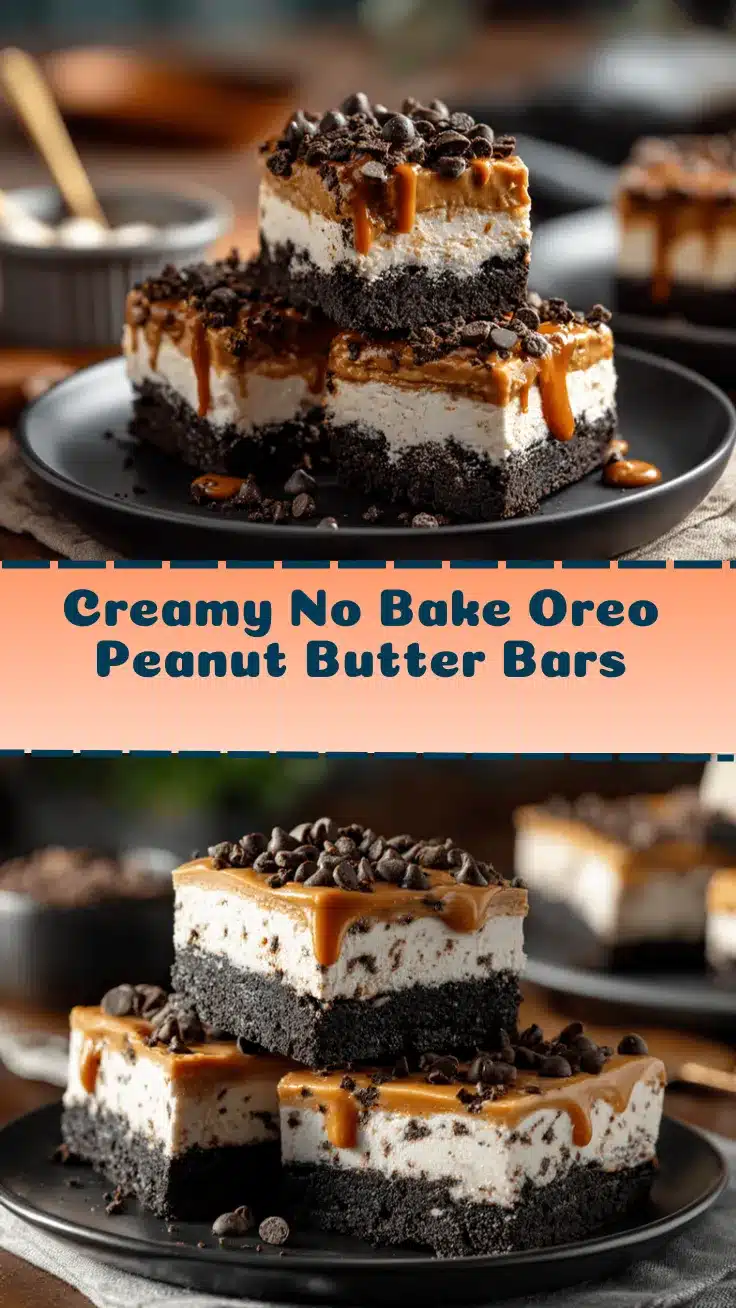
No Bake Peanut Butter Oreo Cheesecake Bars
These No Bake Peanut Butter Oreo Cheesecake Bars are a creamy, decadent dessert with a crunchy Oreo crust and a silky peanut butter cheesecake filling. Perfect for hot days or when you need an easy, crowd-pleasing treat—no oven required!
- Prep Time: 20 minutes
- Cook Time: 0 minutes
- Total Time: 4 hours 20 minutes
- Yield: 16 bars 1x
- Category: Dessert
- Cuisine: American
Ingredients
- 24 double-stuffed Oreo cookies (about 264g), crushed finely
- 6 tablespoons unsalted butter (85g), melted
- 8 ounces cream cheese (227g), softened to room temperature
- 1 cup creamy peanut butter (240g)
- 1 cup powdered sugar (120g), sifted
- 1 teaspoon pure vanilla extract (5ml)
- 1 cup heavy whipping cream (240ml), cold
- 6 Oreo cookies (66g), chopped or crushed (for topping)
- 2 tablespoons creamy peanut butter (30g), melted (optional, for drizzle)
Instructions
- Line an 8×8 inch (20x20cm) square pan with parchment paper, leaving overhang for easy removal.
- Crush 24 Oreos into fine crumbs using a food processor or by placing them in a zip-top bag and smashing with a rolling pin.
- Add 6 tablespoons melted butter to the Oreo crumbs and blend until the mixture resembles wet sand.
- Press the crumb mixture firmly into the bottom of the prepared pan to form an even crust. Freeze for about 10 minutes while preparing the filling.
- In a large bowl, beat 8 ounces cream cheese until smooth. Add 1 cup peanut butter, 1 cup powdered sugar, and 1 teaspoon vanilla extract. Beat until creamy and well combined.
- In a separate bowl, whip 1 cup heavy cream until stiff peaks form (about 3-4 minutes).
- Gently fold the whipped cream into the peanut butter mixture in two additions, using a spatula and light strokes to keep the filling fluffy.
- Spread the cheesecake filling evenly over the chilled Oreo crust. Smooth the top with a spatula.
- Sprinkle 6 chopped Oreos over the top and drizzle with 2 tablespoons melted peanut butter (optional). Swirl lightly with a knife for a marbled effect.
- Cover the pan and refrigerate for at least 4 hours, or overnight for best results, until the bars are firm and set.
- Lift the bars out of the pan using the parchment overhang. Slice into 16 squares (or 9 for larger bars), wiping the knife between cuts for clean edges.
- Serve chilled. Store leftovers in an airtight container in the refrigerator for up to 5 days.
Notes
Let cream cheese fully soften for a smooth filling. Whip cream to stiff peaks for best texture. Chill bars at least 4 hours (overnight is best) for clean slices. For gluten-free, use gluten-free chocolate sandwich cookies. For dairy-free, substitute plant-based cream cheese and coconut cream. Bars freeze well; thaw in fridge before serving. Dip knife in hot water for neat cuts.
Nutrition
- Serving Size: 1 bar (1/16 of recipe)
- Calories: 320
- Sugar: 20
- Sodium: 180
- Fat: 21
- Saturated Fat: 10
- Carbohydrates: 30
- Fiber: 1
- Protein: 6
Keywords: no bake, peanut butter, oreo, cheesecake bars, easy dessert, summer dessert, potluck, party, creamy, chocolate, kid-friendly


