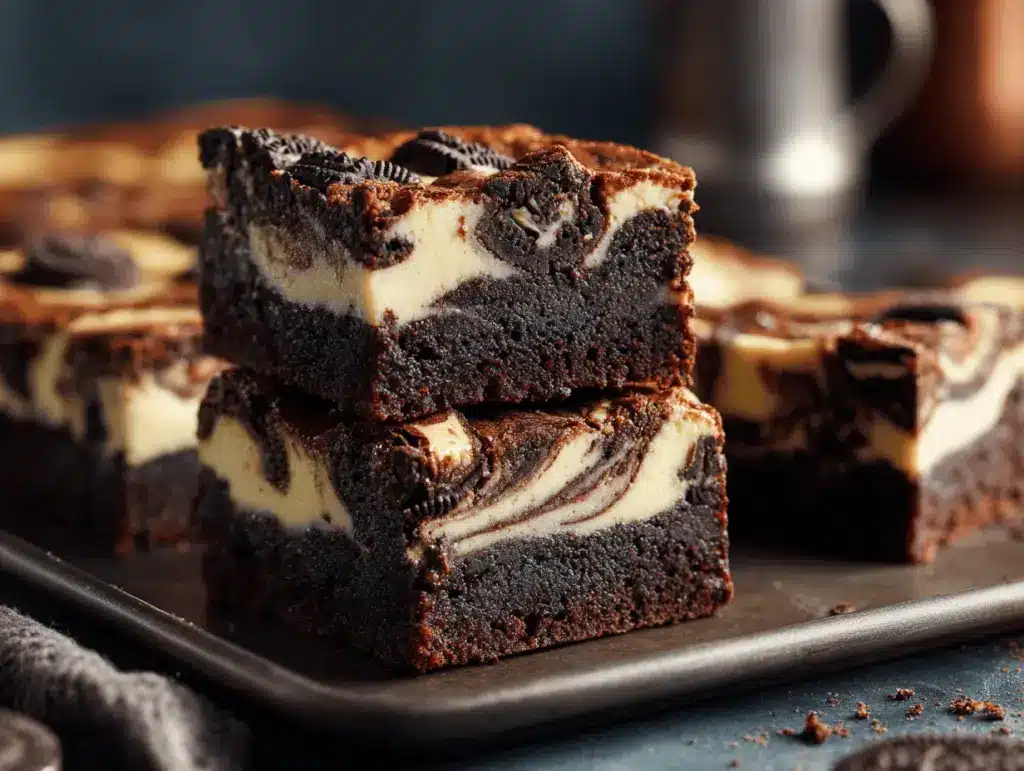
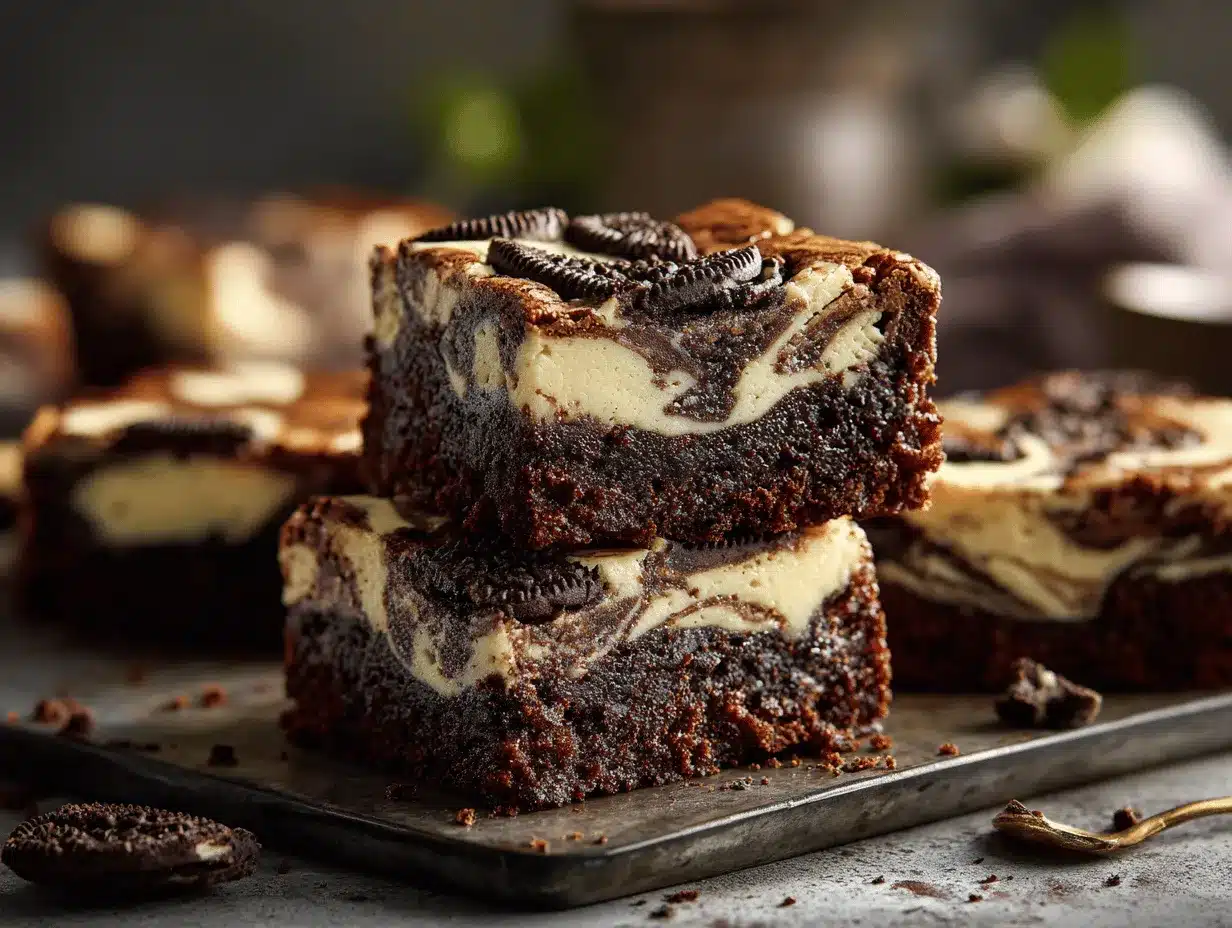
The first time I pulled a pan of Oreo cheesecake brownies out of the oven, the kitchen smelled like pure happiness—warm chocolate, a hint of tangy cream cheese, and that unmistakable Oreo aroma. I wish you could have seen my family’s faces when I sliced into those thick, fudgy bars—swirls of cheesecake, crunchy cookie bits, and all that gooey, chocolatey goodness. It’s basically dessert heaven, and I’m obsessed! If you’re a fan of brownies, cheesecake, and Oreos (honestly, who isn’t?), this Oreo cheesecake brownies recipe is about to become your new go-to treat.
I stumbled across the idea for these brownies one rainy afternoon when I wanted something a little extra with my usual chocolate fix. I’d tried classic brownies, cheesecake bars, even cookies ‘n cream everything, but combining them into one epic dessert? That was a game-changer. After a few kitchen experiments (and some hilarious fails—one batch oozed everywhere), I finally nailed the perfect balance: deeply fudgy brownies, creamy cheesecake swirls, and lots of crunchy Oreo pieces in every bite.
Why do I love this recipe so much? It’s the kind of dessert that stops people in their tracks. Whether you’re baking for a birthday, a cozy movie night, or just a Tuesday pick-me-up, these Oreo cheesecake brownies hit all the right notes—rich, sweet, and a little bit over-the-top. Plus, you don’t need fancy ingredients or hours of prep. If you’ve got a sweet tooth, a box of Oreos, and a craving for something truly special, these ultimate fudgy brownies are for you!
After making these more times than I can count, I can honestly say: Oreo cheesecake brownies are the ultimate indulgence. As a passionate home baker who’s always looking for a crowd-pleaser, I promise this recipe is worth every single calorie. Ready to bake?
Why You’ll Love This Recipe
- Ultimate Fudgy Texture: These Oreo cheesecake brownies are loaded with melty chocolate and creamy cheesecake, so every bite is gooey, rich, and satisfying.
- Easy to Make: No complicated steps or special equipment—just simple mixing and swirling. You’ll have bakery-worthy brownies in under an hour.
- All-Star Ingredients: Pantry staples plus a package of Oreos are all you need. No hunting for hard-to-find items!
- Showstopper Dessert: Perfect for parties, potlucks, or whenever you want to impress. These brownies look as good as they taste (swirls and cookie chunks always get “oohs” and “aahs”).
- Kid and Adult Approved: I’ve tested this recipe on picky eaters, chocolate lovers, and even “I don’t like sweets” folks—everyone comes back for seconds.
- Customizable: You can add extra Oreos, try different flavored cookies, or tweak the cheesecake layer for your own signature touch.
What really sets these Oreo cheesecake brownies apart? First, the brownie base is ultra-fudgy—thanks to a mix of melted chocolate and cocoa powder. I always blend the cheesecake layer until super smooth, so it bakes up creamy but holds its shape. And the best part: crushed Oreos baked right in and scattered on top, so you get a little crunch and plenty of cookies ‘n cream flavor in every piece.
Honestly, this dessert is more than just a treat—it’s a mood booster. You know those days when only chocolate will do? Or when you want to make someone smile? This is the recipe you reach for. It’s comfort food with a playful twist, and it never fails to steal the show at any gathering.
So, if you’ve been searching for a dessert that ticks every box—fudgy, creamy, crunchy, and above all, delicious—trust me, these Oreo cheesecake brownies are the answer. I bake them for birthdays, holidays, and “just because” days, and I’ve never regretted it.
What Ingredients You Will Need
This recipe uses classic ingredients to create that iconic Oreo cheesecake brownie flavor and texture—nothing fancy, just the good stuff. Most are probably already in your pantry, and a quick run for Oreos is totally worth it!
- For the Brownie Layer:
- 1/2 cup (115g) unsalted butter, melted (adds rich flavor and fudgy texture)
- 1 cup (200g) granulated sugar
- 2/3 cup (80g) all-purpose flour (use gluten-free 1:1 blend if needed)
- 2/3 cup (60g) unsweetened cocoa powder (Dutch process gives deeper flavor)
- 2 large eggs, room temperature
- 1 tsp vanilla extract
- 1/4 tsp salt
- 1/2 cup (90g) semisweet chocolate chips or chopped chocolate (optional, for extra fudginess)
- For the Cheesecake Swirl:
- 8 oz (225g) cream cheese, softened (full fat for best results—light works too, but texture is softer)
- 1/4 cup (50g) granulated sugar
- 1 large egg yolk
- 1/2 tsp vanilla extract
- For the Oreo Layer:
- 12-15 classic Oreo cookies, roughly chopped (plus a few extra for topping—double-stuffed or any flavor works!)
Ingredient Tips: For the creamiest cheesecake, always use room temperature cream cheese. If you want a gluten-free version, swap the flour for a cup-for-cup gluten-free baking blend and use gluten-free sandwich cookies. No chocolate chips? Leave them out, or chop up a bar of your favorite chocolate instead. I like to use Ghirardelli or Guittard for extra richness, but store brand works in a pinch. If you’re feeling fancy, try using Golden Oreos or peanut butter Oreos for a fun twist!
Honestly, don’t stress if you’re missing one or two things—this recipe is super forgiving. I’ve made these with brown sugar when I ran out of white, and it just added a little extra depth. You do you!
Equipment Needed
- 8×8-inch (20x20cm) baking pan: Metal pans bake more evenly, but glass works too. If you only have a 9×9-inch, reduce the baking time by a few minutes.
- Parchment paper: Makes removing the brownies so much easier (trust me—no more stuck corners!).
- Mixing bowls: One large for brownie batter, one medium for the cheesecake swirl.
- Whisk and spatula: A sturdy whisk helps blend the batter smoothly, and a spatula is perfect for folding in Oreos and scraping every last bit.
- Electric mixer (optional): You can mix the cheesecake layer by hand, but an electric mixer makes it ultra-smooth and lump-free.
- Measuring cups and spoons: For accuracy—especially with the cocoa and chocolate!
If you don’t have parchment, generously butter the pan. I’ve used foil in a pinch, but it’s trickier to peel off. No electric mixer? Just soften your cream cheese well and stir vigorously. For budget-friendly options, I’ve bought most of my baking tools at big-box stores and they’ve lasted years. Keep your pans clean—brownie edges get sticky, and a quick soak makes life easier.
Preparation Method
- Preheat and Prep: Preheat your oven to 350°F (175°C). Line an 8×8-inch (20x20cm) pan with parchment, leaving a little overhang for easy lifting. Lightly grease the sides if you want extra insurance.
- Mix the Brownie Batter: In a large bowl, whisk together 1/2 cup (115g) melted butter and 1 cup (200g) sugar until glossy. Add 2 eggs, one at a time, whisking well after each. Stir in 1 tsp vanilla extract and 1/4 tsp salt.
- Add 2/3 cup (80g) flour and 2/3 cup (60g) cocoa powder. Whisk until just combined—don’t overmix or the brownies will be tough. Fold in 1/2 cup (90g) chocolate chips if using. The batter will be thick and fudgy. If it looks dry, that’s normal!
- Gently fold in about half of your chopped Oreos. Reserve the rest for the top.
- Make the Cheesecake Swirl: In a medium bowl, beat 8 oz (225g) softened cream cheese with 1/4 cup (50g) sugar until creamy and smooth (about 1-2 minutes). Add 1 egg yolk and 1/2 tsp vanilla, beating until fully combined. No lumps = perfect swirl!
- Assemble: Spread about 3/4 of the brownie batter into your prepared pan—it’s thick, so use a spatula to coax it into the corners. Dollop spoonfuls of the cheesecake mixture on top, then drop the remaining brownie batter in between.
- Using a butter knife or skewer, gently swirl the layers together. Don’t overdo it! You want distinct ribbons of cheesecake and brownie.
- Scatter remaining chopped Oreos over the top, pressing in lightly so they stick.
- Bake: Bake for 35-40 minutes, or until the center is just set and a toothpick comes out with a few moist crumbs (not wet batter). My oven is a bit wonky, so I always check at 32 minutes—edges should look firm and center slightly wobbly.
- Cool the brownies in the pan for at least 30 minutes, then lift out using the parchment. For super clean slices, chill in the fridge for an hour before cutting (but good luck waiting that long!).
Notes: If your brownies seem underdone in the center, let them cool completely—they firm up as they sit. If using a glass pan, baking may take 5 minutes longer. Swirling too much can muddy the layers, so go easy for that pretty marbled effect. I’ve learned the hard way: don’t overbake or you lose the fudgy magic.
Cooking Tips & Techniques
- Don’t Overmix: When adding flour and cocoa to the brownie batter, mix just until you see no more streaks. Overmixing = dense, dry brownies. I’ve made this mistake in a hurry and regretted it—gentle is best.
- Room Temperature Ingredients: Soft cream cheese and room temp eggs help everything blend smoothly. Cold cream cheese results in lumps (not fun when you want pretty swirls!).
- Swirl Like a Pro: Use a butter knife or chopstick to gently swirl the cheesecake and brownie layers. Less swirling gives bold, dramatic ribbons; more swirling results in a softer marbled look. Find your favorite style!
- Check Early: Ovens vary, so check your brownies at the 32-minute mark. If the edges are set but the center jiggles slightly, you’re on track. Overbaked brownies dry out fast.
- Chill for Clean Slices: Refrigerate the cooled brownies for an hour before cutting—this helps the layers set and makes it easier to get those picture-perfect squares (my secret for Pinterest-ready photos!).
- Line the Pan: Parchment paper is your friend. It keeps the brownies from sticking and makes cleanup a breeze.
- Personal Note: The first time I tried to slice these warm, it was a gooey (delicious) mess. If you can wait for them to cool, you’ll get neat, bakery-style squares every time.
Honestly, it’s all about patience and a gentle touch—let the brownies cool, resist overmixing, and don’t rush the swirling. You’ll get dreamy, fudgy Oreo cheesecake brownies every single time.
Variations & Adaptations
- Gluten-Free: Swap the all-purpose flour for your favorite 1:1 gluten-free blend, and use gluten-free sandwich cookies. The taste is almost identical!
- Peanut Butter Swirl: Dollop a few tablespoons of peanut butter on top with the cheesecake layer, then swirl. Oreo, cheesecake, and peanut butter is a combo dreams are made of.
- Seasonal Twists: Try adding peppermint extract and crushed candy canes around the holidays, or swap in Golden Oreos and lemon zest for a spring-inspired treat.
If you want an extra chocolate punch, sprinkle mini chocolate chips on top before baking. For a lighter take, use reduced-fat cream cheese and cut the sugar by a couple of tablespoons. I’ve even made a “birthday cake” version with confetti sprinkles and birthday cake Oreos—my niece still asks for them every year.
For nut allergies, always check the cookie label and skip any peanut butter swirl. If you’re dairy-free, use a vegan cream cheese and plant-based butter—the texture is a bit softer, but it totally works.
Honestly, these brownies are a blank canvas. Mix in your favorite flavors and have fun experimenting. My family’s favorite? A double batch with extra Oreos on top!
Serving & Storage Suggestions
These Oreo cheesecake brownies are best served slightly chilled or at room temperature. I love them straight from the fridge—the fudgy texture is even more decadent! For a party, slice into small squares and arrange on a pretty platter. Dust with a little powdered sugar or drizzle with melted chocolate for that extra wow factor.
Pair them with a cold glass of milk, a scoop of vanilla ice cream, or a hot cup of coffee. They’re also delicious with berries or a dollop of whipped cream if you want something lighter alongside.
To store, cover brownies tightly and keep in the fridge for up to 5 days. They also freeze beautifully—just wrap individual slices in plastic wrap, then foil. Thaw overnight in the fridge or let sit at room temp for 30 minutes before serving. To reheat, microwave for 10-15 seconds for a warm, melty treat (careful, the cheesecake layer heats fast!).
The flavor actually improves after a day or two—the Oreos soften just a bit, and the chocolate and cheesecake meld together for that extra “wow.”
Nutritional Information & Benefits
Each Oreo cheesecake brownie is estimated to have about 280 calories, with 17g fat, 30g carbs, and 4g protein (for a standard 16-slice batch). They’re definitely a treat, but you get a little calcium and protein from the cream cheese and eggs, and a bit of fiber from the cocoa.
If you use gluten-free flour or dairy-free cream cheese, these can easily fit special diets—with all the indulgent flavor. Just keep in mind: Oreos contain wheat and soy, and the recipe has dairy and eggs, so check ingredient labels for allergies.
From a wellness perspective, I think it’s all about balance. Enjoying a square (or two!) of these fudgy brownies feels like a celebration every time. And honestly, sometimes a little chocolate is good for the soul.
Conclusion
So, why should you make these Oreo cheesecake brownies? Because they’re more than just dessert—they’re a chocolate lover’s dream, a cheesecake fan’s delight, and a cookie addict’s fantasy rolled into one. Each bite is rich, creamy, and loaded with cookies ‘n cream flavor. Whether you’re baking for a party or just treating yourself, this recipe is always a hit.
Don’t be afraid to make it your own—try new Oreo flavors, add swirls of peanut butter, or double the cheesecake if you’re feeling bold. That’s the beauty of baking at home: you get to play, taste, and tweak until it’s perfect for you.
I make these brownies every time I want to impress (or just need a little chocolate comfort), and they never disappoint. If you give them a try, let me know in the comments how they turned out—or share your own creative twist! Life’s too short for boring brownies—make them irresistible, make them yours, and enjoy every fudgy bite.
Happy baking—can’t wait to see your Oreo cheesecake brownie creations!
Frequently Asked Questions
How do I know when the Oreo cheesecake brownies are done baking?
The edges should look set and slightly pulled away from the pan, while the center will be just a bit wobbly. A toothpick inserted in the center should have a few moist crumbs but not wet batter. They’ll firm up as they cool!
Can I use different kinds of Oreos in this recipe?
Absolutely! Golden Oreos, peanut butter Oreos, or even seasonal flavors all work great. Just chop and fold in as you would with the classic ones.
What’s the best way to get clean slices?
Chill the brownies in the fridge for at least an hour before cutting. Use a sharp knife, and wipe it clean between slices for those perfect bakery-style squares.
How should I store leftovers?
Keep brownies covered in the refrigerator for up to 5 days, or freeze individual slices for up to 2 months. Thaw overnight in the fridge or let them sit at room temperature before serving.
Can I make these Oreo cheesecake brownies gluten-free?
Yes! Substitute the all-purpose flour with a gluten-free 1:1 baking blend, and use gluten-free sandwich cookies. The taste and texture are still amazing!
Pin This Recipe!
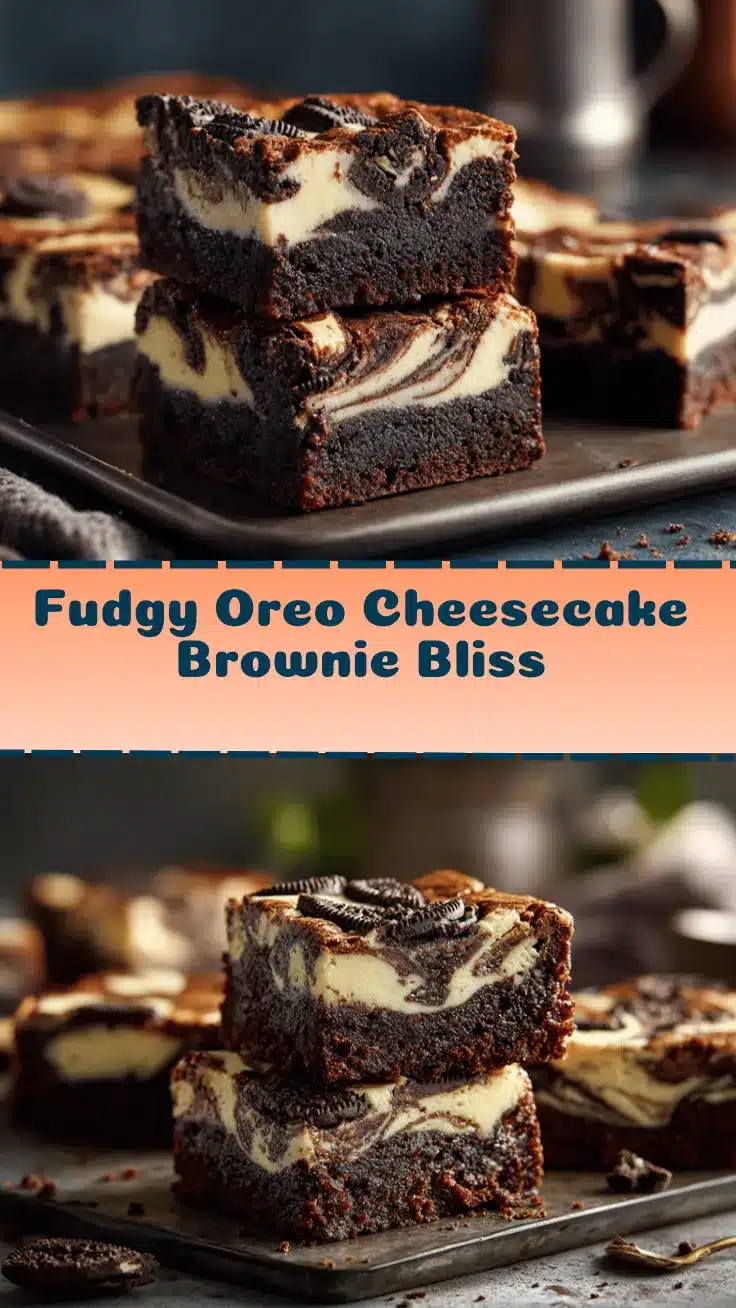
Oreo Cheesecake Brownies
These Oreo cheesecake brownies combine ultra-fudgy chocolate brownies, creamy cheesecake swirls, and crunchy Oreo cookie pieces for the ultimate decadent dessert. Perfect for parties, celebrations, or whenever you need a chocolatey pick-me-up.
- Prep Time: 15 minutes
- Cook Time: 35-40 minutes
- Total Time: 55 minutes
- Yield: 16 brownies 1x
- Category: Dessert
- Cuisine: American
Ingredients
- 1/2 cup (115g) unsalted butter, melted
- 1 cup (200g) granulated sugar
- 2/3 cup (80g) all-purpose flour (or gluten-free 1:1 blend)
- 2/3 cup (60g) unsweetened cocoa powder
- 2 large eggs, room temperature
- 1 tsp vanilla extract
- 1/4 tsp salt
- 1/2 cup (90g) semisweet chocolate chips or chopped chocolate (optional)
- 8 oz (225g) cream cheese, softened
- 1/4 cup (50g) granulated sugar
- 1 large egg yolk
- 1/2 tsp vanilla extract
- 12–15 classic Oreo cookies, roughly chopped (plus a few extra for topping)
Instructions
- Preheat your oven to 350°F (175°C). Line an 8×8-inch (20x20cm) pan with parchment paper, leaving an overhang for easy lifting. Lightly grease the sides if desired.
- In a large bowl, whisk together melted butter and 1 cup sugar until glossy. Add eggs one at a time, whisking well after each. Stir in 1 tsp vanilla extract and 1/4 tsp salt.
- Add flour and cocoa powder. Whisk until just combined—do not overmix. Fold in chocolate chips if using. Batter will be thick.
- Gently fold in about half of the chopped Oreos. Reserve the rest for topping.
- In a medium bowl, beat softened cream cheese with 1/4 cup sugar until creamy and smooth (about 1-2 minutes). Add egg yolk and 1/2 tsp vanilla, beating until fully combined and lump-free.
- Spread about 3/4 of the brownie batter into the prepared pan. Dollop spoonfuls of the cheesecake mixture on top, then drop the remaining brownie batter in between.
- Using a butter knife or skewer, gently swirl the layers together for a marbled effect. Do not overmix.
- Scatter remaining chopped Oreos over the top, pressing in lightly.
- Bake for 35-40 minutes, or until the center is just set and a toothpick comes out with a few moist crumbs (not wet batter).
- Cool brownies in the pan for at least 30 minutes, then lift out using parchment. For clean slices, chill in the fridge for an hour before cutting.
Notes
For best results, use room temperature cream cheese and eggs. Do not overmix the batter or over-swirl the layers for a distinct marbled look. Chill brownies before slicing for clean edges. To make gluten-free, use a 1:1 gluten-free flour blend and gluten-free sandwich cookies. Brownies can be stored in the fridge for up to 5 days or frozen for up to 2 months.
Nutrition
- Serving Size: 1 brownie (1/16 of pan)
- Calories: 280
- Sugar: 20
- Sodium: 140
- Fat: 17
- Saturated Fat: 9
- Carbohydrates: 30
- Fiber: 2
- Protein: 4
Keywords: oreo cheesecake brownies, fudgy brownies, cookies and cream dessert, chocolate brownies, cheesecake swirl brownies, easy brownies, party dessert, kid friendly dessert, potluck brownies, homemade brownies


