Let me tell you—there’s just something magical about the aroma of pumpkin and chocolate swirling together in my kitchen. The first time I whipped up these Pumpkin Oreo Balls, the whole house smelled like fall (think cinnamon, sweet pumpkin, and a hint of creamy chocolate). You know, the kind of moment where you pause, take a deep breath, and just smile because you know you’re onto something truly special.
I stumbled upon this recipe on a chilly October afternoon, knee-high to a grasshopper, rooting through my grandma’s old holiday cookie tins. She always had a knack for mixing up classic treats with a twist, and honestly, the idea of combining Oreos, pumpkin, and cream cheese just screamed “cozy sweater weather” to me. I wish I’d known about Pumpkin Oreo Balls years ago—imagine how many school bake sales and last-minute potlucks could have been saved!
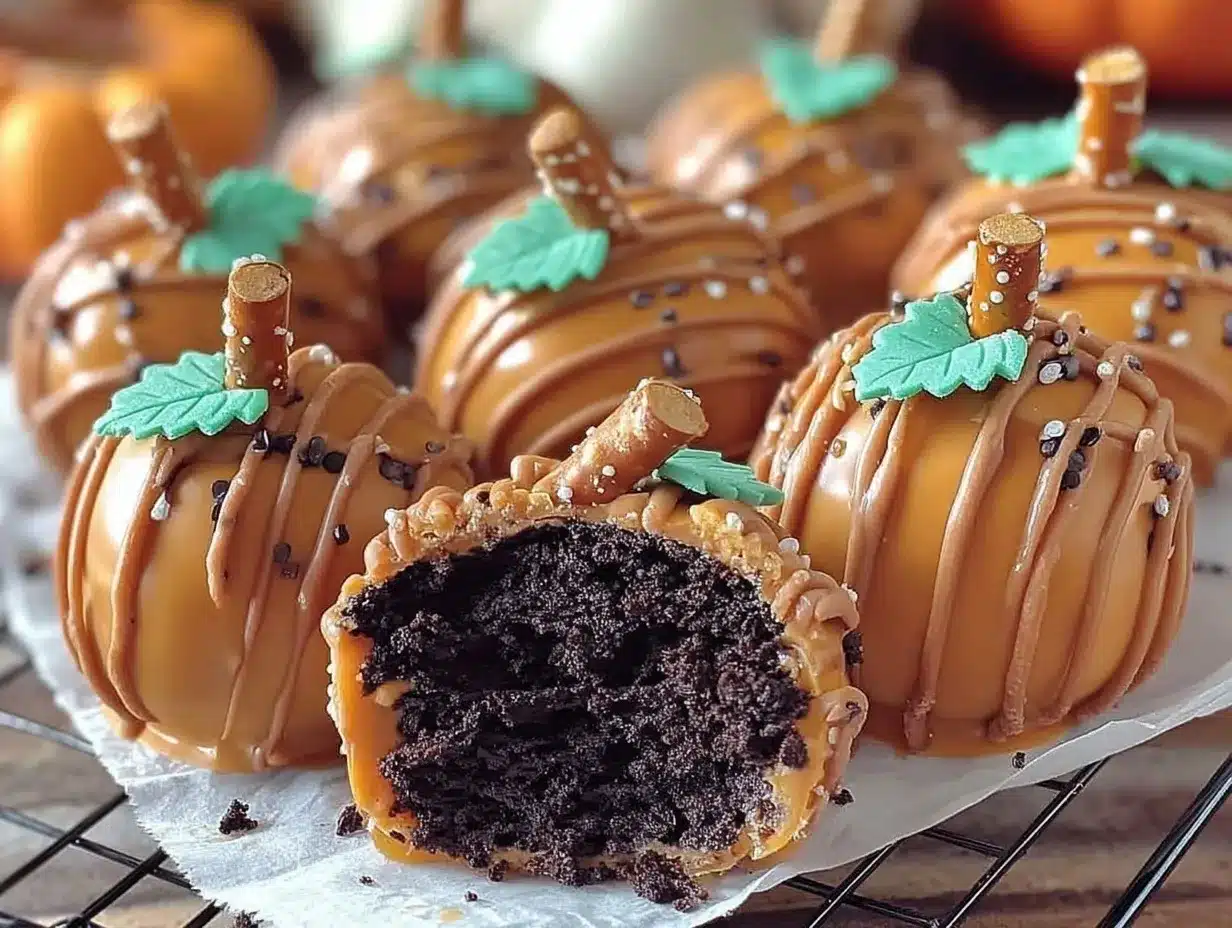
When I finally shared these pumpkin delights at our family’s annual fall gathering, my cousins couldn’t stop sneaking them off the platter (I caught my uncle stashing extras in his shirt pocket, not even kidding). These little bites of comfort have become a staple for family movie nights, festive parties, and even holiday gifting. There’s something about the creamy pumpkin filling, the crunch of Oreo crumbs, and the smooth chocolate shell that feels like pure nostalgia—dangerously easy, and totally irresistible.
Honestly, Pumpkin Oreo Balls are perfect for brightening up your Pinterest dessert board, jazzing up your Thanksgiving spread, or just sneaking as a sweet afternoon treat. I’ve tested this recipe more times than I care to admit—in the name of research, of course—and each batch feels like a warm hug. Trust me, you’re going to want to bookmark this one!
Why You’ll Love This Pumpkin Oreo Balls Recipe
After plenty of trial and error (and a few chocolatey messes along the way), I can say Pumpkin Oreo Balls are a must for anyone who loves quick, satisfying desserts. My background as a food blogger means I’ve tried dozens of truffle recipes, but this one stands out for so many reasons:
- Quick & Easy: You can whip up a batch in under 30 minutes (plus chilling time), which makes it perfect for busy fall weekends or sudden sweet cravings.
- Simple Ingredients: No fancy shopping trips—just Oreos, cream cheese, pumpkin puree, a few spices, and chocolate. You probably have most of them already.
- Perfect for Parties: These are guaranteed to steal the show at autumn gatherings, Thanksgiving, Halloween, or even Friendsgiving. No one can eat just one!
- Crowd-Pleaser: Kids, adults, pumpkin skeptics—they all rave about the creamy, spiced filling wrapped in a chocolate shell.
- Unbelievably Delicious: The combo of pumpkin and Oreo is next-level. Soft on the inside, crunchy on the outside, with a taste that’s pure comfort food.
What sets this recipe apart? I blend the cream cheese and pumpkin until ultra-smooth, then mix in finely crushed Oreos for a perfectly moist, flavorful center. The bit of cinnamon and nutmeg adds a gentle warmth—nothing overpowering, just cozy. It’s not just another pumpkin dessert; it’s the best version I’ve made, hands down.
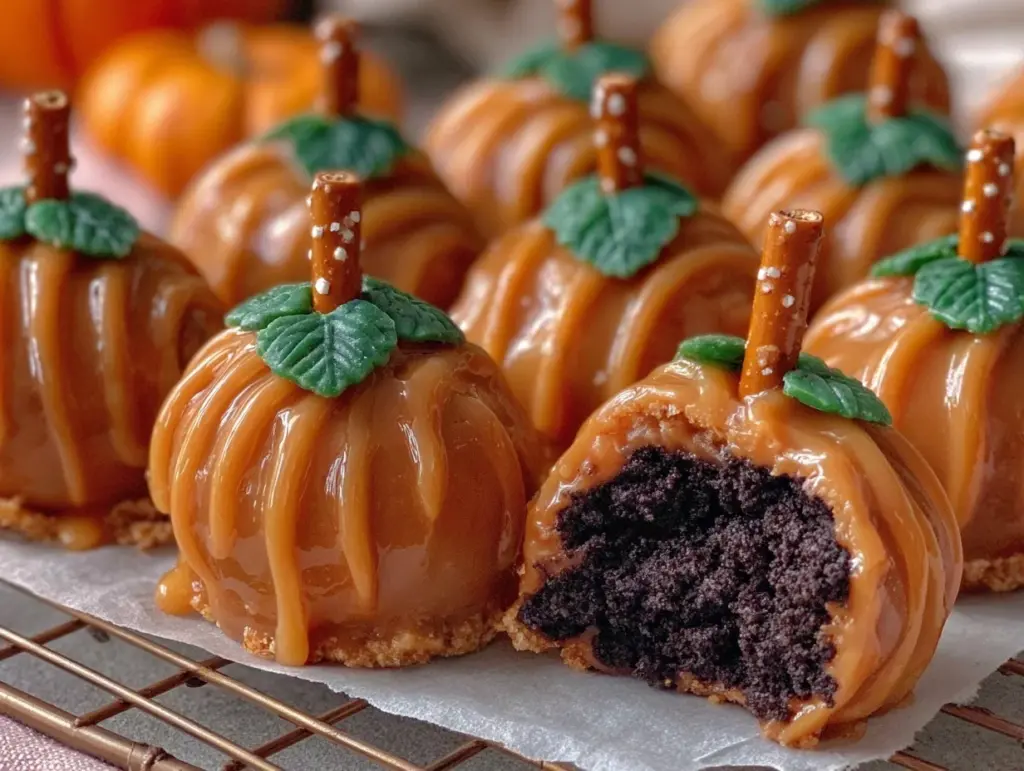
There’s a kind of joy in biting into these Pumpkin Oreo Balls: the chocolate cracks, the filling melts, and you’re suddenly a kid again, sneaking treats before dinner. Healthier than most truffles (thanks to real pumpkin!), faster than a pie, but with the same soul-soothing satisfaction. Whether you’re impressing guests or just treating yourself after a long day, these are the kind of treats that make the season feel special.
What Ingredients You Will Need
This Pumpkin Oreo Balls recipe uses simple, wholesome ingredients to deliver bold flavor and a satisfying texture—no fuss, no fancy techniques. Most are pantry staples, with a few easy-to-find fall favorites.
- For the filling:
- 24 Oreo cookies (original flavor, crushed into fine crumbs)
- 4 oz (113g) cream cheese, softened (full-fat or reduced-fat both work)
- 1/3 cup (80g) pumpkin puree (not pumpkin pie filling)
- 1/2 tsp ground cinnamon
- 1/4 tsp ground nutmeg
- 1/4 tsp ground ginger (optional, for extra warmth)
- 1/2 tsp vanilla extract
- Pinch of salt (balances the sweetness)
- For the coating:
- 10 oz (285g) semisweet chocolate chips or melting wafers (I like Ghirardelli for best results)
- 1 tsp coconut oil (optional, helps chocolate melt smoothly)
- For garnish (optional):
- Crushed Oreos or graham crackers (for sprinkling)
- Orange sprinkles or colored sugar (for festive flair)
- Melted white chocolate, for drizzling
If you need to go gluten-free, swap regular Oreos for a certified gluten-free brand. For dairy-free, use vegan cream cheese and chocolate chips. I’ve tried both versions—honestly, they’re just as tasty! Fresh pumpkin puree is lovely if you have it, but canned works perfectly for consistency. If you’re feeling adventurous, add a dash of pumpkin pie spice instead of the separate spices for a shortcut.
In summer, you can swap pumpkin for mashed sweet potato or even pureed butternut squash. Use reduced-fat cream cheese for a lighter version, and don’t be afraid to play with different Oreo flavors (Golden Oreos, anyone?). Whatever you choose, the ingredient list is flexible and forgiving—just the way I like it!
Equipment Needed
Here’s what you’ll need to whip up a batch of Pumpkin Oreo Balls—nothing too fancy, I promise.
- Food processor or blender (for crushing Oreos—if you don’t have one, a zip-top bag and rolling pin works just fine!)
- Mixing bowl (medium-sized, for combining filling ingredients)
- Rubber spatula or wooden spoon (for mixing and scraping down the bowl)
- Baking sheet or tray (lined with parchment paper for easy cleanup)
- Small cookie scoop or tablespoon (for portioning the balls evenly)
- Microwave-safe bowl (for melting chocolate)
- Forks or dipping tools (to coat the balls in chocolate—two regular forks work great)
- Wire rack (optional, for setting the coated balls)
If you’re like me and have lost more than one cookie scoop, don’t stress—a regular spoon works just fine. For melting chocolate, a double boiler is nice but not essential; the microwave does the trick. I always line my baking sheet with parchment for a quick cleanup (and less sticking). Budget-friendly tip: Dollar store mixing bowls and spatulas hold up surprisingly well for recipes like this. Just rinse your food processor right after using—Oreo crumbs can be stubborn if left to dry!
Preparation Method
-
Crush the Oreos:
Place 24 Oreo cookies in a food processor or blender. Pulse until you have fine crumbs (no big chunks). If you’re using a zip-top bag, smash the cookies with a rolling pin until they’re powdery. This should take about 2 minutes. The crumbs should look like dark, sandy soil—no big lumps! -
Make the filling:
In a medium mixing bowl, combine softened cream cheese, pumpkin puree, cinnamon, nutmeg, ginger (if using), vanilla extract, and salt. Stir until smooth and creamy—about 2 minutes with a spatula, or 1 minute with a hand mixer. Add the Oreo crumbs and mix until fully combined; the mixture will be thick and sticky. If it feels too wet, add 1-2 more crushed Oreos. The filling should hold its shape when scooped. -
Shape the balls and chill:
Use a small cookie scoop or tablespoon to portion the filling into 1-inch (2.5 cm) balls. Roll gently between your palms to smooth them out. Place on a parchment-lined baking sheet. You should get about 20-22 balls. Chill in the refrigerator for at least 30 minutes, or in the freezer for 15 minutes (if you’re impatient like me). The balls should be firm to the touch before dipping—if they’re soft, they’ll fall apart in the chocolate. -
Melt the chocolate:
Place chocolate chips and coconut oil (if using) in a microwave-safe bowl. Heat in 20-second intervals, stirring after each, until smooth and glossy—usually 1–2 minutes total. Don’t overheat! The chocolate should be runny, not thick. If it seizes, add a splash more coconut oil. -
Dip and decorate:
Using two forks, dip each chilled ball into the melted chocolate, turning to coat. Let excess chocolate drip off, then return to the parchment-lined baking sheet. Sprinkle with crushed Oreos, graham crackers, or festive sprinkles while the chocolate is still wet. For extra pizzazz, drizzle with melted white chocolate. Let set at room temperature or refrigerate until firm—about 15–20 minutes.
Prep notes: If your kitchen is warm, keep the tray in the fridge between dips. If the filling gets sticky, chill again for 10 minutes. The finished Pumpkin Oreo Balls should be glossy, smooth, and packed with fall flavor. (And if you sneak one before the chocolate sets—hey, I won’t judge!)
Cooking Tips & Techniques
Here’s what I’ve learned from more than a few batches of Pumpkin Oreo Balls—some successful, some, well, less so!
- Chill the filling: Don’t rush the chilling step. If the balls are too soft, they’ll break apart in the chocolate and make a mess. I once tried to skip ahead, and ended up with chocolate swamp monsters instead of neat truffles!
- Use good-quality chocolate: Melting wafers or high-quality chips melt smoother. Cheap chocolate tends to seize or clump. I always stick with Ghirardelli or Guittard for a reliable finish.
- Don’t overmix: When adding Oreo crumbs to the pumpkin mixture, mix just until combined. Overmixing can make the filling tough—learned that one the hard way.
- Multitasking: While the balls chill, melt your chocolate and set up your dipping station. This saves time and keeps everything moving smoothly.
- Decorating: Sprinkle toppings right after dipping—otherwise, they won’t stick. I’ve lost a few batches to “bald” truffles because I waited too long.
- Consistent sizing: Use a cookie scoop for even portions. This helps the balls chill evenly and look uniform on a platter (always impresses guests!).
If your chocolate thickens as you work, reheat it gently in the microwave for 10 seconds. And if you’re making a double batch, work in stages—chill half while you dip the other. For neat results, use parchment paper; foil tends to stick. Honestly, these little tips make a world of difference!
Variations & Adaptations
Pumpkin Oreo Balls are super flexible—here are a few ways to make them your own:
- Gluten-Free: Use gluten-free Oreo-style cookies and check your chocolate chips for gluten content. I’ve made these for a celiac friend, and they disappeared in minutes!
- Dairy-Free/Vegan: Swap cream cheese for a vegan version (like Kite Hill or Tofutti) and use dairy-free chocolate chips. The texture is still creamy and the pumpkin flavor shines through.
- Flavor Twists: Try Golden Oreos for a vanilla-based filling, or use pumpkin spice-flavored Oreos for extra punch. For something different, add a pinch of cayenne for a spicy-sweet kick.
- Different Cooking Methods: If you don’t want to dip in chocolate, roll the balls in crushed graham crackers or cocoa powder for a lighter finish.
- Nut-Free: Skip the coconut oil and use sunflower seed butter if you need a nut-free version for school events.
My personal favorite? Swapping half the Oreos for gingersnaps—adds a spicy zing that’s perfect for grown-up holiday parties. The recipe is forgiving, so don’t be afraid to experiment with your favorite cookies, spices, or toppings. Just remember, whatever you change, keep the pumpkin and cream cheese as your base for that classic fall flavor.
Serving & Storage Suggestions
Serve Pumpkin Oreo Balls chilled or at room temperature—they’re delicious either way. I love arranging them on a festive platter with extra sprinkles for color (makes them Pinterest-worthy!). Pair with a mug of hot apple cider, pumpkin spice latte, or even a scoop of vanilla ice cream for a fancy touch.
For storage, keep the balls in an airtight container in the refrigerator for up to 5 days. If you’re making them ahead, you can freeze them for up to 2 months—just thaw overnight in the fridge before serving. To reheat or freshen up, let the balls sit at room temperature for 15–20 minutes. The flavors deepen over time; honestly, they taste even better on day two!
If you’re gifting, pack the balls in mini cupcake liners and stack in a gift box. They travel well and make adorable party favors. Just be sure to keep them cool until serving—especially if you’re taking them to a picnic or outdoor event.
Nutritional Information & Benefits
Here’s a quick breakdown of what you’re getting in each Pumpkin Oreo Ball (based on a batch of 22):
- Calories: approx. 110 per ball
- Fat: 7g
- Protein: 1g
- Carbohydrates: 12g
- Sugar: 8g
Pumpkin puree adds a boost of vitamin A and a bit of fiber, making these treats a touch healthier than your average truffle. The recipe can easily be adapted for gluten-free or dairy-free needs—just check your cookie and chocolate brands. Potential allergens include wheat, dairy, and soy (in chocolate), so keep that in mind for guests.
Personally, I love sneaking in extra pumpkin during the fall for its nutrients and natural sweetness. These balls aren’t exactly a health food, but they’re a more wholesome indulgence—especially for those of us with a sweet tooth and a love for seasonal flavors!
Conclusion
If you’re searching for a fall dessert that’s easy, festive, and downright crave-worthy, Pumpkin Oreo Balls are it. They combine the best of classic Oreo truffles with cozy pumpkin spice—no oven required, minimal mess, and maximum flavor.
Don’t be afraid to make them your own, whether you’re swapping cookies, adding a dash of spice, or going gluten-free. That’s the beauty of these little treats—they’re flexible, forgiving, and always a crowd favorite. Personally, I love how they turn any gathering into a party (and how I can sneak one with my morning coffee, too!).
Give this recipe a try, and let me know in the comments how you adapted it or who loved it most at your table. Share your creations on social media, or pin it for later—these Pumpkin Oreo Balls are sure to become a staple in your fall dessert rotation. Wishing you cozy afternoons, happy baking, and plenty of sweet memories!
Frequently Asked Questions
Can I make Pumpkin Oreo Balls ahead of time?
Absolutely! You can prepare and refrigerate them up to 5 days in advance, or freeze for up to 2 months. Just thaw in the fridge before serving.
Do I need to use a food processor to crush the Oreos?
Nope! A zip-top bag and rolling pin work just fine. Just crush until the cookies are very fine—no big chunks.
Can I use pumpkin pie filling instead of pumpkin puree?
I wouldn’t recommend it. Pumpkin pie filling is sweetened and spiced, which can throw off the flavor and texture. Stick with pure pumpkin puree for best results.
How do I keep the balls from falling apart when dipping in chocolate?
Chill the balls until firm before dipping. If they’re soft, pop them in the freezer for 10 minutes before coating in chocolate.
Are Pumpkin Oreo Balls suitable for gluten-free or dairy-free diets?
Yes! Just use gluten-free Oreos and vegan cream cheese and chocolate chips. The taste and texture are still incredible.
Pin This Recipe!
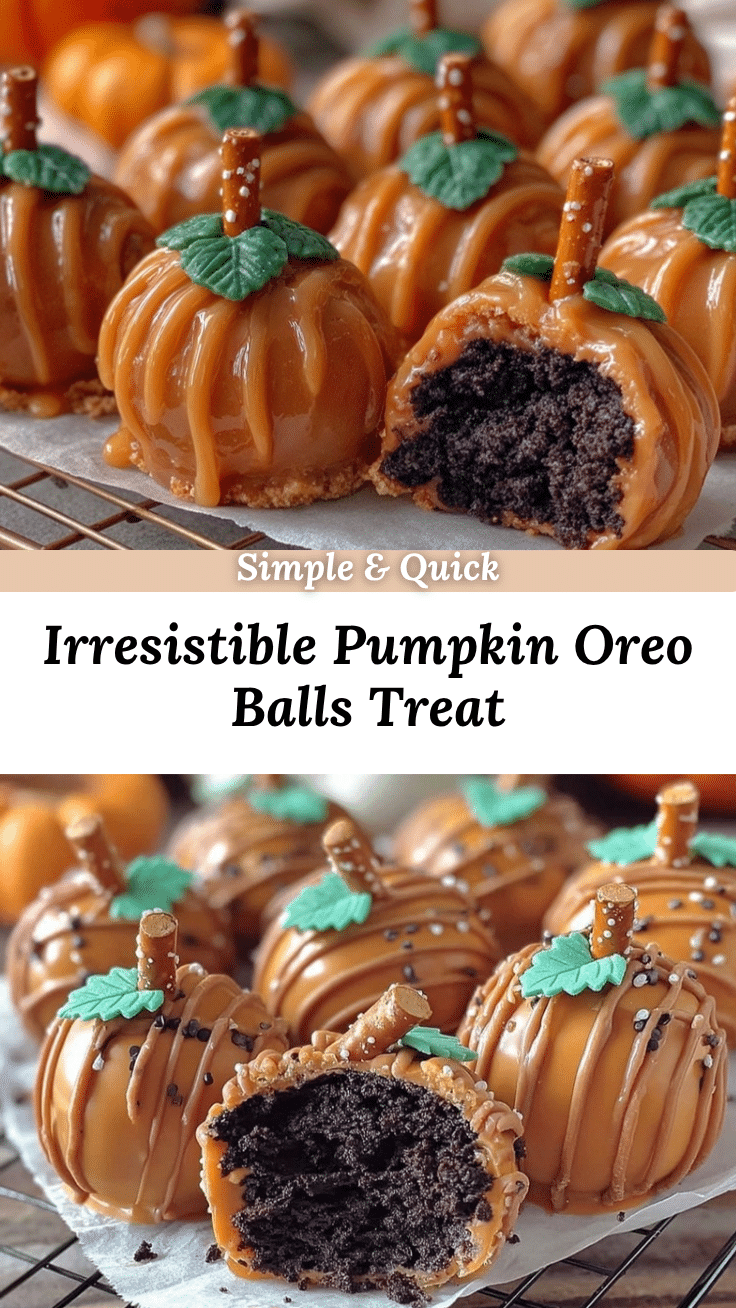
Pumpkin Oreo Balls Recipe: Easy 5-Step Fall Dessert for Parties

Pumpkin Oreo Balls are a quick, no-bake fall dessert featuring creamy pumpkin filling, crushed Oreos, and a smooth chocolate shell. Perfect for parties, gifting, or cozy nights in, these truffles are irresistibly festive and easy to make.
- Prep Time: 15 minutes
- Cook Time: 0 minutes
- Total Time: 45 minutes
- Yield: 22 balls 1x
- Category: Dessert
- Cuisine: American
Ingredients
- 24 Oreo cookies (original flavor, crushed into fine crumbs)
- 4 oz (113g) cream cheese, softened
- 1/3 cup (80g) pumpkin puree (not pumpkin pie filling)
- 1/2 tsp ground cinnamon
- 1/4 tsp ground nutmeg
- 1/4 tsp ground ginger (optional)
- 1/2 tsp vanilla extract
- Pinch of salt
- 10 oz (285g) semisweet chocolate chips or melting wafers
- 1 tsp coconut oil (optional)
- Crushed Oreos or graham crackers (for sprinkling, optional)
- Orange sprinkles or colored sugar (optional)
- Melted white chocolate, for drizzling (optional)
Instructions
- Place 24 Oreo cookies in a food processor or blender and pulse until fine crumbs form. Alternatively, crush cookies in a zip-top bag with a rolling pin.
- In a medium mixing bowl, combine softened cream cheese, pumpkin puree, cinnamon, nutmeg, ginger (if using), vanilla extract, and salt. Stir until smooth and creamy. Add Oreo crumbs and mix until fully combined; the mixture should be thick and sticky.
- Use a small cookie scoop or tablespoon to portion the filling into 1-inch balls. Roll gently between your palms to smooth. Place on a parchment-lined baking sheet and chill in the refrigerator for at least 30 minutes, or in the freezer for 15 minutes, until firm.
- Place chocolate chips and coconut oil (if using) in a microwave-safe bowl. Heat in 20-second intervals, stirring after each, until smooth and glossy (about 1–2 minutes).
- Using two forks, dip each chilled ball into the melted chocolate, turning to coat. Let excess chocolate drip off, then return to the parchment-lined baking sheet. Sprinkle with crushed Oreos, graham crackers, or festive sprinkles while chocolate is wet. Drizzle with melted white chocolate if desired. Let set at room temperature or refrigerate until firm (about 15–20 minutes).
Notes
Chill the balls thoroughly before dipping in chocolate to prevent them from falling apart. Use high-quality chocolate for a smoother coating. For gluten-free or dairy-free adaptations, substitute Oreos, cream cheese, and chocolate chips with certified alternatives. Decorate immediately after dipping for best results. Store in an airtight container in the fridge for up to 5 days or freeze for up to 2 months.
Nutrition
- Serving Size: 1 ball
- Calories: 110
- Sugar: 8
- Sodium: 60
- Fat: 7
- Saturated Fat: 4
- Carbohydrates: 12
- Fiber: 1
- Protein: 1
Keywords: pumpkin, oreo balls, truffles, fall dessert, no-bake, party treats, Thanksgiving, Halloween, easy dessert, chocolate, cream cheese, pumpkin spice


