Introduction
The first time I bit into a Salted Caramel Apple Cider Whoopie Pie, my kitchen smelled like a cozy hayride at sunset—warm apples, hints of cinnamon, and that unmistakable sweet tang of apple cider. Honestly, I never thought a whoopie pie could taste like fall wrapped up in a handheld treat. But here we are! This recipe was born out of a chilly October afternoon when I craved something more festive than cookies but less fussy than cake.
Let’s be real: autumn is the time for apple cider everything. I’d always loved sipping hot apple cider, but transforming those flavors into a fluffy, salted caramel-stuffed whoopie pie? That’s pure magic. After a few messy tries (and a caramel incident that nearly glued my spatula to the counter), I finally nailed the perfect apple cider whoopie pie. The cake part is pillowy-soft with actual apple cider—and the gooey, salted caramel filling makes you close your eyes with every bite.
This Salted Caramel Apple Cider Whoopie Pies recipe is now my go-to for fall gatherings, bake sales, and honestly, just those nights when I want to treat myself. If you’re looking for a show-stopping, easy fall dessert that’s as fun to make as it is to eat, this recipe is for you. Whether you’re baking with kids, impressing friends, or just fueling your own sweet tooth (no judgment here), you’re going to love these whoopie pies. I’ve made them more times than I can count—and each batch disappears faster than I can say “save me one for breakfast.”
Why You’ll Love This Recipe
When I say these Salted Caramel Apple Cider Whoopie Pies are irresistible, I’m not exaggerating. After testing this recipe for countless autumn parties, family get-togethers, and random Tuesday cravings, I can honestly say it’s a keeper. Here’s why you’ll be obsessed, too:
- Quick & Easy: Ready from start to finish in about an hour—no complicated steps or fancy equipment. Perfect for last-minute plans or when you want a homemade treat without a full-day baking marathon.
- Simple Ingredients: You probably have most of these in your pantry already. No wild goose chases for obscure flours or extracts—just real apples, apple cider, caramel, and cozy spices.
- Perfect for Every Occasion: These whoopie pies shine at fall bake sales, holiday dessert tables, or as a sweet reward after apple picking. They’re portable, kid-friendly, and easy to share (or not share—your call!).
- Crowd-Pleaser: Kids love them, adults love them, and my neighbor once texted me three days after a party asking for the recipe. They’re that memorable.
- Unbelievably Delicious: The combination of tart apple cider, soft spiced cake, and gooey salted caramel is basically autumn in a dessert. The flaky sea salt on top? I promise, it’s the secret that takes these over the edge.
What really sets this recipe apart is the real apple cider reduction—none of that “apple flavoring” business. And the salted caramel filling? It’s homemade, but honestly, way easier than you’d think. I’ve even had friends who claim to be “meh” on caramel swoon after the first bite.
If you’re like me and want your fall treats to taste like apple-picking memories and cozy sweater days, these whoopie pies are your ticket. They’re the kind of dessert that makes people pause mid-conversation and go, “Whoa, what IS this?” Trust me—these will become your new autumn tradition.
What Ingredients You Will Need
This Salted Caramel Apple Cider Whoopie Pies recipe combines pantry staples with a few seasonal favorites to create bold, nostalgic flavors. Here’s everything you’ll need (and a few tips from my own kitchen trials):
- For the Apple Cider Whoopie Pie Cakes:
- 1 cup (240 ml) apple cider (reduce to intensify flavor—see prep method)
- 2 cups (250 g) all-purpose flour (I use King Arthur for best texture)
- 1/2 teaspoon baking soda
- 1/2 teaspoon baking powder
- 1/2 teaspoon salt
- 1 teaspoon ground cinnamon
- 1/4 teaspoon ground nutmeg
- 1/4 teaspoon ground allspice (optional, but worth it for warmth)
- 1/2 cup (113 g) unsalted butter, softened
- 1/2 cup (100 g) granulated sugar
- 1/4 cup (50 g) brown sugar, packed
- 1 large egg, room temperature
- 1 teaspoon pure vanilla extract
- 1/2 cup (120 g) unsweetened applesauce (adds moisture and apple flavor)
- For the Salted Caramel Filling:
- 1/2 cup (100 g) granulated sugar
- 2 tablespoons (30 ml) water
- 3 tablespoons (45 g) unsalted butter, cubed
- 1/4 cup (60 ml) heavy cream, room temperature
- 1/2 teaspoon flaky sea salt (plus more for sprinkling)
- 1/2 teaspoon vanilla extract
- 1 1/2 cups (180 g) powdered sugar, sifted
- 8 tablespoons (113 g) unsalted butter, softened (for the buttercream base)
Ingredient Notes & Substitutions:
- If you’re gluten-free, swap the all-purpose flour for a 1:1 gluten-free blend (like Bob’s Red Mill).
- No applesauce? Use an extra egg and a splash more cider, but flavor will be a little less apple-y.
- Store-bought caramel sauce can pinch-hit in the filling if you’re short on time—just add a pinch of flaky salt and blend with the buttercream base.
- Lactose-free or vegan? Use vegan butter and coconut cream for the filling (I’ve tried this, and it’s surprisingly rich!).
- Don’t skip the apple cider reduction—it’s the magic behind the flavor punch.
Trust me, the combination of these ingredients is what makes these Salted Caramel Apple Cider Whoopie Pies unforgettable!
Equipment Needed

- Large baking sheet(s) (parchment-lined recommended for easy cleanup)
- Medium and large mixing bowls (at least two—one for wet, one for dry ingredients)
- Electric hand mixer or stand mixer (I’ve made these by hand, but a mixer saves your wrists!)
- Small saucepan (for reducing cider and making caramel)
- Whisk and spatula (a silicone spatula is perfect for scraping caramel)
- Cookie scoop or tablespoon (for evenly sized whoopie pies)
- Wire cooling rack
- Piping bag or zip-top bag (for neat filling—spooning works too, but piping is tidier)
No stand mixer? A sturdy whisk and some elbow grease will do the trick. For the caramel, a small, heavy-bottomed saucepan helps prevent scorching—just keep stirring. I’ve used budget-friendly tools for years, and as long as you dry everything well (especially after caramel-making!), your tools will last ages.
If you don’t have a cookie scoop, just use two spoons to dollop the batter onto your baking sheet. For piping, a zip-top bag with the tip snipped off is my trusty backup.
Preparation Method
- Reduce the Apple Cider: Pour 1 cup (240 ml) apple cider into a small saucepan. Simmer over medium heat until reduced to about 1/3 cup (80 ml), about 15-20 minutes. The cider should be thick, syrupy, and intensely fragrant. Let cool to room temperature. (Tip: Watch closely toward the end so it doesn’t scorch!)
- Prep and Preheat: Preheat oven to 350°F (180°C). Line two baking sheets with parchment paper.
- Mix Dry Ingredients: In a medium bowl, whisk together 2 cups (250 g) all-purpose flour, 1/2 teaspoon baking soda, 1/2 teaspoon baking powder, 1/2 teaspoon salt, 1 teaspoon cinnamon, 1/4 teaspoon nutmeg, and 1/4 teaspoon allspice.
- Cream Butter and Sugars: In a large bowl, beat 1/2 cup (113 g) softened butter, 1/2 cup (100 g) granulated sugar, and 1/4 cup (50 g) brown sugar until light and fluffy, about 2-3 minutes.
- Add Egg and Vanilla: Beat in 1 large egg and 1 teaspoon vanilla extract until smooth and creamy.
- Add Applesauce and Reduced Cider: Mix in 1/2 cup (120 g) applesauce and the cooled, reduced apple cider. Batter may look a bit curdled—don’t panic, it’ll come together with the flour.
- Combine Wet and Dry Ingredients: Gently fold the dry ingredients into the wet mixture, mixing just until no streaks of flour remain. Don’t overmix—stop as soon as you have a thick, smooth batter.
- Portion: Use a cookie scoop or tablespoon to drop 2-tablespoon-sized mounds of batter onto prepared baking sheets, spacing about 2 inches (5 cm) apart. You should get about 24 cakes (12 sandwiches).
- Bake: Bake for 10-12 minutes, until set and springy to the touch (they won’t brown much, so check texture). Rotate pans halfway through for even baking.
- Cool: Cool cakes on baking sheet for 5 minutes, then transfer to a wire rack to cool completely.
- Make Salted Caramel: In a small heavy saucepan, combine 1/2 cup (100 g) sugar and 2 tablespoons (30 ml) water. Cook over medium heat without stirring until the syrup turns a deep amber. Remove from heat; immediately whisk in 3 tablespoons (45 g) butter (it’ll bubble!), then 1/4 cup (60 ml) cream, 1/2 teaspoon sea salt, and 1/2 teaspoon vanilla. Cool to room temp (caramel thickens as it cools).
- Make Caramel Buttercream: Beat 8 tablespoons (113 g) softened butter till creamy. Gradually add 1 1/2 cups (180 g) powdered sugar. Beat in cooled caramel a tablespoon at a time until fluffy. If it’s too thick, add a splash of cream; if too runny, more powdered sugar.
- Assemble Whoopie Pies: Pair up cakes by size. Pipe or spoon filling onto the flat side of half the cakes. Top with remaining cakes, gently pressing to sandwich.
- Finish: Sprinkle a pinch of flaky sea salt on each whoopie pie. Let them sit 10 minutes to set (if you can wait!).
Troubleshooting: If your cakes spread too much, chill the batter 15 minutes before scooping. If the caramel seizes, gently rewarm and whisk until smooth. It’s okay if they’re a little rustic—messy filling just means more caramel!
Cooking Tips & Techniques
- Don’t Rush the Apple Cider Reduction: Letting the cider reduce properly is the real game-changer. If you pull it off early, your flavor won’t be as bold. The syrup should coat the back of a spoon—patience pays off!
- Room Temp Ingredients: Using room temperature butter and eggs helps everything blend evenly. Cold butter can leave lumps, and cold eggs can make the batter stiff.
- Watch the Caramel: Caramel goes from perfect to burnt quickly. Once it’s amber, pull it off the heat straight away. Trust your eyes and nose—if it smells toasty but not bitter, you’re ready.
- Even Whoopie Pies: For matching halves, use a cookie scoop and level each scoop. If you don’t have one, lightly oil your tablespoon for easier batter release.
- Let the Cakes Cool: If you fill them while warm, the buttercream will melt and slide out. (I learned this the hard way, watching my first batch ooze everywhere!)
- Salt Matters: Only sprinkle flaky sea salt at the end, right before serving. Otherwise, it can dissolve into the caramel and lose that pop.
- Multitasking: While the cider is reducing, prep your dry ingredients and line your baking sheets. You’ll save time (and feel like a kitchen pro).
I’ve had a few sticky caramel mishaps, but letting it cool and beating slowly into the buttercream makes all the difference. And don’t worry if your pies aren’t bakery-perfect—imperfections just make them more inviting!
Variations & Adaptations
- Gluten-Free: Swap the all-purpose flour for a 1:1 gluten-free blend. I’ve done this with Bob’s Red Mill and the cakes come out just as fluffy.
- Vegan: Use vegan butter in both the cake and filling, and replace the egg with a flaxseed egg (1 tbsp flaxseed meal + 3 tbsp water, let sit 5 min). Substitute coconut cream for heavy cream in the caramel.
- Caramel Apple Spice: Add 1/4 cup finely diced cooked apples to the cake batter before baking for extra apple chunks. (Just sauté apples in a teaspoon of butter and a sprinkle of cinnamon for 2–3 minutes until soft.)
- Shortcut Caramel: In a rush? Use thick store-bought caramel sauce and blend with the butter and powdered sugar for a quick filling.
- Flavor Twists: Try adding a pinch of ground ginger or cardamom to the batter for a spicier, more complex flavor. Or, for a kid-friendly version, leave out the salt for a classic caramel apple experience.
- Nut-Free: This recipe is naturally nut-free, but always check your caramel and butter sources if you’re baking for someone with allergies.
My favorite twist? Swapping in homemade pear butter for the applesauce—totally changes the vibe and is perfect for late fall. Don’t be afraid to get creative!
Serving & Storage Suggestions
Salted Caramel Apple Cider Whoopie Pies are best enjoyed at room temperature, when the cake is soft and the filling is creamy. For a party platter, arrange them on a rustic wooden board with apple slices and a few cinnamon sticks for that Pinterest-worthy look.
- Serving: Serve as a dessert centerpiece, after-dinner treat, or even as a breakfast indulgence with hot coffee or spiced chai. A mug of warm apple cider on the side really brings out the flavors.
- Storage: Store leftover whoopie pies in an airtight container at room temperature for up to 2 days, or in the refrigerator for up to 5 days. If chilled, let them sit out for 15 minutes before eating for best texture.
- Freezing: You can freeze assembled whoopie pies for up to 2 months. Wrap individually in plastic wrap and store in a zip-top freezer bag. Thaw at room temp for 30–45 minutes before serving.
- Reheating: Not needed, but if you want the filling extra gooey, a 10-second zap in the microwave does the trick (just don’t overdo it, or the filling will slide out!).
Honestly, the flavors deepen overnight, so if you can resist, they’re even better the next day. I love sneaking one for breakfast—no judgment, right?
Nutritional Information & Benefits
Each Salted Caramel Apple Cider Whoopie Pie has approximately 290 calories, 13g fat, 42g carbs, and 2g protein. It’s a treat, for sure, but with real applesauce and cider, you get a touch of fruit fiber and vitamin C. The unsalted butter and egg offer a little protein and richness, while the spices (like cinnamon) have antioxidant benefits.
If you’re gluten-free or dairy-free, just follow the swaps above. Allergens to watch for: wheat, eggs, butter, and cream (plus caramel, which contains dairy). I’m all for balanced indulgence—these whoopie pies are a soul-satisfying way to celebrate the flavors of fall, especially when shared with people you love.
Conclusion
So, if you’re craving a fall dessert that’s equal parts nostalgic and impressive, these Salted Caramel Apple Cider Whoopie Pies are your answer. They’re easy enough for a weeknight, fancy enough for a party, and downright addictive. Each bite tastes like autumn leaves, apple orchards, and caramel dreams—all in one sweet sandwich.
Don’t be afraid to tweak the flavors to suit your family. Add extra spice, dial up the salt, or sneak in a different fruit butter. That’s half the fun! Personally, I love making a double batch so there’s always one hidden for a late-night snack.
If you whip up a batch, I’d love to hear how they turn out. Leave a comment, share your own twist, or tag me on your favorite social spot! Happy baking—and here’s to a fall filled with sweet, sticky, apple-cider moments.
Frequently Asked Questions (FAQs)
Can I make the whoopie pies ahead of time?
Absolutely! You can bake the cakes and prep the caramel filling up to two days ahead. Assemble the day you serve for freshest texture.
What’s the best apple cider to use?
Go for real, unfiltered apple cider (not apple juice). The cloudy, tangy stuff from the orchard gives the best flavor punch.
Can I use store-bought caramel instead of making my own?
Yes! Just make sure it’s thick enough to hold its shape in the filling. Add a pinch of flaky salt to mimic the homemade vibe.
How do I keep my whoopie pies from spreading too much?
If your batter is too loose, chill it for 15–20 minutes before scooping. Also, make sure you measure your flour correctly (spoon and level, don’t pack).
Are these whoopie pies kid-friendly?
Definitely! Just go a little lighter on the flaky sea salt topping for little ones, and they’ll love the soft cake and gooey caramel filling.
Pin This Recipe!

Salted Caramel Apple Cider Whoopie Pies

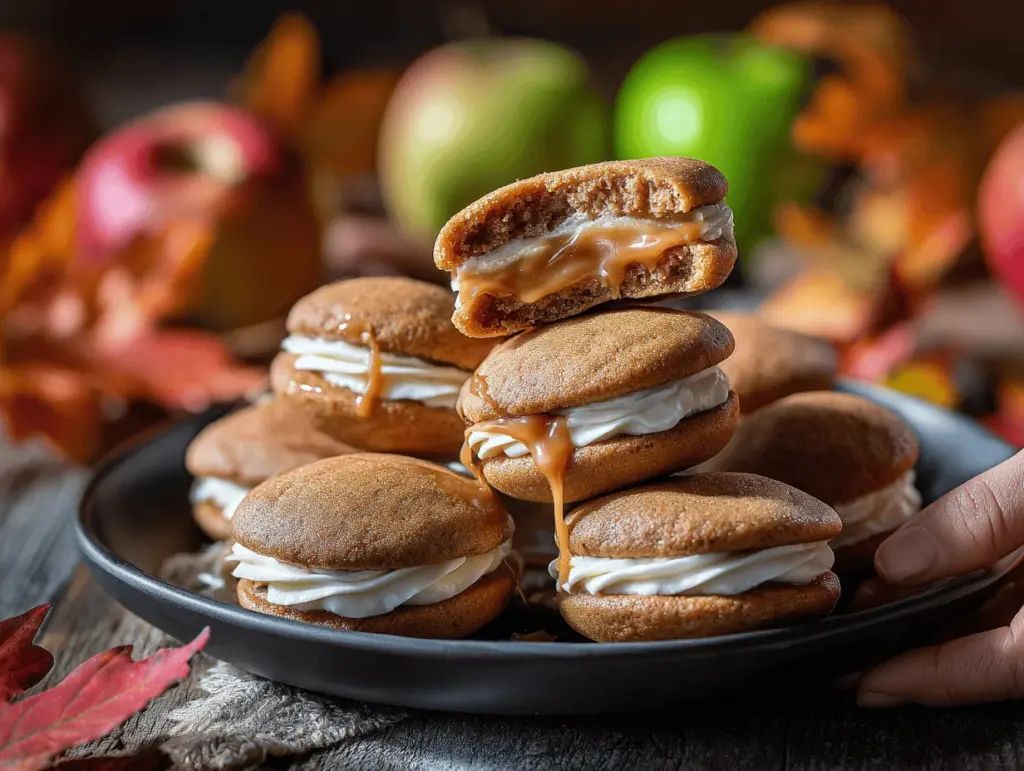
These Salted Caramel Apple Cider Whoopie Pies are a cozy, handheld fall dessert featuring pillowy apple cider cakes and a gooey salted caramel buttercream filling. Perfect for autumn gatherings, bake sales, or a festive treat at home.
- Prep Time: 30 minutes
- Cook Time: 20 minutes
- Total Time: 1 hour
- Yield: 12 whoopie pies 1x
- Category: Dessert
- Cuisine: American
Ingredients
- 1 cup (240 ml) apple cider (reduce to intensify flavor)
- 2 cups (250 g) all-purpose flour
- 1/2 teaspoon baking soda
- 1/2 teaspoon baking powder
- 1/2 teaspoon salt
- 1 teaspoon ground cinnamon
- 1/4 teaspoon ground nutmeg
- 1/4 teaspoon ground allspice (optional)
- 1/2 cup (113 g) unsalted butter, softened
- 1/2 cup (100 g) granulated sugar
- 1/4 cup (50 g) brown sugar, packed
- 1 large egg, room temperature
- 1 teaspoon pure vanilla extract
- 1/2 cup (120 g) unsweetened applesauce
- 1/2 cup (100 g) granulated sugar (for caramel)
- 2 tablespoons (30 ml) water
- 3 tablespoons (45 g) unsalted butter, cubed (for caramel)
- 1/4 cup (60 ml) heavy cream, room temperature
- 1/2 teaspoon flaky sea salt (plus more for sprinkling)
- 1/2 teaspoon vanilla extract (for caramel)
- 1 1/2 cups (180 g) powdered sugar, sifted
- 8 tablespoons (113 g) unsalted butter, softened (for buttercream base)
Instructions
- Pour 1 cup apple cider into a small saucepan. Simmer over medium heat until reduced to about 1/3 cup (80 ml), about 15-20 minutes. Let cool to room temperature.
- Preheat oven to 350°F (180°C). Line two baking sheets with parchment paper.
- In a medium bowl, whisk together flour, baking soda, baking powder, salt, cinnamon, nutmeg, and allspice.
- In a large bowl, beat 1/2 cup softened butter, 1/2 cup granulated sugar, and 1/4 cup brown sugar until light and fluffy, about 2-3 minutes.
- Beat in egg and 1 teaspoon vanilla extract until smooth.
- Mix in applesauce and cooled, reduced apple cider. Batter may look curdled.
- Gently fold dry ingredients into wet mixture just until no streaks of flour remain.
- Use a cookie scoop or tablespoon to drop 2-tablespoon-sized mounds of batter onto prepared baking sheets, spacing about 2 inches apart. Makes about 24 cakes.
- Bake for 10-12 minutes, until set and springy to the touch. Rotate pans halfway through.
- Cool cakes on baking sheet for 5 minutes, then transfer to a wire rack to cool completely.
- For the caramel: In a small heavy saucepan, combine 1/2 cup sugar and 2 tablespoons water. Cook over medium heat without stirring until syrup turns deep amber. Remove from heat; whisk in 3 tablespoons butter, then 1/4 cup cream, 1/2 teaspoon sea salt, and 1/2 teaspoon vanilla. Cool to room temperature.
- For the buttercream: Beat 8 tablespoons softened butter until creamy. Gradually add 1 1/2 cups powdered sugar. Beat in cooled caramel a tablespoon at a time until fluffy. Adjust consistency with more cream or powdered sugar as needed.
- Pair up cakes by size. Pipe or spoon filling onto the flat side of half the cakes. Top with remaining cakes, gently pressing to sandwich.
- Sprinkle a pinch of flaky sea salt on each whoopie pie. Let sit 10 minutes to set before serving.
Notes
For best flavor, use real, unfiltered apple cider and reduce it to a syrup. Let cakes cool completely before filling to prevent buttercream from melting. If cakes spread too much, chill batter before baking. Store in an airtight container at room temperature for 2 days or refrigerate up to 5 days. Freeze for up to 2 months, thaw before serving.
Nutrition
- Serving Size: 1 whoopie pie
- Calories: 290
- Sugar: 28
- Sodium: 180
- Fat: 13
- Saturated Fat: 8
- Carbohydrates: 42
- Fiber: 1
- Protein: 2
Keywords: whoopie pies, apple cider, salted caramel, fall dessert, autumn, easy dessert, apple, caramel, bake sale, kid-friendly, party dessert


