The smell of buttery dough baking in the oven, caramel bubbling gently on the stovetop, and a sprinkle of flaky sea salt—these salted caramel thumbprint cookies honestly never last long in my house. I remember the first time I made these, I was craving something sweet but wanted a homemade treat that felt just a little fancy. You know, something that would make my family pause mid-bite and go, “Whoa, what is this magic?” That’s exactly what happened.
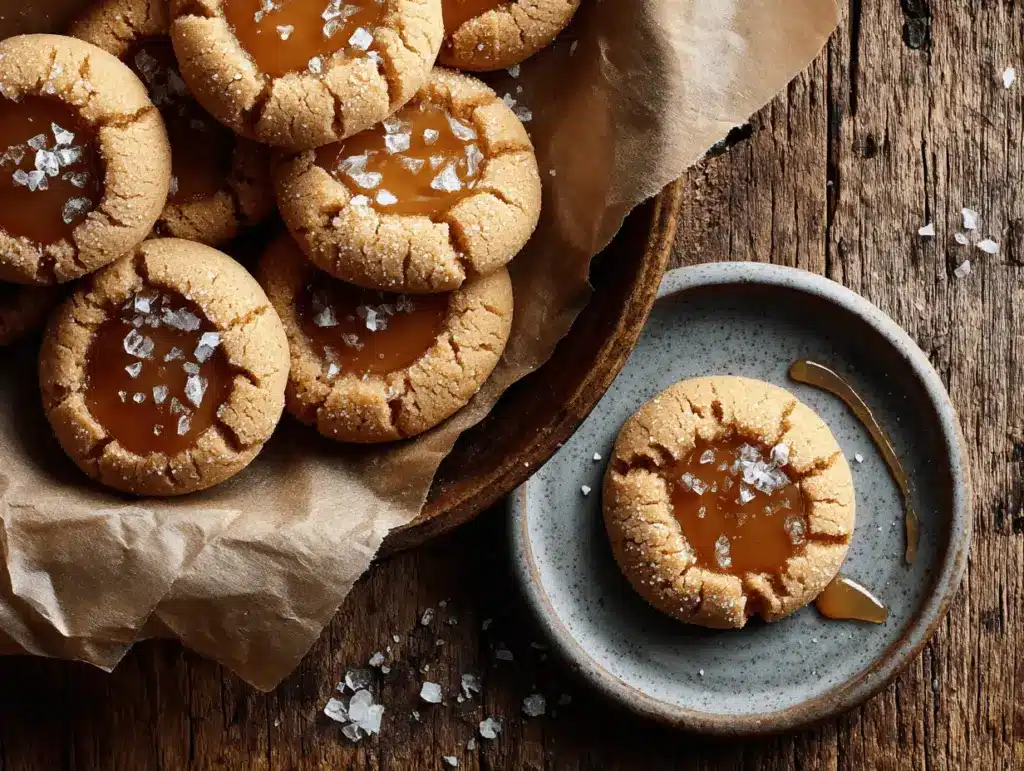
Salted caramel thumbprint cookies are the perfect marriage of soft, melt-in-your-mouth shortbread and gooey, rich caramel. The best part? That hit of flaky sea salt on top. It’s pure bliss. I’ve tested this recipe more times than I can count—sometimes sneaking a caramel-filled cookie before they’ve even cooled. There’s something about the combination of sweet and salty that just hits every craving.
These homemade cookies are my go-to for everything from holiday cookie swaps to cozy nights in. If you love baking but don’t want anything too complicated, this salted caramel thumbprint cookies recipe is a total winner. It uses pantry staples and a few extra minutes for that homemade caramel (totally worth it, trust me). Plus, they look beautiful on any dessert platter. Whether you’re baking with kids or just want something special for yourself, you’ll fall for these cookies just like I did.
Why You’ll Love This Recipe
- Quick & Easy: These salted caramel thumbprint cookies come together in about an hour—ideal for last-minute get-togethers or sweet cravings that just won’t wait.
- Simple Ingredients: No wild goose chases at the grocery store. If you bake at all, you probably have most of what you need right in your pantry and fridge.
- Perfect for Any Occasion: They’re a showstopper at holiday parties, brunches, or even as a thoughtful homemade gift. I’ve even made them for a Tuesday night Netflix snack—no shame!
- Crowd-Pleaser: Every single time I’ve brought these to a party or bake sale, someone asks for the recipe. Kids love the caramel center, and adults go wild for the salty-sweet combo.
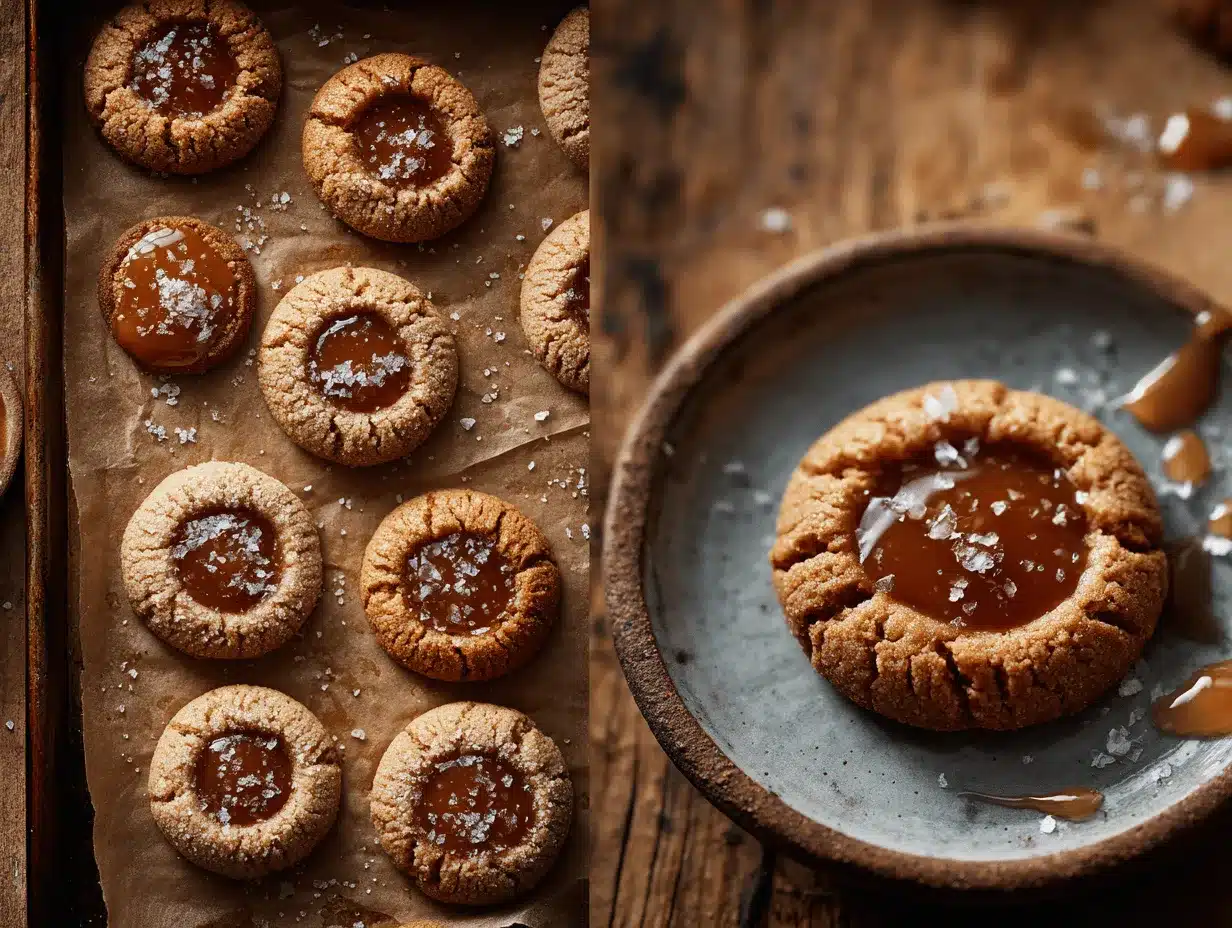
- Unbelievably Delicious: The cookies are buttery and tender, with a thick puddle of homemade caramel and just enough salt to make each bite sing. Honestly, they taste like something from a fancy bakery, but you can whip them up at home.
What really sets this salted caramel thumbprint cookies recipe apart is the homemade caramel. I’ve tried shortcuts before—store-bought caramels, quick microwave hacks—but nothing, and I mean nothing, beats the taste and texture of warm, freshly made caramel. Plus, you can control exactly how salty and sweet the filling is, which is a game-changer. If you’re like me and love a cookie that’s both classic and a little extra, this recipe will absolutely become a staple in your kitchen. It’s the kind of treat that makes you feel like you’ve pulled off something special, even on a regular day. Trust me, these cookies are worth every bite (and every little caramel finger lick!).
What Ingredients You Will Need
This salted caramel thumbprint cookies recipe is built on simple, classic baking ingredients. Every component has a job—some for flavor, some for texture, and a few for that “wow” factor.
- For the Cookie Dough:
- All-purpose flour (2 cups / 250g) – The base for our tender, buttery cookies.
- Unsalted butter (1 cup / 226g, room temperature) – Makes the cookies rich and soft. I use Kerrygold for extra flavor.
- Granulated sugar (1/2 cup / 100g) – Adds sweetness and helps with structure.
- Egg yolks (2 large) – For richness and a tender crumb.
- Pure vanilla extract (1 tsp) – Rounds out the flavor. Go for real vanilla if you can swing it.
- Fine sea salt (1/2 tsp) – Just a touch, to balance the sweetness and bring out the butteriness.
- For the Salted Caramel Filling:
- Granulated sugar (1/2 cup / 100g) – The base for caramel, melts into that deep golden syrup.
- Unsalted butter (3 tbsp / 43g, cubed) – Adds silkiness and flavor.
- Heavy cream (1/4 cup / 60ml, room temperature) – Makes the caramel creamy and spoonable.
- Fine sea salt (1/4 tsp, plus more for sprinkling) – For that signature salty finish. I like Maldon for sprinkling on top.
- Topping (Optional, but highly recommended):
- Flaky sea salt – For that bakery-style finish and a little crunch.
Ingredient Tips & Substitutions: If you’re out of heavy cream, you can use full-fat coconut cream for a dairy-free caramel (just know the flavor will be slightly different). For gluten-free cookies, swap in a 1:1 gluten-free baking flour blend. No vanilla? Almond extract gives a fun twist, but it’s strong, so use half the amount. If you want to skip homemade caramel, store-bought soft caramels melted with a splash of cream work in a pinch, but the flavor won’t be quite the same.
Honestly, the beauty of these cookies is their flexibility. I’ve made them with dark brown sugar for a deeper flavor, or added a pinch of cinnamon to the dough when I felt adventurous. Use what you have—it’s all about that buttery base and that gooey, salty caramel center.
Equipment Needed
- Mixing bowls – One medium for the dough, one small for prepping caramel ingredients.
- Hand mixer or stand mixer – Creams the butter and sugar to fluffy perfection. I’ve used both; hand mixer is great if you’re making a single batch.
- Baking sheet – Lined with parchment paper or a silicone mat for easy cleanup.
- Small saucepan – For making that luscious caramel. Stainless steel pans work best so you can see the sugar color change.
- Wooden spoon or heatproof spatula – For stirring the caramel (avoid metal; it can get too hot to handle safely!).
- Teaspoon or small cookie scoop – For portioning dough and making the thumbprint indentations.
- Wire cooling rack – Helps the cookies cool evenly after baking.
Alternatives & Tips: No stand mixer? Good old-fashioned elbow grease with a wooden spoon works—just takes a bit more effort. If you don’t have a cookie scoop, use a rounded teaspoon. I once used the back of a measuring spoon to make the “thumbprints” when my nails were too long! For caramel, keep a bowl of cold water nearby to test the consistency (old-school candy makers’ trick). And if you’re on a budget, skip the fancy equipment—the real magic is in the ingredients and your hands.
Preparation Method
-
Prep Your Baking Area:
Preheat your oven to 350°F (175°C). Line a baking sheet with parchment paper or a silicone baking mat. Set aside. Softening your butter ahead of time makes a big difference—if you forgot, cut it into small cubes and let it sit for 10 minutes.
-
Make the Cookie Dough:
In a medium bowl, whisk together 2 cups (250g) all-purpose flour and 1/2 tsp fine sea salt. In a large mixing bowl, cream 1 cup (226g) unsalted butter and 1/2 cup (100g) granulated sugar with your mixer on medium speed until light and fluffy, about 2-3 minutes. Scrape down the bowl as needed.
Add 2 large egg yolks and 1 tsp vanilla extract, mixing until smooth. Gradually add the flour mixture, mixing on low just until a soft dough forms. Don’t overmix—stop as soon as no flour streaks remain! If the dough feels sticky, chill for 10-15 minutes.
-
Shape and Bake the Cookies:
Using a small cookie scoop or rounded teaspoon, portion dough into 1-inch (2.5 cm) balls. Place 2 inches apart on your prepared baking sheet. Gently press your thumb or the back of a 1/2 teaspoon into the center of each ball to create a well. If the dough cracks, just press it back together (imperfections make them charming!).
Bake for 12-14 minutes, or until the edges just start to turn golden. Don’t overbake—these should be soft. If the centers puff up, gently re-press with your spoon right after baking. Cool on the pan for 5 minutes, then transfer to a wire rack.
-
Make the Salted Caramel:
While cookies cool, make the caramel. In a clean, dry saucepan over medium-low heat, add 1/2 cup (100g) granulated sugar. Stir constantly with a wooden spoon as the sugar melts into a golden syrup—this can take 5-7 minutes. Watch carefully! Sugar goes from golden to burnt quicker than you’d think.
Once melted, add 3 tbsp (43g) unsalted butter, stirring until melted and smooth. Slowly pour in 1/4 cup (60ml) heavy cream (it’ll bubble, so stand back). Stir until combined and glossy. Remove from heat, add 1/4 tsp fine sea salt, and let cool for 5-10 minutes. Caramel should be thick but spoonable.
-
Fill and Finish:
Using a small spoon, fill each cookie well with about 1/2 tsp caramel. If the caramel firms up, warm it gently. Sprinkle each cookie with flaky sea salt while the caramel is still sticky (so it sticks!).
-
Let Set & Serve:
Allow cookies to cool completely so caramel sets—about 30 minutes at room temp. Or, pop them in the fridge for 10 minutes if you’re impatient (I always am). Enjoy right away or store as directed below.
Prep Tip: If making caramel feels intimidating, practice once with a little extra sugar and butter. The flavor is worth it, even if your first batch is a bit rustic. And don’t stress if your thumbprints aren’t perfectly round—homemade charm is the goal!
Cooking Tips & Techniques
- Don’t Skip Softened Butter: Starting with room temperature butter is key for a fluffy dough. Cold butter won’t cream properly, and melted butter makes the dough greasy.
- Caramel Patience: When melting sugar, keep the heat on medium-low and stir constantly. If it starts to clump or crystallize, lower the heat and keep stirring—it’ll smooth out eventually.
- Thumbprint Trick: I’ve learned (the hard way) that pressing too hard can crack the dough. Use gentle pressure and re-shape as needed.
- Timing the Caramel: Make the caramel while the cookies bake, then let it cool while the cookies cool—this way, everything comes together at the perfect time.
- Consistency Counts: If your caramel is too runny, cook it a minute longer. If it’s too thick, add a splash of cream and stir until smooth.
- Don’t Overbake: Cookies should look pale with just a hint of gold at the edges when you pull them out. They’ll firm up as they cool.
I’ve burned my fair share of caramel (it happens to the best of us), so the best advice is to keep an eye on the pan and trust your nose. If you smell even a hint of burnt sugar, pull it off the heat. And if you’re multitasking—set a timer! It’s easy to lose track when you’re busy shaping cookies and prepping caramel at the same time.
Variations & Adaptations
- Chocolate Caramel Thumbprints: Add 1/4 cup (25g) unsweetened cocoa powder to the flour for a chocolatey base. You can also drizzle melted dark chocolate over the finished cookies for extra decadence.
- Nutty Caramel Crunch: Before baking, roll the dough balls in finely chopped toasted pecans or almonds. The nuts add crunch and a toasty flavor that pairs perfectly with caramel.
- Gluten-Free Version: Use a 1:1 gluten-free all-purpose flour blend. I’ve tried this with King Arthur’s blend, and the cookies came out just as tender.
- Dairy-Free Swap: Use a plant-based butter (like Miyoko’s) and coconut cream for the caramel. The flavor will have a subtle coconut note—delicious if you like a little tropical twist.
- Holiday Spice: Add 1/2 tsp ground cinnamon or pumpkin pie spice to the dough for a cozy, seasonal variation.
One of my favorite spins? Swapping the caramel for homemade raspberry jam and topping with powdered sugar for Valentine’s Day. It’s amazing how easily these cookies adapt to your cravings or dietary needs—just tweak the filling, roll-ins, or spice level to match your mood or the season!
Serving & Storage Suggestions
Salted caramel thumbprint cookies are best served at room temperature, where the caramel is soft but not runny. Arrange them on a pretty platter with a sprinkle of extra flaky salt for a bakery-worthy presentation.
Pair these cookies with a mug of strong coffee, hot cocoa, or even a glass of cold milk. They also make a gorgeous addition to any holiday cookie tray—just saying! If you’re feeling fancy, serve them with a scoop of vanilla ice cream and a drizzle of leftover caramel for dessert.
To store, keep cookies in an airtight container at room temperature for up to 4 days. If your kitchen is warm or humid, pop them in the fridge—just allow them to come to room temp before serving for the best texture. You can freeze the cookies (filled or unfilled) for up to 2 months; thaw at room temperature. If the caramel gets too firm, a quick 5-10 second zap in the microwave brings them back to life. The flavors actually deepen after a day or two, so they’re just as delicious (maybe even more so!) the next day.
Nutritional Information & Benefits
Each salted caramel thumbprint cookie (based on a batch of 24) contains roughly:
- Calories: 140
- Fat: 8g
- Saturated fat: 5g
- Carbohydrates: 18g
- Sugar: 10g
- Protein: 1g
These cookies are rich, so a little goes a long way! The butter provides that classic, satisfying cookie texture, and the caramel gives a burst of sweet flavor. If you use gluten-free flour or dairy-free ingredients, these can fit special diets (with a few tweaks). But heads-up: they do contain eggs, dairy, and gluten in the classic version—so always check with guests if you’re sharing. Personally, I love making small treats like this part of a balanced approach to sweets—one or two cookies with coffee hits the spot without going overboard.
Conclusion
Salted caramel thumbprint cookies are the kind of treat you’ll want to make again and again. They’re buttery, rich, and just a little bit fancy—without any fuss. Whether you’re baking for a crowd, treating your family, or just indulging yourself, this recipe is pure comfort in cookie form.
Don’t be afraid to mix things up—try a new filling, swap in a favorite spice, or go gluten-free if needed. The best cookies are the ones you make your own. Personally, I come back to this recipe every holiday season (and, let’s be honest, plenty of random weekends in between). It’s a little taste of joy, and I hope it brings you as much happiness as it has my family.
If you try these salted caramel thumbprint cookies, please leave a comment below or share your own twist! Did you add nuts, change the filling, or come up with a genius hack? I’d love to hear how these turned out for you. Happy baking—and don’t forget to savor every bite!
Frequently Asked Questions
How do I keep my caramel from burning?
Keep the heat at medium-low, stir constantly, and don’t walk away from the stove. Trust your nose—if you smell burning, remove the pan from the heat right away.
Can I use store-bought caramel?
Yes, you can melt soft caramels with a splash of cream as a shortcut. The flavor won’t be quite as deep, but it works in a pinch!
What if I don’t have flaky sea salt?
Regular fine sea salt works, but sprinkle lightly. Flaky salt adds a fun crunch, but don’t let it stop you if you can’t find it—these cookies are still delicious!
How do I make these cookies gluten-free?
Use a 1:1 gluten-free baking flour blend in place of regular flour. I’ve had great results with King Arthur’s or Bob’s Red Mill blends.
Can I freeze these cookies?
Absolutely! Freeze them (filled or unfilled) in a single layer, then transfer to a freezer-safe bag. Thaw at room temperature and enjoy—maybe even with a little extra caramel on top!
Pin This Recipe!
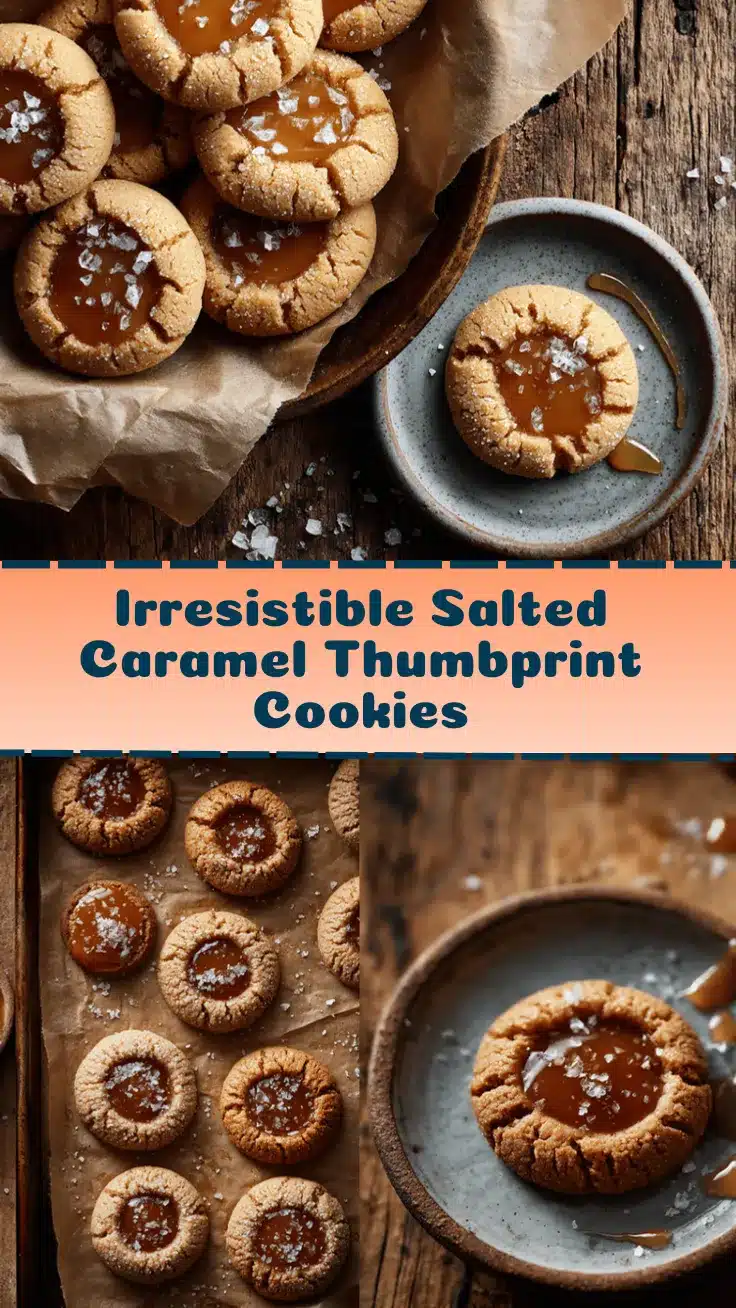
Salted Caramel Thumbprint Cookies
These salted caramel thumbprint cookies combine buttery, melt-in-your-mouth shortbread with gooey homemade caramel and a sprinkle of flaky sea salt. They’re easy to make, look beautiful on a dessert platter, and are a guaranteed crowd-pleaser for any occasion.
- Prep Time: 20 minutes
- Cook Time: 14 minutes
- Total Time: 1 hour
- Yield: 24 cookies 1x
- Category: Dessert
- Cuisine: American
Ingredients
- 2 cups all-purpose flour (250g)
- 1 cup unsalted butter, room temperature (226g)
- 1/2 cup granulated sugar (100g)
- 2 large egg yolks
- 1 teaspoon pure vanilla extract
- 1/2 teaspoon fine sea salt
- For the caramel filling:
- 1/2 cup granulated sugar (100g)
- 3 tablespoons unsalted butter, cubed (43g)
- 1/4 cup heavy cream, room temperature (60ml)
- 1/4 teaspoon fine sea salt, plus more for sprinkling
- Flaky sea salt, for topping (optional but recommended)
Instructions
- Preheat oven to 350°F (175°C). Line a baking sheet with parchment paper or a silicone baking mat.
- In a medium bowl, whisk together flour and 1/2 teaspoon fine sea salt.
- In a large mixing bowl, cream 1 cup unsalted butter and 1/2 cup granulated sugar with a mixer on medium speed until light and fluffy, about 2-3 minutes.
- Add egg yolks and vanilla extract, mixing until smooth.
- Gradually add the flour mixture, mixing on low just until a soft dough forms. If sticky, chill for 10-15 minutes.
- Portion dough into 1-inch balls using a small cookie scoop or rounded teaspoon. Place 2 inches apart on the prepared baking sheet.
- Gently press your thumb or the back of a 1/2 teaspoon into the center of each ball to create a well.
- Bake for 12-14 minutes, or until edges just start to turn golden. If centers puff up, gently re-press after baking. Cool on the pan for 5 minutes, then transfer to a wire rack.
- While cookies cool, make the caramel: In a clean, dry saucepan over medium-low heat, add 1/2 cup granulated sugar. Stir constantly with a wooden spoon until melted and golden (5-7 minutes).
- Add 3 tablespoons unsalted butter, stirring until melted and smooth. Slowly pour in 1/4 cup heavy cream (it will bubble), and stir until combined and glossy.
- Remove from heat, add 1/4 teaspoon fine sea salt, and let cool for 5-10 minutes until thick but spoonable.
- Fill each cookie well with about 1/2 teaspoon caramel. If caramel firms up, warm gently. Sprinkle each cookie with flaky sea salt while caramel is sticky.
- Allow cookies to cool completely so caramel sets, about 30 minutes at room temperature or 10 minutes in the fridge.
Notes
For gluten-free cookies, use a 1:1 gluten-free flour blend. If you prefer, you can use store-bought soft caramels melted with a splash of cream for the filling. Don’t overbake the cookies—they should be pale with just a hint of gold at the edges. If caramel is intimidating, practice with extra sugar and butter. Cookies can be frozen (filled or unfilled) for up to 2 months.
Nutrition
- Serving Size: 1 cookie
- Calories: 140
- Sugar: 10
- Sodium: 60
- Fat: 8
- Saturated Fat: 5
- Carbohydrates: 18
- Protein: 1
Keywords: salted caramel thumbprint cookies, caramel cookies, holiday cookies, easy cookie recipe, homemade caramel, shortbread cookies, sweet and salty cookies, dessert, baking