“You know, the sizzle when bacon hits the grill—it’s like music in the kitchen,” my buddy Jake said as he flipped the last slider patty that night. It was a late Saturday, and honestly, I was already juggling a dozen things, trying to get dinner ready for a crowd that was way bigger than I expected. I had planned on something simple, but then Jake showed up with a pack of bacon and a mischievous grin. That’s when these Ultimate Loaded BBQ Bacon Cheeseburger Sliders were born.
It wasn’t some fancy, planned-out meal. Nope, I forgot to grab the usual burger buns and had to improvise with slider rolls from the corner store. The BBQ sauce? I accidentally grabbed a smoky chipotle instead of the sweet one I’d meant to buy. Yet, somehow, the combination came together better than I imagined. The smoky tang, the crispy bacon crackling, and the melty cheese all packed into tiny, handheld sliders turned out to be a total hit—so much so that I keep making them whenever a crowd’s around.
Maybe you’ve been there: last-minute guests, limited time, and the pressure to serve something both comforting and fun. These sliders fit that bill perfectly. They’re not just crowd-pleasers; they’re the kind of recipe that gets people chatting, grabbing seconds, and asking for the “secret sauce.” Spoiler: there isn’t much of a secret, just good ingredients and a little creativity. I love how this recipe brings everyone together—whether it’s backyard BBQs, game nights, or casual family dinners. And honestly, the mess in the kitchen is totally worth it.
Why You’ll Love This Recipe
This Ultimate Loaded BBQ Bacon Cheeseburger Sliders recipe isn’t just another burger variation; it’s a trusted crowd-pleaser that I’ve perfected through plenty of kitchen chaos and happy accidents. Here’s why it might become your go-to too:
- Quick & Easy: Ready in about 30 minutes from start to finish—perfect for busy weeknights or last-minute gatherings.
- Simple Ingredients: Uses basics you probably already have in your fridge and pantry, no special trips needed.
- Perfect for Parties: Bite-sized and fun, these sliders are ideal for potlucks, game days, or casual celebrations.
- Crowd-Pleaser: Crispy bacon, melty cheese, and tangy BBQ sauce combine for a flavor combo that both kids and adults rave about.
- Unbelievably Delicious: The juicy patties with a smoky sauce and sharp cheddar make every bite feel indulgent but approachable.
What sets this recipe apart is the layering technique. I like to lightly toast the slider buns to add texture, and the homemade BBQ sauce blend I use balances smoky heat with a hint of sweetness. Plus, the cheese melts just right without turning greasy, thanks to the timing of assembly. I’ve learned through trial and error that stacking the ingredients in the right order really makes the slider shine. Honestly, it’s one of those recipes that gets better the more you make it, and every time, people ask for the recipe or want to know what’s different. Well, it’s this little mix of smoky, crispy, cheesy magic that keeps me coming back.
What Ingredients You Will Need
This recipe uses simple, wholesome ingredients to deliver bold flavor and satisfying texture without the fuss. Most items are pantry staples or easy to find at your local grocery store, making it a straightforward recipe to pull off anytime.
- For the Sliders:
- 1½ pounds (680g) ground beef, 80/20 blend for juiciness
- 12 slider buns or small dinner rolls (I recommend King’s Hawaiian for a slightly sweet touch)
- 12 slices crispy cooked bacon (thick-cut if you want a meatier bite)
- 12 slices sharp cheddar cheese (or your favorite melting cheese)
- Salt and freshly ground black pepper, to taste
- For the BBQ Sauce:
- ½ cup (120ml) ketchup
- 2 tablespoons apple cider vinegar
- 1 tablespoon brown sugar (packed)
- 1 teaspoon smoked paprika
- ½ teaspoon garlic powder
- ½ teaspoon onion powder
- 1 teaspoon Worcestershire sauce
- Pinch of cayenne pepper (optional, for a little kick)
- For Assembly:
- Pickles, sliced (adds a nice crunch and tang)
- Leafy lettuce or baby spinach (optional, for freshness)
- Butter, for toasting buns
Pro tip: I like to keep the bacon warm in the oven while preparing everything else—it helps keep it crispy. If you prefer a smoky store-bought BBQ sauce, that works too, but mixing your own allows you to tweak sweetness and spice. For a gluten-free option, swap slider buns for gluten-free rolls or sturdy lettuce leaves. And if you’re short on cheddar, Monterey Jack or mozzarella melt nicely as well.
Equipment Needed
- Large skillet or grill pan – for cooking the patties evenly
- Baking sheet – perfect for warming buns and bacon together
- Mixing bowl – to combine the BBQ sauce ingredients
- Spatula or tongs – for flipping and handling sliders
- Sharp knife – to slice pickles and buns cleanly
- Optional: meat thermometer – handy if you want to check patty doneness precisely
If you don’t have a grill pan, a heavy-bottomed skillet works just fine. I once made these sliders on a cast iron griddle, which gave the patties a nice crust. For a budget-friendly alternative, you can use a regular non-stick pan, but watch the heat to avoid burning the bacon or buns. When toasting buns, I suggest a light coating of butter and keeping an eye on them—they go from golden to burnt faster than you expect. Also, cleaning your skillet well before cooking helps prevent any burned bits from affecting the burger’s flavor.
Preparation Method
- Preheat your oven to 350°F (175°C). Start by crisping the bacon on a baking sheet lined with foil; this usually takes about 15 minutes. Keep an eye on it so it doesn’t burn but gets nice and crunchy.
- While the bacon cooks, prepare the BBQ sauce. In a mixing bowl, whisk together ketchup, apple cider vinegar, brown sugar, smoked paprika, garlic powder, onion powder, Worcestershire sauce, and cayenne pepper. Taste and adjust the sweetness or heat as you like.
- Form the slider patties. Divide the ground beef into 12 equal portions (about 2 ounces or 57g each). Gently shape them into thin, round patties slightly larger than your slider buns since they shrink during cooking. Season both sides with salt and pepper.
- Heat your skillet or grill pan over medium-high heat. Cook the patties for about 2-3 minutes per side. Add a slice of cheddar cheese on each patty in the last minute of cooking and cover the pan briefly to melt the cheese perfectly.
- Toast the slider buns. Spread softened butter on the cut sides and place them on a baking sheet. Warm them in the oven for about 5 minutes or until golden and slightly crisp.
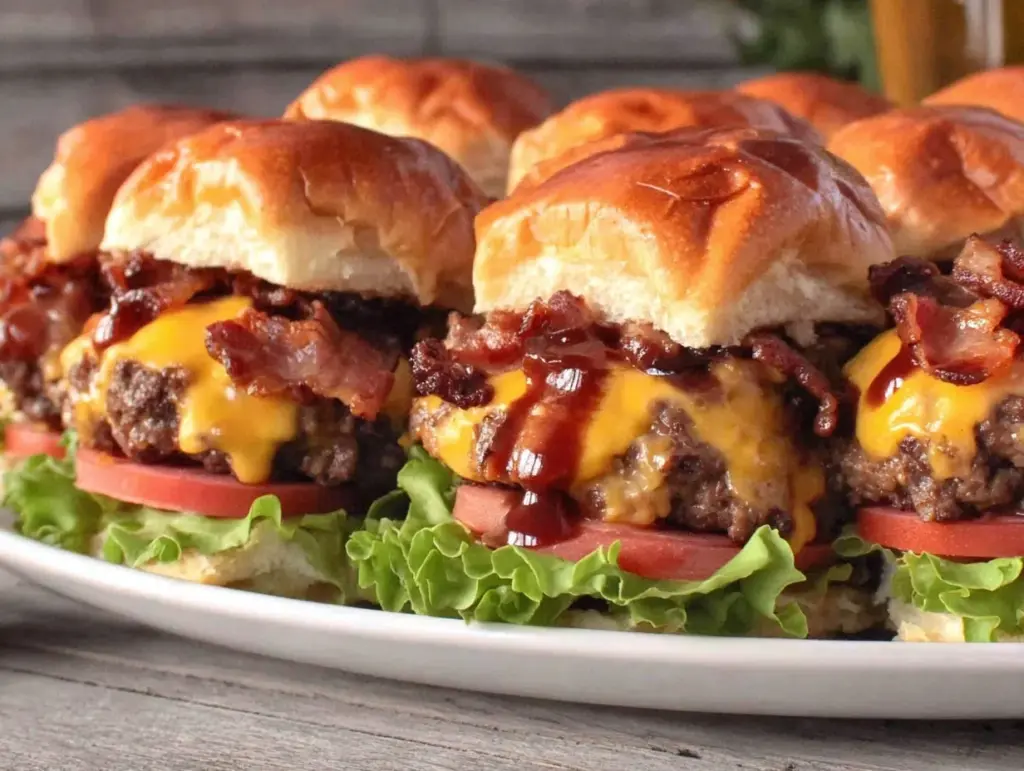
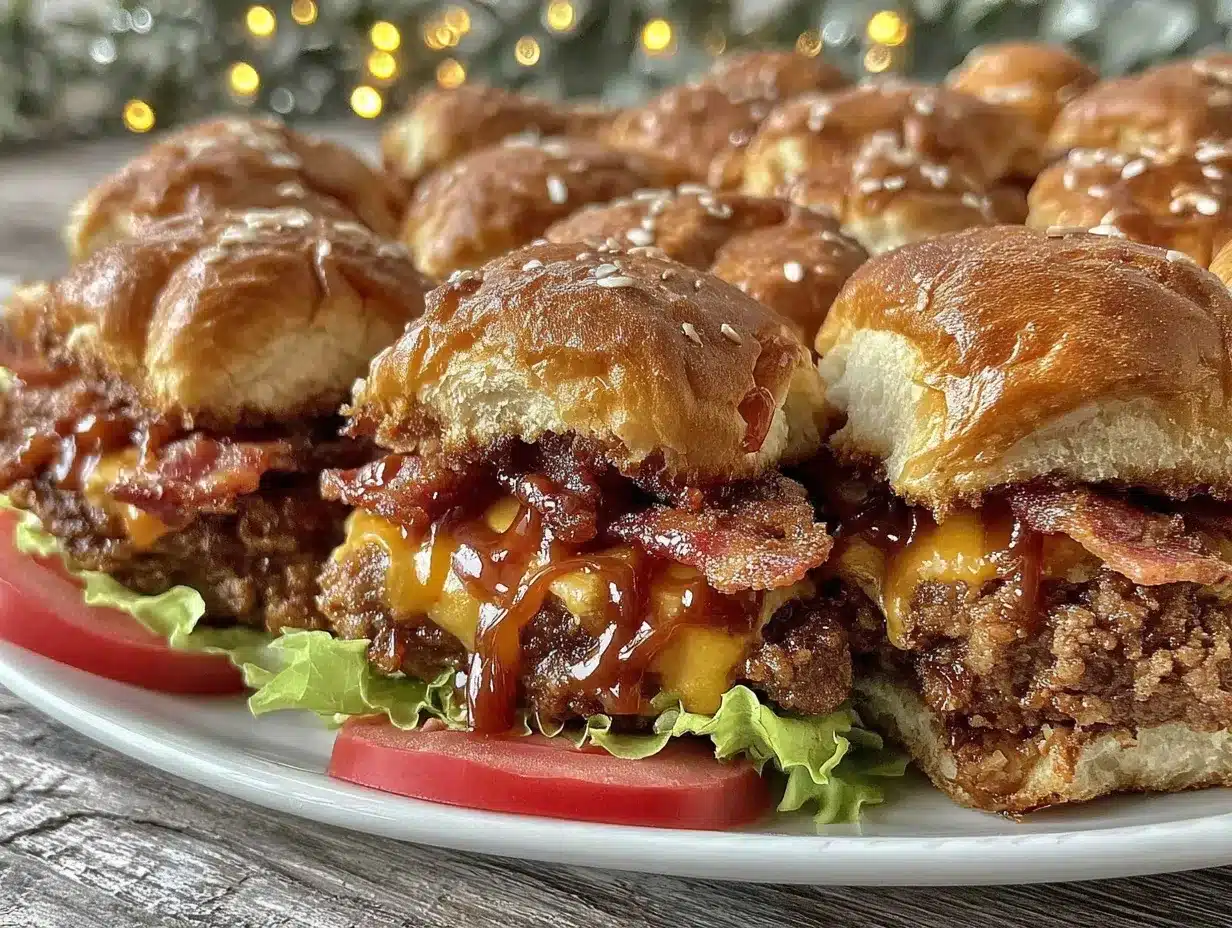
- Assemble the sliders. Spread a spoonful of the BBQ sauce on the bottom bun, add the cheeseburger patty, then a slice of crispy bacon. Top with pickles and a small leaf of lettuce or spinach if you like, and finish with the top bun.
- Serve immediately. These sliders are best enjoyed warm when the cheese is still melty and the bacon’s crunch is fresh.
Note: If you want to prep ahead, you can cook the patties and bacon up to a day before and reheat gently in the oven. Just avoid toasting the buns early to keep them fresh. Also, if your patties seem thick, press them down a bit before cooking to help them cook evenly without overcooking the exterior.
Cooking Tips & Techniques
Getting these BBQ bacon cheeseburger sliders just right takes a little finesse, but nothing too crazy. Here are some tips from my kitchen experiments:
- Don’t overwork the meat. When forming patties, handle the beef gently. Overmixing can make the sliders tough instead of juicy.
- Thin patties cook more evenly. Since sliders are small, thinner patties avoid the dreaded raw center and burnt edges dilemma.
- Cheese timing is key. Add cheese toward the end of cooking and cover the pan to trap heat, so it melts nicely without turning greasy.
- Butter the buns lightly. Too much butter can make the buns soggy, so a thin layer is enough to get that golden toast.
- Keep bacon warm and crispy. If you cook bacon too early and let it sit, it loses its crunch. I keep mine in a low oven (around 200°F/93°C) to maintain texture.
- Multitask smartly. While bacon is in the oven, prep sauce and form patties to save time. It helps keep everything fresh and hot when assembled.
I once had a batch where I forgot to season the patties—let me tell you, even the best cheese can’t save a bland burger! So seasoning is non-negotiable. Also, when you flip the patties, resist the urge to press them down. That just squeezes out the juices and dries the meat.
Variations & Adaptations
One of the fun things about this recipe is how easy it is to tweak to match your taste or dietary needs:
- Spicy Kick: Add diced jalapeños to the patties or use a hot BBQ sauce variant for extra heat.
- Vegetarian Option: Swap beef patties for grilled portobello mushrooms or plant-based burger patties, and use dairy-free cheese.
- Different Cheese: Try pepper jack for a smoky, spicy flavor or Swiss for a milder, nuttier taste.
- Gluten-Free: Use gluten-free slider buns or large lettuce leaves to wrap the sliders.
- Seasonal Twist: In summer, add fresh tomato slices or swap pickles for tangy cucumber ribbons.
I once tried mixing a bit of caramelized onion into the patties for sweetness, and that was surprisingly good—adds a subtle depth without overpowering the BBQ flavor. Feel free to experiment with your favorite condiments, too. A smear of garlic aioli or honey mustard can make these sliders uniquely yours.
Serving & Storage Suggestions
These sliders are best served hot off the grill or pan, right after assembly. The combination of melty cheese and crispy bacon tastes fantastic when the buns are still warm and slightly toasted.
For presentation, line a platter with parchment paper and arrange the sliders close together—makes for an inviting spread that encourages grabbing more than one. Pair them with classic sides like coleslaw, sweet potato fries, or a fresh green salad. And a cold beer or iced tea rounds out the meal perfectly.
To store leftovers, wrap sliders individually in foil or place them in an airtight container and refrigerate for up to 2 days. Reheat in the oven at 325°F (160°C) for about 10 minutes to bring back the warmth without sogginess. Avoid microwaving if you want to keep the buns from getting chewy.
Flavors tend to meld a bit when refrigerated, which can be great if you prepare these a day ahead for a party. Just toast the buns fresh before serving to maintain that satisfying crunch.
Nutritional Information & Benefits
Each slider contains approximately 250 calories, with 15 grams of fat, 18 grams of protein, and 10 grams of carbohydrates. The beef provides a solid dose of iron and B vitamins, essential for energy. Bacon adds flavor and fat but should be eaten in moderation.
Using leaner ground beef can reduce fat content, while swapping cheddar for a reduced-fat cheese cuts calories without losing much flavor. The homemade BBQ sauce adds tang without extra preservatives or sugars you might find in store-bought versions.
This recipe is naturally gluten-free if you choose appropriate buns or wraps, and it can be adapted for dairy-free diets easily by switching cheese and butter. I appreciate how this meal covers comfort food cravings while allowing some control over ingredients—perfect for balancing indulgence with mindful eating.
Conclusion
So, if you’re looking for a fun, tasty way to feed a crowd without stressing over complicated recipes, these Ultimate Loaded BBQ Bacon Cheeseburger Sliders might just be your new best friend. They bring together simple ingredients with bold flavors in a way that’s approachable, satisfying, and totally shareable.
Don’t be afraid to tweak the toppings or sauce to fit your family’s favorites—that’s the beauty of sliders. I love making these because they remind me of good times with friends, the easy laughter around the table, and yes, that glorious sound of bacon sizzling in the pan. Give them a try, and let me know how you customize yours!
And hey, if you make these sliders, drop a comment below or share your version. I’d love to hear what you think or any creative twists you come up with. Happy cooking and even happier eating!
FAQs
Can I make these sliders ahead of time?
Yes! You can cook the patties and bacon a day ahead and store them in the fridge. Assemble and toast the buns just before serving for best results.
What’s the best type of beef to use?
I recommend an 80/20 ground beef blend—it’s juicy and flavorful without too much fat that can cause flare-ups or greasy sliders.
Can I freeze these sliders?
Absolutely. Wrap them tightly in foil or plastic wrap and freeze for up to 2 months. Reheat in the oven at 350°F (175°C) until warmed through.
How do I prevent the buns from getting soggy?
Lightly butter and toast the buns, and add sauces just before serving. Avoid assembling too far in advance to keep buns from absorbing moisture.
What can I use instead of bacon?
If you want a vegetarian option, crispy smoked tempeh or grilled mushrooms work well. Turkey bacon is also a leaner alternative.
Pin This Recipe!
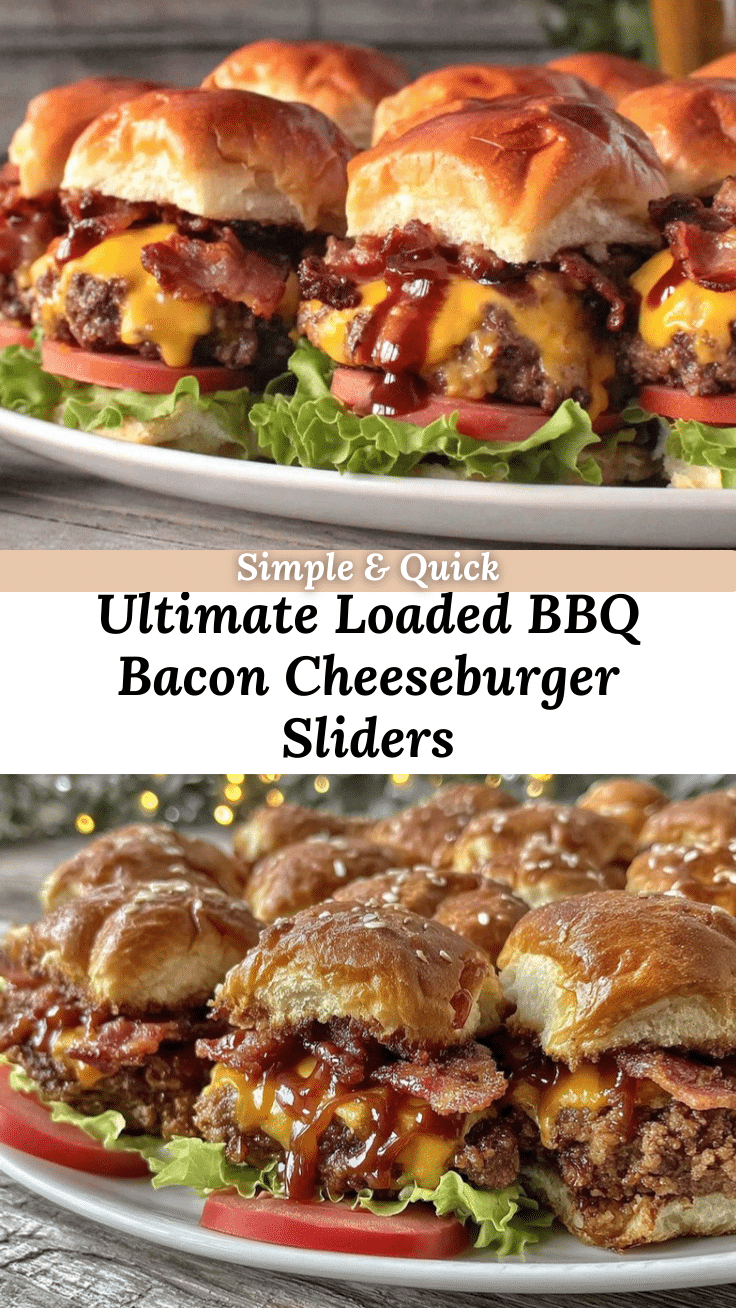
Ultimate Loaded BBQ Bacon Cheeseburger Sliders

These Ultimate Loaded BBQ Bacon Cheeseburger Sliders are a quick and easy crowd-pleaser featuring juicy beef patties, crispy bacon, melty cheese, and tangy homemade BBQ sauce, perfect for parties and casual dinners.
- Prep Time: 10 minutes
- Cook Time: 20 minutes
- Total Time: 30 minutes
- Yield: 12 sliders 1x
- Category: Main Course
- Cuisine: American
Ingredients
- 1½ pounds (680g) ground beef, 80/20 blend
- 12 slider buns or small dinner rolls (King’s Hawaiian recommended)
- 12 slices crispy cooked bacon (thick-cut preferred)
- 12 slices sharp cheddar cheese
- Salt and freshly ground black pepper, to taste
- ½ cup (120ml) ketchup
- 2 tablespoons apple cider vinegar
- 1 tablespoon brown sugar (packed)
- 1 teaspoon smoked paprika
- ½ teaspoon garlic powder
- ½ teaspoon onion powder
- 1 teaspoon Worcestershire sauce
- Pinch of cayenne pepper (optional)
- Pickles, sliced
- Leafy lettuce or baby spinach (optional)
- Butter, for toasting buns
Instructions
- Preheat your oven to 350°F (175°C). Crisp the bacon on a baking sheet lined with foil for about 15 minutes until crunchy.
- While the bacon cooks, prepare the BBQ sauce by whisking together ketchup, apple cider vinegar, brown sugar, smoked paprika, garlic powder, onion powder, Worcestershire sauce, and cayenne pepper in a mixing bowl. Adjust sweetness or heat to taste.
- Divide the ground beef into 12 equal portions (about 2 ounces or 57g each) and gently shape into thin, round patties slightly larger than the slider buns. Season both sides with salt and pepper.
- Heat a skillet or grill pan over medium-high heat. Cook patties for 2-3 minutes per side. Add a slice of cheddar cheese on each patty in the last minute of cooking and cover briefly to melt the cheese.
- Spread softened butter on the cut sides of the slider buns and toast them on a baking sheet in the oven for about 5 minutes until golden and slightly crisp.
- Assemble the sliders by spreading a spoonful of BBQ sauce on the bottom bun, adding the cheeseburger patty, then a slice of crispy bacon. Top with pickles and a leaf of lettuce or spinach if desired, then finish with the top bun.
- Serve immediately while warm and enjoy.
Notes
Keep bacon warm in a low oven to maintain crispiness. Use gluten-free buns or lettuce wraps for gluten-free option. Add cheese at the end of cooking and cover pan to melt without greasiness. Avoid pressing patties while cooking to retain juiciness. Toast buns lightly with butter to avoid sogginess. Patties and bacon can be cooked a day ahead and reheated.
Nutrition
- Serving Size: 1 slider
- Calories: 250
- Fat: 15
- Carbohydrates: 10
- Protein: 18
Keywords: BBQ bacon cheeseburger sliders, loaded sliders, party food, crowd-pleaser, easy sliders, bacon cheeseburger, BBQ sauce, slider recipe


