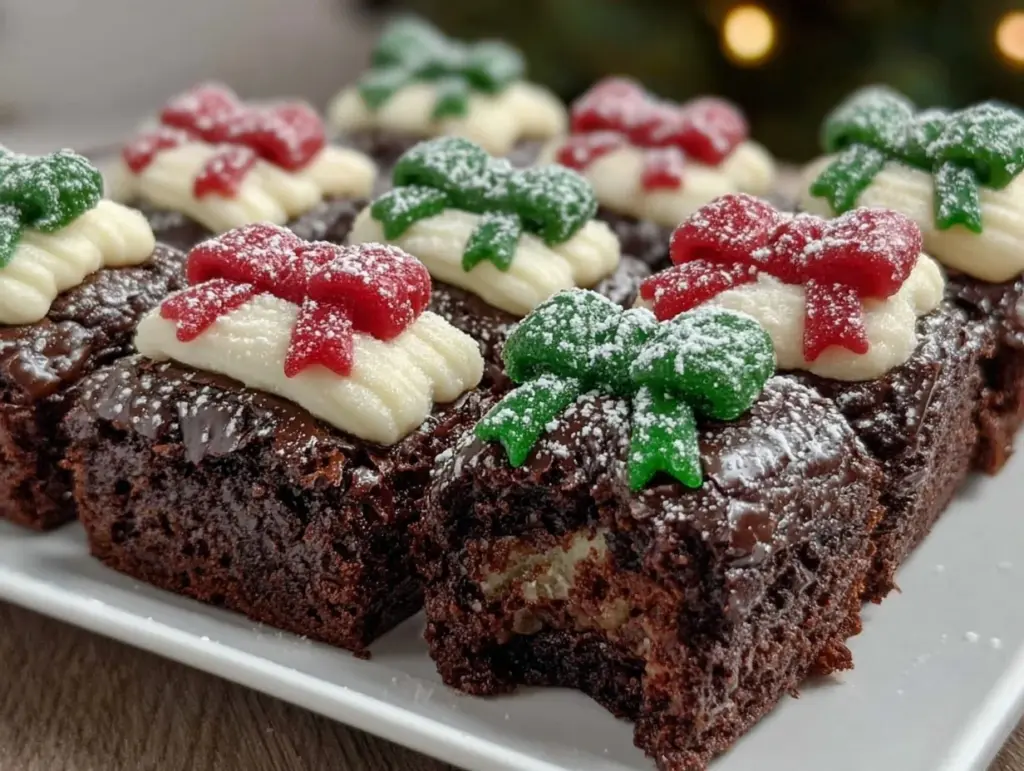
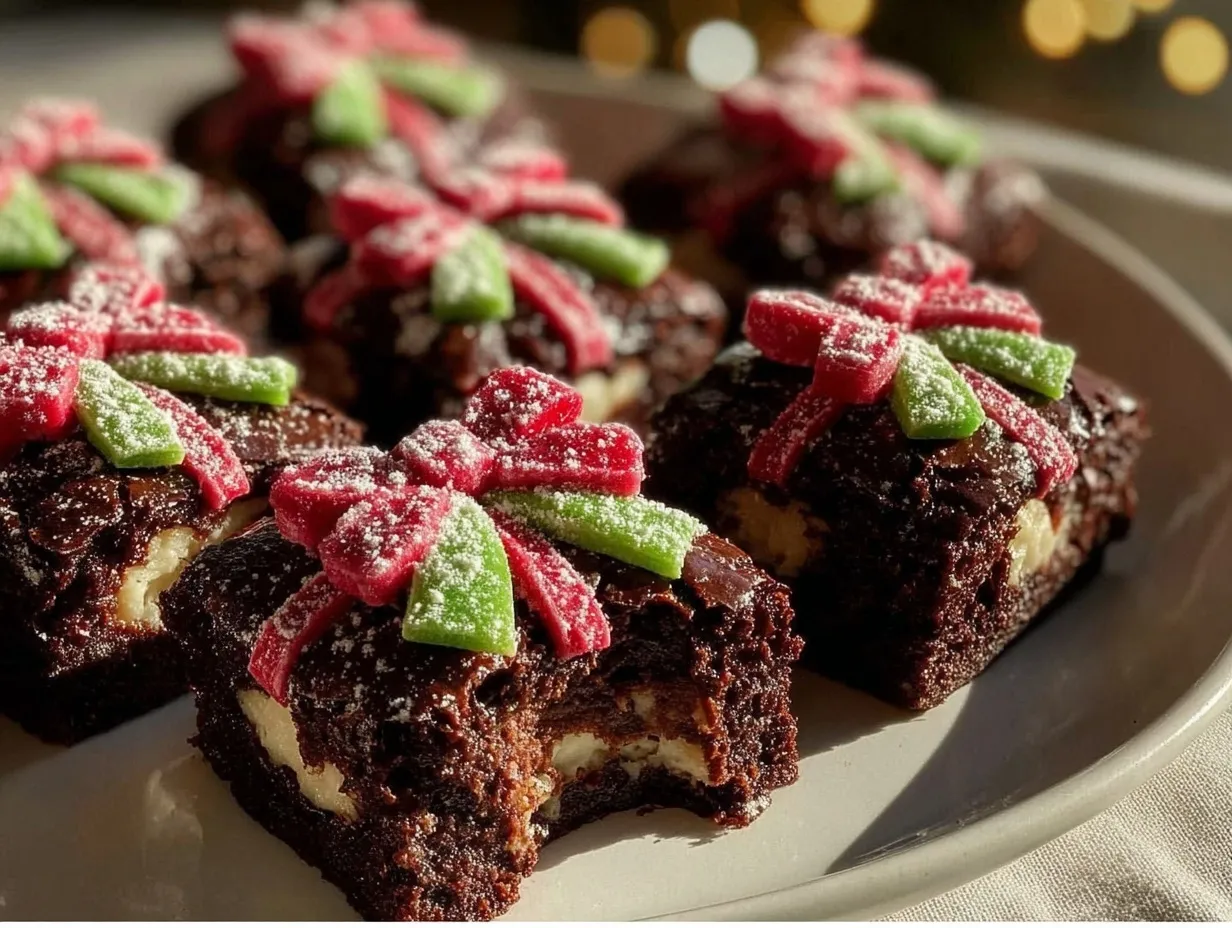
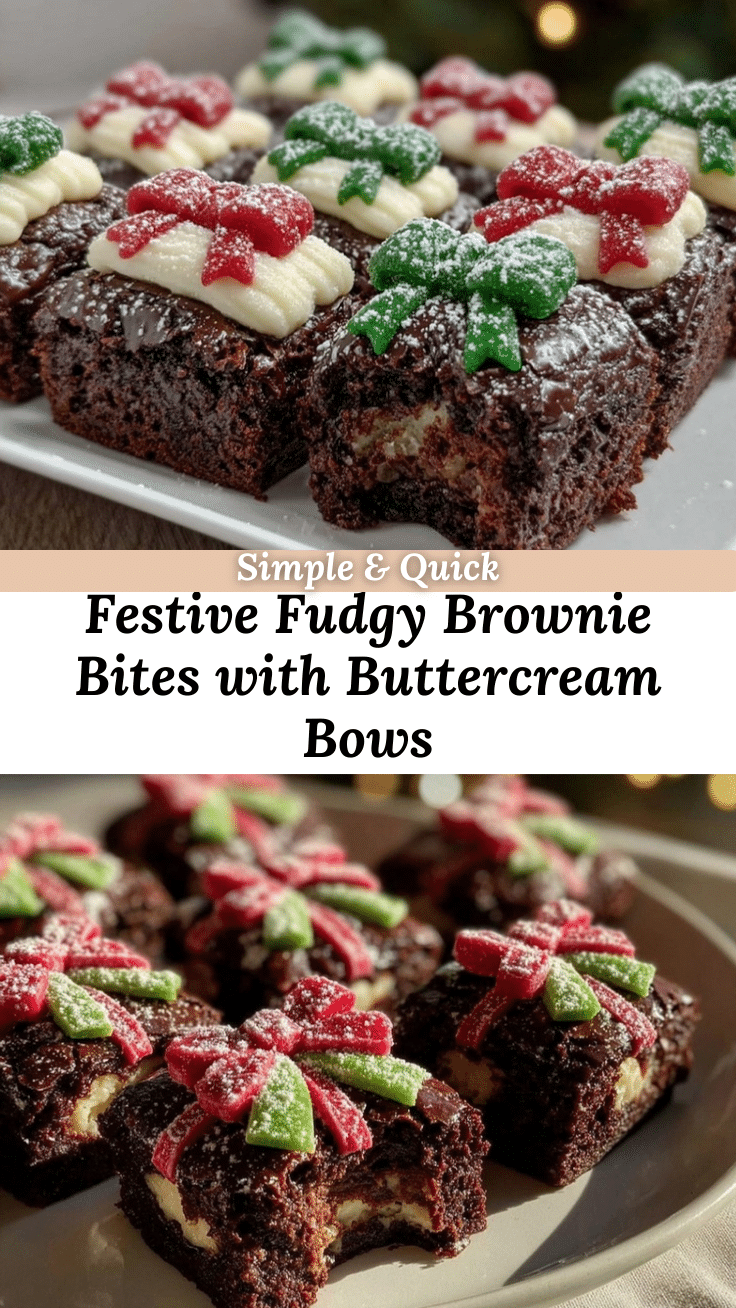
Picture this: the scent of rich cocoa and melted chocolate swirling through your kitchen, holiday music playing softly in the background, and a tray of adorable Christmas Present Brownie Bites with buttercream bows cooling on the counter. There’s something about the way these little bites glisten, topped with vibrant buttercream, that makes you pause—maybe just for a second—and realize you’ve crafted something magical. The first time I made these Christmas Present Brownie Bites, I was knee-high to a grasshopper, watching my grandma tie ribbons on her legendary fudge squares. That moment stuck with me. Years ago, I stumbled on the idea of transforming classic brownies into festive gifts, and I wish I’d discovered this trick sooner. Let’s face it, brownies are good, but brownies dressed up as Christmas presents are pure, nostalgic comfort wrapped in a bow (literally!).
When I baked my first batch, my kids couldn’t stop sneaking them off the rack. I caught my husband trying to snag one before dinner—no shame, honestly. These little treats have become our family’s secret weapon for holiday gatherings, teacher gifts, and cookie exchanges. They’re the kind of dessert that draws a crowd and starts conversations (“How did you make those bows so perfect?”). I’ve tested this recipe more times than I can count—in the name of research, of course—and every time, it feels like a warm hug for your taste buds. Whether you’re looking to brighten up your Pinterest board, wow your neighbors, or just treat yourself to something special, these Christmas Present Brownie Bites are dangerously easy and impossibly cute. You’re going to want to bookmark this one for every holiday season!
Why You’ll Love This Recipe
Let me just say, these Christmas Present Brownie Bites with Buttercream Bows aren’t your average holiday treat. I’ve baked a lot of brownies over the years (some for bake sales, some just because), and this version is hands-down my favorite for Christmas. Here’s why they stand out:
- Quick & Easy: Ready in under 45 minutes, so you can whip up a batch even on a busy December night.
- Simple Ingredients: No fancy chocolate or weird flour blends—just pantry staples you probably already have.
- Perfect for Gifting: These look like little presents, making them ideal for neighbor drop-offs, teacher gifts, or holiday parties.
- Crowd-Pleaser: Even picky eaters (and skeptical family members) go back for seconds. Trust me, I’ve seen it happen more than once.
- Unbelievably Delicious: The combo of fudgy brownie and creamy buttercream is classic comfort food, but the presentation is next-level.
What makes these different? I use a slightly thicker brownie batter for sturdy bites, and the buttercream is whipped just right for easy piping. No dry edges, no crumbly mess. Plus, decorating with bows is way easier than it looks (even if you’re clumsy with a piping bag). I’ve tried other recipes, but the balance of chewy, chocolatey brownie with sweet, smooth buttercream is what keeps folks coming back for these year after year.
This recipe isn’t just about looks—it’s about that moment when you close your eyes after the first bite and think, “Yep, this is Christmas.” It’s festive, fun, and totally memorable. If you want something that feels homemade, tastes amazing, and actually gets people talking, these Christmas Present Brownie Bites are it. You’ll impress your guests, make your kids grin, and honestly—have a blast making them.
What Ingredients You Will Need
This Christmas Present Brownie Bites recipe uses simple, wholesome ingredients to deliver bold chocolate flavor and a creamy buttercream finish—without any fuss. Most of these are pantry staples, but a couple of details make all the difference.
For the Brownie Bites:
- Unsalted butter, melted (1/2 cup / 115g; for richness and fudginess)
- Granulated sugar (1 cup / 200g; classic sweetness and chewy texture)
- Light brown sugar (1/3 cup / 70g; adds depth and a slight caramel note)
- Large eggs, room temperature (2; helps with structure and richness)
- Pure vanilla extract (1 tsp / 5ml; flavor booster)
- All-purpose flour (3/4 cup / 95g; for just the right bite)
- Unsweetened cocoa powder (1/2 cup / 50g; I love Valrhona or Hershey’s)
- Salt (1/2 tsp / 3g; balances sweetness)
- Semi-sweet chocolate chips (1/2 cup / 85g; optional, but I always add them for extra texture)
For the Buttercream Bows:
- Unsalted butter, softened (1/2 cup / 115g; must be soft for smooth piping)
- Powdered sugar (2 cups / 240g; sifted for best results)
- Milk or heavy cream (2–3 tbsp / 30–45ml; helps with consistency)
- Vanilla extract (1/2 tsp / 2.5ml; flavor)
- Red and green gel food coloring (for festive bows; Wilton and Americolor work great)
Optional Decorative Add-Ons:
- Sprinkles (gold, silver, or holiday-themed for extra sparkle)
- Edible glitter (if you’re feeling fancy)
If you need gluten-free, swap in your favorite 1:1 gluten-free flour blend. Dairy-free? Use plant-based butter and milk—Earth Balance is reliable. For a nutty twist, add a handful of chopped pecans or walnuts to the batter. In a pinch, you can even use boxed brownie mix, but homemade is worth it (you know what I mean). These ingredients come together for perfect Christmas Present Brownie Bites every time!
Equipment Needed
- Mini muffin pan (24-count works best; gives you perfect bite-size squares)
- Mixing bowls (one for wet, one for dry ingredients)
- Whisk and rubber spatula (for mixing and scraping every last bit of batter)
- Electric mixer (hand or stand mixer for buttercream; trust me, your arms will thank you)
- Piping bags (disposable or reusable; I’ve used both and they work fine)
- Small star or ribbon tip (Wilton #21 for bows, but you can also snip the end off a plastic bag for rustic charm)
- Wire cooling rack (so the bites cool evenly and don’t get soggy bottoms)
- Nonstick spray or muffin liners (helps with easy release; I’ve ruined a batch by skipping this—don’t do it!)
If you’re missing a mini muffin pan, you can use a regular one and cut the brownies into squares afterward. For budget options, most big box stores have these pans for under $10. Keep your piping tips clean by soaking them in warm soapy water right after decorating. I once tried using a Ziploc bag as a piping bag—worked in a pinch and the bows looked rustic but cute. These tools make the process smooth and fun, even if you’re not a pro!
Preparation Method
- Preheat and Prepare: Preheat your oven to 350°F (175°C). Spray a 24-count mini muffin pan with nonstick spray or line with mini paper liners. (Don’t skip this or your brownies will stick!)
- Mix Wet Ingredients: In a large bowl, whisk together 1/2 cup (115g) melted unsalted butter, 1 cup (200g) granulated sugar, and 1/3 cup (70g) light brown sugar until smooth. Add 2 room temperature eggs and 1 tsp (5ml) vanilla extract. Whisk until glossy—about 1 minute.
- Combine Dry Ingredients: In a separate bowl, sift together 3/4 cup (95g) all-purpose flour, 1/2 cup (50g) unsweetened cocoa powder, and 1/2 tsp (3g) salt. (Use a fine mesh sieve for lump-free batter.)
- Make Brownie Batter: Gradually stir the dry mixture into the wet ingredients using a rubber spatula. (Don’t overmix—just until no streaks remain.) Fold in 1/2 cup (85g) semi-sweet chocolate chips if you like a chunkier bite.
- Fill Muffin Pan: Spoon batter evenly into prepared muffin cups, filling each about 3/4 full. (I use a small cookie scoop for perfect portions.) Tap the pan gently to level the tops.
- Bake: Bake for 13–16 minutes, until the tops look set and a toothpick inserted in the center comes out with a few moist crumbs. (Watch closely—overbaking makes them dry!)
- Cool: Let brownie bites cool in the pan for 5 minutes, then carefully transfer to a wire rack. Cool completely before decorating. (If you rush this, the buttercream will melt.)
- Make Buttercream: Beat 1/2 cup (115g) softened butter in a bowl until creamy—about 1 minute. Gradually add 2 cups (240g) powdered sugar, beating on low to combine. Add 2–3 tbsp (30–45ml) milk or cream and 1/2 tsp (2.5ml) vanilla extract. Whip until light and fluffy. Divide into bowls and tint with red and green gel food coloring.
- Pipe Bows: Transfer colored buttercream to piping bags fitted with star or ribbon tips. Pipe a vertical and horizontal line on each brownie bite to mimic ribbon, then add a bow on top. (Don’t sweat perfection—handmade bows look charming!)
- Decorate: Add sprinkles or edible glitter if desired. Let set at room temperature for 15 minutes so buttercream firms up.
- Serve or Store: Arrange on a festive platter and watch them disappear! Store leftovers in an airtight container at room temp for up to 3 days.
Troubleshooting: If brownie bites sink, you may have underbaked or overmixed—happened to me once, so keep an eye on the timer. If the buttercream is too stiff, add a splash more milk; too runny, add extra powdered sugar. Sensory cues help—batter should be thick, bows hold their shape, and the kitchen smells like a holiday dream. For best efficiency, prep your buttercream while brownies bake. You’ll get perfect Christmas Present Brownie Bites every time!
Cooking Tips & Techniques
Let’s be honest, even with a simple recipe like Christmas Present Brownie Bites, a few tricks make all the difference. Over the years, I’ve learned (sometimes the hard way!) what works best for both the brownies and the buttercream bows.
- Brownie Batter Consistency: The batter should be thick but spreadable. If it’s runny, add a tablespoon of flour—too thick, a splash of milk. A thick batter gives you bites that hold their shape.
- Don’t Overbake: Mini brownies bake fast. Set a timer and check at 13 minutes. Overbaked bites are dry and crumbly—been there, regretted it!
- Room Temperature Ingredients: Butter and eggs blend better when not cold. I set mine on the counter while preheating. If you’re in a rush, submerge eggs in warm water for 5 minutes.
- Piping Buttercream: If you’re new to piping, practice bows on parchment before decorating the brownies. Even wobbly bows look festive! If buttercream is too warm, pop it in the fridge for 5 minutes.
- Multitasking: While the brownie bites bake, whip up your buttercream and prep colors. This saves time and keeps everything moving.
- Consistency Is Key: Use a cookie scoop for batter and measure ingredients by weight if possible. This keeps each bite the same size and texture.
- Clean Up: Soak piping tips and bowls immediately after use—dried buttercream is tough to scrub!
Biggest mistake I ever made? Not letting brownies cool before decorating. Trust me, melted buttercream isn’t pretty. With these tips, your Christmas Present Brownie Bites will be festive and flawless every time!
Variations & Adaptations
One of the best things about Christmas Present Brownie Bites is how easy it is to customize them. Here are a few of my favorite twists:
- Gluten-Free: Swap all-purpose flour for a 1:1 gluten-free blend. The bites stay fudgy and delicious.
- Dairy-Free: Use plant-based butter and milk for both brownies and buttercream. Earth Balance and almond milk work like a charm.
- Flavor Boost: Add a teaspoon of espresso powder to enhance the chocolate flavor, or fold in a handful of crushed peppermint candies for a holiday zing.
- Seasonal Toppings: Instead of bows, pipe snowflakes or stars with white buttercream for a winter wonderland theme.
- Cooking Methods: No mini muffin pan? Bake in a square pan, cool, and cut into bite-sized squares before decorating.
- Allergen Substitutions: Nut-free? Skip chocolate chips or use seed-based chocolate. For egg-free, try a flax egg (1 tbsp ground flax + 3 tbsp water).
- Personal Favorite: I love adding a layer of raspberry jam between the brownie and buttercream—tastes like a chocolate truffle in disguise!
Don’t be afraid to mix and match based on your pantry and preferences. The bows are fun for kids to help pipe, and you can try different colors for a personalized touch. However you adapt this recipe, the results are always festive and delicious!
Serving & Storage Suggestions
Christmas Present Brownie Bites are best served at room temperature—the buttercream softens just a bit, and the brownies stay chewy. For a Pinterest-worthy presentation, arrange them on a cake stand or tiered platter. A sprinkle of edible glitter or holiday sprinkles adds instant sparkle.
Pair these bites with a mug of hot cocoa, spiced tea, or even a glass of milk. They make great companions to a tray of sugar cookies or peppermint bark. For gifting, nestle brownie bites in mini cupcake wrappers and tuck them into festive treat boxes (I’ve even used mason jars for an extra-cute look).
To store, place brownie bites in a single layer in an airtight container. They’ll keep at room temperature for up to 3 days. If you want to make them ahead, freeze undecorated brownie bases for up to 1 month. Thaw overnight, then decorate before serving. To refresh leftovers, microwave for 5–10 seconds (buttercream may soften). Flavors develop and meld after a day, so they’re even better if you make them a little ahead!
Nutritional Information & Benefits
Each Christmas Present Brownie Bite packs about 120 calories, 6g fat, 16g carbs, and 1g protein—just enough to satisfy a sweet craving without going overboard. The cocoa brings antioxidants, and using real butter gives a rich flavor with no weird additives.
If you choose gluten-free or dairy-free substitutions, the nutrition stays pretty similar. These bites are nut-free unless you add optional mix-ins, and you can easily make them egg-free. As always, check your food coloring labels for allergens if you’re gifting to others. I love that this recipe can fit nearly every dietary need with a few tweaks. For me, sharing homemade treats is part of my wellness routine—brings joy, connection, and a little chocolate happiness to my holiday.
Conclusion
So, why should you try these Christmas Present Brownie Bites with Buttercream Bows? They’re festive, fun, and irresistibly delicious—every bite feels like a mini celebration. You don’t need fancy skills or expensive ingredients, just a willingness to get a little creative with piping and a love for holiday treats.
I’ve made these for family, friends, and even as last-minute gifts, and they never disappoint. Don’t be afraid to customize—swap colors, add flavors, or let the kids help with decorating. This recipe is one I come back to every December because it’s easy, impressive, and full of heart. If you try it, let me know in the comments how you made it your own, or tag me on Pinterest so I can see your creations!
Wishing you a sweet, cozy, and chocolate-filled holiday season. Happy baking—you’re about to make someone’s day a little brighter!
Frequently Asked Questions
Can I make Christmas Present Brownie Bites in advance?
Absolutely! Bake the brownie bites up to two days ahead and store them airtight. Decorate with buttercream bows the day you plan to serve for freshest results.
What’s the best way to get vibrant buttercream colors?
Use gel food coloring for bold reds and greens. Start with a small amount and add more until you reach your desired shade. Powdered food coloring works too, but avoid liquid—it makes buttercream runny.
Can I use boxed brownie mix for this recipe?
You can! Prepare the mix according to package instructions, then bake in mini muffin pans. Homemade brownies have more flavor, but boxed saves time if you’re in a rush.
How do I keep brownie bites from sticking to the pan?
Spray your muffin pan well or use mini paper liners. Let the bites cool for 5 minutes in the pan, then gently loosen with a butter knife. Nonstick pans help too.
Are these brownie bites freezer friendly?
Yes! Freeze undecorated brownie bites in a single layer for up to one month. Thaw overnight and decorate with buttercream before serving. Decorated bites are best fresh.
Pin This Recipe!
Christmas Present Brownie Bites – Easy Buttercream Bow Treats
These festive brownie bites are rich, fudgy, and topped with vibrant buttercream bows, making them the perfect holiday treat for gifting, parties, or cozy family gatherings. Quick to make and irresistibly cute, they’re sure to be a crowd-pleaser all season long.
- Prep Time: 20 minutes
- Cook Time: 16 minutes
- Total Time: 36 minutes
- Yield: 24 brownie bites 1x
- Category: Dessert
- Cuisine: American
Ingredients
- 1/2 cup unsalted butter, melted
- 1 cup granulated sugar
- 1/3 cup light brown sugar
- 2 large eggs, room temperature
- 1 teaspoon pure vanilla extract
- 3/4 cup all-purpose flour
- 1/2 cup unsweetened cocoa powder
- 1/2 teaspoon salt
- 1/2 cup semi-sweet chocolate chips (optional)
- 1/2 cup unsalted butter, softened (for buttercream)
- 2 cups powdered sugar, sifted
- 2–3 tablespoons milk or heavy cream
- 1/2 teaspoon vanilla extract (for buttercream)
- Red and green gel food coloring
- Sprinkles (optional)
- Edible glitter (optional)
Instructions
- Preheat oven to 350°F (175°C). Spray a 24-count mini muffin pan with nonstick spray or line with mini paper liners.
- In a large bowl, whisk together melted butter, granulated sugar, and light brown sugar until smooth. Add eggs and vanilla extract; whisk until glossy.
- In a separate bowl, sift together flour, cocoa powder, and salt.
- Gradually stir dry mixture into wet ingredients using a rubber spatula until just combined. Fold in chocolate chips if desired.
- Spoon batter evenly into prepared muffin cups, filling each about 3/4 full. Tap pan gently to level tops.
- Bake for 13–16 minutes, until tops look set and a toothpick inserted in the center comes out with a few moist crumbs.
- Let brownie bites cool in the pan for 5 minutes, then transfer to a wire rack to cool completely.
- For buttercream: Beat softened butter until creamy. Gradually add powdered sugar, beating on low. Add milk or cream and vanilla extract; whip until light and fluffy.
- Divide buttercream into bowls and tint with red and green gel food coloring.
- Transfer colored buttercream to piping bags fitted with star or ribbon tips. Pipe vertical and horizontal lines on each brownie bite to mimic ribbon, then add a bow on top.
- Decorate with sprinkles or edible glitter if desired. Let set at room temperature for 15 minutes.
- Serve on a festive platter or store leftovers in an airtight container at room temperature for up to 3 days.
Notes
For gluten-free, substitute a 1:1 gluten-free flour blend. For dairy-free, use plant-based butter and milk. Practice piping bows on parchment before decorating. Do not overbake; check at 13 minutes. Let brownies cool completely before decorating to prevent buttercream from melting. Store in airtight container for up to 3 days or freeze undecorated bases for up to 1 month.
Nutrition
- Serving Size: 1 brownie bite
- Calories: 120
- Sugar: 13
- Sodium: 55
- Fat: 6
- Saturated Fat: 4
- Carbohydrates: 16
- Fiber: 1
- Protein: 1
Keywords: Christmas brownies, holiday treats, brownie bites, buttercream bows, festive dessert, easy brownies, giftable dessert, mini brownies


