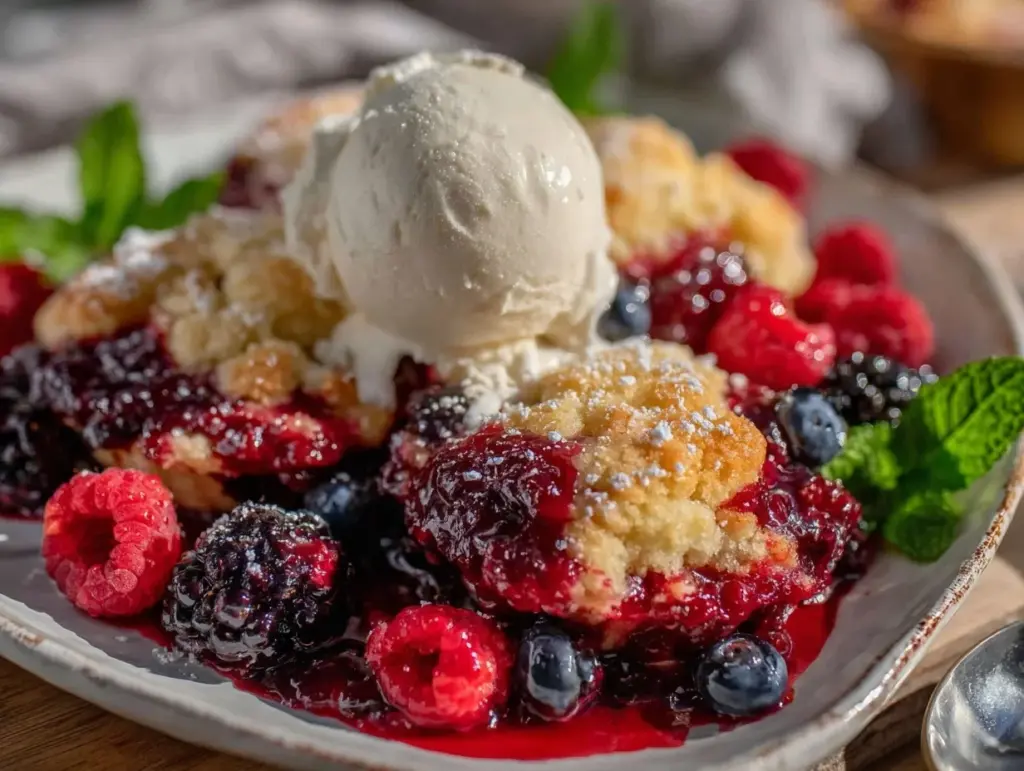
“The kitchen was unusually quiet that Sunday afternoon, except for the soft clinking of spoons and the occasional hum from the oven timer. I was halfway through cleaning up when my neighbor, Mrs. Jensen, popped her head in and casually asked if I wanted to try her ‘little berry treats.’ I wasn’t expecting much—just some humble dessert to end the weekend. But honestly, those cozy mini berry cobbler cups with creamy vanilla ice cream changed my mind about what a simple dessert could taste like. They weren’t fancy, but the way the berries bubbled through the golden crust, paired with that melting cold ice cream, was something else. It took me back to those lazy summer evenings when life felt slower and sweeter, even if just for a moment.”
Maybe you’ve been there—craving something warm and comforting but wanting to keep it easy and fuss-free. These mini cobbler cups fit that bill perfectly, and the best part is, they’re just the right size for a personal treat. I’ll admit, I once forgot to add enough sugar to the berries and almost tossed the whole batch, but the tangy surprise was delightful in its own way. It’s these small kitchen imperfections that make cooking fun, don’t you think? If you’re ready to make a dessert that’s both approachable and soul-satisfying, keep reading. You might find this recipe sticking around your favorites list, just like it did for me.”
Why You’ll Love This Recipe
Honestly, this cozy mini berry cobbler cups recipe is the kind of dessert that makes you want to slow down and savor each bite. Having tested several berry cobbler recipes over the years, I can say this one hits the sweet spot between ease and indulgence without taking hours or exotic ingredients.
- Quick & Easy: Ready in under 45 minutes, perfect for those last-minute dessert cravings or spontaneous weekend treats.
- Simple Ingredients: Uses pantry staples and fresh or frozen berries, so no special grocery runs required.
- Perfect for Any Occasion: Whether it’s a cozy dinner at home, a casual get-together, or even a picnic, these mini cups impress effortlessly.
- Crowd-Pleaser: Kids and adults alike adore the warm, fruity filling with a crisp, buttery topping.
- Unbelievably Delicious: The combination of tart berries and sweet, flaky crust with creamy vanilla ice cream is a classic for a reason.
This isn’t just another cobbler — the mini cups make portion control easy and add a bit of charm to your presentation. Plus, I like to add a pinch of cinnamon in the topping for a subtle warmth that’s a nice twist on tradition. Honestly, you might find yourself making these for breakfast, too!
What Ingredients You Will Need
This recipe uses simple, wholesome ingredients to deliver bold flavor and satisfying texture without the fuss. Most of these are pantry staples or easily found in your local grocery store. You can swap fresh berries with frozen ones if out of season, making it a year-round treat.
- For the Berry Filling:
- 2 cups mixed berries (fresh or frozen; I prefer a combo of blueberries, raspberries, and blackberries)
- ¼ cup granulated sugar (adjust based on berry sweetness)
- 1 tablespoon lemon juice (brightens the flavor)
- 1 teaspoon cornstarch (helps thicken the filling)
- ½ teaspoon vanilla extract (adds depth)
- For the Cobbler Topping:
- 1 cup all-purpose flour (King Arthur flour works great for consistency)
- ⅓ cup granulated sugar (for a lightly sweet crust)
- ½ teaspoon baking powder (for a slight rise)
- ¼ teaspoon salt
- 6 tablespoons unsalted butter (cold and cubed; I like Plugrá for its creaminess)
- ⅓ cup whole milk (or dairy-free milk if preferred)
- ½ teaspoon ground cinnamon (optional, but highly recommended)
- For Serving:
- Vanilla ice cream (homemade or store-bought; Häagen-Dazs is a personal favorite)
If you want a gluten-free option, swapping the all-purpose flour with almond flour works well but expect a slightly denser topping. Also, feel free to swap sugar for coconut sugar for a richer flavor. The key is fresh or well-thawed berries, so don’t skimp there!
Equipment Needed
- Mini muffin tin or small ramekins (I use a 12-cup mini muffin pan; ramekins work if you prefer larger portions)
- Mixing bowls (one for filling, one for topping)
- Measuring cups and spoons (accuracy helps, especially with baking powder and cornstarch)
- Pastry cutter or fork (to cut butter into flour for the topping; a food processor is optional but handy)
- Spoon or small ice cream scoop (for portioning filling and topping evenly)
- Oven mitts and cooling rack (safety first and to prevent soggy bottoms!)
If you don’t have a pastry cutter, two forks or even your fingertips can work to blend the butter into the flour—but be careful not to overwork the dough or it gets tough. For budget-friendly options, mini foil baking cups can replace the muffin tin, though the crust might bake a little differently.
Preparation Method
- Preheat your oven to 375°F (190°C). This ensures the oven is ready when you finish assembling, so the topping bakes perfectly.
- Prepare the berry filling: In a medium bowl, combine 2 cups of mixed berries with ¼ cup sugar, 1 tablespoon lemon juice, 1 teaspoon cornstarch, and ½ teaspoon vanilla extract. Gently toss until the berries are evenly coated. You’ll notice the cornstarch starts thickening the juices—this keeps the filling from being runny.
- Mix the cobbler topping dry ingredients: In a separate bowl, whisk together 1 cup flour, ⅓ cup sugar, ½ teaspoon baking powder, ¼ teaspoon salt, and ½ teaspoon ground cinnamon (if using).
- Cut in the cold butter: Add 6 tablespoons cold, cubed unsalted butter to the dry mixture. Use a pastry cutter or fork to blend until the mixture looks like coarse crumbs with pea-sized bits of butter. This is the secret to that flaky, tender topping.
- Stir in milk: Pour in ⅓ cup whole milk and gently mix just until combined. The dough will be sticky but don’t overmix or it’ll get tough.
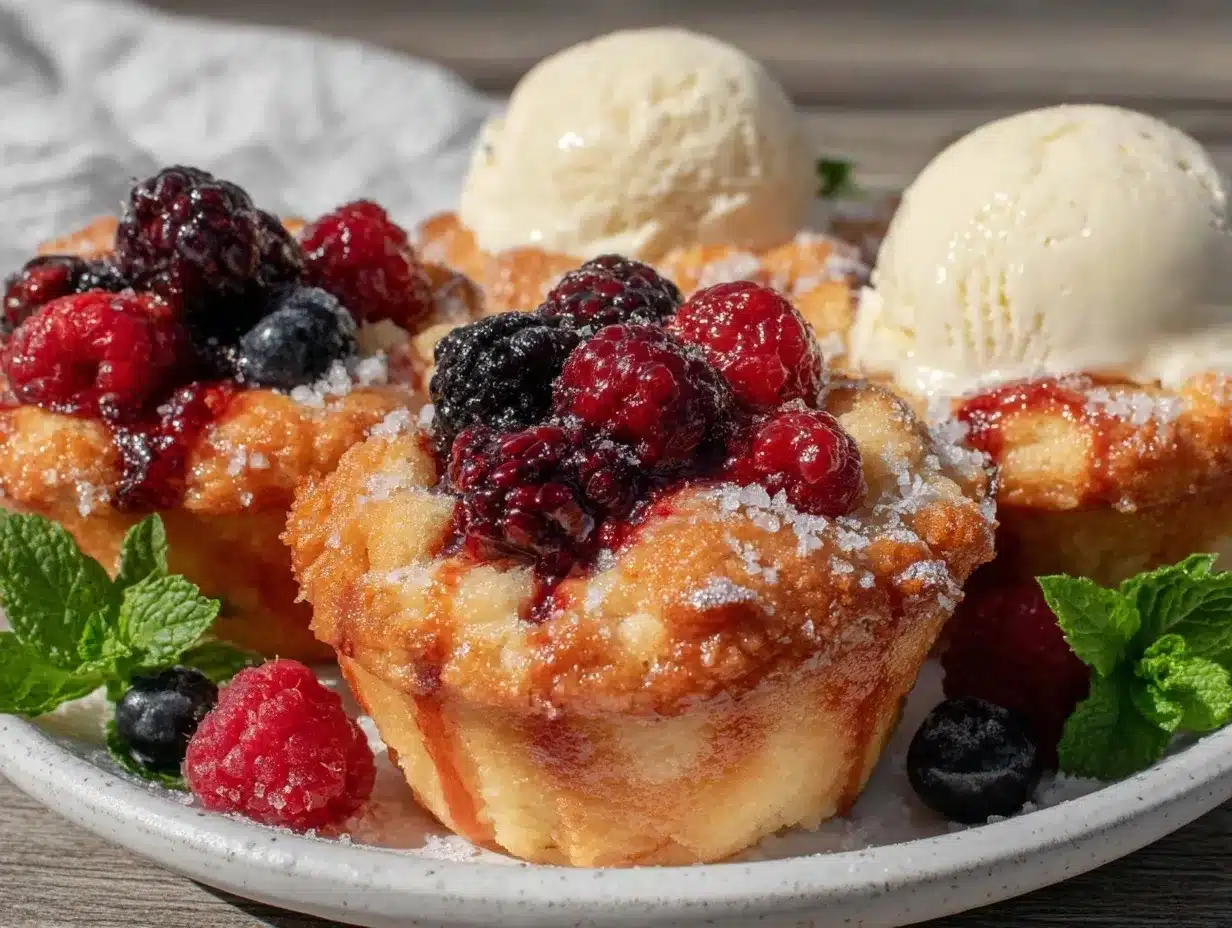
- Assemble the cobbler cups: Lightly grease your mini muffin tin or ramekins. Spoon about 1 tablespoon of berry filling into each cup. Then, scoop a heaping tablespoon of the topping over the berries, covering them mostly but leaving some berries peeking through for that rustic look.
- Bake for 22–25 minutes: The topping should be golden brown and the berry filling bubbly. If your oven runs hot, check around 20 minutes to avoid burning.
- Cool slightly: Let the cobbler cups rest in the pan for 10 minutes before removing. They’ll be hot and juicy, so patience helps avoid spills.
- Serve warm: Top each cup with a generous scoop of creamy vanilla ice cream. The contrast of warm cobbler and cold ice cream is honestly what dreams are made of.
If you find the topping browns too fast, tent the pan loosely with foil halfway through. Also, a light sprinkle of coarse sugar on top before baking adds a nice crunch.
Cooking Tips & Techniques
One of the trickiest parts of making these mini cobbler cups is getting the topping just right—flaky but not dry or doughy. Here’s what I’ve learned from trial and error:
- Keep your butter cold: Cold butter creates steam while baking, which makes the topping flaky. Warm butter just melts and ruins the texture.
- Don’t overmix the dough: The moment you add milk, mix gently and stop as soon as it comes together. Overworking develops gluten, leading to tough crust.
- Use cornstarch for thickening: Without it, the berry filling can get watery, especially with frozen berries. It also helps the juices cling better to the crust.
- Watch your oven temperature: Some ovens have hotspots. Rotate the pan halfway through baking for even browning.
- Let the cobblers rest: They’re tempting hot, but resting helps juices thicken and makes serving easier.
Once, I tried adding oats to the topping for texture, but it made the crust crumbly instead of tender. Lesson learned: keep it simple! Also, multitasking by prepping the topping while the berries macerate saves time and keeps things moving smoothly.
Variations & Adaptations
This cozy mini berry cobbler recipe is pretty flexible, so you can make it your own easily:
- Seasonal variations: Swap berries for sliced peaches or apples with a dash of nutmeg during autumn. The method stays the same, just adjust sugar depending on fruit sweetness.
- Dietary swaps: For gluten-free, use a 1-to-1 gluten-free flour blend. For dairy-free, replace butter with coconut oil and milk with almond or oat milk.
- Flavor twists: Stir in a teaspoon of almond extract to the filling or add chopped fresh mint for a refreshing note.
- Size adjustments: Want bigger portions? Use standard muffin tins or small ramekins and increase baking time to around 30 minutes.
- My personal twist: I sometimes sprinkle a pinch of sea salt on top of the cobbler before baking, which surprisingly balances the sweetness and gives a subtle crunch.
Serving & Storage Suggestions
These mini cobbler cups are best enjoyed warm, straight from the oven, topped with creamy vanilla ice cream. The contrast is one of those simple pleasures that makes you pause and smile.
For a pretty presentation, serve them in the mini tins or transfer to small dessert plates with a drizzle of honey or a sprig of fresh mint. They pair beautifully with hot coffee or a light dessert wine like Moscato.
To store leftovers, cover them tightly and refrigerate for up to 3 days. For longer storage, freeze the cobbler cups without ice cream for up to 2 months—just thaw and warm in the oven before serving.
When reheating, pop them in a 350°F (175°C) oven for about 10 minutes until warm and bubbly again. Avoid microwaving if possible, as the crust can get soggy.
Over time, the flavors meld nicely, making the cobbler even more comforting the next day—a little kitchen magic if you ask me.
Nutritional Information & Benefits
Each mini berry cobbler cup, without the ice cream, roughly contains:
| Nutrient | Amount |
|---|---|
| Calories | 180–200 kcal |
| Carbohydrates | 28 g |
| Fat | 7 g |
| Protein | 2 g |
| Fiber | 3 g |
Berries are a fantastic source of antioxidants, vitamins C and K, and fiber, which support digestion and immune health. Using real butter and moderate sugar keeps the recipe balanced—perfect for an occasional treat without feeling guilty.
If you’re mindful of allergens, note the presence of gluten and dairy, but as mentioned, substitutions can make this dessert accessible for many diets.
Conclusion
Cozy mini berry cobbler cups with creamy vanilla ice cream are the kind of dessert that feels like a warm hug after a long day. They’re straightforward to make but bring that special touch that turns simple ingredients into something memorable. Whether you’re cooking for yourself, your family, or friends, this recipe offers comfort and joy in every bite.
Feel free to tweak the fruits, spices, or toppings to match your mood and pantry. I love that it’s forgiving and flexible, making it a reliable go-to whenever the craving strikes.
So, why not whip up a batch this weekend? I’d love to hear how you customize yours—drop a comment or share your berry cobbler stories. Happy baking and even happier eating!
FAQs
Can I use frozen berries for this recipe?
Yes, frozen berries work great. Just thaw and drain any excess liquid before mixing to prevent sogginess.
How do I prevent the topping from getting soggy?
Keep your butter cold and don’t overmix the dough. Also, letting the cobbler rest after baking helps the juices thicken, avoiding soggy crust.
Can I make this recipe vegan?
Absolutely! Replace butter with coconut oil or vegan butter, and swap milk for plant-based milk like almond or oat milk. Use vegan vanilla ice cream for serving.
How do I store leftover cobbler cups?
Store covered in the refrigerator for up to 3 days or freeze without ice cream for up to 2 months. Reheat in the oven before serving.
Is it possible to make this recipe ahead of time?
You can prepare the filling and topping separately and assemble just before baking. This helps save time on the day you want to serve them fresh and warm.
Pin This Recipe!
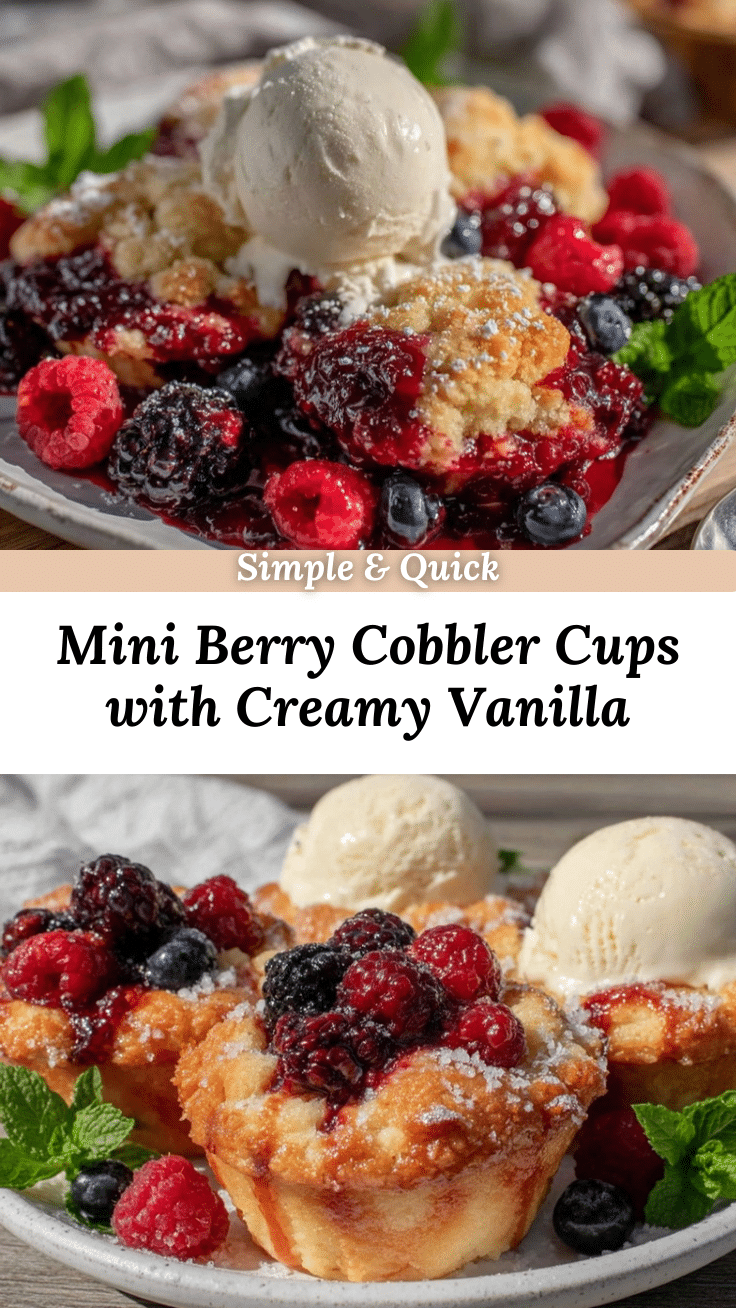
Cozy Mini Berry Cobbler Cups
These cozy mini berry cobbler cups are a quick and easy homemade dessert featuring a warm, bubbly berry filling topped with a flaky, buttery crust and served with creamy vanilla ice cream.
- Prep Time: 15 minutes
- Cook Time: 25 minutes
- Total Time: 40 minutes
- Yield: 12 mini cobbler cups 1x
- Category: Dessert
- Cuisine: American
Ingredients
- 2 cups mixed berries (fresh or frozen; blueberries, raspberries, blackberries)
- 1/4 cup granulated sugar (adjust based on berry sweetness)
- 1 tablespoon lemon juice
- 1 teaspoon cornstarch
- 1/2 teaspoon vanilla extract
- 1 cup all-purpose flour
- 1/3 cup granulated sugar
- 1/2 teaspoon baking powder
- 1/4 teaspoon salt
- 6 tablespoons unsalted butter (cold and cubed)
- 1/3 cup whole milk (or dairy-free milk if preferred)
- 1/2 teaspoon ground cinnamon (optional)
- Vanilla ice cream (for serving)
Instructions
- Preheat your oven to 375°F (190°C).
- In a medium bowl, combine 2 cups mixed berries with 1/4 cup sugar, 1 tablespoon lemon juice, 1 teaspoon cornstarch, and 1/2 teaspoon vanilla extract. Gently toss until berries are evenly coated.
- In a separate bowl, whisk together 1 cup flour, 1/3 cup sugar, 1/2 teaspoon baking powder, 1/4 teaspoon salt, and 1/2 teaspoon ground cinnamon (if using).
- Add 6 tablespoons cold, cubed unsalted butter to the dry mixture. Use a pastry cutter or fork to blend until mixture resembles coarse crumbs with pea-sized bits of butter.
- Pour in 1/3 cup whole milk and gently mix just until combined. Do not overmix.
- Lightly grease a mini muffin tin or ramekins. Spoon about 1 tablespoon of berry filling into each cup.
- Scoop a heaping tablespoon of the topping over the berries, covering mostly but leaving some berries visible.
- Bake for 22–25 minutes until topping is golden brown and filling is bubbly. Check at 20 minutes if oven runs hot.
- Let the cobbler cups rest in the pan for 10 minutes before removing.
- Serve warm topped with a generous scoop of vanilla ice cream.
Notes
Keep butter cold to ensure a flaky topping. Do not overmix the dough to avoid toughness. Use cornstarch to thicken the berry filling and prevent sogginess. Rotate pan halfway through baking for even browning. Let cobbler rest before serving to thicken juices. Tent with foil if topping browns too fast. Sprinkle coarse sugar on top before baking for extra crunch. Frozen berries can be used if thawed and drained well.
Nutrition
- Serving Size: 1 mini cobbler cup w
- Calories: 190
- Sugar: 15
- Sodium: 150
- Fat: 7
- Saturated Fat: 4
- Carbohydrates: 28
- Fiber: 3
- Protein: 2
Keywords: mini berry cobbler, berry dessert, easy cobbler recipe, homemade dessert, vanilla ice cream dessert, quick berry cobbler


