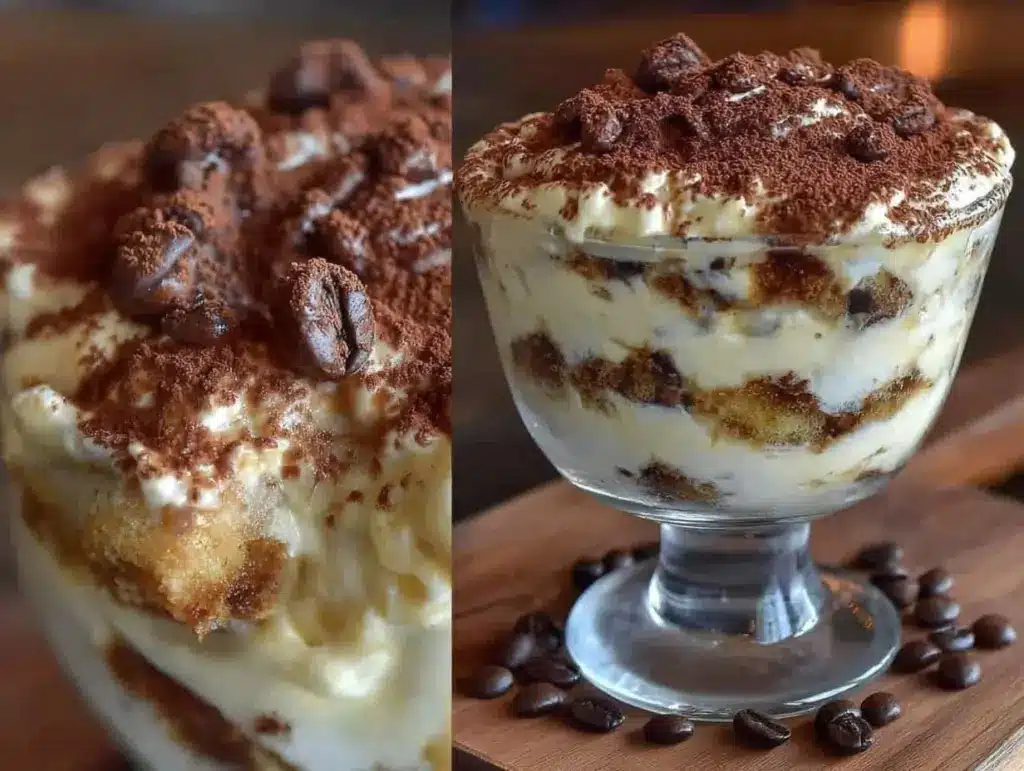
“You wouldn’t believe it,” my neighbor said one rainy Thursday evening, “but my grandma swore by this tiramisu recipe she scribbled on the back of a faded postcard.” I was half-listening as I stirred my tea, but then the aroma of freshly brewed espresso wafted in from her kitchen, pulling me closer. That night, between the clinking of coffee cups and the soft hum of rain, I tasted the richest, creamiest tiramisu I’d ever had. Honestly, it wasn’t the fanciest, nor the most complicated dessert, but it had this magic that made you close your eyes and savor every bite.
Last weekend, I found myself craving that same velvety texture and bold espresso punch. I tried recreating that recipe, with a few tweaks I’d picked up from years of kitchen experiments—some successful, others, well, let’s just say “learning moments.” Maybe you’ve been there, juggling late-night cravings and a half-empty pantry. This creamy classic tiramisu with espresso isn’t just any layered dessert; it’s the kind that feels like a warm hug after a long day.
Oh, and a little confession: I forgot to sift the cocoa powder the first time I made this, and the top looked a bit clumpy. But guess what? The taste was still spot on. That’s how forgiving this recipe is, and why I keep coming back to it—no fuss, just pure indulgence. Let me tell you, once you get this into your rotation, it’s hard to stop at just one slice.
Why You’ll Love This Recipe
There’s something truly special about this creamy classic tiramisu recipe that’s earned its place in my kitchen. From my chef-tested trial runs to family gatherings where it disappears faster than I can plate it, this layered dessert is a standout—trust me, I’ve tried plenty!
- Quick & Easy: Ready in under 30 minutes, perfect for those evenings when you want dessert without the drama.
- Simple Ingredients: Uses pantry staples like espresso, mascarpone, and ladyfingers—no hunting down odd items required.
- Perfect for Entertaining: Ideal for dinner parties, potlucks, or just treating yourself after a long week.
- Crowd-Pleaser: Kids and adults alike rave about the creamy texture and that punch of espresso.
- Unbelievably Delicious: The balance of smooth mascarpone cream and bold coffee-soaked layers is downright irresistible.
What sets this tiramisu apart? It’s the way the mascarpone is gently folded, keeping the cream luxuriously light without losing richness. Plus, I use freshly brewed espresso instead of instant coffee, which gives the dessert a robust flavor that lingers. Honestly, it’s the kind of recipe that makes you pause mid-bite and think, “Yep, this is the good stuff.” Whether you want to impress guests or just savor a classic with a homemade touch, this tiramisu hits all the right notes.
What Ingredients You Will Need
This recipe calls for straightforward, wholesome ingredients that come together to create bold flavors and a luscious texture. Most of these are pantry essentials or easy to find at your local grocery store.
- For the Cream Layer:
- 1 cup (240 ml) heavy cream, chilled (adds lightness to the mascarpone mixture)
- 8 oz (225 g) mascarpone cheese, room temperature (the star of the creamy texture; I prefer Galbani for its smoothness)
- 3 large egg yolks, room temperature (helps to thicken and enrich the cream)
- ⅓ cup (65 g) granulated sugar (balances the richness—adjust to taste)
- 1 tsp pure vanilla extract (for a subtle warm note)
- For the Coffee Soak:
- 1 ½ cups (360 ml) freshly brewed espresso, cooled (using strong espresso is key for authentic flavor)
- 2 tbsp coffee liqueur such as Kahlúa (optional, adds depth)
- For Assembly:
- 24 ladyfinger cookies (savoiardi), store-bought or homemade (look for firm, crisp ones to avoid sogginess)
- Unsweetened cocoa powder, for dusting (a fine sift is best to avoid clumps)
Substitution tips: You can swap heavy cream for full-fat coconut cream for a dairy-free twist, and use eggless mascarpone-style spreads if you prefer. For a gluten-free version, ladyfingers made from almond or rice flour work well. If you don’t have espresso, strong brewed coffee is okay but slightly less intense.
Equipment Needed
- Mixing bowls (one large for cream and mascarpone, one for egg yolks)
- Electric mixer or whisk (an electric hand mixer saves time, but a sturdy whisk works fine)
- 9×9 inch (23×23 cm) square baking dish or similar-sized glass dish for layering
- Fine mesh sieve or sifter (for dusting cocoa powder evenly)
- Measuring cups and spoons
- Espresso machine or coffee maker (fresh espresso is a game-changer here)
If you don’t have a sifter, a small, fine tea strainer does the trick for dusting cocoa. I’ve used both, and honestly, even a spoon tap can get the cocoa on pretty well—just watch out for clumps! For the mixer, I often rely on my trusty handheld, which is easy to clean and stores neatly. If you’re budget-conscious, manual tools work perfectly fine, though it might take a bit more elbow grease.
Preparation Method

- Brew the espresso: Make 1 ½ cups (360 ml) of strong espresso using your preferred method. Allow it to cool completely to avoid soggy ladyfingers later. (Tip: Brew it ahead and chill in the fridge.)
- Prepare the mascarpone cream: In a large bowl, whisk the egg yolks and sugar together until pale and creamy—this should take about 3-5 minutes with an electric mixer at medium speed. (If you’re worried about raw eggs, use pasteurized yolks.)
- Fold in mascarpone: Add the room temperature mascarpone to the yolk mixture and gently fold together with a spatula until smooth and homogenous. Be careful not to overmix, or the mascarpone might become too loose.
- Whip the cream: In a separate bowl, whip the chilled heavy cream with vanilla extract until stiff peaks form. This usually takes 3-4 minutes on medium-high speed. (You’ll know it’s ready when the cream holds its shape and doesn’t slide off the whisk.)
- Combine cream and mascarpone mixture: Gently fold the whipped cream into the mascarpone mixture in two batches, preserving as much air as possible for that light, dreamy texture. (This is the moment you want to be gentle—no rushing!)
- Mix espresso and liqueur: In a shallow dish, combine the cooled espresso with coffee liqueur if using. This will be your soak for the ladyfingers.
- Assemble the tiramisu: Quickly dip each ladyfinger into the espresso mixture—just a second or two per side to avoid sogginess. Arrange a single layer of soaked ladyfingers in your baking dish (about 12 pieces). (Pro tip: Don’t soak too long; they should be moist but still hold their shape.)
- Spread half the mascarpone cream: Spoon half of the cream mixture over the ladyfingers, smoothing it evenly with a spatula.
- Repeat layering: Add another layer of dipped ladyfingers and spread the remaining mascarpone cream on top.
- Chill: Cover with plastic wrap and refrigerate for at least 4 hours, preferably overnight. This resting time lets the flavors meld and the dessert to set properly.
- Finish with cocoa powder: Just before serving, sift a generous layer of unsweetened cocoa powder over the top for that classic bittersweet finish.
Note: If your kitchen gets warm, keep the tiramisu refrigerated until just before serving to maintain its creamy texture. Also, when dipping ladyfingers, work quickly to avoid them turning mushy.
Cooking Tips & Techniques
Making tiramisu might look intimidating, but with a few tricks, it’s easy to get right every time. Let me share what I’ve learned—from kitchen triumphs and the occasional “oops” moments.
- Use fresh espresso: It really makes a difference. Instant coffee just can’t match that rich, smooth flavor. If you’re short on time, strong brewed coffee works, but espresso is worth the extra effort.
- Temperature matters: Let mascarpone and eggs come to room temperature before mixing. Cold ingredients can cause lumps or prevent smooth blending.
- Whip cream just right: Don’t overwhip or it turns grainy. Look for stiff peaks that hold shape but still look glossy.
- Don’t soak ladyfingers too long: A quick dip is enough. They absorb liquid fast and can become mushy if left too long.
- Patience is key: Chilling overnight allows flavors to marry and the dessert to firm up perfectly. If you try to rush this step, the texture won’t be quite right.
- Folding technique: Gently fold whipped cream into mascarpone to keep the airiness. I learned this the hard way after making dense tiramisu once—lesson learned!
Honestly, the best advice is to relax and enjoy the process. I once had a power outage mid-prep and ended up finishing by candlelight—turns out, the tiramisu tasted just as amazing even if the kitchen was a little chaotic.
Variations & Adaptations
This creamy classic tiramisu recipe is a fantastic base for customization. Here are some of my favorite tweaks:
- Fruit infusion: Swap half the espresso for a berry syrup or add fresh raspberries between the layers for a fruity twist.
- Chocolate lover’s edition: Add a layer of finely chopped dark chocolate or sprinkle chocolate shavings over the top for extra indulgence.
- Dairy-free version: Use coconut cream instead of heavy cream and a dairy-free mascarpone alternative; opt for gluten-free ladyfingers to make it allergen-friendly.
- Alternative liqueur: Switch coffee liqueur with amaretto or hazelnut liqueur for a different flavor profile.
- Quick mini tiramisus: Assemble in individual cups or ramekins for single servings—great for parties and portion control.
I once tried adding a splash of orange zest to the mascarpone cream—it was unexpected but gave a fresh, zesty lift that my friends adored. Don’t hesitate to experiment; tiramisu is forgiving and welcomes creativity.
Serving & Storage Suggestions
Tiramisu is best served chilled, straight from the refrigerator. The cream should be set but still soft, and the espresso-soaked ladyfingers tender but not soggy.
For presentation, dust the top with a fresh layer of cocoa powder just before serving to keep that classic look. Garnishing with a few dark chocolate curls or a sprig of mint adds a nice touch if you’re feeling fancy.
This dessert pairs wonderfully with a cup of espresso or a glass of sweet dessert wine, like Vin Santo. For a cozy night in, I recommend a lightly brewed black tea to balance the richness.
Storage: Cover tightly and refrigerate for up to 3 days. The flavors actually deepen with time, making leftovers even better (if there are any!). You can freeze tiramisu for up to 1 month—thaw overnight in the fridge and give a gentle stir before serving.
If reheating, a quick 10-15 minute rest at room temperature is best; avoid microwaving, as it can ruin the delicate texture.
Nutritional Information & Benefits
This classic tiramisu recipe offers a comforting treat with a few nutritional perks from its ingredients. Here’s an approximate breakdown per serving (based on 8 servings):
- Calories: ~350 kcal
- Fat: 25 g (mostly from mascarpone and cream)
- Carbohydrates: 25 g
- Protein: 5 g
Mascarpone provides a good source of calcium and healthy fats, while espresso delivers a caffeine kick and antioxidants. Using real eggs adds protein and richness, though this means it’s not suitable for those avoiding raw eggs.
For gluten-sensitive folks, swapping ladyfingers for gluten-free versions makes this dessert accessible. It’s definitely a treat to enjoy in moderation, but the simple ingredients mean no artificial nasties.
Personally, I appreciate that tiramisu can be part of a balanced lifestyle when enjoyed alongside nutritious meals and active days. It’s comfort food without overcomplication, which feels like a win in my book.
Conclusion
So, why try this creamy classic tiramisu with espresso? Because it’s a timeless dessert that combines rich, dreamy cream with the boldness of coffee in a way that feels both indulgent and approachable. You can customize it to your liking, whip it up with simple ingredients, and impress anyone lucky enough to share it with you.
I love this recipe because it’s forgiving, quick, and utterly delicious—plus, every time I make it, I’m reminded of those cozy, rainy evenings chatting with my neighbor over coffee. I’d love to hear how you put your own spin on tiramisu or what memories it brings up for you.
Give it a try, and if you do, don’t forget to drop a comment below or share your photos. Let’s keep the tiramisu love going strong—because honestly, who can resist that creamy espresso goodness?
Frequently Asked Questions (FAQs)
Can I make tiramisu without raw eggs?
Yes! You can use pasteurized egg yolks or substitute with whipped cream and mascarpone only for a safer option, though the texture might be slightly different.
How long should I soak the ladyfingers in espresso?
Just a quick dip of 1-2 seconds per side is enough to absorb flavor without becoming mushy.
Can I prepare tiramisu ahead of time?
Absolutely. It’s best made at least 4 hours ahead or overnight to allow the flavors to meld and the dessert to set properly.
What can I use if I don’t have mascarpone cheese?
Mix cream cheese with a bit of heavy cream and sour cream to mimic mascarpone’s texture, though the flavor will be slightly tangier.
Is it okay to freeze tiramisu?
Yes, you can freeze it for up to a month. Thaw overnight in the fridge and gently stir before serving for best results.
Pin This Recipe!
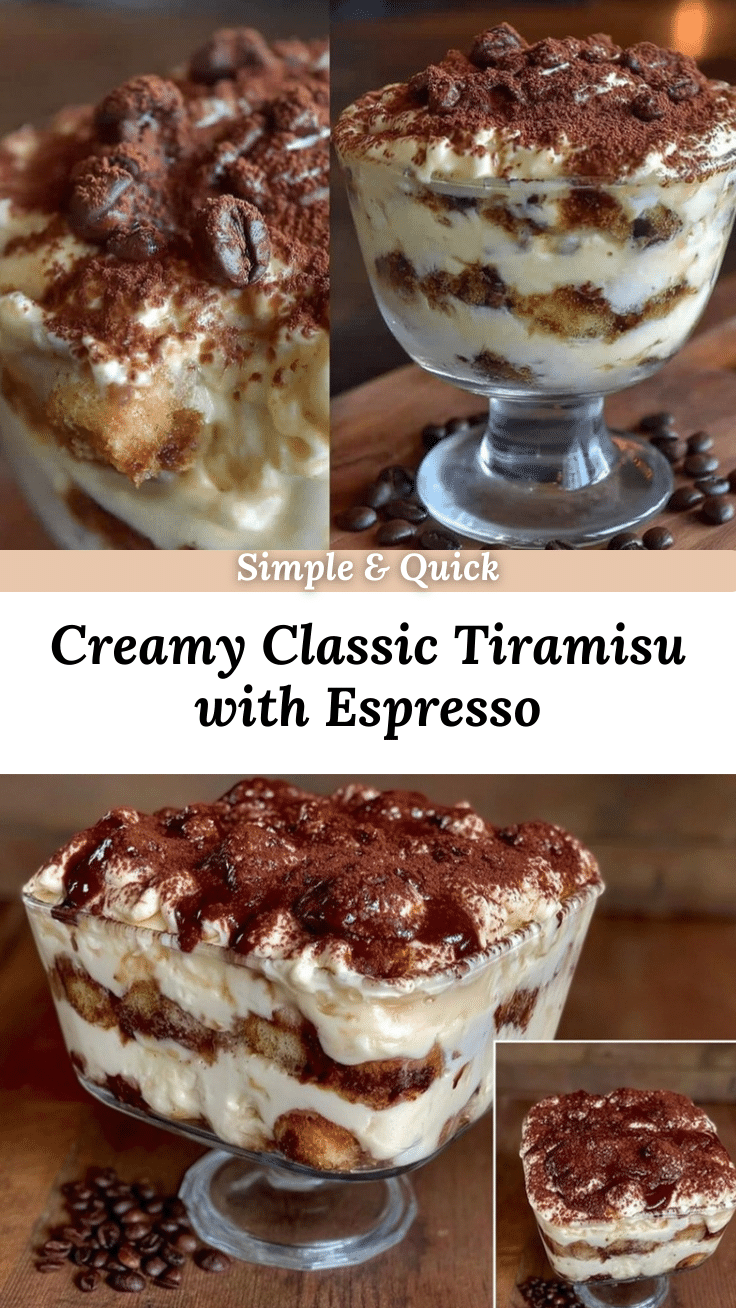
Creamy Classic Tiramisu Recipe Easy Homemade Espresso Layered Dessert

A rich and creamy classic tiramisu layered dessert featuring bold espresso-soaked ladyfingers and a light mascarpone cream, perfect for quick and easy indulgence.
- Prep Time: 15 minutes
- Cook Time: 0 minutes
- Total Time: 4 hours 15 minutes
- Yield: 8 servings 1x
- Category: Dessert
- Cuisine: Italian
Ingredients
- 1 cup (240 ml) heavy cream, chilled
- 8 oz (225 g) mascarpone cheese, room temperature
- 3 large egg yolks, room temperature
- ⅓ cup (65 g) granulated sugar
- 1 tsp pure vanilla extract
- 1 ½ cups (360 ml) freshly brewed espresso, cooled
- 2 tbsp coffee liqueur such as Kahlúa (optional)
- 24 ladyfinger cookies (savoiardi), store-bought or homemade
- Unsweetened cocoa powder, for dusting
Instructions
- Brew the espresso: Make 1 ½ cups (360 ml) of strong espresso using your preferred method. Allow it to cool completely.
- Prepare the mascarpone cream: In a large bowl, whisk the egg yolks and sugar together until pale and creamy, about 3-5 minutes.
- Fold in mascarpone: Add the room temperature mascarpone to the yolk mixture and gently fold until smooth and homogenous.
- Whip the cream: In a separate bowl, whip the chilled heavy cream with vanilla extract until stiff peaks form, about 3-4 minutes.
- Combine cream and mascarpone mixture: Gently fold the whipped cream into the mascarpone mixture in two batches, preserving airiness.
- Mix espresso and liqueur: In a shallow dish, combine the cooled espresso with coffee liqueur if using.
- Assemble the tiramisu: Quickly dip each ladyfinger into the espresso mixture for 1-2 seconds per side and arrange a single layer in a 9×9 inch dish.
- Spread half the mascarpone cream over the ladyfingers, smoothing evenly.
- Repeat layering with another layer of dipped ladyfingers and the remaining mascarpone cream.
- Chill: Cover with plastic wrap and refrigerate for at least 4 hours, preferably overnight.
- Finish with cocoa powder: Just before serving, sift a generous layer of unsweetened cocoa powder over the top.
Notes
Use fresh espresso for best flavor. Let mascarpone and eggs come to room temperature before mixing. Whip cream to stiff peaks but do not overwhip. Dip ladyfingers quickly to avoid sogginess. Chill overnight for best texture and flavor. Can substitute heavy cream with coconut cream and use gluten-free ladyfingers for dietary adaptations.
Nutrition
- Serving Size: 1 slice (1/8 of the
- Calories: 350
- Fat: 25
- Carbohydrates: 25
- Protein: 5
Keywords: tiramisu, classic tiramisu, espresso dessert, layered dessert, mascarpone, easy tiramisu, homemade tiramisu


