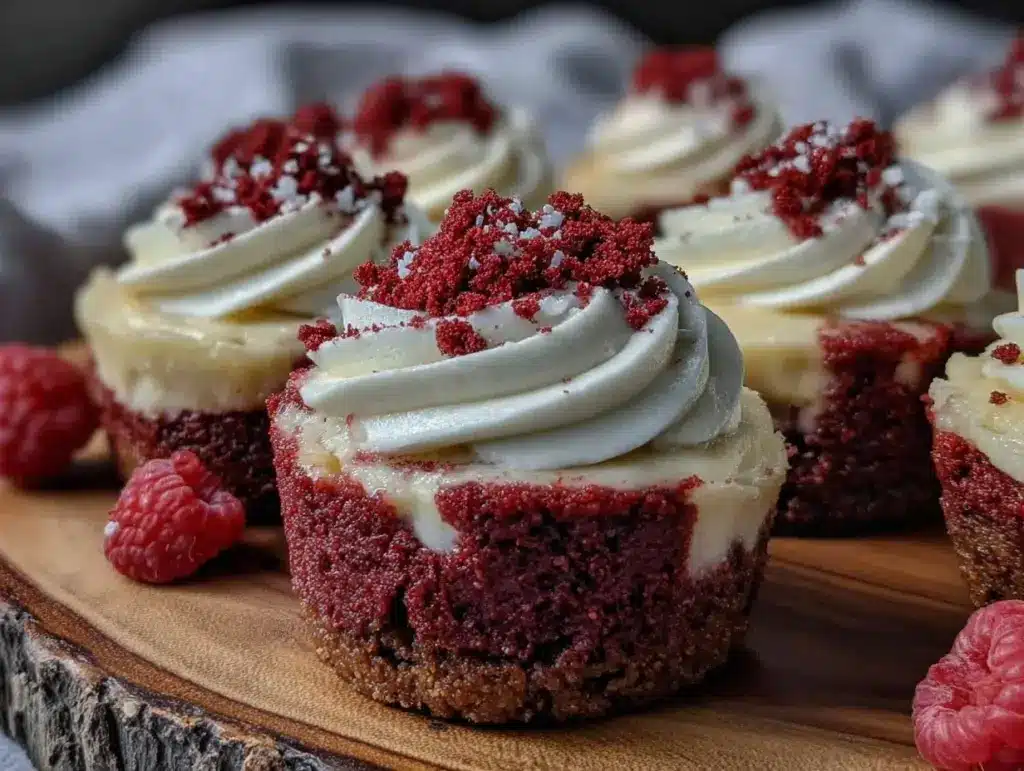
Let me tell you, the sight of these creamy mini red velvet cheesecake bites just sitting on my kitchen counter is enough to make anyone’s mouth water. The rich, velvety red color paired with that luscious, smooth cheesecake filling practically calls your name. The first time I made these little gems, I was instantly hooked—honestly, the kind of moment where you pause, take a deep breath, and just smile because you know you’re onto something truly special. When I was knee-high to a grasshopper, my grandma used to bake luscious red velvet cakes for every holiday, and those memories of her baking filled with warmth and sweetness have stuck with me all these years. This recipe is a nod to those cozy, nostalgic times but with a fun, bite-sized twist.
My family couldn’t stop sneaking these off the cooling rack (and I can’t really blame them). You know what makes these mini cheesecake bites so dangerously easy? They come together in just 15 minutes, and you don’t even need a fancy oven—no baking, just chill and enjoy! They are perfect for potlucks, a sweet treat for your kids after school, or to brighten up your Pinterest cookie board with a pop of color and creamy goodness. After testing this recipe more times than I can count (in the name of research, of course), these mini red velvet cheesecake bites have become a staple for family gatherings and gifting. Honestly, they feel like a warm hug wrapped up in a tiny dessert, and you’re going to want to bookmark this one for sure.
Why You’ll Love This Creamy Mini Red Velvet Cheesecake Bites Recipe
This recipe isn’t just another dessert—it’s a little piece of heaven that’s incredibly easy and fast to make. From my own kitchen trials and family approvals, here’s why this recipe will quickly become your go-to:
- Quick & Easy: Ready in under 15 minutes, perfect for those last-minute dessert cravings or when you want something sweet without the fuss.
- Simple Ingredients: No need to run all over town; these are made with pantry staples you likely have on hand.
- Perfect for Any Occasion: Whether it’s a holiday party, a casual get-together, or a cozy night in, these bites steal the show.
- Crowd-Pleaser: Kids and adults alike rave about the creamy texture and that subtle hint of cocoa paired with tangy cream cheese.
- Unbelievably Delicious: The smooth, creamy filling contrasts beautifully with the delicate red velvet flavor, delivering pure nostalgic comfort in each bite.
- Unique Twist: Unlike traditional cheesecakes, these bites require no baking, saving you time and energy but still giving you that perfect cheesecake texture.
Honestly, this recipe isn’t just good—it’s the kind that makes you close your eyes after the first bite, savoring the perfect balance of sweet and tangy. It’s comfort food reinvented to fit your busy life, so you can impress guests or treat yourself anytime without breaking a sweat.
What Ingredients You Will Need
This recipe uses simple, wholesome ingredients to deliver bold flavor and satisfying texture without the fuss. Most of these are pantry staples or easy to find at any grocery store.
- Cream Cheese, softened (I prefer Philadelphia for the creamiest texture)
- Powdered Sugar, sifted (to avoid any lumps and keep the filling smooth)
- Heavy Cream, cold (whipping cream works well too; adds richness and silkiness)
- Red Velvet Cake Mix (I like Betty Crocker’s classic red velvet for the best color and flavor)
- Butter, melted (unsalted is best; adds moisture to the cake base)
- Vanilla Extract (pure vanilla really makes a difference here)
- Cocoa Powder, unsweetened (optional, for a deeper chocolate kick)
Optional Toppings:
- Mini chocolate chips
- White chocolate drizzle
- Crushed pecans or walnuts
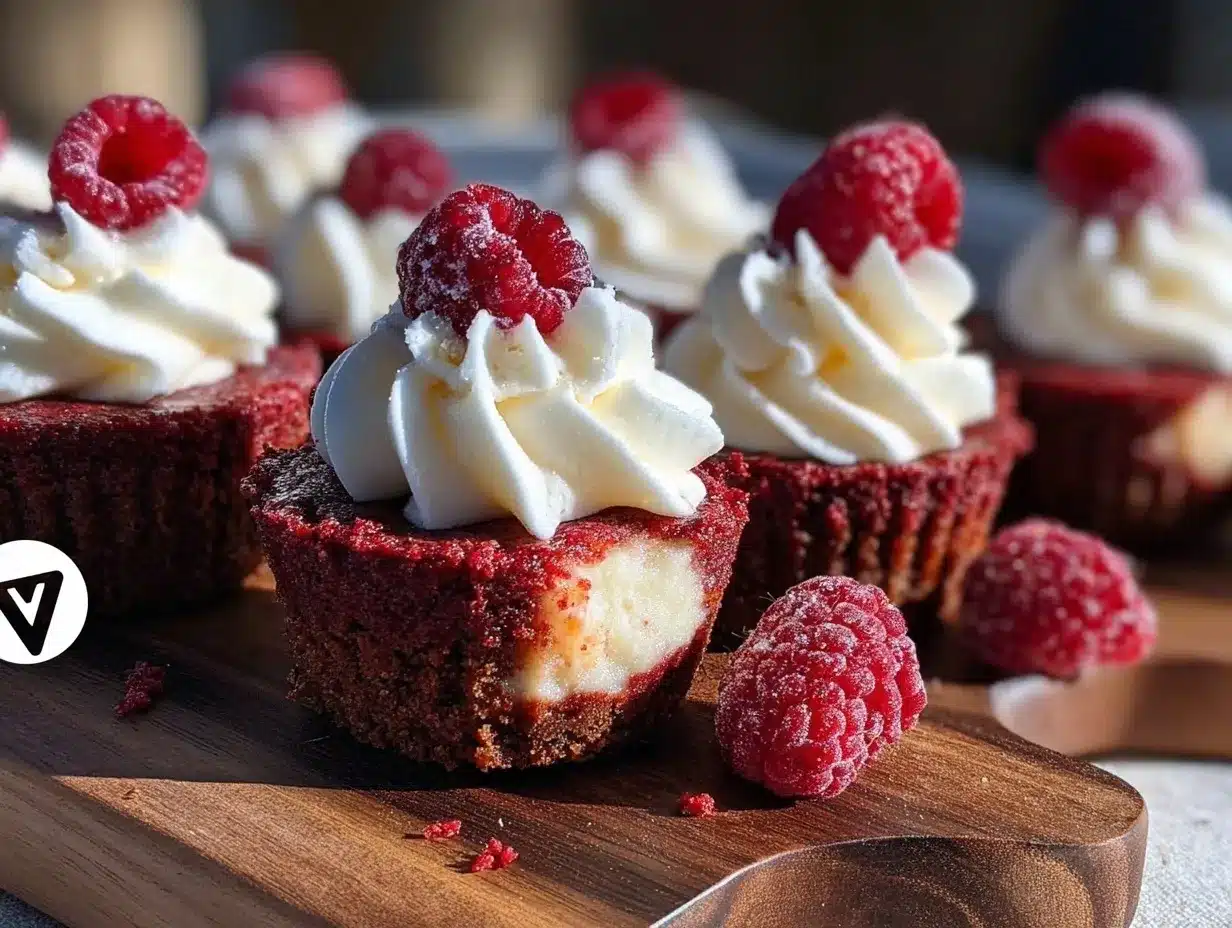
- Fresh berries (strawberries or raspberries work great in summer)
If you want a gluten-free version, feel free to swap in a gluten-free red velvet cake mix or use almond flour blended with cocoa powder and a touch of beetroot powder for color. For dairy-free, coconut cream can replace heavy cream, and vegan cream cheese is a decent alternative (though the texture changes a bit).
Equipment Needed
- Mixing Bowls: At least two – one for the cake base and one for the cheesecake filling.
- Electric Mixer or Hand Whisk: I swear by my stand mixer for the smoothest filling, but a hand whisk works if you’ve got some elbow grease.
- Muffin Tin or Mini Cupcake Pan: For shaping those perfect mini bites. Silicone pans make popping them out easier.
- Measuring Cups & Spoons: Precision is key, especially with powdered sugar and cake mix.
- Spoon or Small Scoop: To portion out the cheesecake filling evenly.
If you don’t have a mini cupcake pan, small silicone molds or even an ice cube tray can work in a pinch. Just be sure to line them if needed. And don’t forget, keeping your cream cheese and heavy cream cold before mixing helps achieve that silky texture that’s so dreamy.
Preparation Method
- Prep your pan: Lightly grease a mini muffin tin or line with paper liners. This helps the bites release easily after chilling.
- Make the cake base: In a medium bowl, combine 1 cup (120g) of red velvet cake mix with 4 tbsp (57g) melted unsalted butter. Mix until you get a moist, crumbly texture. If the mix feels too dry, add a splash of milk (about 1 tbsp/15ml) to help it come together. Press about 1 teaspoon of this mixture firmly into the bottom of each mini muffin cup. This forms the cake crust for your cheesecake bites.
- Prepare the cheesecake filling: Using a stand mixer or hand mixer, beat 8 oz (225g) softened cream cheese until smooth and creamy, about 2 minutes. Gradually add ½ cup (60g) powdered sugar and continue mixing. Slowly pour in ½ cup (120ml) cold heavy cream and 1 teaspoon vanilla extract. Beat on high speed until the mixture thickens and holds soft peaks, approximately 3-4 minutes. If you want a subtle cocoa boost, sift in 1 tbsp (7g) unsweetened cocoa powder and mix gently.
- Assemble the bites: Spoon or pipe the cheesecake filling over the cake crust in each muffin cup, filling them almost to the top. Smooth the surface with the back of a spoon or small offset spatula. Optionally, add mini chocolate chips or a sprinkle of crushed nuts on top for texture and flair.
- Chill: Refrigerate the mini cheesecake bites for at least 2 hours, or until firm. For faster results, pop them in the freezer for 30-45 minutes but watch carefully so they don’t freeze solid.
- Serve: Once chilled, gently remove the bites from the pan. If they stick, run a thin knife around the edges to loosen. Serve cold and enjoy the creamy, velvety goodness!
Pro tip: If your cream cheese is too cold, it won’t blend smoothly, and lumps might form. Let it sit out for about 20 minutes before mixing. Also, pressing the cake base firmly helps it hold together better when you serve or transport these bites.
Cooking Tips & Techniques
Getting these mini red velvet cheesecake bites just right is surprisingly simple, but a few tricks make all the difference. First off, whipping the heavy cream to soft peaks before folding it into the cream cheese mixture can give you an even lighter texture—though beating everything together as one works fine too if you’re in a rush.
One mistake I made early on was not chilling the cream cheese enough, which resulted in a grainy filling. So, patience with that step is key! Also, don’t overmix the cheesecake filling once you add the powdered sugar; overbeating can cause the texture to become dense or curdled.
When pressing the cake base into the pan, use the back of a small spoon or your fingers to compact it firmly. This prevents the base from crumbling when you serve. And, for ease of removal, silicone pans are pure magic—you’ll thank me later!
Multitasking tip: While the bites chill, clean your prep area and maybe whip up a quick cup of coffee. These little bites chill fast, so it’s a great excuse to take a well-deserved pause before enjoying your creation.
Variations & Adaptations
Want to mix things up? Here are some fun ways to customize your creamy mini red velvet cheesecake bites:
- Flavor Swap: Instead of classic red velvet, try a strawberry cake mix for a fruity twist or chocolate cake mix for a richer bite.
- Diet-Friendly: Use almond flour and cocoa powder in place of cake mix for a gluten-free option, or swap heavy cream with coconut cream for dairy-free bites.
- Seasonal Flair: Add a teaspoon of pumpkin pie spice in fall or sprinkle crushed peppermint candies on top during winter holidays for a festive touch.
- Cooking Method: If you want a baked version, bake the cheesecake bites at 325°F (163°C) for 15 minutes, then chill until firm. It adds a slightly denser texture but still delicious.
- Personal Favorite: I once added a swirl of homemade raspberry jam into the cheesecake filling before chilling—mind-blowing combo of sweet and tangy!
Serving & Storage Suggestions
These creamy mini red velvet cheesecake bites are best served chilled, straight from the fridge. They hold their shape beautifully and are easy to pop into your mouth in just one or two bites. For a pretty presentation, arrange them on a decorative platter and garnish with a dusting of powdered sugar or a drizzle of white chocolate.
Pair these bites with a hot cup of coffee or a glass of milk for a classic treat. They also make a charming addition to any dessert table, especially alongside fresh berries or whipped cream.
To store, keep them covered in an airtight container in the refrigerator for up to 4 days. Freezing is possible—just pop them in a freezer-safe container for up to a month. When ready to eat, thaw in the fridge for a few hours to bring back that creamy texture. Over time, the flavors meld beautifully, making leftovers even tastier (if you have any!).
Nutritional Information & Benefits
Each mini red velvet cheesecake bite is a small indulgence packed with creamy richness. On average, a bite contains about 120 calories, 8 grams of fat, 10 grams of carbs, and 2 grams of protein. The cream cheese provides a good dose of calcium and vitamin A, while the red velvet cake mix offers a bit of energy-boosting carbs.
For those watching gluten or dairy, the recipe is easily adaptable as mentioned earlier. And honestly, these bites are a nice little treat that fits into a balanced diet when enjoyed in moderation. From a wellness perspective, making your own desserts means you control the ingredients—no added preservatives, artificial colors, or mystery additives here.
Conclusion
So there you have it—creamy mini red velvet cheesecake bites that are as easy to make as they are irresistible to eat. Whether you’re after a quick dessert for unexpected guests or a sweet treat to brighten your day, this recipe checks all the boxes. Feel free to tweak the flavors and toppings to suit your own taste buds, because that’s what cooking at home is all about.
I love this recipe because it brings a little slice of joy in every bite and reminds me of those warm, family-filled moments in grandma’s kitchen. I’d love to hear how you make these your own, so please drop a comment or share your variations!
Go ahead and make these mini cheesecake bites your new dessert obsession—you won’t regret it!
Frequently Asked Questions
Can I make these mini red velvet cheesecake bites ahead of time?
Absolutely! They can be made up to 2 days in advance and stored in the refrigerator. Just keep them covered to maintain their creamy texture.
Do I have to use red velvet cake mix?
Nope! You can substitute with chocolate or strawberry cake mix, or even make your own gluten-free base using almond flour and cocoa powder.
Can I freeze these cheesecake bites?
Yes, freeze them in an airtight container for up to a month. Thaw in the fridge before serving to keep that creamy texture.
Is there a way to make these dairy-free?
Swap the cream cheese with vegan cream cheese and heavy cream with coconut cream. The texture will be slightly different but still delicious.
How do I prevent the cheesecake filling from being grainy?
Make sure your cream cheese is softened to room temperature before mixing and beat it well to get a smooth consistency. Sifting powdered sugar also helps avoid lumps.
Pin This Recipe!
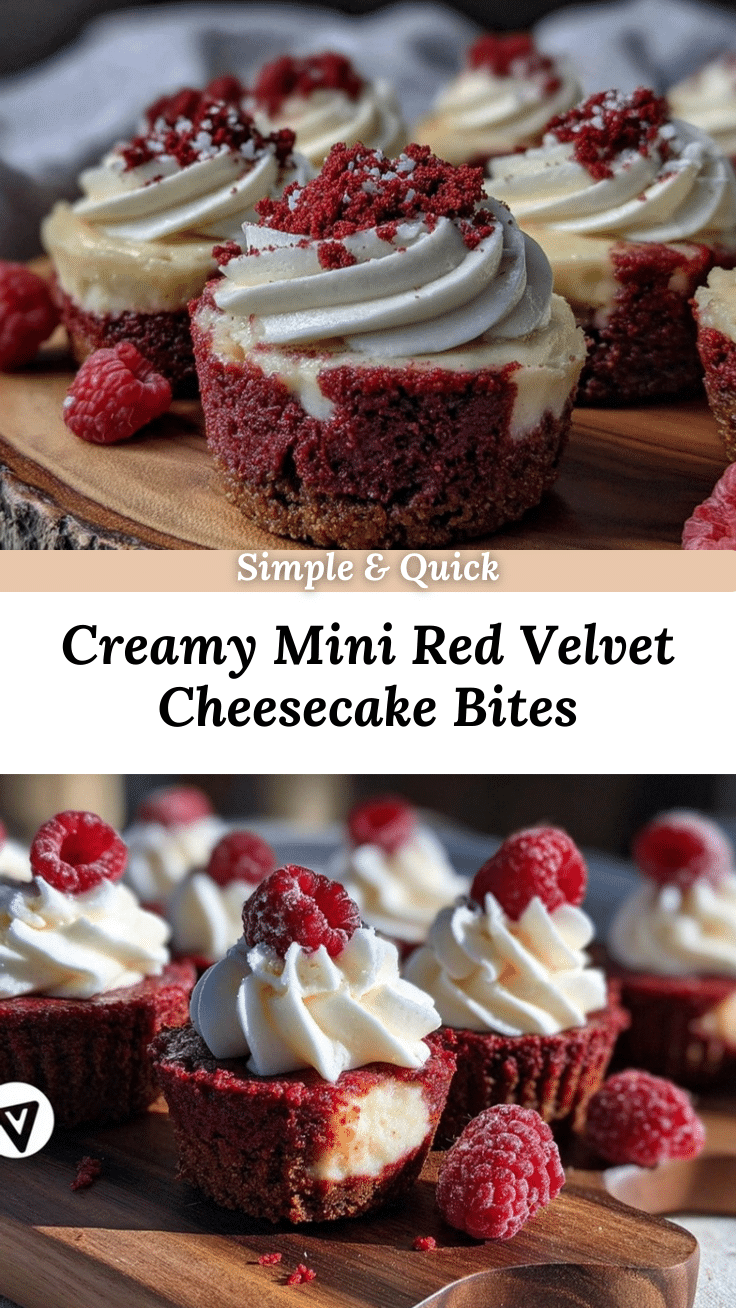
Creamy Mini Red Velvet Cheesecake Bites
These creamy mini red velvet cheesecake bites are a quick, no-bake dessert that combines a rich red velvet cake base with a smooth, luscious cheesecake filling. Perfect for potlucks, family gatherings, or a sweet treat anytime.
- Prep Time: 10 minutes
- Cook Time: 0 minutes
- Total Time: 2 hours 10 minutes
- Yield: 24 mini bites 1x
- Category: Dessert
- Cuisine: American
Ingredients
- 1 cup (120g) red velvet cake mix
- 4 tbsp (57g) unsalted butter, melted
- 1 tsp milk (optional, to moisten cake base)
- 8 oz (225g) cream cheese, softened
- 1/2 cup (60g) powdered sugar, sifted
- 1/2 cup (120ml) cold heavy cream
- 1 tsp vanilla extract
- 1 tbsp (7g) unsweetened cocoa powder (optional)
- Optional toppings: mini chocolate chips, white chocolate drizzle, crushed pecans or walnuts, fresh berries (strawberries or raspberries)
Instructions
- Lightly grease a mini muffin tin or line with paper liners to help the bites release easily after chilling.
- In a medium bowl, combine red velvet cake mix and melted unsalted butter. Mix until moist and crumbly. If too dry, add about 1 tsp milk to help it come together.
- Press about 1 teaspoon of the cake mixture firmly into the bottom of each mini muffin cup to form the cake crust.
- Using a stand mixer or hand mixer, beat softened cream cheese until smooth and creamy, about 2 minutes.
- Gradually add powdered sugar and continue mixing.
- Slowly pour in cold heavy cream and vanilla extract. Beat on high speed until mixture thickens and holds soft peaks, about 3-4 minutes.
- If desired, sift in unsweetened cocoa powder and mix gently for a subtle chocolate flavor.
- Spoon or pipe the cheesecake filling over the cake crust in each muffin cup, filling almost to the top. Smooth the surface.
- Optionally, add mini chocolate chips or crushed nuts on top.
- Refrigerate for at least 2 hours or until firm. For faster chilling, freeze for 30-45 minutes but do not freeze solid.
- Gently remove bites from the pan. If stuck, run a thin knife around edges to loosen. Serve chilled.
Notes
Let cream cheese soften to room temperature before mixing to avoid lumps. Press cake base firmly to hold together. Silicone pans help with easy removal. Whip heavy cream to soft peaks for lighter texture if desired. Do not overmix cheesecake filling after adding powdered sugar to prevent dense texture.
Nutrition
- Serving Size: 1 mini cheesecake bi
- Calories: 120
- Sugar: 7
- Sodium: 90
- Fat: 8
- Saturated Fat: 4
- Carbohydrates: 10
- Protein: 2
Keywords: red velvet cheesecake bites, mini cheesecake, no bake dessert, easy dessert, red velvet dessert, creamy cheesecake, bite-sized dessert


