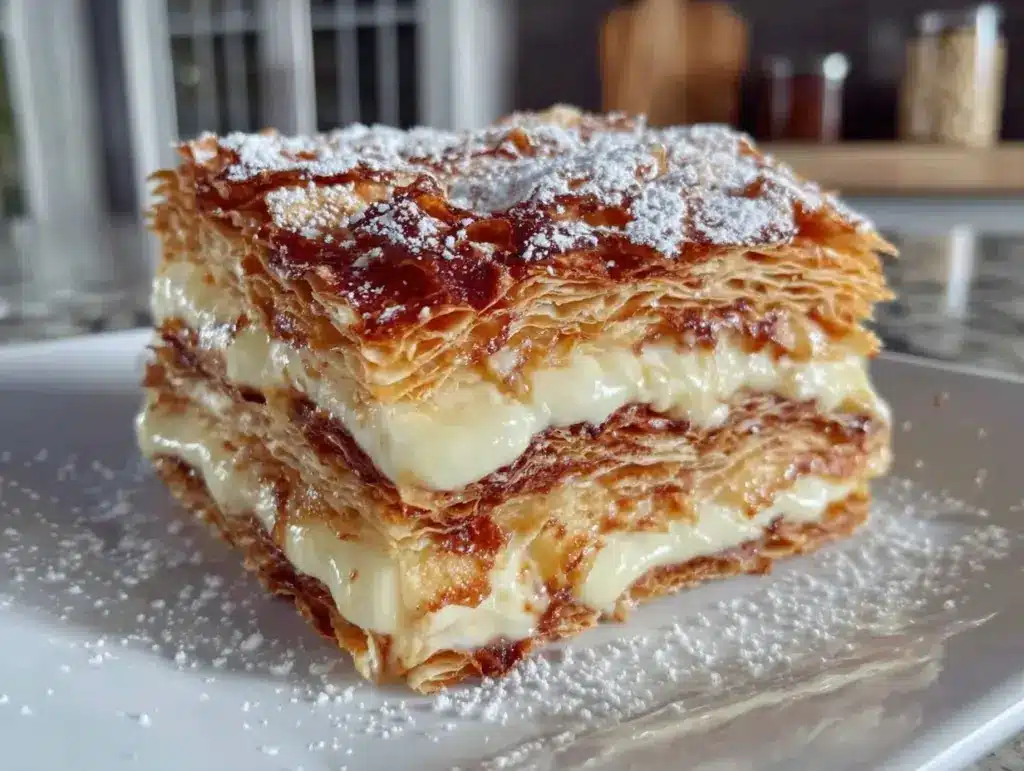
Picture this: the kitchen fills with the buttery aroma of freshly baked pastry, golden and crisp, while a cool, velvety vanilla custard waits patiently to be slathered between each flaky layer. I’ll be honest—there’s nothing quite like the first time I sliced into a homemade Napoleon cake. The shattering crunch of the top layer, the creamy filling oozing just a little, and the anticipation of that first bite—it’s the kind of moment where you pause, take a deep breath, and just grin because you know you’ve created something truly special.
Years ago, when I was knee-high to a grasshopper, my grandma would bring out her “fancy cake” for birthdays and family reunions. She called it Napoleon, and it was always the centerpiece—towering, generous, and absolutely irresistible. I remember sneaking into the kitchen, hoping to nab a corner piece before anyone else (my siblings still call me out for it!). The delicate pastry layers, softened by a rich custard, felt like pure, nostalgic comfort.
Honestly, I stumbled upon my own version of this creamy Napoleon cake on a rainy weekend, craving something indulgent but not too fussy. I wanted the flaky layers, the dreamy filling, and that dramatic look you see all over Pinterest boards—but with simple ingredients and steps. You know what? My family couldn’t stop sneaking bites off the cooling rack (and I didn’t blame them one bit). Now it’s a staple for parties, gifting, and those days when you just want a dessert that feels like a warm hug.
This cake is dangerously easy to assemble, yet fancy enough to steal the spotlight at potlucks or special occasions. If you’re aiming to impress, brighten up your dessert table, or just treat yourself to something decadent, this creamy Napoleon cake with flaky layers is going to be one you’ll want to bookmark. Trust me—I tested it so many times “in the name of research, of course”—and it’s now my go-to for family gatherings and sweet celebrations.
Why You’ll Love This Creamy Napoleon Cake
Let’s face it: not all layered desserts are created equal. I’ve tried more versions of Napoleon cake than I care to admit, and this one stands out for a bunch of reasons. Here’s what makes it a must-try:
- Quick & Easy: Ready in under two hours (most of that is chilling time), so you can make it even on a busy weeknight.
- Simple Ingredients: No need for fancy pastry skills or specialty store runs—you probably have most of these items right in your pantry.
- Perfect for Parties: It slices beautifully and looks like a million bucks on a platter, making it ideal for birthdays, holidays, or any celebration.
- Crowd-Pleaser: Kids love the creamy filling, adults go wild for the flaky layers. I haven’t met anyone who can resist a second slice.
- Unbelievably Delicious: The combo of crisp pastry and ultra-creamy custard is, honestly, next-level comfort food.
Here’s what sets this creamy Napoleon cake apart from the rest: I use a blend of homemade custard and whipped cream for the filling, giving it that light-as-air texture without sacrificing richness. The pastry layers are simple but bake up with perfect flakiness (you can use store-bought puff pastry for convenience, but I’ll share my homemade tip too). Unlike some recipes that end up soggy or too sweet, this one strikes a beautiful balance—each bite is tender, creamy, and just the right amount of sweet.
This isn’t just another layered dessert—it’s my best version. It’s comfort food reimagined: faster, easier, and still packed with that soul-soothing satisfaction. Whether you’re looking to impress guests without the stress, or just want a dessert that feels special even on a regular Tuesday, this creamy Napoleon cake is the answer. I promise, after the first bite, you’ll know exactly why it’s become a staple in my kitchen.
What Ingredients You Will Need
This creamy Napoleon cake uses simple, wholesome ingredients to deliver bold flavor and a satisfying texture—without the fuss. Most of these are pantry staples, but I’ll note a few trusted brands and tips for getting the best results.
- For the Flaky Pastry Layers:
- Frozen puff pastry sheets (2 sheets, about 500g total; I love Pepperidge Farm for consistent flakiness, but homemade works wonders too)
- All-purpose flour (for dusting, about 2 tbsp / 15g)
- Egg wash (1 large egg, beaten with 1 tbsp / 15ml water—for a golden finish, optional)
- For the Creamy Custard Filling:
- Whole milk (2 cups / 480ml; organic milk gives a richer flavor)
- Heavy cream (1 cup / 240ml; adds extra silkiness)
- Granulated sugar (3/4 cup / 150g)
- Large eggs (3, room temperature)
- Cornstarch (3 tbsp / 25g; thickens the custard without giving a starchy taste)
- Unsalted butter (1/4 cup / 60g, softened; I prefer European-style for extra richness)
- Pure vanilla extract (2 tsp / 10ml; Nielsen-Massey is my go-to)
- For Whipped Cream Layer (Optional, but highly recommended):
- Heavy whipping cream (1 cup / 240ml; for extra fluffiness)
- Powdered sugar (2 tbsp / 20g; sweetens without grittiness)
- Vanilla extract (1/2 tsp / 2.5ml)
- For Garnish:
- Crumbled pastry scraps (from trimming layers)
- Fresh berries (raspberries or strawberries for color; optional)
- Powdered sugar (for dusting, optional, about 1 tbsp / 8g)
Ingredient Tips & Substitutions:
- For gluten-free: Use gluten-free puff pastry (Schar is a reliable brand).
- For dairy-free: Swap milk and cream with unsweetened almond or oat milk; use coconut cream for the whipped layer.
- Seasonal adaption: In summer, try layering with a thin spread of berry jam between pastry and custard (so good!).
- If you’re short on eggs, use 2 eggs and add an extra tablespoon of cornstarch—the custard will still set nicely.
- I always recommend using real vanilla extract for the best flavor—skip the imitation stuff if you can.
Honestly, once you’ve got the essentials, this creamy Napoleon cake is totally forgiving. You can customize a bit depending on what you have at home, and it’ll still wow every time.
Equipment Needed
You don’t need a professional pastry kitchen for this recipe—just a few trusty tools. Here’s what I use every time (and a few budget-friendly alternatives):
- Baking sheet (large enough for the puff pastry sheets; rimmed sheets help contain any leaks)
- Parchment paper (saves you from sticky messes and makes cleanup a breeze)
- Rolling pin (for even pastry; a wine bottle works in a pinch!)
- Sharp knife or pizza cutter (for trimming pastry layers)
- Mixing bowls (medium and large; glass or stainless steel are easiest to clean)
- Whisk (for smooth custard)
- Small saucepan (for cooking custard)
- Electric mixer or stand mixer (for whipped cream; hand whisking is doable but a workout!)
- Offset spatula (for spreading filling; a butter knife works if you don’t have one)
Personal tip: I’ve made this creamy Napoleon cake with just a baking sheet and a whisk before—so don’t sweat if you’re missing something fancy. For maintenance, always wash your rolling pin and whisk right away to avoid stuck-on dough. If you’re on a budget, most discount stores have perfectly good baking sheets and mixing bowls.
Preparation Method
- Prepare the Pastry Layers:
- Preheat your oven to 400°F (200°C). Line two baking sheets with parchment paper.
- Unfold the puff pastry sheets and lightly dust with flour. Roll each sheet to about 1/8 inch (3mm) thick—don’t worry if they’re not perfectly rectangular.
- Trim edges and cut each sheet into three equal rectangles (about 10 x 4 inches / 25 x 10cm each). You should have six layers total.
- Place rectangles on baking sheets. Prick all over with a fork to prevent puffing. Brush lightly with egg wash if you want a golden finish.
- Bake for 12-15 minutes, rotating halfway, until golden and crisp. Cool completely. Save trimmings for garnish.
- Make the Custard Cream:
- In a medium saucepan, combine milk and heavy cream. Heat over medium until just steaming (don’t boil).
- In a bowl, whisk eggs, sugar, and cornstarch until smooth. Slowly pour hot milk mixture into eggs, whisking constantly to avoid scrambling.
- Return mixture to saucepan. Cook over medium heat, stirring nonstop, until thickened (about 5-8 minutes). You’ll know it’s ready when it coats the back of a spoon and leaves a line when you run your finger through it.
- Remove from heat. Stir in butter and vanilla. Let cool to room temperature, then refrigerate until chilled (at least 30 minutes).
- Whip the Cream (Optional):
- In a large bowl, whip heavy cream with powdered sugar and vanilla until stiff peaks form. Chill until ready to use.
- Assemble the Cake:
- Place first pastry layer on your serving platter. Spread with a thin layer of custard (about 1/2 cup / 120ml). Top with next pastry, repeat custard. After three layers, spread whipped cream instead of custard for a lighter middle.
- Continue layering, alternating custard and whipped cream as desired, finishing with a pastry layer on top.
- Gently press down (not too hard—just enough to settle the layers).
- Spread remaining custard over the top layer. Sprinkle with crumbled pastry scraps and dust with powdered sugar. Add fresh berries for color if you like.
- Chill and Serve:
- Refrigerate cake for at least 1 hour before slicing. This lets the layers meld and makes neat slices.
- Slice with a sharp, serrated knife, wiping between cuts for clean edges.
Troubleshooting: If pastry layers puff up too much, gently press them down after baking while still warm. Lumpy custard? Strain it through a fine sieve. If your cake feels unstable, chill longer—patience pays off for beautiful slices.
Personal tip: I always double the custard and keep extra for drizzling on each plate. The sensory cues—golden pastry, creamy filling, the faint scent of vanilla—are your sign you’ve nailed it!
Cooking Tips & Techniques
Making the ultimate creamy Napoleon cake can feel intimidating, but once you’ve got these tricks up your sleeve, you’ll be a pro!
- Keep Ingredients Cold: Puff pastry loves the cold. If it gets too soft, pop it back in the fridge for a few minutes before baking.
- Prick Pastry Thoroughly: Don’t skimp on this step—poke all over to keep layers flat and flaky.
- Whisk, Don’t Rush: Custard takes patience. Stir constantly and keep heat medium-low to avoid curdling. If it’s too thick, add a splash of cold milk and whisk smooth.
- Layer Quickly: While assembling, work quickly so the pastry doesn’t absorb too much moisture and get soggy.
- Chill for Clean Slices: The longer you chill the assembled cake, the neater your slices. Overnight is best if you have time.
Let me admit—I’ve burned the pastry (forgot a timer), and once my custard boiled over. If that happens, don’t panic! Salvage what you can and remember, a little imperfection never hurt anyone. Timing is key, but multitasking can save you minutes—make the custard while the pastry bakes.
To keep consistency, measure ingredients precisely (I use a kitchen scale for flour and sugar). And always taste your custard before chilling—adjust vanilla or sugar if needed. Trust me, these small details make all the difference for a creamy Napoleon cake that wows every time.
Variations & Adaptations
This creamy Napoleon cake is endlessly customizable. Here are a few ways you can switch it up:
- Gluten-Free: Use gluten-free puff pastry, and double-check your cornstarch is certified gluten-free.
- Berry Layer: Add a thin layer of raspberry or strawberry jam between custard layers for a tart twist.
- Chocolate Lovers: Stir 2 oz (60g) of melted dark chocolate into the custard for a mocha vibe.
- Dairy-Free: Swap dairy milk and cream for almond or oat milk, and use coconut cream for whipping.
- Lemon Zest: Add 1 tsp (5g) grated lemon zest to the custard for a bright, citrusy note.
If you want to try a different cooking method, bake the pastry layers in a convection oven for extra crispness (just watch the bake time—it’s usually faster). For those with nut allergies, skip the nut garnishes and stick to plain pastry crumbs or fresh berries.
My personal favorite adaptation? A layer of thinly sliced fresh strawberries between the whipped cream and custard. It’s a springtime hit and looks stunning on your Pinterest board!
Serving & Storage Suggestions
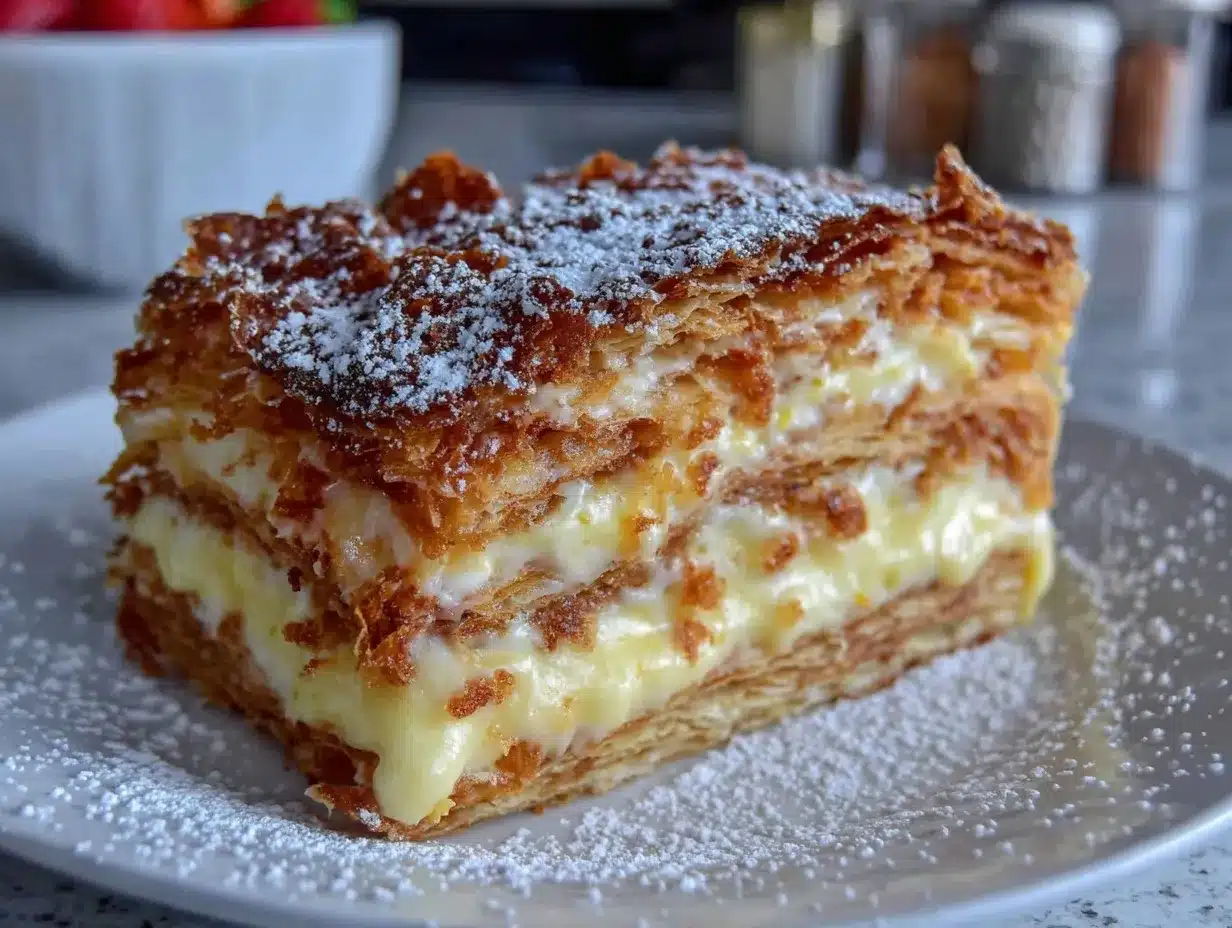
Serve this creamy Napoleon cake chilled, straight from the fridge. It slices best when cold, and the layers hold beautifully, showing off that gorgeous stack. For an extra wow factor, place each slice on a plate with a drizzle of leftover custard and a few fresh berries.
Pair with a cup of strong coffee or black tea—trust me, the bitterness cuts the sweetness perfectly. For parties, cut into small squares for bite-size treats or larger wedges for a showstopper centerpiece.
Storage is simple: wrap leftovers tightly in plastic and refrigerate for up to 3 days. The flavors actually deepen overnight, and the pastry softens just enough for that melt-in-your-mouth feel. To freeze, wrap individual slices and store for up to 1 month—thaw in the fridge overnight before serving.
Reheating isn’t recommended (the cream filling doesn’t appreciate warmth), but you can refresh the top with a light dusting of powdered sugar if it starts to look a bit tired. Honestly, the cake never lasts long enough in my house for this to be a problem!
Nutritional Information & Benefits
Here’s a quick look at what you’re getting in each serving (based on 12 slices):
- Calories: ~380
- Fat: 25g
- Carbohydrates: 32g
- Protein: 6g
- Sugar: 18g
This creamy Napoleon cake recipe is rich but surprisingly balanced, thanks to the wholesome milk, eggs, and real vanilla. Eggs and milk provide protein, while the pastry offers satisfying carbs for energy. If you go with gluten-free or dairy-free options, you can fit most dietary needs.
Just a heads-up: contains gluten, dairy, and eggs—so not suitable for those with allergies. But for most, it’s a treat that feels indulgent without being over-the-top. I always say, a little slice of joy is good for the soul!
Conclusion
There’s a reason this creamy Napoleon cake with flaky layers keeps showing up at my family get-togethers—it’s easy, gorgeous, and flat-out delicious. Whether you’re a seasoned baker or just looking for a Pinterest-worthy dessert, this recipe is worth every minute in the kitchen.
Feel free to customize it—add berries, swap out the cream, or experiment with chocolate. I absolutely love how forgiving and adaptable it is. For me, it’s more than just dessert; it’s a slice of tradition, comfort, and a little bit of celebration.
If you try this creamy Napoleon cake recipe, please leave a comment, share your version, or tag me with your creations! Your feedback and twists inspire me (and honestly, I’m always looking for an excuse to make this cake again). Here’s to flaky pastry, creamy filling, and happy moments around the table!
FAQs about Creamy Napoleon Cake with Flaky Layers
Can I make creamy Napoleon cake ahead of time?
Yes! You can assemble the cake a day in advance—the flavors meld beautifully, and it slices even better after chilling overnight.
Can I use store-bought puff pastry?
Absolutely. Store-bought puff pastry saves time and works perfectly for this recipe. Pepperidge Farm is a reliable option.
How do I prevent the pastry from getting soggy?
Prick the pastry well before baking, and cool completely before layering with custard. Chilling the assembled cake helps keep layers crisp.
Can I freeze Napoleon cake?
Yes, you can freeze individual slices wrapped in plastic for up to 1 month. Thaw in the fridge overnight for best texture.
Is this recipe gluten-free or dairy-free?
It’s not by default, but you can use gluten-free puff pastry and swap dairy ingredients for plant-based alternatives to suit your needs.
Pin This Recipe!
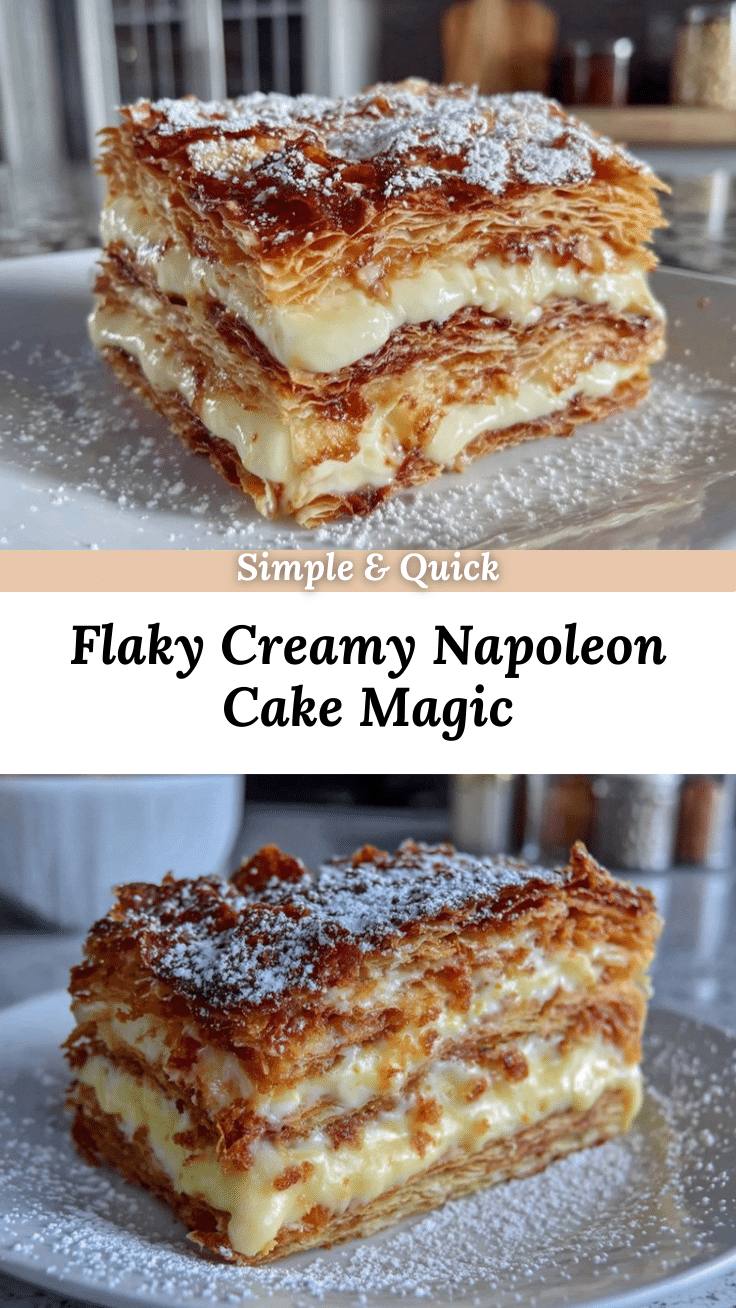
Creamy Napoleon Cake
This creamy Napoleon cake features flaky layers of puff pastry and a rich vanilla custard filling, topped with whipped cream and pastry crumbs. It’s an easy, show-stopping dessert perfect for parties and celebrations.
- Prep Time: 30 minutes
- Cook Time: 15 minutes
- Total Time: 1 hour 45 minutes
- Yield: 12 servings 1x
- Category: Dessert
- Cuisine: French
Ingredients
- 2 sheets frozen puff pastry (about 17.5 oz total)
- 2 tbsp all-purpose flour (for dusting)
- 1 large egg, beaten with 1 tbsp water (egg wash, optional)
- 2 cups whole milk
- 1 cup heavy cream
- 3/4 cup granulated sugar
- 3 large eggs
- 3 tbsp cornstarch
- 1/4 cup unsalted butter, softened
- 2 tsp pure vanilla extract
- 1 cup heavy whipping cream (for whipped cream layer, optional)
- 2 tbsp powdered sugar (for whipped cream)
- 1/2 tsp vanilla extract (for whipped cream)
- Crumbled pastry scraps (from trimming layers)
- Fresh berries (raspberries or strawberries, optional)
- Powdered sugar (for dusting, about 1 tbsp, optional)
Instructions
- Preheat oven to 400°F (200°C). Line two baking sheets with parchment paper.
- Unfold puff pastry sheets and lightly dust with flour. Roll each sheet to about 1/8 inch thick.
- Trim edges and cut each sheet into three equal rectangles (about 10 x 4 inches each). You should have six layers total.
- Place rectangles on baking sheets. Prick all over with a fork. Brush lightly with egg wash if desired.
- Bake for 12-15 minutes, rotating halfway, until golden and crisp. Cool completely. Save trimmings for garnish.
- In a medium saucepan, combine milk and heavy cream. Heat over medium until just steaming.
- In a bowl, whisk eggs, sugar, and cornstarch until smooth. Slowly pour hot milk mixture into eggs, whisking constantly.
- Return mixture to saucepan. Cook over medium heat, stirring nonstop, until thickened (about 5-8 minutes).
- Remove from heat. Stir in butter and vanilla. Let cool to room temperature, then refrigerate until chilled (at least 30 minutes).
- In a large bowl, whip heavy cream with powdered sugar and vanilla until stiff peaks form. Chill until ready to use.
- Place first pastry layer on serving platter. Spread with a thin layer of custard. Top with next pastry, repeat custard. After three layers, spread whipped cream instead of custard for a lighter middle.
- Continue layering, alternating custard and whipped cream as desired, finishing with a pastry layer on top.
- Gently press down to settle the layers.
- Spread remaining custard over the top layer. Sprinkle with crumbled pastry scraps and dust with powdered sugar. Add fresh berries if desired.
- Refrigerate cake for at least 1 hour before slicing.
- Slice with a sharp, serrated knife, wiping between cuts for clean edges.
Notes
Keep ingredients cold for best pastry results. Prick pastry thoroughly before baking to prevent puffing. Chill cake well before slicing for neat layers. For gluten-free or dairy-free adaptations, use suitable puff pastry and plant-based milk/cream. Cake can be made a day ahead and slices best when cold.
Nutrition
- Serving Size: 1 slice (1/12 of cak
- Calories: 380
- Sugar: 18
- Sodium: 220
- Fat: 25
- Saturated Fat: 15
- Carbohydrates: 32
- Fiber: 1
- Protein: 6
Keywords: Napoleon cake, creamy dessert, flaky pastry, vanilla custard, party dessert, layered cake, French dessert, easy cake recipe


