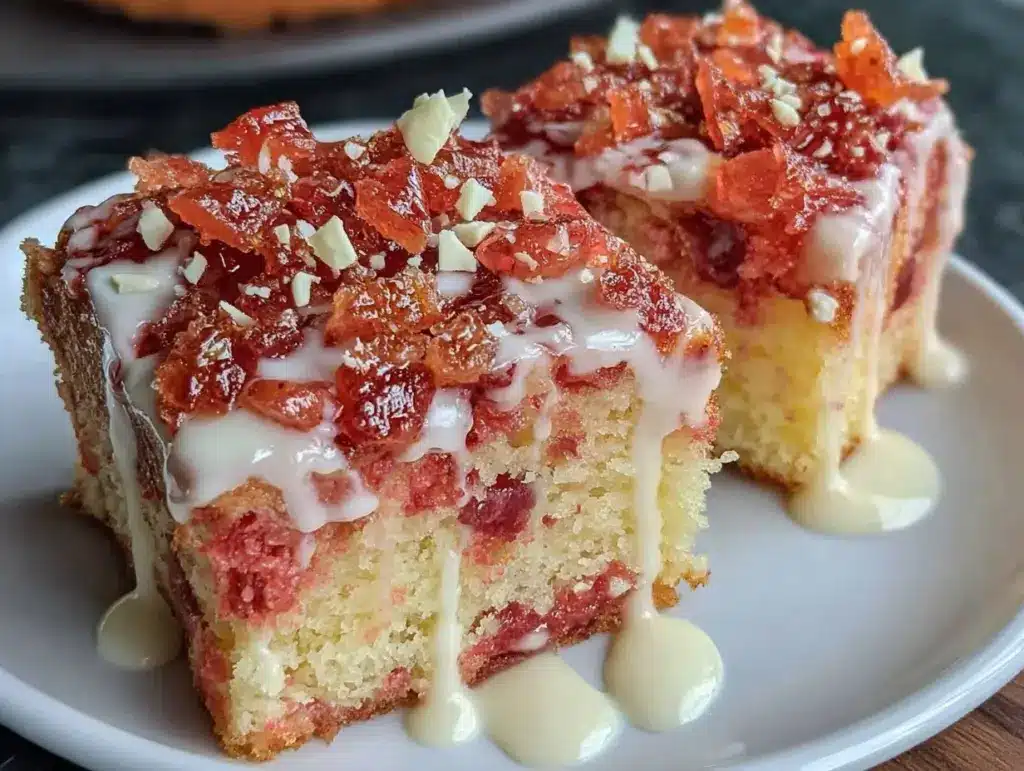
Let me tell you, the scent of rich, velvety cake mingling with the subtle sweetness of white chocolate is enough to make anyone’s mouth water. The first time I baked this Creamy Pink Velvet Poke Cake with White Chocolate, I was instantly hooked—the kind of moment where you pause, take a deep breath, and just smile because you know you’re onto something truly special. It was a rainy weekend when I stumbled upon an old family recipe book, and this cake caught my eye with its bright pink hue and promise of creamy indulgence. You know what? I wish I’d discovered this gem years ago when I was knee-high to a grasshopper and my grandma would bake treats that felt like warm hugs.
My family couldn’t stop sneaking pieces off the cooling rack (and honestly, I can’t really blame them). This poke cake quickly became a staple for birthday parties, casual gatherings, and even last-minute celebrations. Let’s face it, it’s dangerously easy to whip up, and the creamy white chocolate drizzle adds just the right touch of nostalgia and fancy without any fuss. Whether you’re looking for a sweet treat to brighten up your Pinterest cookie board or a show-stopping dessert for potlucks, this recipe fits the bill perfectly.
I’ve tested it multiple times in the name of research, of course, and each batch feels like a little victory. Trust me, once you try this Creamy Pink Velvet Poke Cake with White Chocolate, you’re going to want to bookmark this one for every special occasion (or just because!).
Why You’ll Love This Creamy Pink Velvet Poke Cake with White Chocolate
This recipe is truly a keeper, and here’s why:
- Quick & Easy: Comes together in under an hour, perfect for busy weeknights or last-minute dessert cravings.
- Simple Ingredients: No need for fancy grocery trips; you likely have everything in your pantry and fridge already.
- Perfect for Any Occasion: Whether it’s brunch, potlucks, cozy dinners, or holiday mornings, this poke cake shines.
- Crowd-Pleaser: Gets rave reviews from kids and adults alike—always a hit at family gatherings.
- Unbelievably Delicious: The combo of moist pink velvet cake soaked with creamy filling and topped with luscious white chocolate is next-level comfort food.
What sets this recipe apart is the perfectly balanced texture between the soft, airy cake and the creamy, dreamy white chocolate drizzle. I like to blend the filling just so it seeps into every poke hole, ensuring each bite bursts with flavor. Honestly, this isn’t just another poke cake—it’s my best version, crafted after several tweaks and plenty of taste tests. It’s comfort food reimagined—faster, lighter, with that nostalgic vibe you crave, but without the fuss.
This recipe isn’t just good; it’s the kind that makes you close your eyes after the first bite and smile. If you ever want to impress guests without stress or turn a simple meal into something memorable, this Creamy Pink Velvet Poke Cake with White Chocolate is your go-to.
What Ingredients You Will Need
This recipe uses simple, wholesome ingredients to deliver bold flavor and satisfying texture without the fuss. Most of these are pantry staples, and the pink color comes from classic red velvet components with a creamy twist.
- For the Cake:
- 1 box pink velvet cake mix (or classic red velvet cake mix with a touch of pink food coloring)
- 1 cup water (240 ml), room temperature
- 1/3 cup vegetable oil (80 ml)
- 3 large eggs, room temperature
- 1 tsp vanilla extract (adds warmth and depth)
- For the Creamy Filling:
- 1 (8 oz) package cream cheese, softened (I recommend Philadelphia for smooth texture)
- 1 cup powdered sugar (120 g), sifted
- 1/2 cup whole milk (120 ml) or use almond milk for dairy-free option
- 1 tsp vanilla extract
- For the White Chocolate Topping:
- 6 oz white chocolate chips or chopped white chocolate (170 g) (Ghirardelli works wonders here)
- 1/4 cup heavy cream (60 ml) or coconut cream for dairy-free
Optional: For a fun twist, sprinkle crushed freeze-dried raspberries on top for a tangy pop. In summer, you might swap the cream cheese filling with a whipped berry cream for a fresh note.
Equipment Needed
- 9×13 inch (23×33 cm) baking pan – a glass or metal pan works fine; glass tends to brown edges more evenly.
- Mixing bowls – one large for cake batter, one medium for cream cheese filling.
- Electric mixer or stand mixer – makes cream cheese filling silky smooth, but a sturdy whisk and some elbow grease will do in a pinch.
- Toothpick or skewer – to poke holes in the cake once baked.
- Small saucepan or microwave-safe bowl – for melting white chocolate and cream.
- Spatula or spoon – for spreading filling and topping.
If you don’t have an electric mixer, just make sure your cream cheese is really soft to avoid lumps. I’ve used both a hand whisk and mixer, and trust me, the mixer speeds things up but it’s not mandatory. For melting white chocolate, a microwave in short bursts works great to prevent burning.
Preparation Method
- Preheat your oven to 350°F (177°C). Grease your 9×13 inch (23×33 cm) pan lightly with butter or non-stick spray. This helps the cake release easily after baking.
- Prepare the cake batter: In a large bowl, combine the pink velvet cake mix, 1 cup (240 ml) water, 1/3 cup (80 ml) vegetable oil, 3 large eggs, and 1 tsp vanilla extract. Mix with an electric mixer or whisk until smooth and well blended, about 2-3 minutes. The batter should be thick but pourable.
- Pour the batter into the prepared pan, spreading evenly with a spatula. Tap the pan gently on the counter to release any air bubbles. Bake for 28-32 minutes, or until a toothpick inserted in the center comes out clean or with a few moist crumbs.
- While the cake bakes, prepare the creamy filling: In a medium bowl, beat 8 oz (227 g) softened cream cheese until smooth. Gradually add 1 cup (120 g) powdered sugar, 1/2 cup (120 ml) milk, and 1 tsp vanilla extract. Mix until silky and pourable but still thick enough to hold shape.
- Once the cake is done, let it cool for 10 minutes. Then, use a toothpick or skewer to poke holes all over the cake, about 1 inch (2.5 cm) apart. Don’t be shy—poke deep enough to reach near the bottom but leave the base intact.
- Pour the creamy filling evenly over the warm cake, letting it seep into the holes. Spread gently with a spatula if needed. The warm cake will absorb the filling, creating that luscious poke cake texture. Let it cool completely to room temperature, then chill in the fridge for at least 1 hour to set.
- Prepare the white chocolate topping: In a small saucepan over low heat or microwave-safe bowl in 20-second bursts, melt 6 oz (170 g) white chocolate chips with 1/4 cup (60 ml) heavy cream. Stir frequently until smooth and glossy. Let it cool slightly—too hot and it will soak into the cake; slightly warm is perfect for drizzling.
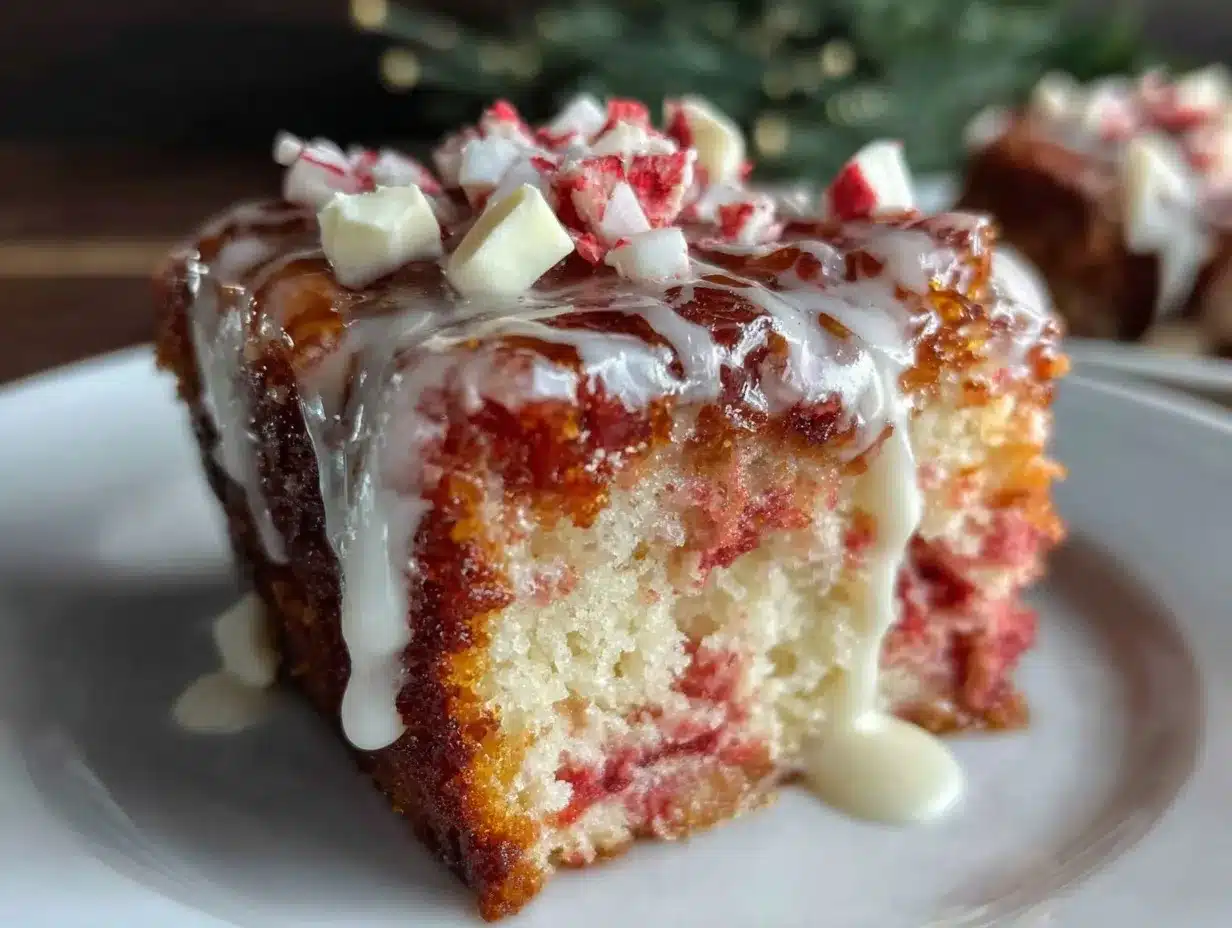
- Drizzle the white chocolate over the chilled cake in a decorative pattern. You can use a spoon or a piping bag. For an extra touch, sprinkle some crushed freeze-dried raspberries or white chocolate shavings on top.
- Refrigerate the cake for another 30 minutes before serving to let the topping set nicely. Slice into squares and watch the creamy pink magic unfold with every bite!
Cooking Tips & Techniques for Perfect Pink Velvet Poke Cake
Here’s what I’ve learned from countless tries and a few kitchen mishaps:
- Don’t skip the cream cheese softening step. Cold cream cheese won’t blend well and can leave lumps in your filling. Let it sit out for 30 minutes or microwave for 10 seconds if you’re in a rush.
- Use room temperature eggs and liquids for a smoother batter and better rise. Cold ingredients can lead to a denser cake.
- Be generous with the poking. The more holes, the more filling absorption, but avoid poking too close to edges to prevent leakage.
- Cool the cake before adding the white chocolate drizzle. If the cake is too warm, the chocolate topping will melt and run off, which is a beautiful mess but not the look you want.
- Microwave white chocolate in short bursts. White chocolate burns easily, so stir often and heat in 15-20 second intervals.
- Multitask by chilling the cake while preparing the topping—saves time and lets flavors meld beautifully.
- For extra moistness, brush the cake with a splash of milk before filling. I sometimes do this when the cake feels a bit dry out of the oven.
Variations & Adaptations
You can mix things up with this Creamy Pink Velvet Poke Cake to suit your taste or dietary needs:
- Berry Bliss: Swap the cream cheese filling for whipped cream folded with fresh or frozen raspberries. Top with berry compote instead of white chocolate drizzle.
- Chocolate Lover’s Dream: Add 1/2 cup cocoa powder to the cake mix for a pink-chocolate twist. Use dark chocolate ganache in place of white chocolate topping.
- Gluten-Free Option: Use a gluten-free red velvet cake mix and ensure all other ingredients (like vanilla extract) are gluten-free certified.
- Dairy-Free Adaptation: Swap cream cheese with coconut cream or cashew cream, use almond or oat milk, and replace heavy cream with coconut cream for the topping.
- Personal Twist: I once added a splash of rose water to the cream cheese filling—gives a subtle floral hint that’s absolutely dreamy.
Serving & Storage Suggestions
This Creamy Pink Velvet Poke Cake with White Chocolate is best served chilled or at cool room temperature. The creamy filling sets beautifully in the fridge, creating a melt-in-your-mouth texture.
Serve it with a scoop of vanilla ice cream or a dollop of whipped cream for extra indulgence. A cup of lightly brewed tea or a chilled glass of sparkling rosé pairs surprisingly well, balancing the sweetness.
Store leftovers covered tightly in the fridge for up to 4 days. You can freeze individual slices wrapped in plastic wrap and foil for up to 2 months. To reheat, thaw overnight in the fridge and enjoy chilled or warm slightly in the microwave for about 15 seconds—just enough to bring back the softness without melting the topping.
Flavors tend to deepen and mellow after a day or two, so sometimes I find the poke cake tastes even better the next day. Perfect for prepping ahead of time for parties!
Nutritional Information & Benefits
Each slice of this Creamy Pink Velvet Poke Cake with White Chocolate (assuming 12 servings) roughly contains:
| Calories | 320 kcal |
|---|---|
| Fat | 18 g |
| Carbohydrates | 38 g |
| Protein | 4 g |
| Sugar | 28 g |
The cream cheese adds a good dose of calcium and protein, while the white chocolate topping provides a luscious indulgence. While this isn’t a low-carb or low-sugar treat, you can make adjustments for dietary needs, like using sugar-free cake mix or dairy-free alternatives.
From my wellness perspective, this cake is a delightful reward after a busy week—comfort food that doesn’t feel like a chore to make or eat. Just enjoy it mindfully, and it’s pure happiness on a plate.
Conclusion
In a world full of desserts, this Creamy Pink Velvet Poke Cake with White Chocolate stands out for its ease, beauty, and downright deliciousness. It’s a recipe that invites you to customize and make it your own, whether you want it richer, lighter, or with a fresh fruity twist.
Honestly, I love this cake because it brings a little party to the table without the stress, and everyone always asks for seconds. If you give this recipe a try, I’d love to hear how you made it your own—drop a comment below or share your favorite tweaks!
So go ahead, whip up this sweet, creamy delight, and let it brighten your day and your dessert spread. Happy baking!
FAQs About Creamy Pink Velvet Poke Cake with White Chocolate
Can I make this poke cake from scratch instead of using a cake mix?
Absolutely! You can use your favorite pink or red velvet cake recipe. Just bake, poke, and follow the same filling and topping steps for that creamy finish.
How long should I poke the cake to get the best soaking?
Poke holes about every 1 inch (2.5 cm) apart across the entire cake, going deep but not all the way through. This spacing lets the filling seep evenly without making the cake soggy.
Can I prepare this cake a day ahead?
Yes! In fact, it tastes even better the next day as the filling and topping have time to meld. Just cover and refrigerate overnight.
Is there a way to make this poke cake less sweet?
You can reduce powdered sugar in the filling slightly or use white chocolate with lower sugar content. Adding a pinch of salt to the cream cheese filling also balances sweetness.
What’s the best way to store leftover poke cake?
Store covered in the refrigerator for up to 4 days. For longer storage, freeze slices wrapped tightly, then thaw before serving.
Pin This Recipe!
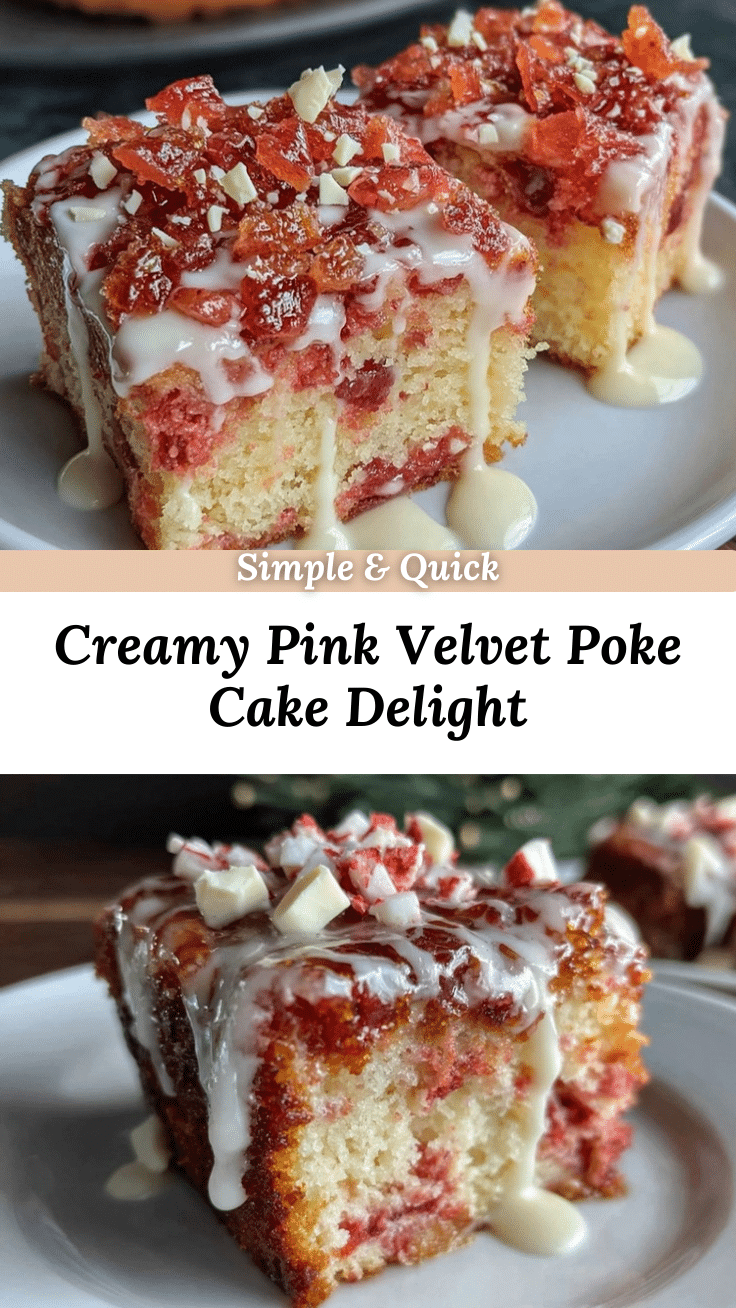
Creamy Pink Velvet Poke Cake with White Chocolate

A quick and easy pink velvet poke cake soaked with a creamy filling and topped with luscious white chocolate drizzle, perfect for any occasion.
- Prep Time: 15 minutes
- Cook Time: 30 minutes
- Total Time: 1 hour 15 minutes
- Yield: 12 servings 1x
- Category: Dessert
- Cuisine: American
Ingredients
- 1 box pink velvet cake mix (or classic red velvet cake mix with a touch of pink food coloring)
- 1 cup water (240 ml), room temperature
- 1/3 cup vegetable oil (80 ml)
- 3 large eggs, room temperature
- 1 tsp vanilla extract
- 8 oz cream cheese, softened
- 1 cup powdered sugar (120 g), sifted
- 1/2 cup whole milk (120 ml) or almond milk for dairy-free option
- 1 tsp vanilla extract
- 6 oz white chocolate chips or chopped white chocolate (170 g)
- 1/4 cup heavy cream (60 ml) or coconut cream for dairy-free
Instructions
- Preheat your oven to 350°F (177°C). Grease a 9×13 inch (23×33 cm) pan lightly with butter or non-stick spray.
- In a large bowl, combine the pink velvet cake mix, 1 cup water, 1/3 cup vegetable oil, 3 large eggs, and 1 tsp vanilla extract. Mix until smooth and well blended, about 2-3 minutes.
- Pour the batter into the prepared pan, spreading evenly. Tap the pan gently to release air bubbles. Bake for 28-32 minutes or until a toothpick inserted in the center comes out clean or with a few moist crumbs.
- While the cake bakes, beat 8 oz softened cream cheese until smooth. Gradually add 1 cup powdered sugar, 1/2 cup milk, and 1 tsp vanilla extract. Mix until silky and pourable but thick enough to hold shape.
- Let the cake cool for 10 minutes. Use a toothpick or skewer to poke holes about 1 inch apart all over the cake, deep enough to reach near the bottom but not through.
- Pour the creamy filling evenly over the warm cake, letting it seep into the holes. Spread gently if needed. Let cool completely to room temperature, then chill in the fridge for at least 1 hour.
- Melt 6 oz white chocolate chips with 1/4 cup heavy cream in a small saucepan over low heat or microwave in 20-second bursts, stirring frequently until smooth and glossy. Let cool slightly.
- Drizzle the white chocolate over the chilled cake in a decorative pattern. Optionally, sprinkle crushed freeze-dried raspberries or white chocolate shavings on top.
- Refrigerate the cake for another 30 minutes before serving. Slice into squares and serve.
Notes
Let cream cheese soften before mixing to avoid lumps. Use room temperature eggs and liquids for better batter texture. Poke holes about 1 inch apart and deep enough to near the bottom but not through. Cool cake before drizzling white chocolate to prevent melting and running. Microwave white chocolate in short bursts and stir frequently to avoid burning. For extra moistness, brush cake with a splash of milk before filling.
Nutrition
- Serving Size: 1 slice (1/12 of cak
- Calories: 320
- Sugar: 28
- Fat: 18
- Carbohydrates: 38
- Protein: 4
Keywords: pink velvet cake, poke cake, white chocolate, creamy filling, easy dessert, birthday cake, party dessert


