
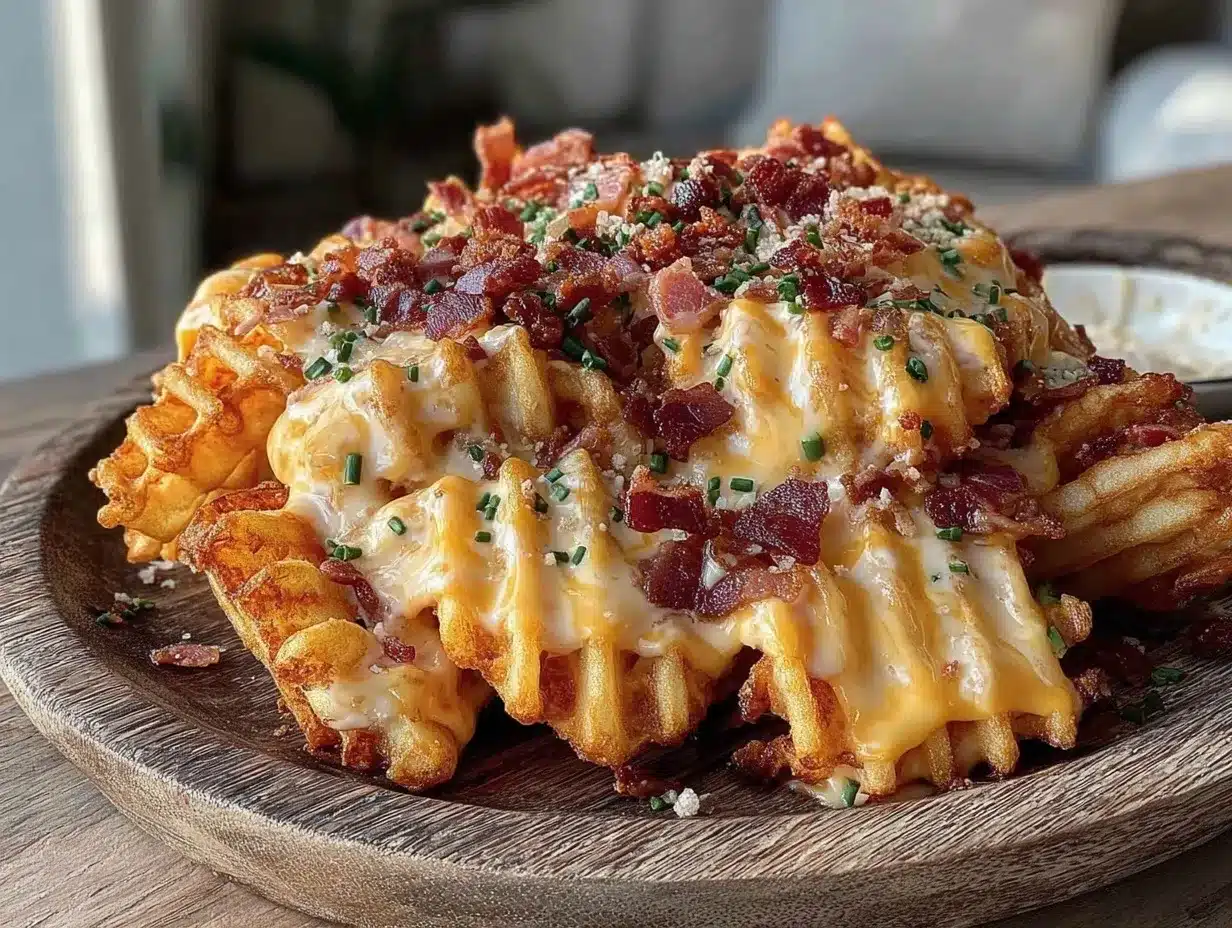
“You know that moment when you’re halfway through fixing a leaky faucet, and your neighbor strolls by with a plate of something that smells ridiculously good? That was last Saturday afternoon for me. I was elbow-deep in plumbing chaos when Mike, the guy next door, popped over holding this tray piled high with crispy Irish nachos. Honestly, I wasn’t expecting much—just some fries and cheese, right? But the crunch, the melty cheese, and the little bursts of green onions had me hooked before I could even ask for the recipe.
It wasn’t just the snack itself—there was this warmth in the way Mike described how his grandma used to make it on chilly evenings, with the family gathering around the TV. I went home, rummaged through my freezer for some waffle fries, and gave it a shot. Spoiler: it was a total hit, even though I forgot the sour cream the first time (classic me). Since then, Crispy Irish Nachos with Cheesy Waffle Fries have become my go-to comfort food when I’m craving something simple but totally satisfying. Maybe you’ve been there—looking for a snack that’s easy, cheesy, and has a little bit of crunch to keep things interesting. If so, keep reading because this recipe might just be the one you didn’t know your snack game was missing.
Why You’ll Love This Recipe
After testing multiple versions and tweaking the cheese blend, I can say this recipe nails that perfect balance between crispy and gooey that’s honestly hard to find. It’s the kind of snack that feels indulgent but comes together so quickly, you’ll wonder why you haven’t made it before. Here’s what makes these Crispy Irish Nachos with Cheesy Waffle Fries stand out:
- Quick & Easy: Ready in under 30 minutes, perfect for those busy evenings or spontaneous snack attacks.
- Simple Ingredients: No need to hunt down fancy items; waffle fries, cheese, and a few toppings are all you need.
- Perfect for Game Day or Casual Gatherings: The crispy fries and melted cheese combo is always a crowd favorite.
- Crowd-Pleaser: Kids, adults, picky eaters—you name it, everyone asks for seconds.
- Unbelievably Delicious: The crispy edges of waffle fries hold the cheesy sauce beautifully, making every bite a flavorful crunch.
This recipe isn’t just a cheesy snack; it’s the type of comfort food that makes you close your eyes after the first bite and say, “Yep, this is exactly what I needed.” What sets it apart is the use of crispy waffle fries instead of regular fries or chips, giving it an extra crunch and a unique texture that holds up under all that cheese and toppings. Plus, a little sprinkle of green onions and a drizzle of tangy sour cream finishes things off with a satisfying zing. Honestly, it’s the kind of treat that turns simple ingredients into something memorable, perfect whether you’re feeding a crowd or just treating yourself on a quiet night in.
What Ingredients You Will Need
This recipe uses straightforward ingredients you likely have in your kitchen, combining them for a snack that’s both rich and satisfying without fuss. The waffle fries act as the crispy base, while the cheese and toppings bring layers of flavor and texture.
- Frozen Waffle Fries (about 1 pound / 450g) – I recommend Alexia brand for the best crunch and consistency.
- Cheddar Cheese, shredded (1½ cups / 170g) – sharp cheddar works beautifully for bold flavor.
- Monterey Jack Cheese, shredded (1 cup / 115g) – adds creaminess and meltiness.
- Green Onions, thinly sliced (3 stalks) – for a fresh, mild onion bite.
- Bacon, cooked and crumbled (4 slices) – optional but highly recommended for smoky depth.
- Sour Cream (½ cup / 120ml) – for drizzling on top or serving on the side.
- Jalapeño Peppers, sliced (1 medium) – optional, for those who like a little heat.
- Smoked Paprika (1 teaspoon) – adds a subtle smoky spice to the cheese mix.
- Salt and Freshly Ground Black Pepper – to taste.
If you want to switch things up, you can swap cheddar with a dairy-free cheese for a vegan-friendly option. For gluten-free needs, just make sure the waffle fries you buy are certified gluten-free (some brands are!). And if fresh green onions aren’t in season, a sprinkle of dried chives can work in a pinch. The ingredients here are a perfect mix of pantry staples and a few fresh touches that make all the difference.
Equipment Needed
- Baking Sheet: A rimmed sheet works best to hold the fries and toppings.
- Oven or Air Fryer: You can bake the waffle fries in the oven, or if you’re short on time, an air fryer will crisp them up nicely.
- Mixing Bowls: A couple of medium bowls for tossing fries and mixing cheese.
- Cheese Grater: Freshly shredding cheese makes a big difference in melt and texture.
- Spatula or Tongs: For flipping fries or serving.
I’ve used everything from heavy-duty stainless steel baking sheets to budget-friendly non-stick pans, and honestly, either works fine as long as it’s sturdy. For the cheese, a box grater is simple and quick, but if you’re feeling fancy, a food processor shredder attachment saves time. One pro tip: if you want an even crispier finish, line your baking sheet with parchment paper—it prevents sticking and speeds up cleanup.
Preparation Method
- Preheat your oven to 425°F (220°C). Getting the oven hot is key for crispy fries.
- Spread the frozen waffle fries evenly on a rimmed baking sheet in a single layer. Avoid crowding to keep them crispy. Bake for 20-25 minutes, flipping halfway through, until golden and crunchy. (If using an air fryer, cook at 400°F/200°C for 15-18 minutes, shaking halfway.)
- While fries bake, shred your cheddar and Monterey Jack cheeses and mix them together with smoked paprika in a bowl. This blend ensures a flavorful, gooey topping.
- Cook bacon slices in a skillet over medium heat until crisp, about 5-7 minutes. Drain on paper towels and crumble once cool.
- When fries are done, remove the baking sheet from the oven. Carefully sprinkle the cheese mixture evenly over the fries, then scatter the bacon crumbles and sliced jalapeños on top.
- Return the baking sheet to the oven and bake for an additional 5-7 minutes until the cheese is melted and bubbly. You want it melty but not burnt—watch closely!
- Remove from oven and sprinkle sliced green onions over the top. Let cool for a minute or two so the cheese sets slightly.
- Serve immediately with dollops of sour cream on the side or drizzled over. A squeeze of fresh lime juice can also brighten things up if you have it.
Pro tip: If your cheese isn’t melting evenly, give the tray a quick broil for 30 seconds to get that perfect golden top. Just don’t walk away—you’ll want to catch it before it burns. Also, keep an eye on those jalapeños if you’re sensitive to heat; roasting them slightly before adding mellows the spice.
Cooking Tips & Techniques
Getting crispy, cheesy fries that don’t turn soggy can be a bit of a balancing act. Here’s what I’ve learned from a few experiments (and a couple of burnt cheese mishaps):
- Don’t overcrowd the fries. Spread them in a single layer so air circulates and they crisp up nicely.
- Use a cheese blend. Cheddar gives sharp flavor, while Monterey Jack melts like a dream. This combo keeps the texture creamy without turning rubbery.
- Pre-cook bacon separately. Adding raw bacon before baking fries can make everything greasy and soggy.
- Watch your oven temperature. Too low and fries become limp; too high and cheese burns before melting.
- Timing matters. Add cheese only after the fries are mostly cooked to avoid sogginess.
- Green onions and sour cream bring brightness. Don’t skip these—they cut through the richness and add fresh flavor.
One thing I learned the hard way? Trying to add the sour cream before serving makes the fries soggy real fast. Serve it on the side or dolloped on top just before eating. Also, if multitasking in the kitchen, start baking the fries first, then prep your toppings—that way everything comes together hot and fresh. Honestly, these little details make the difference between a good snack and an unforgettable one.
Variations & Adaptations
This recipe is versatile enough to suit different tastes and dietary needs. Here are a few ideas I’ve tried or recommend:
- Vegetarian Option: Skip the bacon and add sautéed mushrooms or roasted bell peppers for a hearty twist.
- Spicy Kick: Mix in some hot sauce or sprinkle cayenne pepper into the cheese blend for extra heat.
- Vegan Version: Use dairy-free cheese shreds and skip bacon or use plant-based bacon alternatives; swap sour cream for cashew cream.
- Different Cheese Blends: Try mozzarella with Parmesan for a gooey, Italian-inspired take.
- Seasonal Twist: In fall, add caramelized onions and a sprinkle of fresh thyme for warmth and depth.
For a personal favorite, I once swapped the jalapeños for pickled banana peppers—unexpected but so good! And if you’re short on time, using pre-cooked waffle fries (from the deli or frozen section) can cut your cooking time in half. Just keep an eye on the cheese melt so it doesn’t overcook. Feel free to experiment; this recipe loves any little tweak you throw at it.
Serving & Storage Suggestions
Serve these crispy Irish nachos hot, straight from the oven, so the cheese is melty and the fries are still crispy. Plate them on a large platter for sharing, with extra sour cream and sliced green onions on the side for garnish. They pair wonderfully with a cold beer, a fresh salad, or even a spicy salsa for dipping. Honestly, they’re perfect as a standalone snack or a fun appetizer for gatherings.
If you’ve got leftovers (which might be rare!), store them in an airtight container in the refrigerator for up to 2 days. To reheat, use a 375°F (190°C) oven for 10-12 minutes to bring back the crispiness—microwaving tends to make them soggy, so best avoided. Over time, the flavors meld and deepen, especially if you add a sprinkle of fresh herbs like parsley or cilantro before serving again.
Nutritional Information & Benefits
Here’s a rough estimate per serving (based on 4 servings):
| Calories | 450-500 kcal |
|---|---|
| Protein | 18g |
| Carbohydrates | 35g |
| Fat | 28g |
| Fiber | 3g |
Key ingredients like cheddar cheese provide a good source of calcium and protein, while the green onions add small amounts of vitamins A and C. Using baked or air-fried waffle fries keeps the fat content lower than deep-frying. For gluten-sensitive folks, just check your fries to ensure they’re gluten-free. And if you want a lighter version, swap sour cream with Greek yogurt for added probiotics and less fat. From my experience, this snack fits well in a balanced diet when enjoyed occasionally, especially when paired with fresh veggies or a side salad.
Conclusion
In the end, these Crispy Irish Nachos with Cheesy Waffle Fries have become more than just a snack in my kitchen—they’re a little celebration of simple, satisfying flavors that bring people together. Whether you’re craving a quick bite or feeding friends on game night, this recipe delivers without fuss. I love how easily it adapts to whatever you have on hand and how the crispy texture holds up even with all that ooey-gooey cheese. I hope you’ll give it a try, maybe even add your own twist, and come back to share your version. Because honestly, the best recipes are the ones that make you feel like you’ve got a secret weapon in the kitchen — and this one is mine.
Now, go grab those waffle fries and get cooking—you’re in for a treat!
FAQs about Crispy Irish Nachos with Cheesy Waffle Fries
Can I use regular fries instead of waffle fries?
Absolutely! Regular fries or even sweet potato fries work fine, but waffle fries add an extra crunch and hold cheese better.
How do I keep the fries crispy after adding cheese?
Make sure to bake the fries fully before adding cheese and toppings, then bake just long enough to melt the cheese—overbaking can make fries soggy.
Can I prepare this recipe ahead of time?
It’s best served fresh, but you can bake fries ahead and reheat with cheese added just before serving to keep them crispy.
What’s the best cheese for melting?
A mix of sharp cheddar and Monterey Jack works well for flavor and melt. Mozzarella is a good mild alternative.
Is there a vegan or dairy-free version?
Yes! Use dairy-free cheese shreds and plant-based bacon substitutes. Swap sour cream with coconut or cashew cream.
Pin This Recipe!
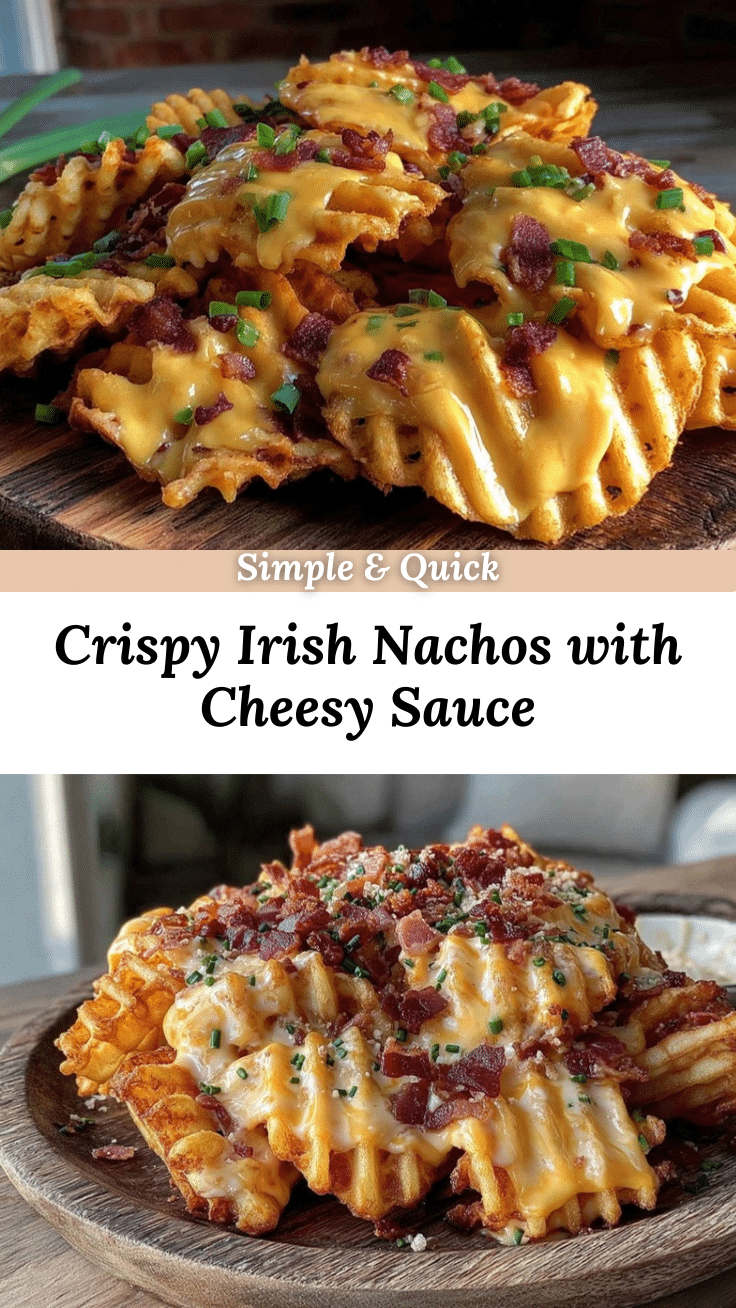
Crispy Irish Nachos with Cheesy Waffle Fries

A quick and easy snack featuring crispy waffle fries topped with a blend of melted cheddar and Monterey Jack cheeses, bacon, jalapeños, and green onions, served with sour cream.
- Prep Time: 10 minutes
- Cook Time: 25-32 minutes
- Total Time: 35-42 minutes
- Yield: 4 servings 1x
- Category: Snack
- Cuisine: Irish-American
Ingredients
- 1 pound (450g) frozen waffle fries
- 1½ cups (170g) shredded sharp cheddar cheese
- 1 cup (115g) shredded Monterey Jack cheese
- 3 stalks green onions, thinly sliced
- 4 slices bacon, cooked and crumbled (optional)
- ½ cup (120ml) sour cream
- 1 medium jalapeño pepper, sliced (optional)
- 1 teaspoon smoked paprika
- Salt and freshly ground black pepper, to taste
Instructions
- Preheat your oven to 425°F (220°C).
- Spread the frozen waffle fries evenly on a rimmed baking sheet in a single layer. Avoid crowding to keep them crispy.
- Bake for 20-25 minutes, flipping halfway through, until golden and crunchy. (If using an air fryer, cook at 400°F/200°C for 15-18 minutes, shaking halfway.)
- While fries bake, shred cheddar and Monterey Jack cheeses and mix them together with smoked paprika in a bowl.
- Cook bacon slices in a skillet over medium heat until crisp, about 5-7 minutes. Drain on paper towels and crumble once cool.
- When fries are done, remove the baking sheet from the oven. Carefully sprinkle the cheese mixture evenly over the fries, then scatter the bacon crumbles and sliced jalapeños on top.
- Return the baking sheet to the oven and bake for an additional 5-7 minutes until the cheese is melted and bubbly.
- Remove from oven and sprinkle sliced green onions over the top. Let cool for a minute or two so the cheese sets slightly.
- Serve immediately with dollops of sour cream on the side or drizzled over. Optionally, add a squeeze of fresh lime juice.
Notes
Do not overcrowd fries to keep them crispy. Add cheese only after fries are mostly cooked to avoid sogginess. Pre-cook bacon separately to prevent greasiness. For extra crispiness, line baking sheet with parchment paper. If cheese isn’t melting evenly, broil for 30 seconds but watch closely to avoid burning. Serve sour cream on the side or drizzled just before eating to prevent sogginess.
Nutrition
- Serving Size: About 1/4 of the rec
- Calories: 475
- Sugar: 2
- Sodium: 600
- Fat: 28
- Saturated Fat: 12
- Carbohydrates: 35
- Fiber: 3
- Protein: 18
Keywords: Irish nachos, waffle fries, cheesy fries, snack, appetizer, game day food, comfort food