
“You know that feeling when you’re just about to close up shop at the farmer’s market, and the sweetest, juiciest berries catch your eye? That’s exactly how the story of this crispy skillet mixed berry cobbler started for me. It wasn’t some fancy recipe I stumbled upon in a glossy magazine or a high-end cooking class; it was a scrappy little note pinned to an old corkboard at a local stall. The note was handwritten—smudged a bit from the summer rain—and it promised a cobbler that “melts in your mouth with a biscuit topping that’s buttery and crisp.”
I wasn’t planning to make a dessert that day, honestly. I was just there for some fresh tomatoes, but those berries looked too good to pass up. I grabbed the note and a basket of mixed berries—blueberries, blackberries, and raspberries—and headed straight to my kitchen. Things got a little messy; I forgot to preheat the oven right away, and the first biscuit topping attempt was a bit too thick. But that’s the charm, isn’t it? The crispy skillet mixed berry cobbler with buttery biscuit topping quickly became a favorite after that imperfect first try.
Maybe you’ve been there—just wanting something simple but special to satisfy a craving without fussing over complicated steps. Well, this cobbler is exactly that. It’s the kind of dessert that pulls you in with its golden, bubbly edges and the scent of warm berries mingling with buttery biscuits. It’s a cozy, nostalgic bite that makes you want to linger at the table a little longer.
And why does this recipe stick with me? Because it’s honest, straightforward, and somehow manages to be both rustic and indulgent at the same time. It’s the kind of recipe you’ll want to keep close, whether you’re making it for a casual weeknight treat or a weekend gathering with friends.
Why You’ll Love This Crispy Skillet Mixed Berry Cobbler Recipe
Cooking this crispy skillet mixed berry cobbler has been one of those joyful kitchen experiences that you repeat again and again—because it just works every time. Crafted with real, fresh ingredients and a buttery biscuit topping that crisps just right, it’s a dessert that feels like a warm hug after a long day.
- Quick & Easy: Ready in under 45 minutes, this recipe fits perfectly into busy evenings or spontaneous dessert cravings.
- Simple Ingredients: No need for exotic or hard-to-find items; chances are, you have most of these staples in your pantry and fridge.
- Perfect for Any Occasion: Whether it’s a casual family dinner, a summer BBQ, or a cozy winter night, this cobbler shines.
- Crowd-Pleaser: Kids and adults both love the sweet-tart berry filling paired with the flaky, buttery biscuit crust.
- Unbelievably Delicious: The contrast of the warm, juicy berries and the crisp, golden biscuit topping is downright addictive.
What sets this recipe apart is the skillet method that crisps the biscuit topping to perfection against the bubbling berry filling. I’ve tried other cobblers that can be soggy or too doughy, but this one keeps each bite balanced — thanks to a small trick of using cold butter and just the right amount of biscuit dough. It’s like comfort food, but with a rustic twist that still feels homey and utterly satisfying.
Honestly, this recipe isn’t just a dessert; it’s a little moment of joy you create for yourself or your guests. It’s the kind of dish that invites smiles, second helpings, and warm memories around the table.
What Ingredients You Will Need for Crispy Skillet Mixed Berry Cobbler
This recipe uses straightforward, wholesome ingredients to deliver a bold flavor and that satisfying crispy texture you crave without any fuss. Most of the ingredients are pantry staples or fresh produce you can find year-round or swap seasonally.
- Mixed Berries (4 cups / 600g) – A combination of fresh or frozen blueberries, blackberries, and raspberries. (In summer, fresh berries make it extra vibrant; frozen works great too.)
- Granulated Sugar (¾ cup / 150g) – Sweetens the berries, balancing their tartness.
- All-Purpose Flour (1 tablespoon + 1 ½ cups / 8g + 190g) – Used both to thicken the berry filling and in the biscuit topping. For best texture, I like King Arthur brand.
- Lemon Juice (1 tablespoon / 15ml) – Adds brightness and lifts the berry flavors.
- Salt (½ teaspoon / 3g) – Enhances all the flavors.
- Baking Powder (2 teaspoons / 8g) – Gives the biscuit topping its lovely rise and fluffiness.
- Unsalted Butter (6 tablespoons / 85g) – Cold and cubed for the biscuit topping to create crisp, flaky layers. Use good quality like Plugrá or Kerrygold if you can.
- Whole Milk or Buttermilk (¾ cup / 180ml) – For moistening the biscuit dough. Buttermilk is preferred for tang and tenderness but milk works fine too.
- Vanilla Extract (1 teaspoon / 5ml, optional) – Adds subtle warmth to the biscuit topping.
If you need a gluten-free option, almond flour or a gluten-free baking mix can replace all-purpose flour, but the texture will be slightly different. For a dairy-free version, swap butter for coconut oil and use a plant-based milk alternative like oat or almond milk.
Remember, fresh and ripe berries make a world of difference here. When berries are in season, this cobbler really sings. If you have a chance, pick up a pint from your local farmer’s market—trust me, your taste buds will thank you.
Equipment Needed
- 10-inch Cast Iron Skillet – Ideal for even heat distribution and creating that crispy bottom crust. If you don’t have cast iron, use an oven-safe heavy skillet or a round baking dish.
- Mixing Bowls – One medium for the berries and one larger for the biscuit dough.
- Pastry Cutter or Fork – To cut the butter into the flour for the biscuit topping. If you don’t have one, two knives or your fingertips work too.
- Measuring Cups and Spoons – For precise ingredient amounts.
- Wooden Spoon or Silicone Spatula – For mixing the filling and batter gently.
- Oven Mitts – Cast iron gets hot fast, so good mitts are a must to avoid burns.
I’ve tried baking this cobbler in different pans, but the cast iron skillet really makes the biscuit crust crisp up perfectly without drying out. Plus, it’s great for serving straight from stove to table. If you’re using a different pan, just keep an eye on baking time as it might vary slightly.
Preparation Method for Crispy Skillet Mixed Berry Cobbler
- Preheat your oven to 400°F (200°C). This ensures a hot start for crisping the biscuit topping. (About 10 minutes prep time before baking.)
- Prepare the berry filling: In a medium bowl, combine 4 cups (600g) mixed berries with ¾ cup (150g) granulated sugar, 1 tablespoon (8g) all-purpose flour, 1 tablespoon (15ml) fresh lemon juice, and ½ teaspoon (3g) salt. Toss gently to coat all berries. Set aside to macerate while you make the biscuit dough. The flour helps thicken the juices when baked.
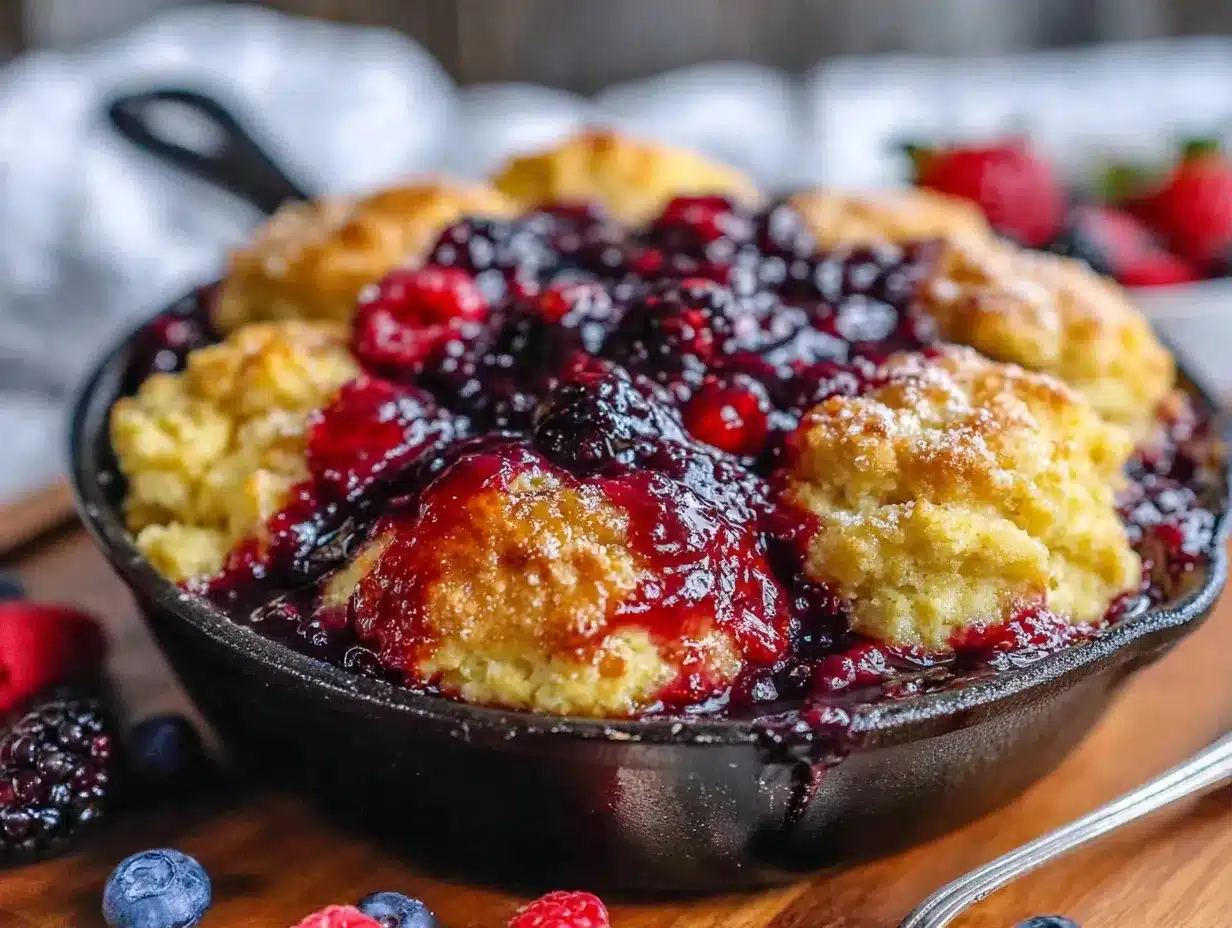
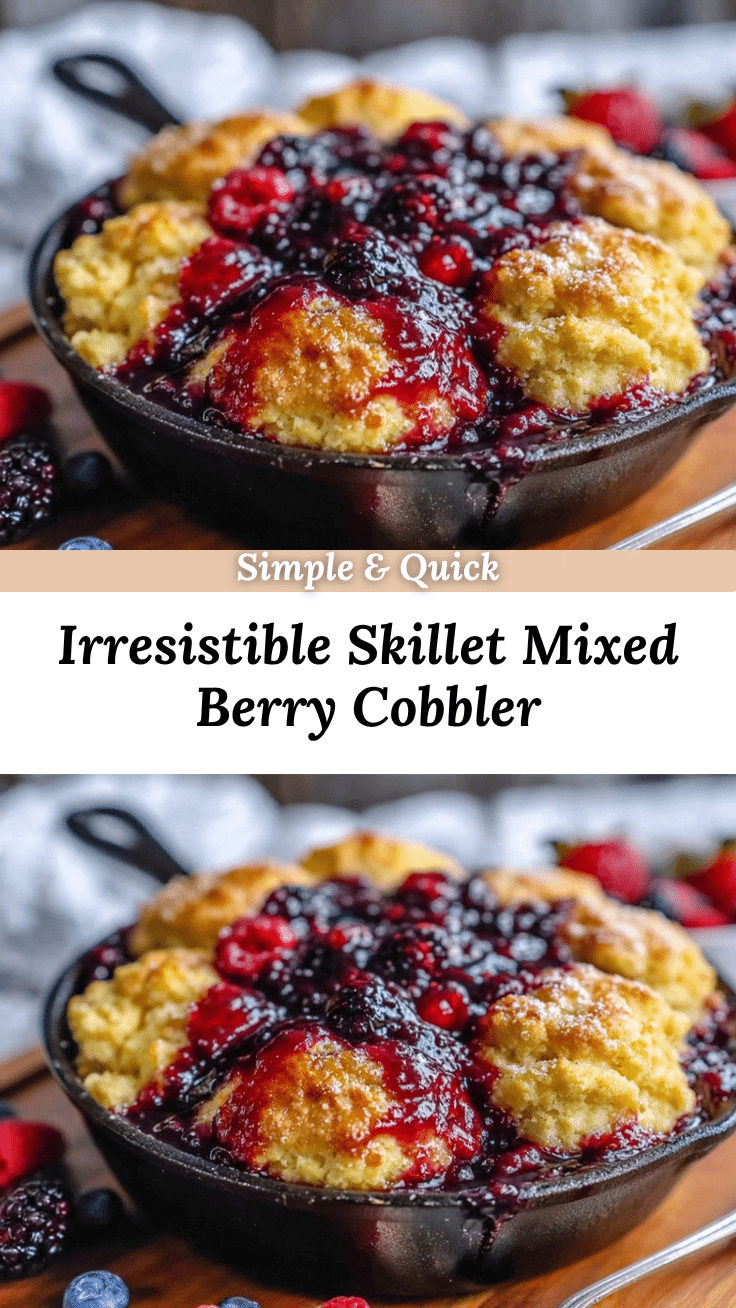
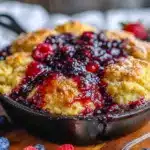
- Transfer the berry mixture to a 10-inch cast iron skillet. Spread evenly, and try not to stir too much — you want the berries to stay mostly whole for texture.
- Make the biscuit topping: In a large bowl, whisk together 1 ½ cups (190g) all-purpose flour, 2 teaspoons (8g) baking powder, ½ teaspoon (3g) salt, and ¼ cup (50g) sugar if you like a sweeter biscuit.
- Cut in 6 tablespoons (85g) cold, cubed unsalted butter using a pastry cutter or two knives until the mixture resembles coarse crumbs with some pea-sized pieces of butter remaining. This texture is key for a flaky topping.
- Stir in ¾ cup (180ml) whole milk or buttermilk and 1 teaspoon (5ml) vanilla extract until just combined. Don’t overmix; the dough should be slightly sticky but manageable.
- Drop the biscuit dough by spoonfuls over the berry filling, leaving small gaps so the fruit can bubble through. This uneven topping crisps better than a smooth layer.
- Bake the cobbler for 30-35 minutes, or until the biscuit topping is golden brown and crisp, and the berry filling is bubbling around the edges. (Oven times can vary, so start checking at 25 minutes.)
- Cool for 10 minutes before serving. The juices thicken slightly as it rests, making it easier to plate.
Pro tip: If you notice the biscuit topping browning too fast but the filling isn’t bubbling yet, loosely cover the skillet with foil halfway through baking. This prevents burning while finishing the cook.
When you cut into the cobbler, you’ll hear that satisfying crunch of the biscuit crust and see the vibrant jewel-toned berries glistening underneath. Honestly, it’s one of those dishes that makes you want to grab a spoon and savor every warm, buttery bite.
Cooking Tips & Techniques for the Best Cobbler
Making the perfect crispy skillet mixed berry cobbler is about balancing textures and flavors—and here’s what I’ve learned through a few trial runs (and a couple of minor mishaps) in my kitchen.
- Keep the Butter Cold: Don’t let the butter soften too much before mixing. Cold butter creates those flaky, crispy pockets in the biscuit topping that make all the difference.
- Don’t Overmix the Biscuit Dough: Mixing too much develops gluten, which can lead to a tough topping. Mix until the ingredients just come together for tender biscuits.
- Use a Cast Iron Skillet: It holds heat well and crisps the bottom crust better than glass or metal pans.
- Watch the Sugar Levels: The berries’ natural sweetness can vary by season, so taste before mixing in the sugar. You can always add more later if needed.
- Let the Filling Macerate: Allowing the berries to sit with sugar and lemon juice for 10-15 minutes helps draw out the juices and enhances flavor.
- Timing the Bake: The bubbling filling signals that the berries are cooked through. If the biscuit topping browns quickly, tent with foil to avoid burning.
- Multitasking Tip: While the cobbler bakes, clean up and prepare any toppings like whipped cream or vanilla ice cream for an easy finish.
One time I left the biscuit topping too thick in spots, and it was chewy in the center—lesson learned to drop spoonfuls evenly. Also, I once forgot the lemon juice, and the filling tasted flat. So a little brightness really wakes this dessert up.
Variations & Adaptations for Your Mixed Berry Cobbler
This recipe is incredibly versatile—one of my favorite things about it! Here are a few ways you can tweak it to suit your taste or dietary needs.
- Seasonal Swaps: Use stone fruits like peaches or plums in late summer, or apples and pears in fall, paired with cinnamon and nutmeg for a cozy twist.
- Gluten-Free Option: Replace the all-purpose flour with a 1:1 gluten-free baking blend. The crumble texture will be slightly different but still delicious.
- Dairy-Free Version: Swap butter for coconut oil and use almond or oat milk instead of dairy milk or buttermilk.
- Extra Crunch: Sprinkle coarse sugar or chopped nuts (like pecans or almonds) on top of the biscuit dough before baking for a textured finish.
- Personal Favorite: I once added a teaspoon of almond extract to the biscuit topping and served the cobbler with a drizzle of homemade honey whipped cream—unforgettable!
These tweaks let you make the cobbler your own without losing the core comfort and crispy biscuit magic.
Serving & Storage Suggestions for Crispy Skillet Mixed Berry Cobbler
This cobbler is best enjoyed warm, right out of the oven, so the biscuit topping stays crisp and the filling is luxuriously juicy. Serve with a scoop of vanilla ice cream or a dollop of whipped cream for an extra indulgent touch.
If you’re serving to a crowd, the cast iron skillet presentation is charming and rustic—just bring it straight to the table with a big spoon.
Leftovers? No worries! Let the cobbler cool completely, then cover it tightly with foil or plastic wrap and store in the refrigerator for up to 3 days.
To reheat, pop it in a 350°F (175°C) oven for 15-20 minutes to revive the biscuit topping’s crispness. Microwave reheating works too but can make the topping a bit soggy.
Interestingly, the flavors deepen overnight, making it a great make-ahead dessert. Just reheat gently before serving to bring back that freshly-baked feeling.
Nutritional Information & Benefits
Each serving of this crispy skillet mixed berry cobbler provides a comforting balance of sweet and tart flavors with a modest calorie count, perfect for a treat without overindulgence.
| Per Serving (1/8 of recipe) | Amount |
|---|---|
| Calories | 280 |
| Fat | 12g |
| Carbohydrates | 38g |
| Fiber | 4g |
| Sugar | 20g |
| Protein | 3g |
The mixed berries are rich in antioxidants, vitamin C, and fiber, supporting immune health and digestion. Using real butter adds calcium and fat-soluble vitamins, while the biscuit topping provides satisfying energy for those chilly days.
For gluten-free or dairy-free diets, the substitutions mentioned earlier keep this dessert inclusive without losing its heart.
Honestly, it’s a treat that can fit nicely into a balanced lifestyle—one that rewards you with genuine, homemade flavor and just the right amount of indulgence.
Conclusion
So there it is—the crispy skillet mixed berry cobbler with buttery biscuit topping that’s as inviting as it is straightforward. Whether you’re looking for a quick dessert fix or a comforting dish to share with friends, this recipe has you covered.
Feel free to make it your own, swap berries, tweak the topping, or add your signature flair. I love how this cobbler keeps me coming back—not just for the sweet-tart berry goodness but for the simple joy of baking something honest and delicious.
If you try this recipe, I’d love to hear how it turned out or what variations you made. Share your stories, tips, or questions below—let’s keep the conversation going and the cobbler baking!
Happy baking and happy eating!
FAQs About Crispy Skillet Mixed Berry Cobbler
Can I use frozen berries for this cobbler?
Absolutely! Frozen mixed berries work well—just don’t thaw them completely before baking to avoid excess liquid. Toss them in sugar and flour as usual.
How do I keep the biscuit topping from getting soggy?
Using cold butter and dropping the dough in spoonfuls helps. Also, baking in a cast iron skillet ensures even heat for a crispy crust.
Can I make this cobbler ahead of time?
Yes! Prepare the filling and biscuit topping separately, then assemble and bake when ready. You can also bake ahead and reheat gently.
What can I substitute for buttermilk?
Mix ¾ cup of milk with 1 tablespoon of lemon juice or vinegar and let it sit for 5 minutes to mimic buttermilk’s tang and acidity.
Is this recipe suitable for people with nut allergies?
Yes, the basic recipe contains no nuts. Just skip any nut toppings or substitutions if you add your own twist.
Pin This Recipe!
Crispy Skillet Mixed Berry Cobbler
A quick and easy homemade mixed berry cobbler with a buttery, crispy biscuit topping, perfect for any occasion and made with fresh or frozen berries.
- Prep Time: 10 minutes
- Cook Time: 30-35 minutes
- Total Time: 40-45 minutes
- Yield: 8 servings 1x
- Category: Dessert
- Cuisine: American
Ingredients
- 4 cups (600g) mixed berries (blueberries, blackberries, raspberries), fresh or frozen
- 3/4 cup (150g) granulated sugar
- 1 tablespoon (8g) all-purpose flour (for thickening berry filling)
- 1 tablespoon (15ml) fresh lemon juice
- 1/2 teaspoon (3g) salt
- 1 1/2 cups (190g) all-purpose flour (for biscuit topping)
- 2 teaspoons (8g) baking powder
- 1/4 cup (50g) sugar (optional, for sweeter biscuit topping)
- 6 tablespoons (85g) cold unsalted butter, cubed
- 3/4 cup (180ml) whole milk or buttermilk
- 1 teaspoon (5ml) vanilla extract (optional)
Instructions
- Preheat your oven to 400°F (200°C).
- In a medium bowl, combine mixed berries, granulated sugar, 1 tablespoon flour, lemon juice, and salt. Toss gently and set aside to macerate.
- Transfer the berry mixture to a 10-inch cast iron skillet, spreading evenly without stirring too much.
- In a large bowl, whisk together 1 1/2 cups flour, baking powder, salt, and optional sugar.
- Cut in cold, cubed butter using a pastry cutter or knives until mixture resembles coarse crumbs with pea-sized pieces.
- Stir in milk or buttermilk and vanilla extract until just combined; do not overmix.
- Drop biscuit dough by spoonfuls over the berry filling, leaving gaps for bubbling.
- Bake for 30-35 minutes until biscuit topping is golden brown and berry filling bubbles around edges. Start checking at 25 minutes.
- Cool for 10 minutes before serving.
Notes
Keep butter cold for flaky biscuit topping. Don’t overmix biscuit dough to avoid toughness. Use cast iron skillet for best crispiness. If biscuit browns too fast, tent with foil. Frozen berries can be used without thawing fully. Let berry filling macerate for 10-15 minutes before baking.
Nutrition
- Serving Size: 1/8 of the cobbler
- Calories: 280
- Sugar: 20
- Fat: 12
- Carbohydrates: 38
- Fiber: 4
- Protein: 3
Keywords: mixed berry cobbler, skillet cobbler, berry dessert, biscuit topping, easy cobbler recipe, homemade cobbler, summer dessert


